Loading ...
Loading ...
Loading ...
12 ENGLISH
5. Release the drive lever and the switch lever to
stop the machine.
For XML10
1. Install the battery cartridges. Insert the lock key,
and then close the battery cover.
2. Press the main power switch.
3. Pull the switch lever toward you while holding
down the switch button. Release the switch button as
soon as the motor starts running.
1 2
Fig.23
► 1. Switch button 2. Switch lever
4. Release the switch lever to stop the motor.
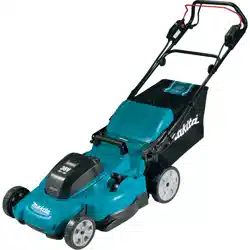
Adjusting the mowing height
WARNING:
Never put your hand or leg under
the mower body when adjusting the mowing height.
WARNING: Always make sure that the lever
ts in the groove properly before operation.
The mowing height can be adjusted in the range of
between 32 mm (1-1/4″) and 100 mm (3-15/16″).
Remove the lock key, and then pull the mowing height
adjusting lever outward of the mower body and move it
to your desired mowing height.
1
Fig.24
► 1. Mowing height adjusting lever
The table below shows the relationship between the
number on the mower body and the approximate mow-
ing height.
Number Mowing height
1 32 mm (1-1/4″)
2 40 mm (1-9/16″)
3 49 mm (1-15/16″)
4 59 mm (2-5/16″)
5 70 mm (2-3/4″)
6 81 mm (3-3/16″)
7 92 mm (3-5/8″)
8 100 mm (3-15/16″)
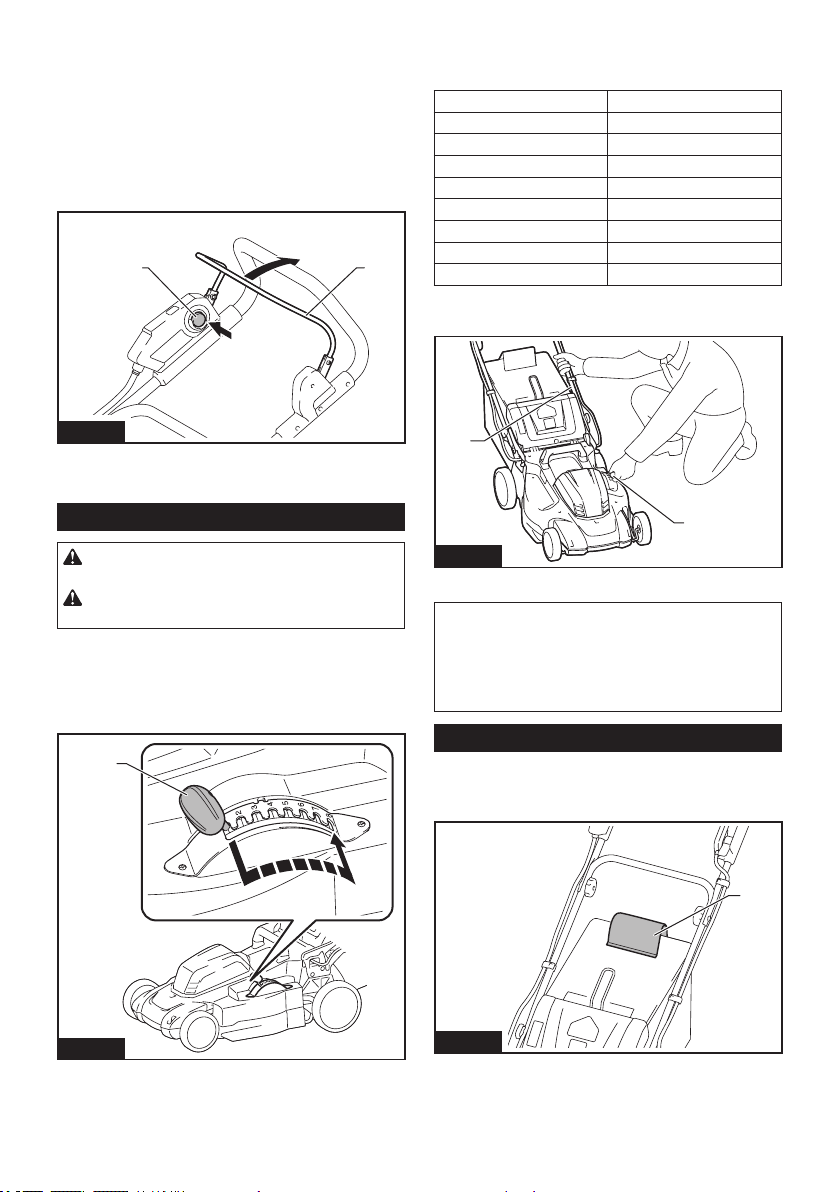
Hold the lower handle with one hand, and then move
the mowing height adjusting lever with the other hand.
1
2
Fig.25
► 1. Mowing height adjusting lever 2. Lower handle
NOTE: The mowing height gures should be used
just as a guideline. Depending on the conditions of
the lawn or the ground, the actual lawn height may
become slightly dierent from the set height.
NOTE: Try a test mowing of grass in a less conspicu-
ous place to get your desired height.
Grass level indicator
Grass level indicator shows the volume of mowed
grass. When the grass basket is not full, the indicator
oats while the blades are running.
1
Fig.26
► 1. Grass level indicator
Loading ...
Loading ...
Loading ...