Loading ...
Loading ...
Loading ...
12 ENGLISH
1
2
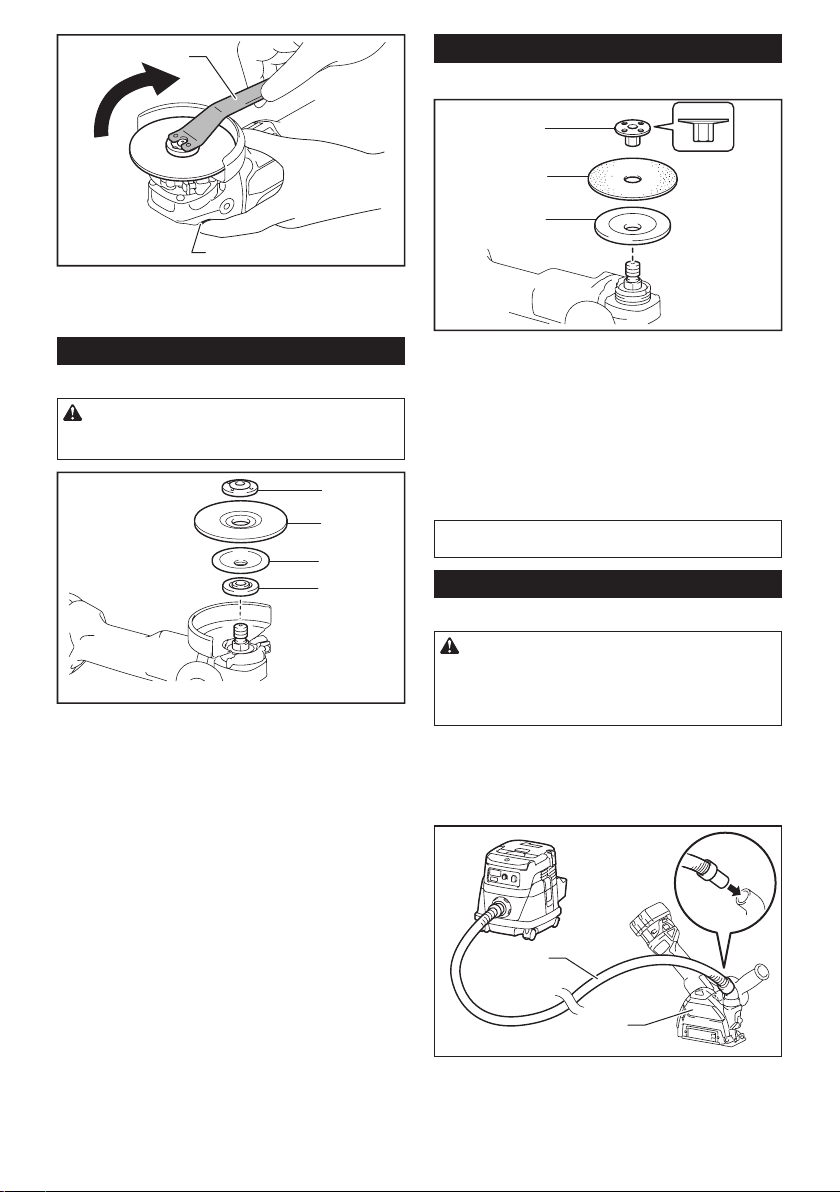
► 1. Lock nut wrench 2. Shaft lock
To remove the wheel, follow the installation procedure
in reverse.
Installing or removing ex wheel
Optional accessory
WARNING: Always use supplied guard when
ex wheel is on tool. Wheel can shatter during use
and guard helps to reduce chances of personal injury.
1
2
3
4
► 1. Lock nut 2. Flex wheel 3. Back up pad 4. Inner
ange
Follow instructions for depressed center wheel but also
use back up pad over wheel. See order of assembly on
accessories page in this manual.
Installing or removing abrasive disc
Optional accessory
1
2
3
► 1. Sanding lock nut 2. Abrasive disc 3. Rubber pad
1. Mount the rubber pad onto the spindle.
2. Fit the disc on the rubber pad and screw the sand-
ing lock nut onto the spindle.
3. Hold the spindle with the shaft lock, and securely
tighten the sanding lock nut clockwise with the lock nut
wrench.
To remove the disc, follow the installation procedure in
reverse.
NOTE: Use sander accessories specied in this man-
ual. These must be purchased separately.
Connecting a vacuum cleaner
Optional accessory
WARNING: Never vacuum metal particles
created by grinding/cutting/sanding operation.
Metal particles created by such operation are so hot
that they ignite dust and the lter inside the vacuum
cleaner.
To avoid dusty environment caused by masonry cut-
ting, use a dust collecting wheel guard and a vacuum
cleaner.
Refer to the instruction manual attached to the dust
collecting wheel guard for assembling and using it.
2
1
► 1. Dust collecting wheel guard 2. Hose of the vac-
uum cleaner
Loading ...
Loading ...
Loading ...