Loading ...
Loading ...
Loading ...
10 ENGLISH
Number Speed
13,000/min
24,500/min
36,000/min
47,500/min
58,500/min
NOTICE: If the tool is operated continuously at
low speed for a long time, the motor will get over-
loaded, resulting in tool malfunction.
NOTICE: When changing the speed dial from "5"
to "1", turn the dial counterclockwise. Do not turn
the dial clockwise forcibly.
Automatic speed change function
1
► 1. Mode indicator
Mode indicator status Operation mode
High speed mode
High torque mode
This tool has "high speed mode" and "high torque
mode". It automatically changes operation mode
depending on the work load. When mode indicator
lights up during operation, the tool is in high torque
mode.
Accidental re-start preventive
function
Even if installing the battery cartridge while pulling the
switch lever, the tool does not start.
To start the tool, rst release the switch lever. Then pull
the lock-off lever, and pull the switch lever.
Electronic torque control function
The tool electronically detects situations where the wheel
or accessory may be at risk to be bound. In the situation,
the tool is automatically shut off to prevent further rotation
of the spindle (it does not prevent kickback).
To restart the tool, switch off the tool rst, remove the
cause of sudden drop in the rotation speed, and then
turn the tool on.
Soft start feature
Soft start feature reduces starting reaction.
Electric brake
Electric brake is activated after the tool is switched off.
The brake does not work when the power supply is shut
down, such as the battery is removed accidentally, with
the switch still on.
ASSEMBLY
CAUTION: Always be sure that the tool is
switched off and the battery cartridge is removed
before adjusting or checking function on the tool.
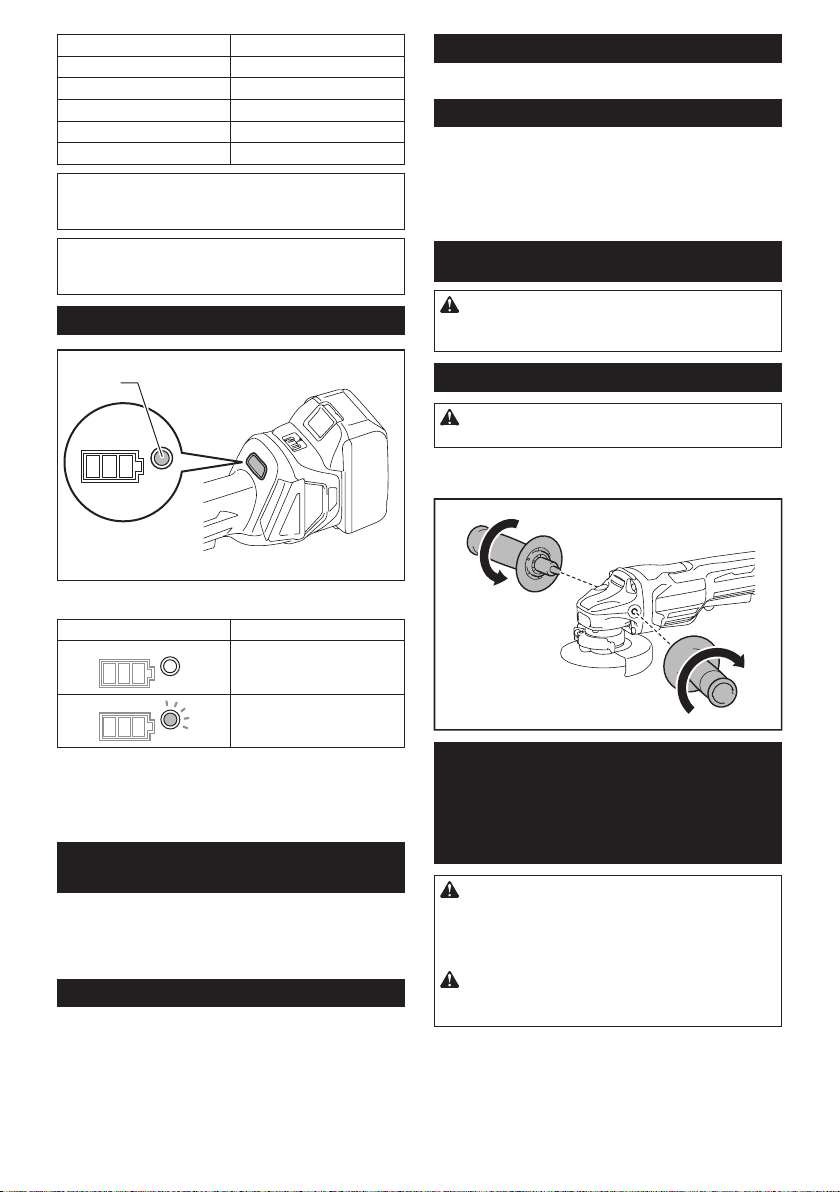
Installing side grip (handle)
CAUTION: Always be sure that the side grip is
installed securely before operation.
Screw the side grip securely on the position of the tool
as shown in the gure.
Installing or removing wheel guard
(For depressed center wheel, multi-
disc, ex wheel, wire wheel brush
/ abrasive cut-off wheel, diamond
wheel)
WARNING: When using a depressed center
wheel, multi-disc, ex wheel or wire wheel brush,
the wheel guard must be tted on the tool so that
the closed side of the guard always points toward
the operator.
WARNING: When using an abrasive cut-off
/ diamond wheel, be sure to use only the special
wheel guard designed for use with cut-off wheels.
Loading ...
Loading ...
Loading ...