Loading ...
Loading ...
Loading ...
Operations
Base bracket installation
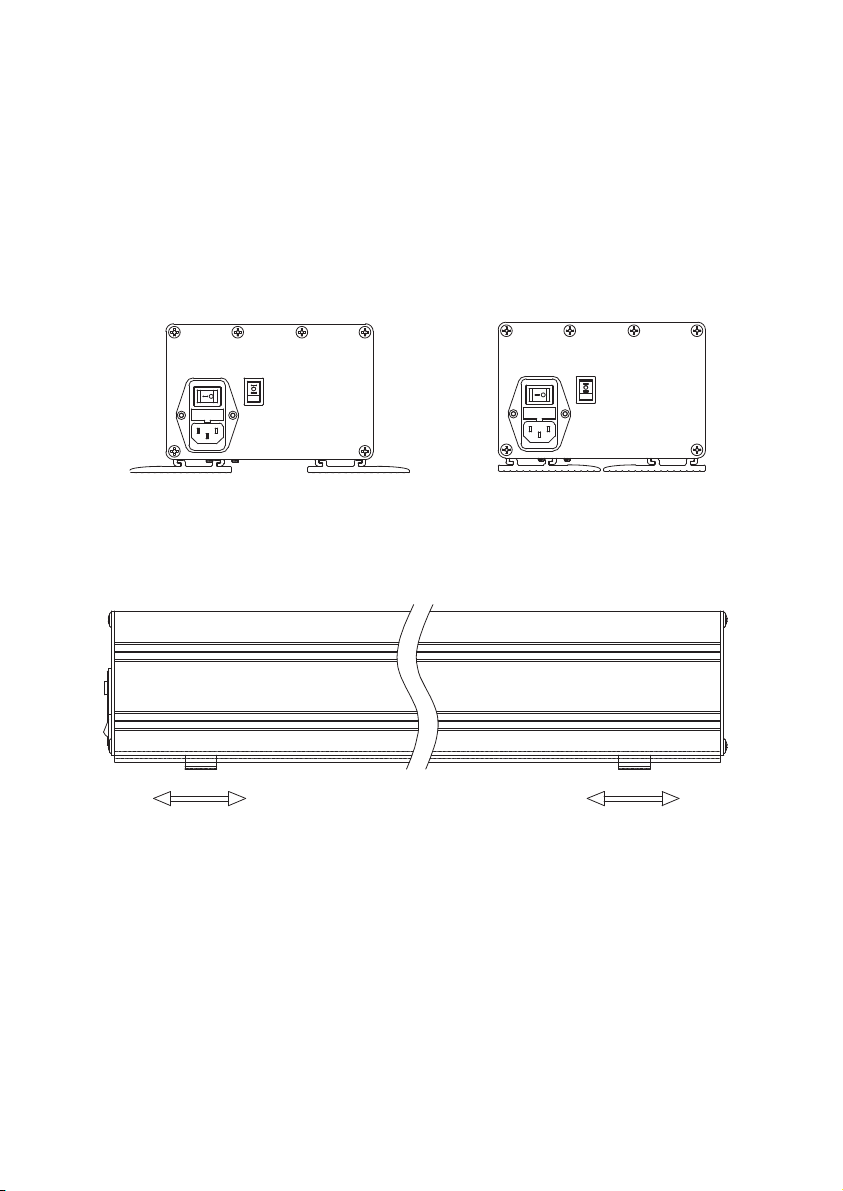
Confirm the motorized screen base bracket installation method according to the site
conditions as shown in the figure below. (It has been adjusted to the state of mode 2
before shipment. If you need to install the base bracket in mode 1, please adjust it yourself)
Motorized screen operation
- Plug the attached power cord to the motorized screen and your local power outlet and
make sure the input AC voltage range of the screen is consistent with your local grid
specification.
- Toggle the power switch on the left side of the motorized screen and the power button’s i
ndicator light will light up red when it is powered on successfully.
- Press the motorized screen remote’s up key to raise the screen to the maximum limit height
automatically, and you can stop it by pressing the remote pause button.
- Press the motorized screen remote’s down key to roll the screen into the shell automatically,
and you can stop it by pressing the remote pause button.
- Design your favorite maximum limit height based on your actual installation environment.
Press and hold the motorized screen remote’s up or down key for about 5 seconds until you
hear the screen’s beep.
Press the remote up/down/pause key to fine tune the screen’s ideal position as your final
maximum limit height.
The motorized screen will automatically remember the current position as the maximum
limit height after 30 seconds of non-operation.
The new maximum limit height setting will overwrite the previous one.
The base bracket can be moved out of the shell along the groove and then reversed into it.
In the meanwhile, you can stick the non-slip mat to the base bottom if needed.
05 06
Mode 1 Mode 2
Power Switch
Up
Down
Loading ...
Loading ...
Loading ...