
GB
GUIDE TO INSTALLATION AND USE (EN)
Washing Machine


1
GB
CONTENTS
Safety instructions .................................................................... 2
Installation ................................................................................ 5
Operation ............................................................................... 11
Maintenance .......................................................................... 24
Troubleshooting ..................................................................... 28
Availability of spare parts ....................................................... 30

GB
Safety instructions
• This appliance is designed to be used for domestic and similar
applications such as:
- kitchen areas for staff in shops, offices and other
professional premises;
- farms;
- use by hotel, motel and other residential clients;
- B&B type environments.
• The appliance must be connected to the mains water supply
using the brand new connection fittings supplied with the
appliance. Never reuse old fittings.
• Never obstruct the ventilation openings.
• This appliance can be used by children aged 8 years and over
and by individuals with physical, sensory or reduced mental
capacity, or lack of experience and knowledge under
supervision or if they have been given instructions on how to
use the appliance safely and have fully understood the risks
involved. Children must not be allowed to play with the
appliance. Cleaning and maintenance operations must not be
carried out by children without supervision.
• Children under the age of three should be kept away from the
appliance unless they are under constant supervision.
• If the power cord is damaged, it should be replaced by the
manufacturer, its after-sales service department or a similarly
qualified person, so as to avoid danger.
• Regarding the instructions for installing the appliance and
making its electrical connections, please refer to the
appropriate section in this guide.
• WARNING: Do not connect the appliance to hot water.
• The maximum weight of dry laundry is 10 kilograms.
• Maximum water supply pressure: 1 MPa
• Minimum water supply pressure: 0.05MPa

3
GB
Warning!
Product installation
• This washing machine is intended for indoor use only.
• It is not designed for built-in installation.
• Never obstruct the openings.
• This washing machine must not be installed in bathrooms, very
damp rooms or in rooms where there are explosive gasses or
caustic substances.
• If the washing machine has only one water inlet valve, connect
it to a cold water source only.
• The power plug must remain accessible after the appliance is
installed.
• Remove all packaging materials and the transit bolts before
using the appliance. Failure to do so may seriously damage
your washing machine.
Appliance damage hazard!
• Your appliance is for household (domestic) use only and is
designed solely for machine washable textiles.
• Do not climb on the top of the washing machine.
• Do not lean against the door of the washing machine.
Care when handling the washing machine:
1. The transit bolts must be refitted to the washing machine by a
qualified person.
2. Drain any water from the appliance before moving the washing
machine.
3. Handle the appliance with care. Never lift the appliance by
grabbing projecting parts. The door must not be used as a
handle when moving the appliance.
4. This appliance is heavy. Carry it with care.
• Do not close the door using excessive force. If the door is hard
to close, make sure that the drum is not overloaded and that
the laundry is properly distributed.
• Do not wash carpets.

GB
Operation of the appliance
• Before using the appliance for the first time, perform a complete
washing cycle empty.
• Use of inflammable and explosive solvents is prohibited. Never
use fuel and alcohol, etc. as detergents. Only choose
detergents that are suitable for machine washing.
• Empty the pockets of your clothes. Cutting and rigid objects like
coins, pins, nails, screws, stones, etc. may seriously damage
this appliance.
• Check that the water inside the drum has been drained before
opening the door. Do not open the door if you can still see water
inside the washing machine.
• Be careful to avoid injury when draining very hot washing water.
• Never add water by hand during washing.
• Once the washing cycle has finished, wait two minutes before
opening the door.
5
GB
Installation
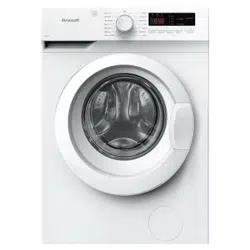
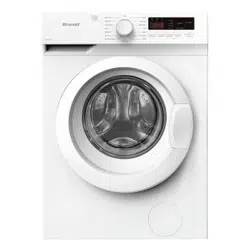
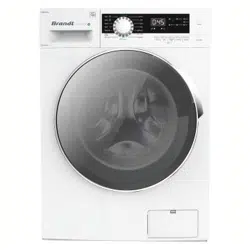
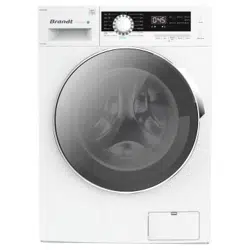
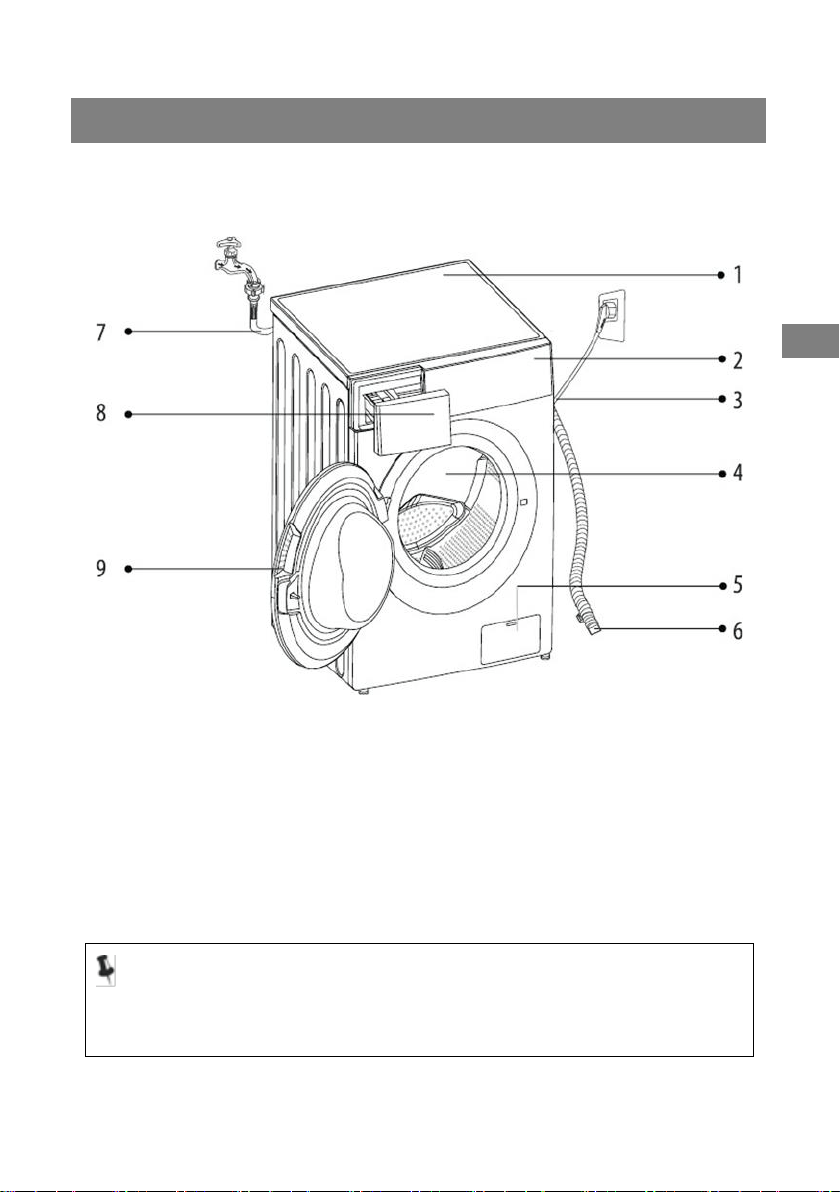
Description of the product
1.
Top panel
6.
Drain hose
2.
Control panel
7.
Water supply hose
2.
Power cord
8.
Detergent compartment
4.
Drum
9.
Window
5.
Filter
Note!
• The illustration of the accessories is provided for reference
purposes only. Please refer to the actual product.
GB
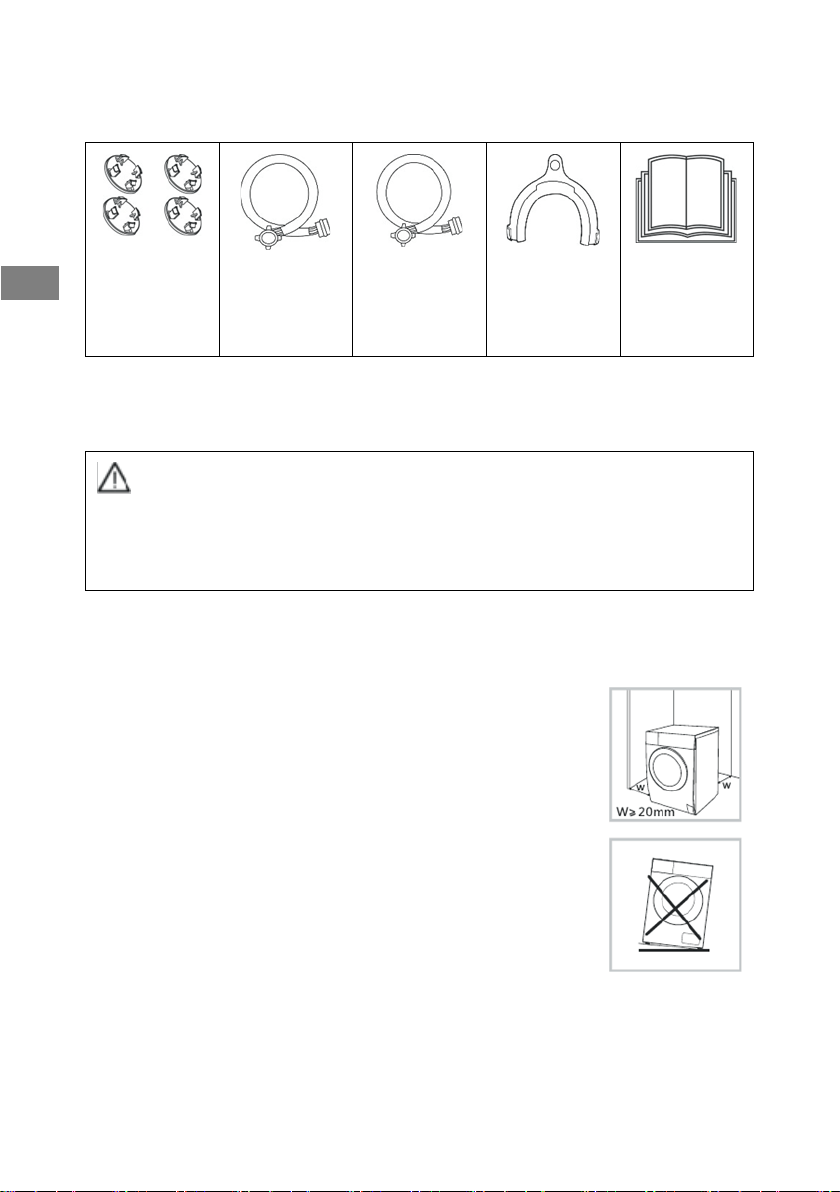
Accessories
Transit bolt
hole covers
Cold water
supply hose
Hot water
supply hose
(not supplied)
Drain hose
holder
(not supplied)
User guide
Installation location
Warning!
• It is important that the product be stabilised so that it will not
move!
• Ensure that the appliance is not resting on the power cord.
To install your washing machine, choose a location that is:
1. On a hard, dry, flat surface
2. Not exposed to direct sunlight
3. Adequately ventilated
4. In a room at ambient temperature
5. Away from heat sources
The washing machine is designed to operate at
ambient temperature. If it is used in a room where
the temperature is below 0°C, the water inlet valve
and the drainage system may be damaged.
7
GB
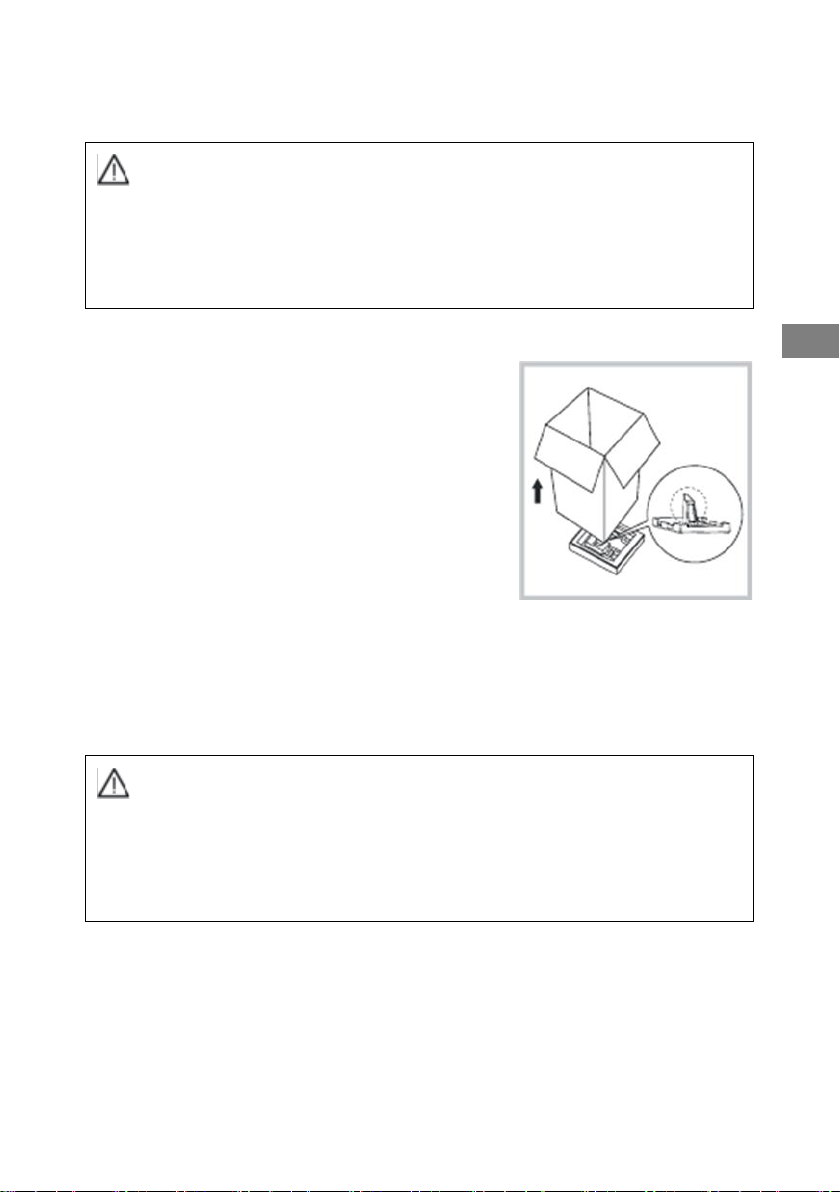
Unpacking the washing machine
Warning!
• Packaging materials (e.g. plastic film, polystyrene) can be
hazardous to children.
• There is a suffocation hazard! Keep all packaging materials
away from children.
1. Remove the cardboard box and the
polystyrene wrapping.
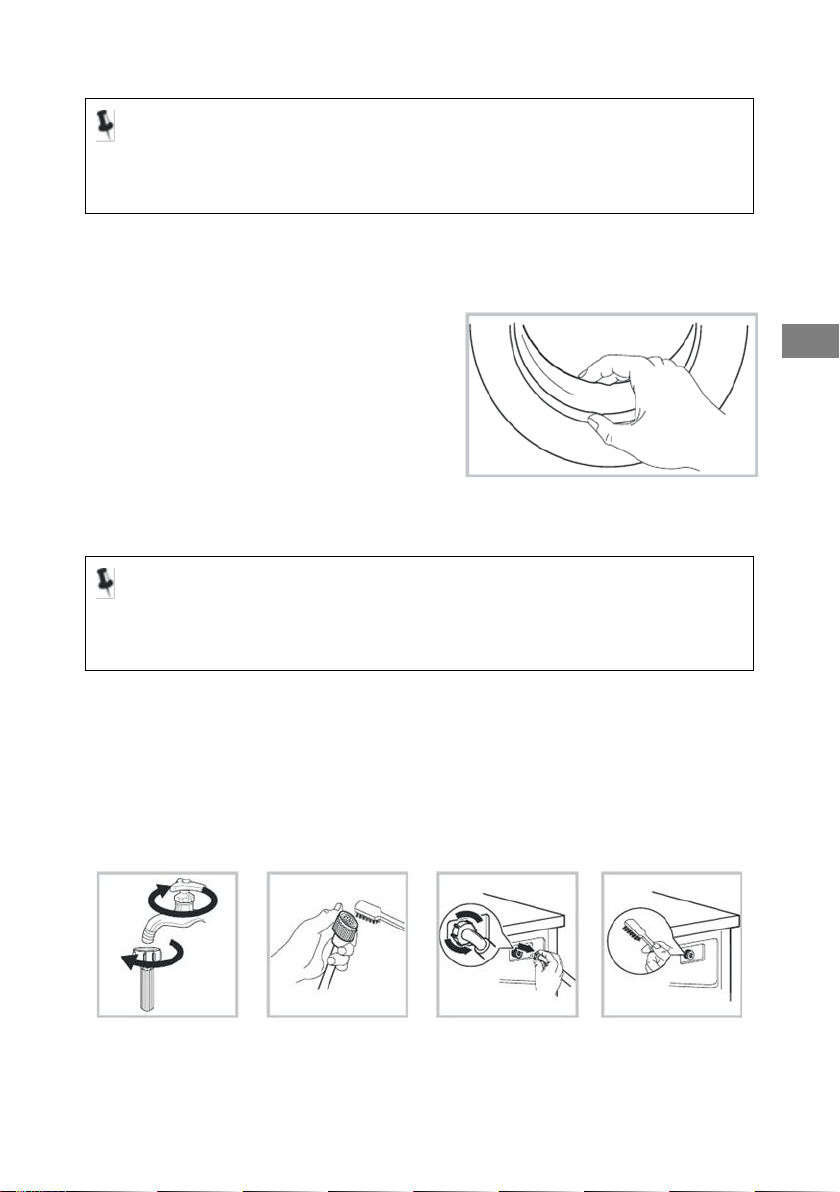
2. Lift the washing machine and remove
the packaging under it. Don't forget to
remove the small foam triangle at the
same time as the lower packaging. If
you cannot do so, lay the washing
machine on its side and remove the
small foam triangle by hand.
3. Remove the adhesive tape that holds
the power cord and the drain hose in place.
4. Remove the water supply hose from the drum.
Remove the transit bolts
Warning!
• You need to remove all of the transit bolts located at the back
of the washing machine before using it.
• You'll need the transit bolts again if you move the washing
machine. Keep them in a safe place.
GB
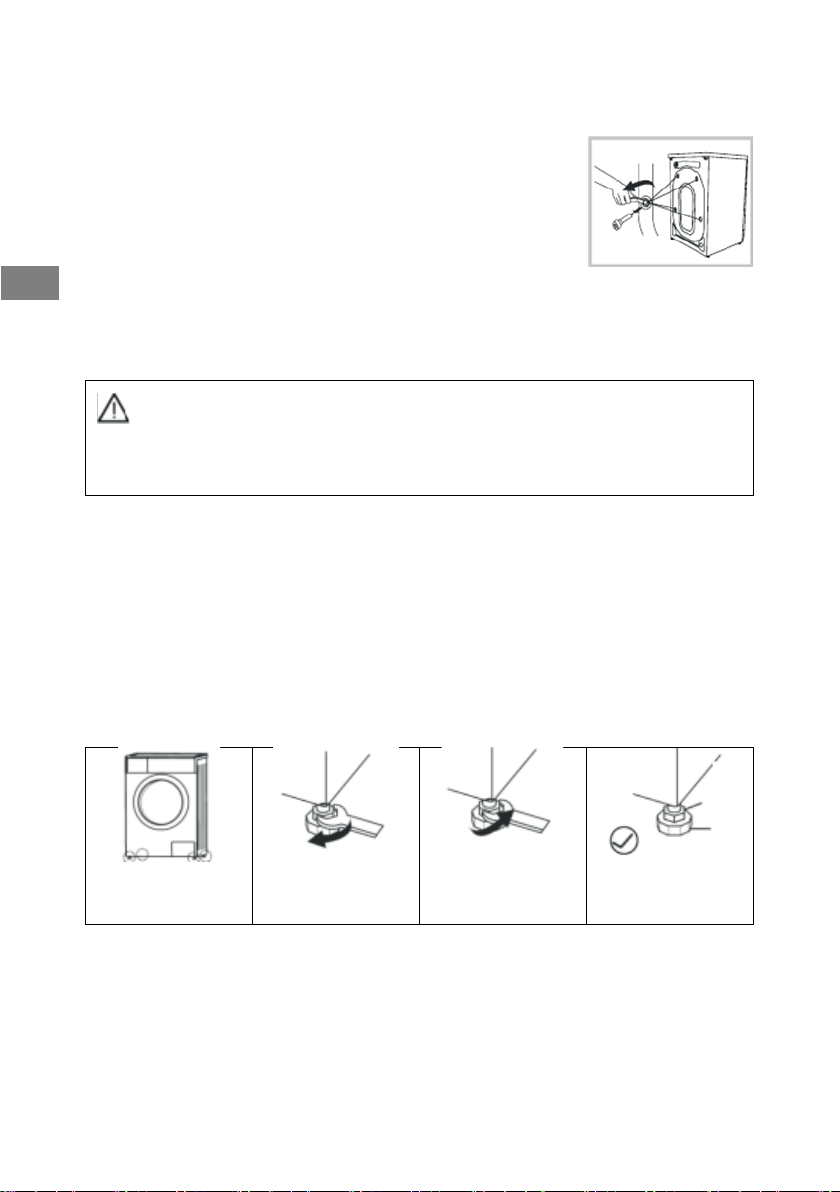
Proceed as follows to remove the transit bolts
1. Use a spanner to loosen the four transit bolts
then pull them out.
2. Push the four transit bolt cover caps provided
for this purpose into the holes.
3. Keep the transit bolts in a safe place for future
reuse.
Adjusting the levelling feet
Warning!
• The lock nuts on the four levelling feet must be tightened
against the washing machine body.
1. Check that the feet are still firmly attached to the washing machine.
If this is not the case, return them to their original position and
tighten the nuts.
2. Slacken the lock nut and turn the foot until it touches the floor.
3. Adjust the feet and lock them into position using a spanner. Check
that the washing machine is stable.
Up
Down
Foot lock nut
1
2
3
4
9
GB
Connecting the Water Supply Hose
Warning!
• Follow the instructions in this section to avoid water leaks or
water damage.
• Don't twist, squash, modify or cut the water supply hose.
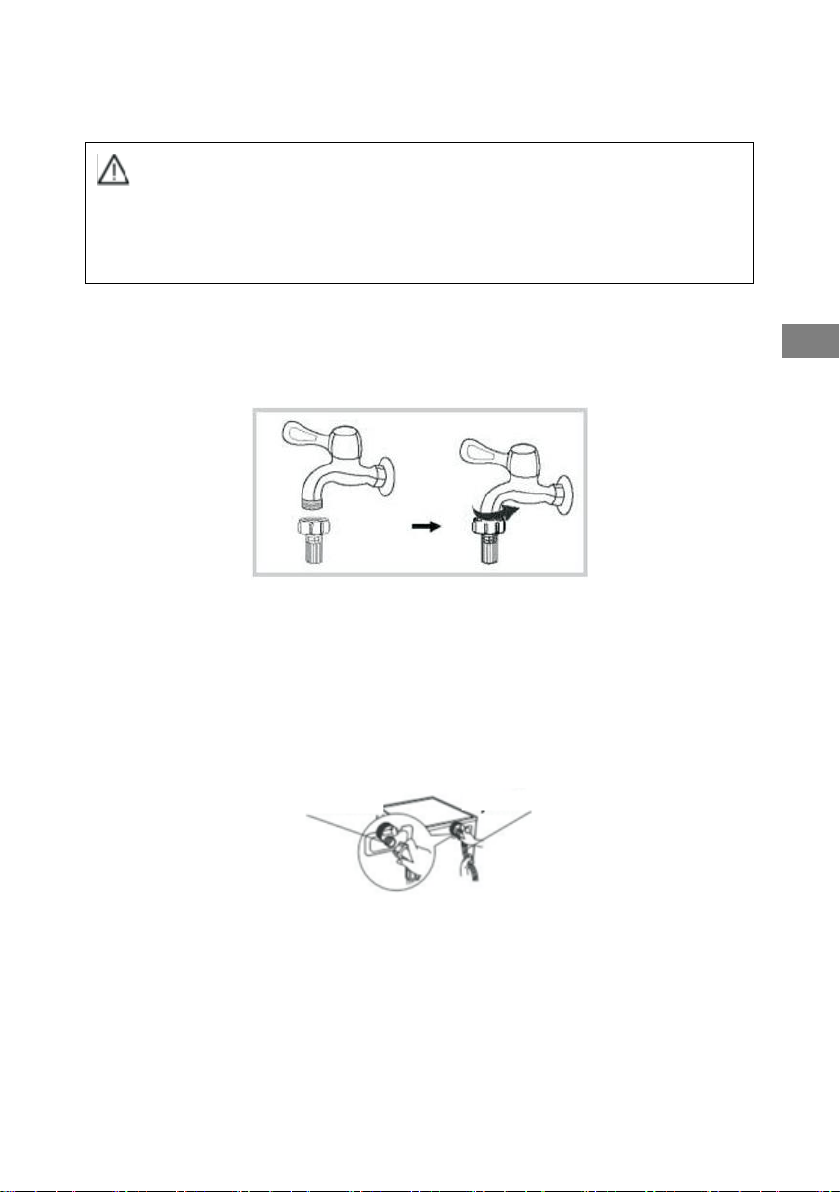
Connecting the water supply hose to a threaded tap
Threaded tap and water supply hose
Connect the other end of the water supply hose to the water supply
valve located on the back of the washing machine then tighten down
the hose by turning it clockwise.
Water supply valve
Water supply hose
GB
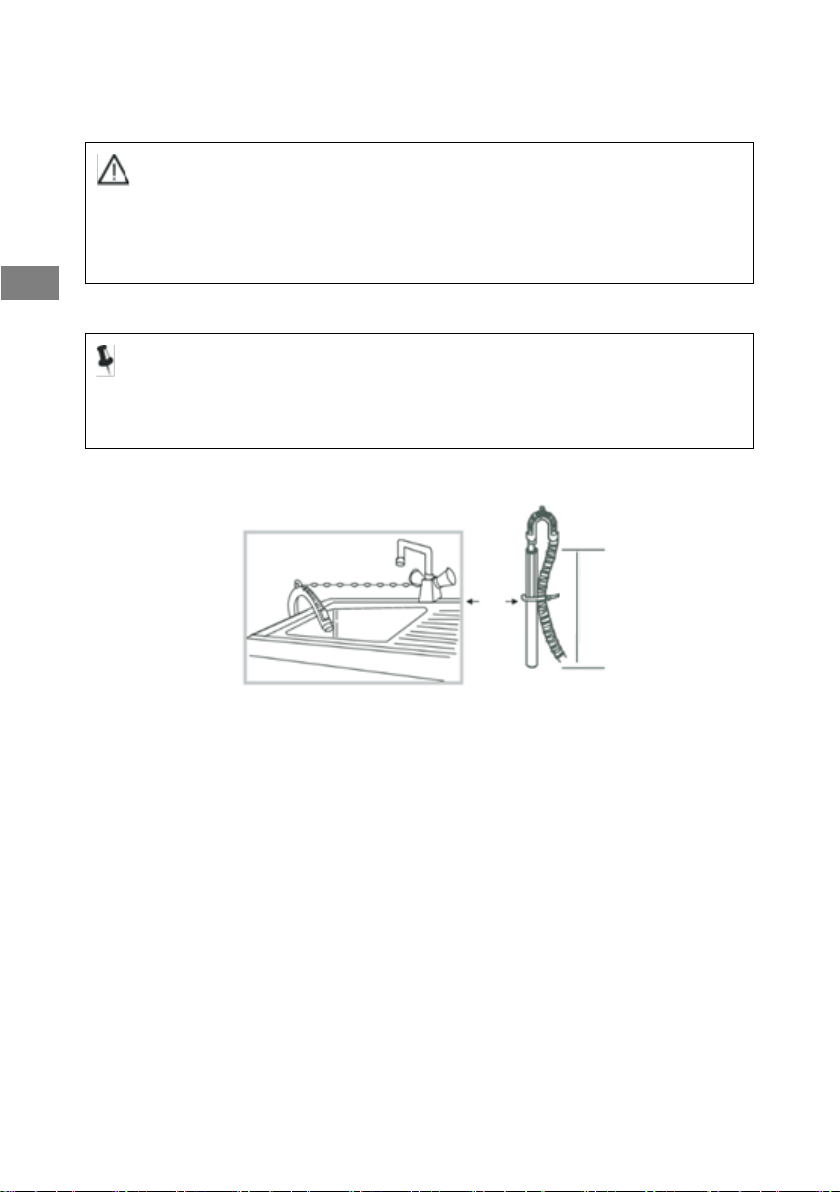
Drain hose
Warning!
• Do not twist or extend the drain hose.
• Position the drain hose correctly. If you do not perform this
operation correctly a water leak may occur.
Note!
• If the washing machine is provided with a drain hose holder,
install it as follows:
Min. 60 cm
Max. 100 cm
11
GB
Warning!
• When you install a drain hose, attach it properly using a cord.
• If the drain hose is too long, never attempt to insert part of it into
the washing machine by forcing it as this will cause unusual
noises.
Operation
Quick start
Warning!
• Before using your washing machine for the first time, always
ensure that it is correctly installed.
• Before using your washing machine for the first time, perform a
complete washing cycle empty.
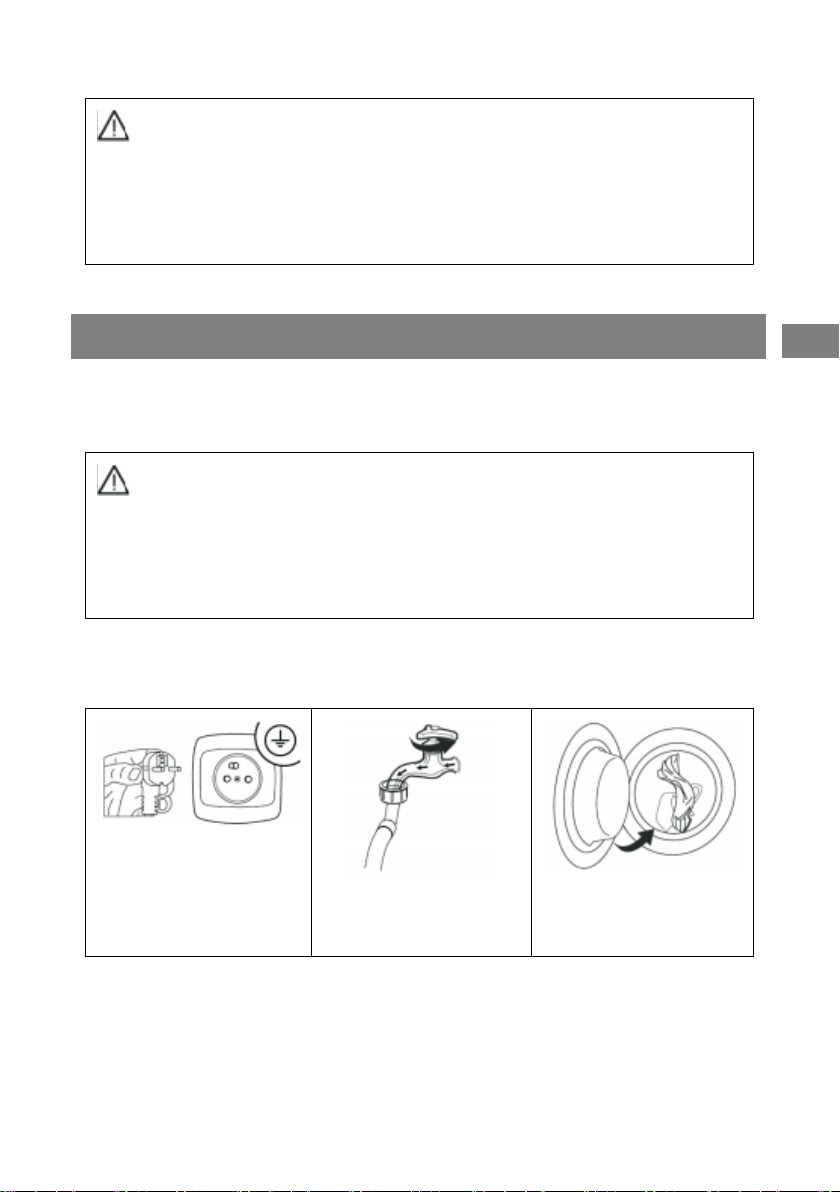
1. Before washing
1. Connect the power
cord
2. Open the tap
3. Load the washing
machine
GB
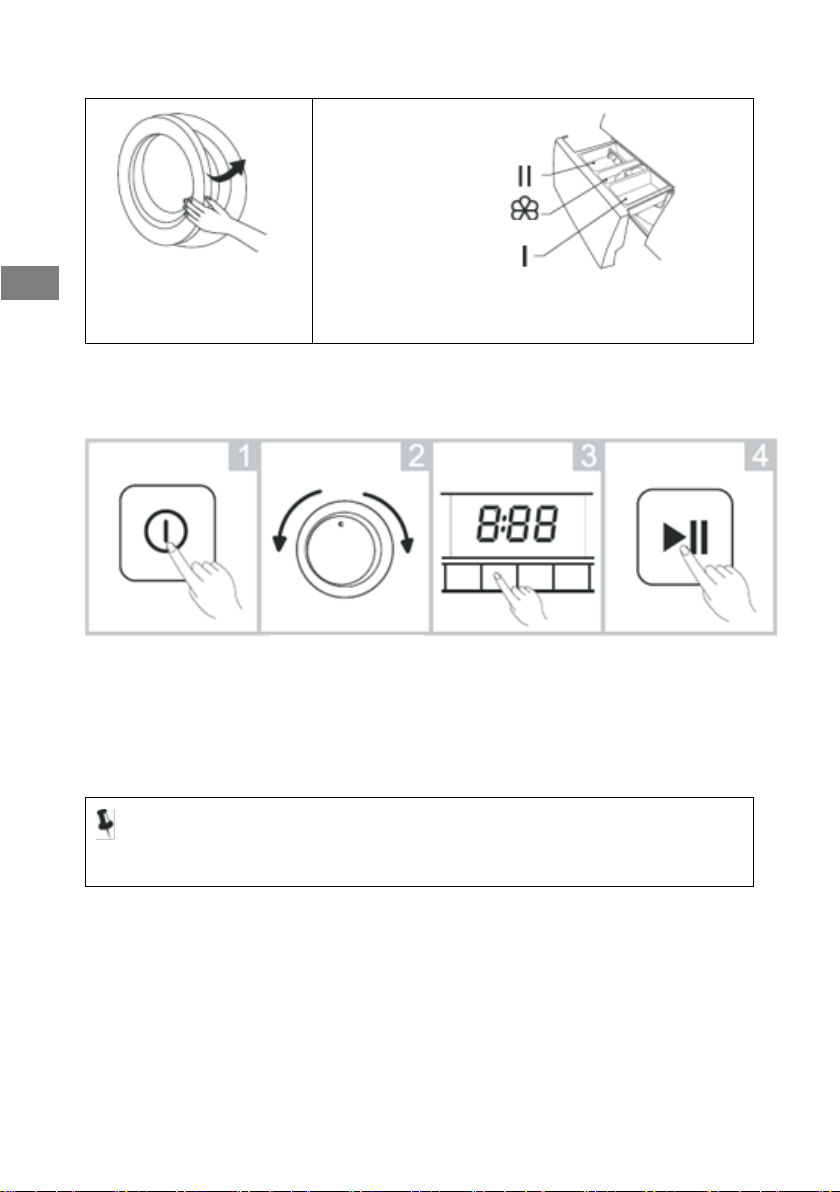
4. Close the door
5. Add detergent
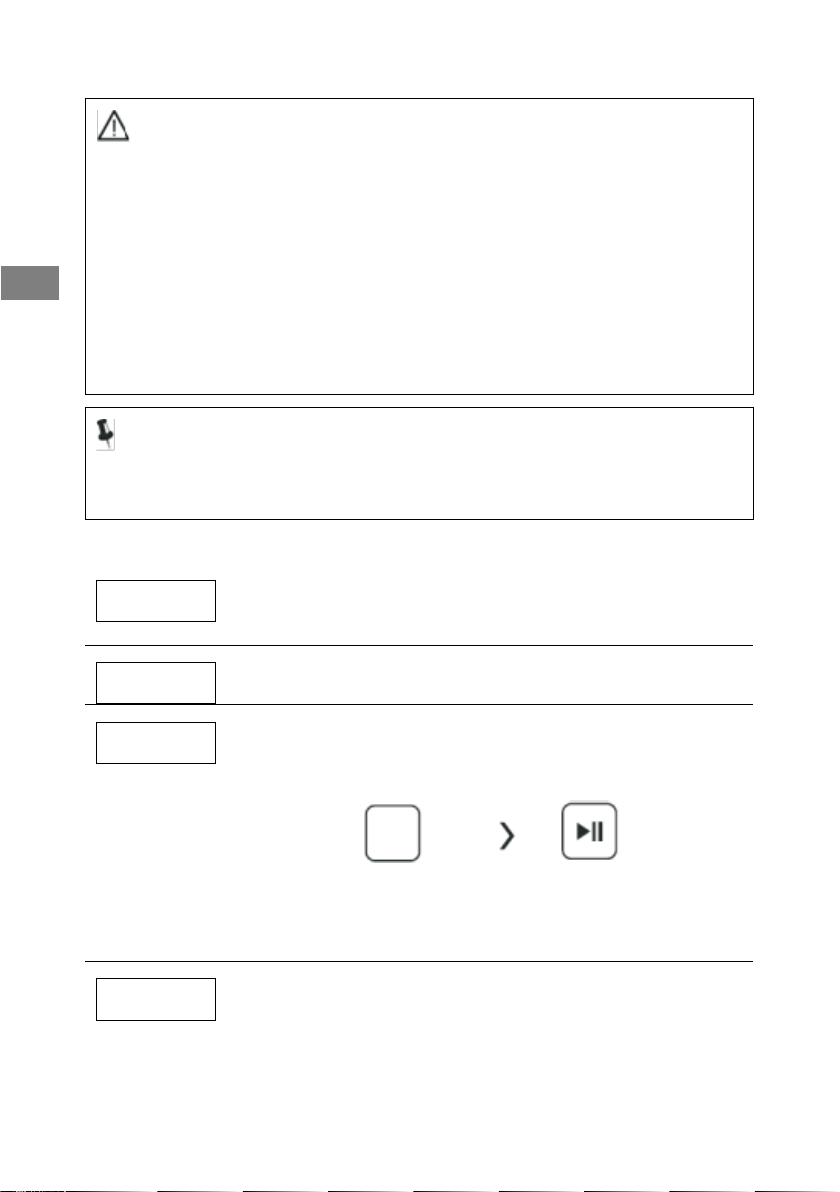
2. Washing
1. Switch on the
appliance
2. Select the
programme
3. Select a
function or the
default settings
4. Start the
programme
Note!
• If you use the default settings, you can skip step 3.
3. After washing
An audible beep is heard or End is displayed on-screen.
Main wash detergent
Softener
Prewash
13
GB
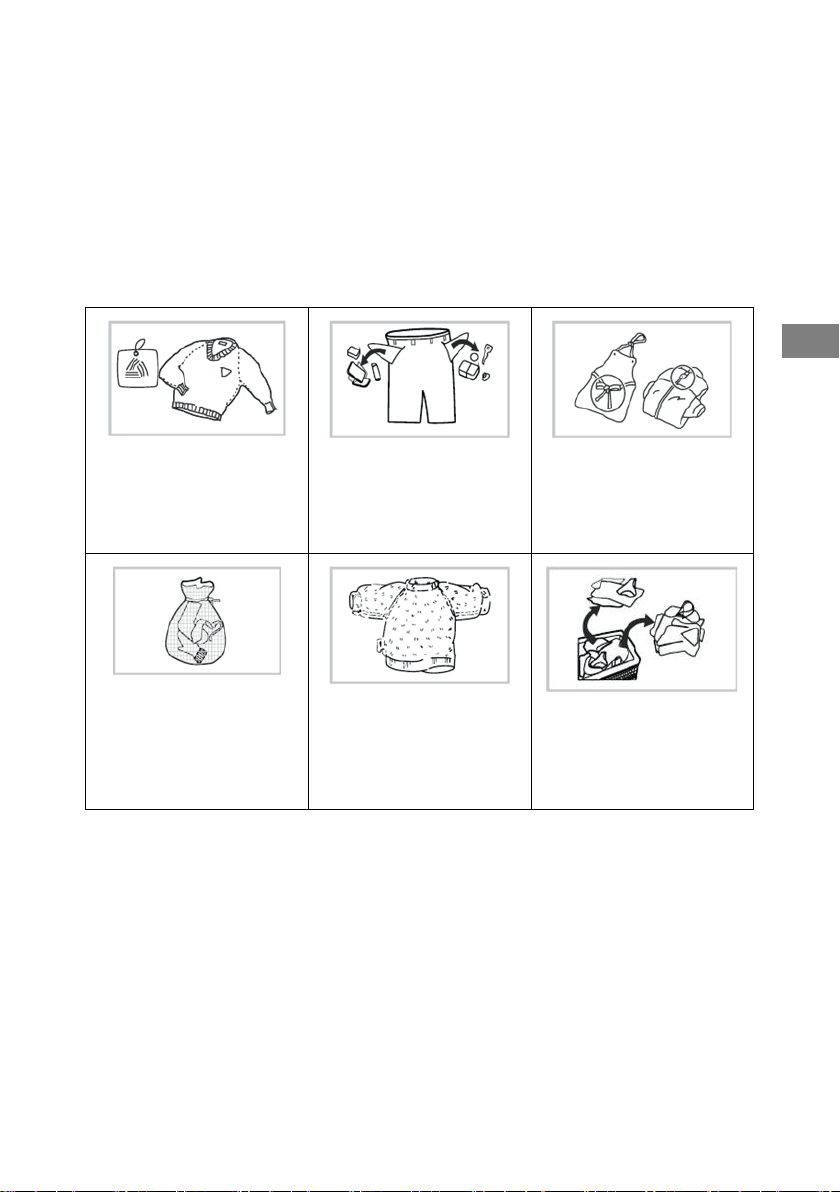
Before every wash
Always read the washing labels on garments and the explanations
on how to use the detergent before washing. Choose detergent
that produces little or no foam for optimum washing and to avoid
any overflowing.
Refer to the instructions provided by the detergent maker as
shown on the detergent packaging.
Always read the
garment labels
Empty the pockets of
your clothes
Attach long
strings/ribbons, close
zippers and button
buttons
Place small size
clothes in pillowcases
If clothes have raise
fabric or suffer from
piling, turn them inside
out
Sort clothes by texture
Choosing the correct detergent
A washing care label symbol shows the right choice of detergent,
temperature and washing cycle.
GB
Type of textile
Programme
Detergent
White cotton
Cotton temp. ≤ 90°C
Detergent with whitening product
Colours made of linen or cotton
Cotton temp. ≤ 60°C
Colour detergent without whitening product
Mixed fibres
Mixed temp. ≤ 60°C
Colour wash
Synthetics
Synthetics temp. ≤ 60°C
Colour/delicate wash
Delicate textiles
Wool Temp. ≤ 40°C
Detergent for delicate textiles
Wool
Wool Temp. ≤ 40°C
Detergent for wool
Warning!
• If there are not enough clothes in the washing machine this may
unbalance the drum and cause the unbalance detection to
trigger, significantly reducing the spin speed.
• Add a few clothes to remove the unbalance so that the washing
machine can spin at the speed you have selected.
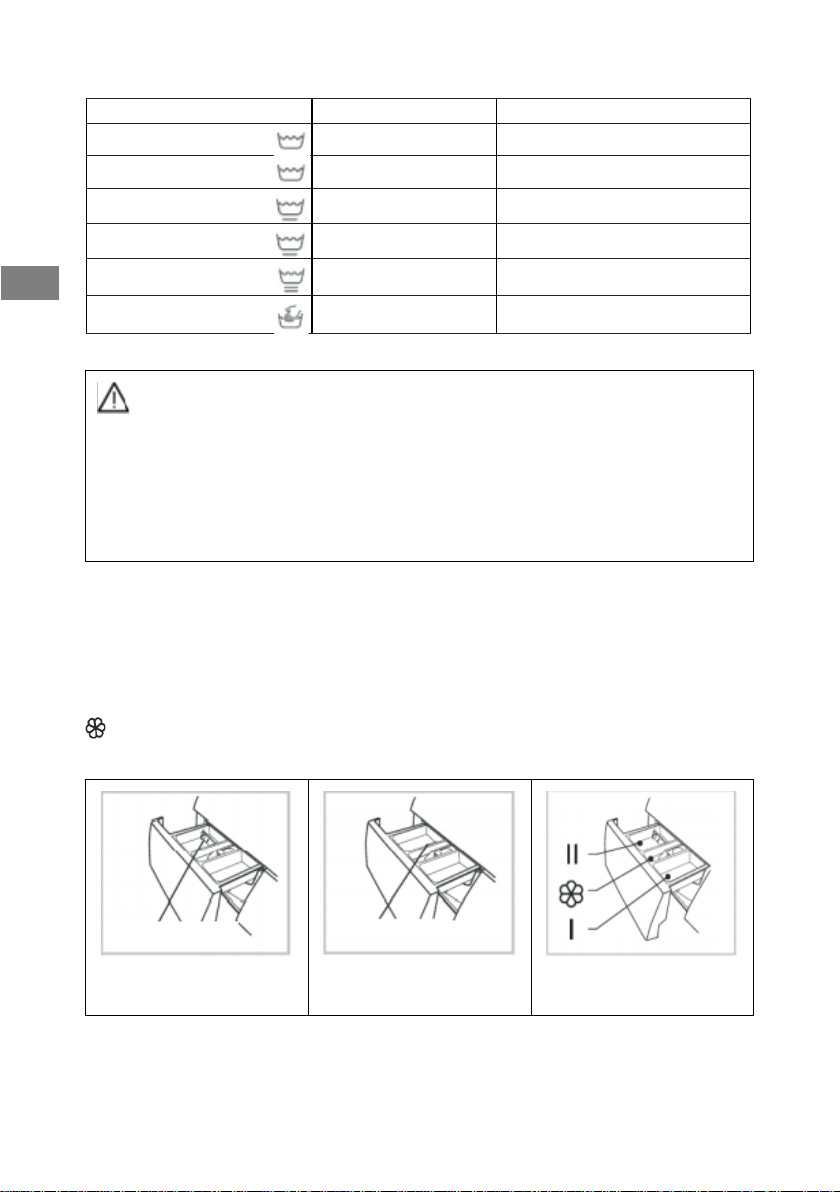
Detergent compartment
I Prewash detergent
II Main wash detergent
Softener
Liquid detergent
Powdered detergent
Pull on the detergent
tray to open it
Separator
Separator
15
GB
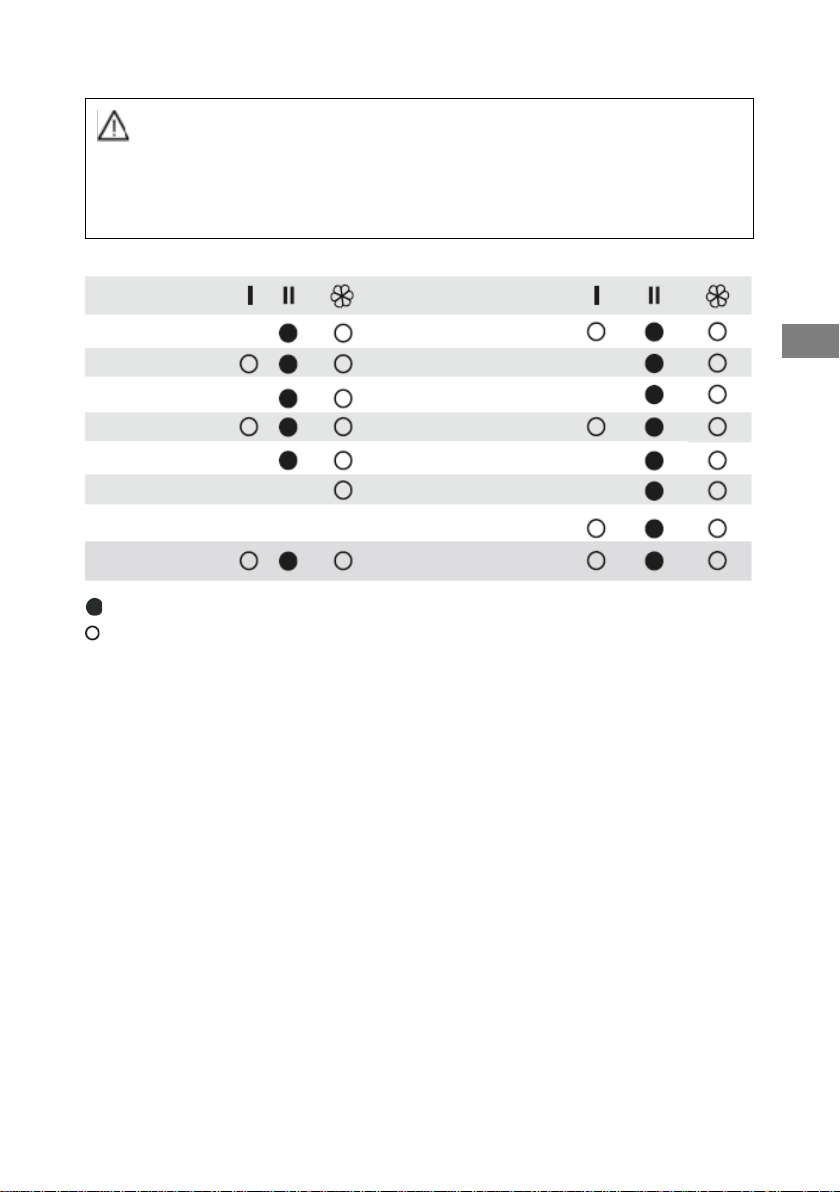
Warning!
• You only need to put detergent in Compartment I if you selected
the Prewash function on washing machines provided with this
function.
Must Do
Optional
Washing products
• Use washing products designed especially for washing machines:
- Powdered detergents for all kinds of textiles except delicate ones.
For these detergents, we recommend first diluting them with some
water to avoid clogging the detergent pipe causing water to
overflow when washing starts.
- Liquid detergents for all low temperature programmes for all kinds
of textiles or specialist liquid detergents (e.g. for woollens).
• Choose the detergent with care to match the required washing
temperature, to optimise washing while saving water and energy.
Excess dosages may cause poor rinsing and leave residual traces
of detergent. On the other hand, an inadequate dosage may
cause poor washing results.
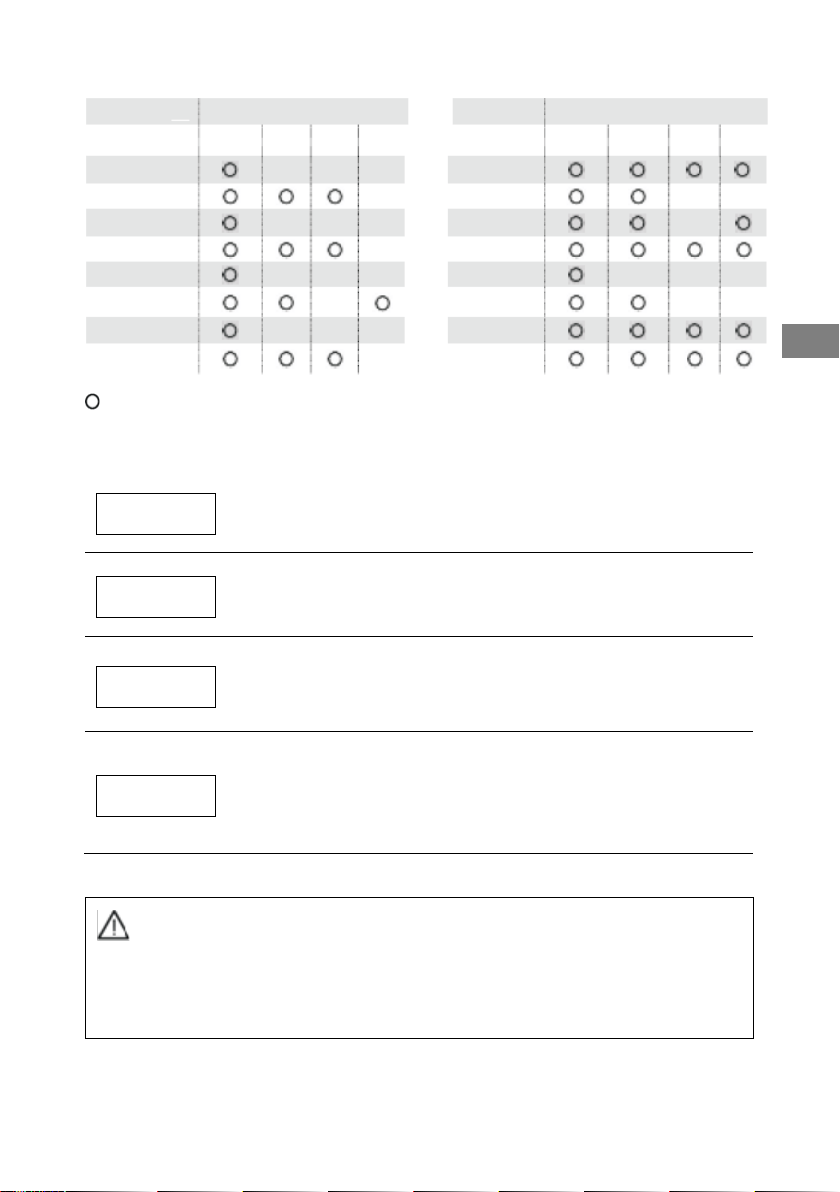
Programme
Programme
ECO 40-60
Sport
Cotton
Wool
Flash 15’
20°C
Rapid 45'
Mixed
Intensive
Drum clean
Rinse and Spin
Hygiene
Spin only
Synthetics
Baby care
Duvet
GB
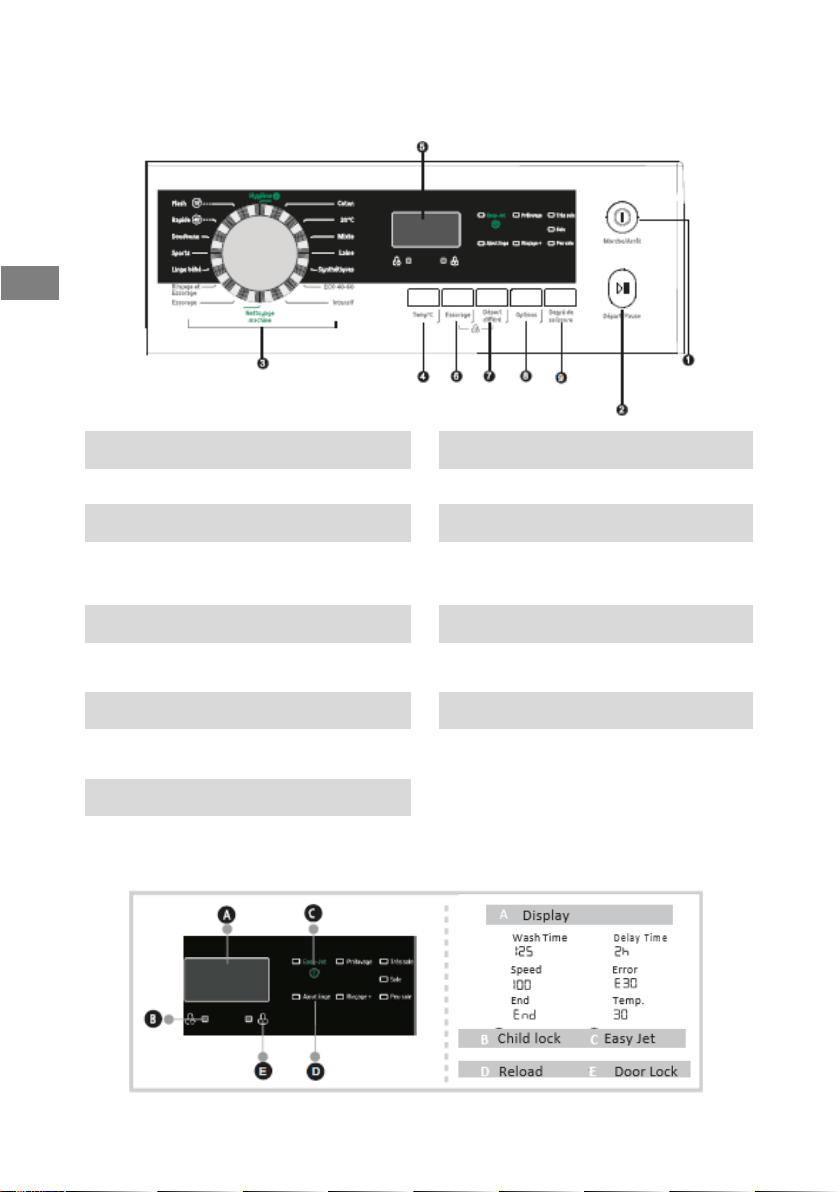
The control panel
On/Off
Start/Pause button
This button switches your washing machine on and off.
Press to start the selected washing cycle.
Press during the cycle to pause it.
Programmes
Temperature button
You can select the programme of your choice to match
your washing requirements.
Press this button to select the desired temperature: the
temperature matching your choice will remain lit up. If
you do not select it, the default temperature will be
activated.
Display
Spin button
The display shows the settings, the time remaining and
information on washing in progress.
It remains lit for the entire cycle.
Choose the spin speed for the selected washing
programme. If you do not select it, the default spin
speed will be activated.
Delayed start button
Options button
This button is used to delay starting a washing cycle.
Press and hold the button until the desired time is
displayed (up to 24 hours).
Keep pressing the button to select the Prewash or
Extra rinse option
Soiling button
Use this button to shorten or lengthen the cycle time
depending on how dirty your washing is. Select the
degree of soiling to match your needs and the
associated LED will remain lit up.

17
GB
GB
Warning!
• To change a setting after starting the washing cycle, press the On/Off
button once to switch off the machine. Press the On/Off button a
second time to switch the machine back on, select the programme,
spin speed and options again, then press the Start/Pause button.
(Ensure that the child safety function is disabled or the initially
selected programme will continue to run.)
• Just before leaving the factory, the appliance is subject to a last check
when water is poured into the drum. Consequently, there may be
water drops or condensation inside the washing machine. This is not
an indication of a malfunction.
Note!
• When the appliance is first launched and used, there may be a slight
smell when the motor starts up.
Options
Prewash
Prewash
The Prewash option lets you perform an additional wash before the main wash.
This is a suitable option for eliminating dirt from your laundry.
You will need to place detergent in compartment (1) after choosing this option.
Extra Rinse
Extra Rinse
When this option is selected, your laundry will get an extra rinse.
Delayed start
Delayed start
Setting the delayed start function:
1. Choose the time by pressing the Delayed start function (you can select a
delay from 0 to 24 hours).
2. Press the Start/Pause button to start the delayed start function.
Select time Start/Pause
Cancelling the Delayed Start function
Press the Delayed start button until 0H is displayed. This operation cannot be
performed once the washing cycle is started. If the programme has already started,
press the On/Off button to reset the machine.
Easy-Jet
Easy-Jet
Use this automatic function to clean the glass door and window seal during the
cycle. One spray of water removes the foam and detergent residue.
Delaye
d start
19
GB
Optional
Other options
Temperature
Temperature
Press the “Temperature” button until the desired temperature is displayed. (Cold,
20°C, 30°C, 40°C, 60°C, 90°C).
Spin
Spin
Press the "Spin” button until the desired spin speed is displayed.
0-400-600-800-1000-1200-1400
Soiling
Use this button to shorten or lengthen the washing cycle depending on how dirty
the washing is. Keep pressing the button to access the three levels
Reload
This operation can be performed during a washing cycle.
Press the Start/Pause button for three seconds, then:
1. Wait until the drum has come to a complete standstill and the door has
unlocked.
2. Load the laundry.
3. Close the door and press the Start/Pause button again. The washing cycle
resumes.
Warning!
• For safety reasons, this function cannot be used when the water
level is above the lower part of the door or when the
temperature is too high.
Programme
Programme
ECO 40-60
Sport
Cotton
Wool
Flash 15’
20°C
Rapid 45'
Mixed
Intensive
Drum clean
Rinse and Spin
Hygiene
Spin only
Synthetics
Duvet
Baby care
Options
Options
Delayed
start
Extra
Rinse
Prewash
Easy-Jet
Delayed
start
Extra
Rinse
Prewash
Easy-Jet
GB
Warning!
• If a power break occurs when the washing machine is running,
the internal memory saves the selected program. Once the
power has returned, press the Start/Pause button to resume
the programme.
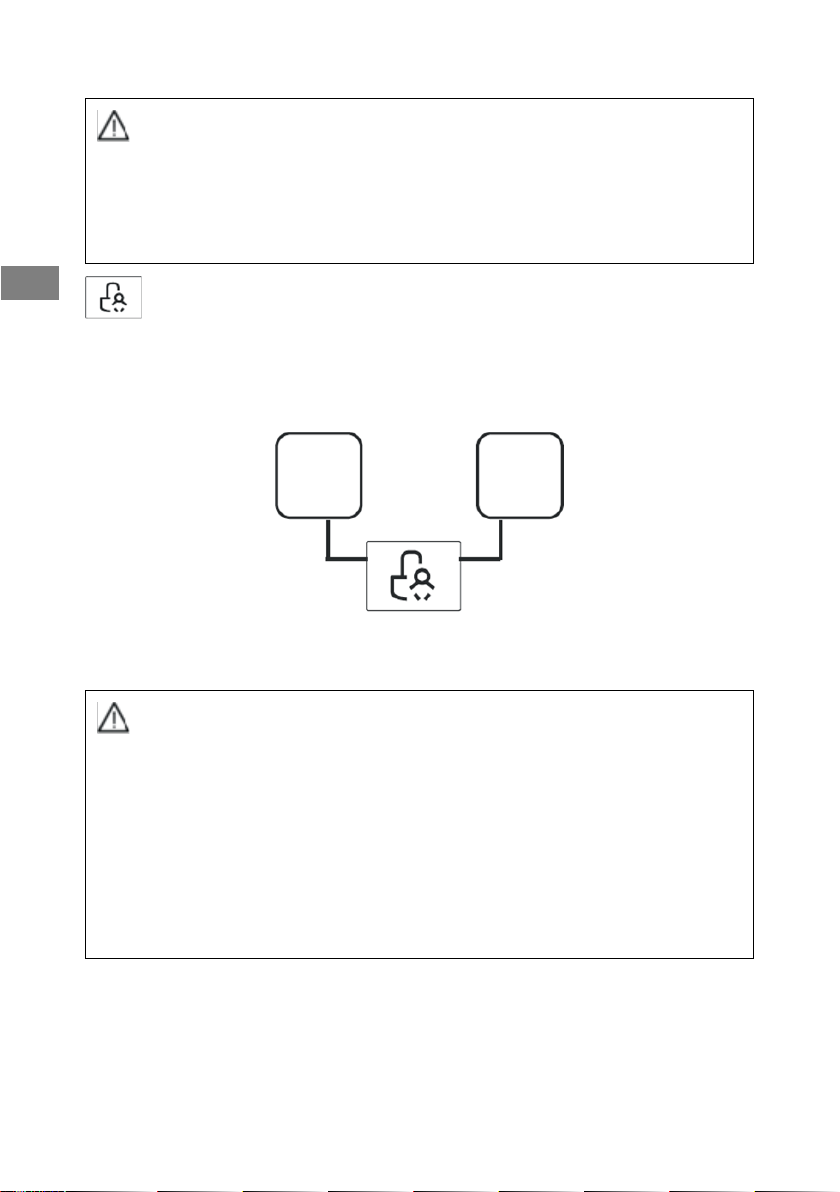
Child safety
This function is used to lock the buttons so that the current
program cannot be changed especially when a child plays with
the keys.
Press Spin and Delayed Start at the same time for three
seconds, until a beep is heard.
Warning!
• To disable to Child safety lock, press the same two buttons for
three seconds.
• The “Child Safety” function will lock all of the buttons except for
the dial.
• When you switch the appliance off, the Child safety lock is
disabled.
• The Child safety function remains active when the washing
machine restarts after a power break.
Spin
Delayed
start

21
GB
Switching off the audible beep
Press the Temp°C button for three seconds to switch off the
audible beep.
Perform the same action to restart it.
The last setting will be retained until the next reset.
Warning!
• After switching off the audible beep, the appliance no longer
makes any sound.

GB
Programmes
The programmes are adapted to the kind of laundry.
Programmes
Cotton
This programme is suited to a load consisting of resistant white or coloured
cotton.
Synthetics
This programme is ideal for a load consisting of resistant synthetics.
Duvet
Wash down jackets with this programme while protecting their appearance.
Rapid 45'
This programme is used to quickly wash a small load of laundry that is not
very dirty.
Mixed
This programme is ideal for a load consisting of mixed fibres.
20°C
This low temperature washing programme is recommended for washing
and protecting colours.
Baby care
This program improves rinse performance to remove as much detergent
residue as possible. This serves to better protect a baby's skin.
Flash 15’
This programme is used to very quickly wash a small load of laundry that is
not very dirty.
Intensive
This programme is intended for dirty laundry, increasing the drum rotation
rate and cycle time.
Wool
This programme is specially intended for protecting your woollens.
Thanks to longer soaking periods, your woollens will be washed gently.
Spin only
This programme is used to only spin your clothes by choosing the desired
spin speed.
Rinse and Spin
This programme is used to simply rinse and spin your clothes.
ECO 40-60
This programme is used to wash your laundry at 40°C (a temperature that
cannot be changed), while optimising water and power consumption.
Sport
This washing programme is used to preserve the elastic fibres in sportswear
so that they do not stretch and they retain their technical properties.
Hygiene
This programme removes the main viruses from your clothes and masks
and up to 99.9% of bacteria from your laundry with an intensified 30-minute
washing cycle at a stabilised temperature of 65°C.
Drum clean
This special programme is used to disinfect the machine at a temperature
of 90°C.
Note!
• The Drum clean programme runs empty. Do not place any
laundry in the machine during this cycle.
• We recommend using this programme for improved hygiene
and to extend the life of your washing machine.
23
GB
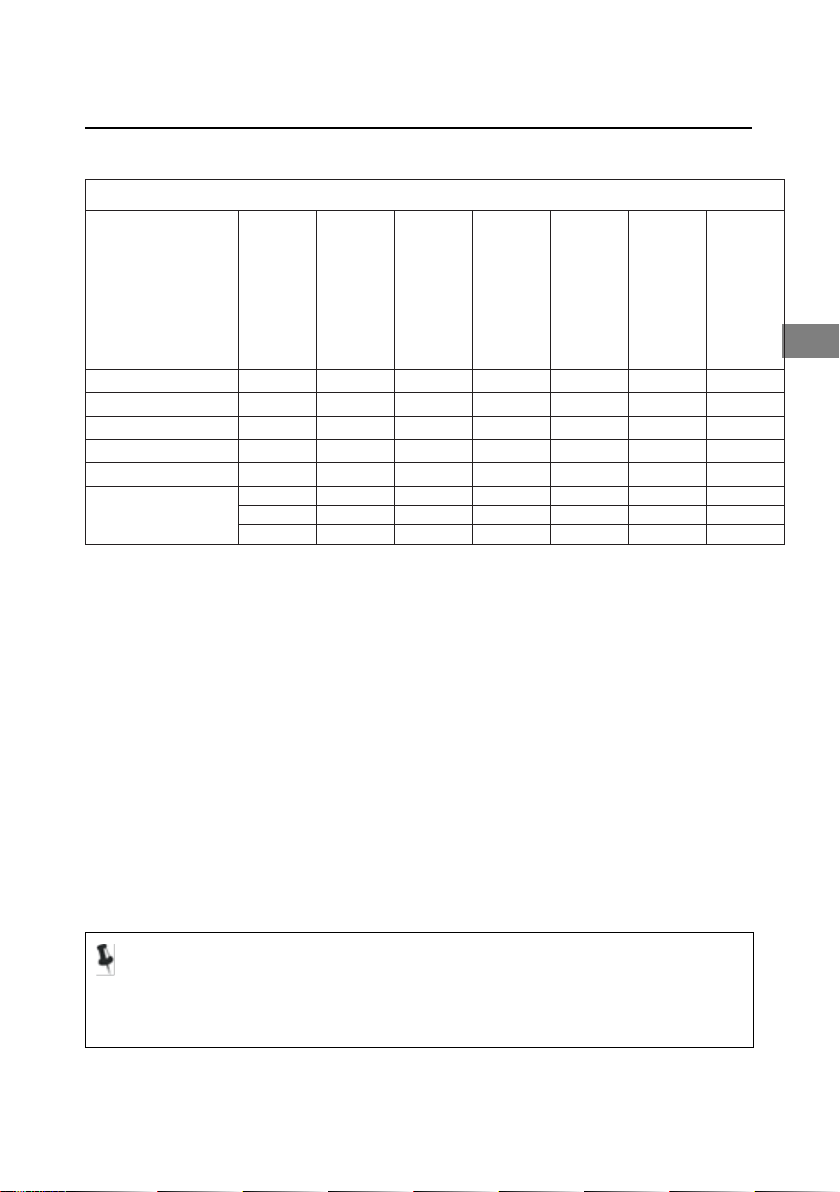
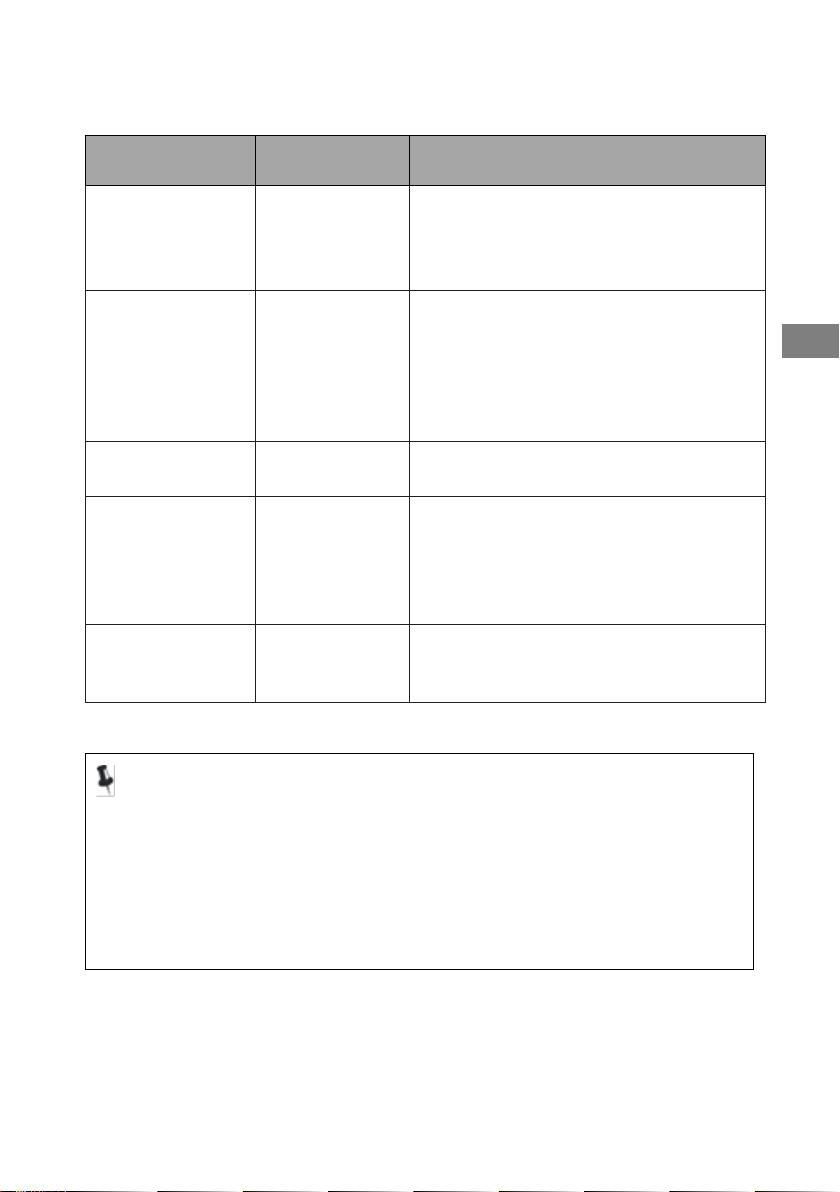
Washing programme table
WFB104QWA
Cycle
Rated capacity in kg
Temperature in °C
Cycle duration in
hours:minutes
Power consumption in
kW
Water consumption in
litres
Remaining moisture
content
Spin
20°C
5.0
20
1:11
0.212
51
65%
1000
Cotton (60°C)
10.0
60
3:44
1.708
85
53%
1500
Intensive
10.0
40
3:48
1.277
85
70%
800
Mixed
10.0
40
1:30
0.889
85
65%
1000
Flash 15’
2.0
Cold
0:15
0.030
31
75%
800
ECO 40-60
3)
10.0
-
3:59
1.015
70.6
53%
1450
5.0
-
3:00
0.635
55.3
53%
1450
2.5
-
3:00
0.286
38.8
53%
1450
The EU energy efficiency classification is: B.
Energy efficiency test programme: ECO 40-60.
Speed: the highest; other settings are set to their default values. Half-
load for a washing machine with a capacity of 10.0kg: 5kg
The “ECO40-60” programme is suitable for washing cotton items that
are moderately dirty and suitable for washing in the same cycle at
40°C or 60°C. This is the programme used to assess compliance with
the European Union's eco-design regulations.
For WELS (Water Efficiency Labelling Scheme) Singapore, ECO 40-60
is the recommanded program for normally soiled load equal to the
rated capacity.
Note!
• The values provided for programmes other than the ECO 40-60
program are provided as an indication only.

GB
Maintenance
Cleaning and Care
Warning!
• Always switch off the appliance and turn off the water tap before
any maintenance operations.
Cleaning the Exterior of your Washing Machine
Suitable maintenance will optimise the service life of
your washing machine. Appliance surfaces can be
cleaned with neutral non-abrasive detergents
diluted where necessary. If the water overflows,
wipe it up immediately.
Never use sharp objects.
Note!
• Do not use formic acid and its diluted solvents or equivalents
such as alcohol, solvents or chemicals, etc.
Cleaning the drum
Any rust left inside the drum by metal articles must be removed
immediately with chlorine-free detergent.
Never use steel wool.
25
GB
Note!
• Don't put laundry in the washing machine during the drum
cleaning.
Cleaning the door and window seal
Wipe the window and seal after each
wash to remove lint and stains. If lint
builds up, it can cause leaks.
Remove coins, buttons and other
objects trapped in the seal after every
wash.
Cleaning the water supply hose filter
Note!
• If there is hardly any water in the appliance and the tap is open,
then the water supply hose filter needs to be cleaned.
1. Close the tap
2. Remove the Water Inlet Hose from the tap.
3. Clean the filter.
4. Reconnect the water inlet hose.
GB
Cleaning the washing machine filter
1. Unscrew the water inlet hose from the back of the machine.
2. Remove the filter using a pair of pliers.
3. Use a brush to clean the filter.
4. Refit the filter once cleaning is finished.
5. Reconnect the water inlet hose.
Cleaning the detergent compartment
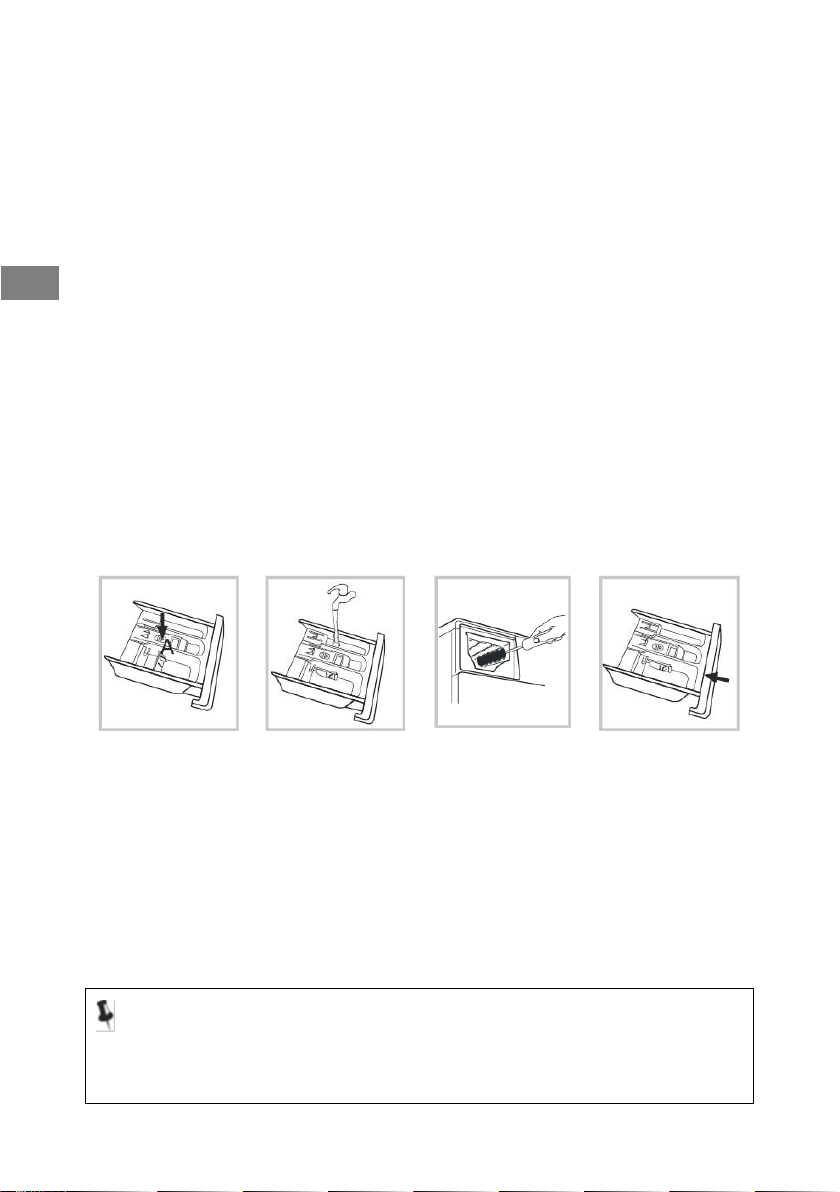
If you observe any dirtying of the detergent drawer, clean it.
To do this
1. Press down on the clip inside the detergent drawer as shown
by the arrow.
2. Release the drawer and remove it so that you can wash it out
with water.
3. Clip the drawer back into place and close it.
1. Open the
detergent drawer
by pressing on A
2. Clean the
detergent drawer
under running
water
3. Clean the
inside of the
compartment
where the
detergent draw
fits, using an old
toothbrush, for
example.
4. Refit the
detergent drawer
Note!
• Do not use alcohol, solvents or chemicals to clean the washing
machine.
27
GB
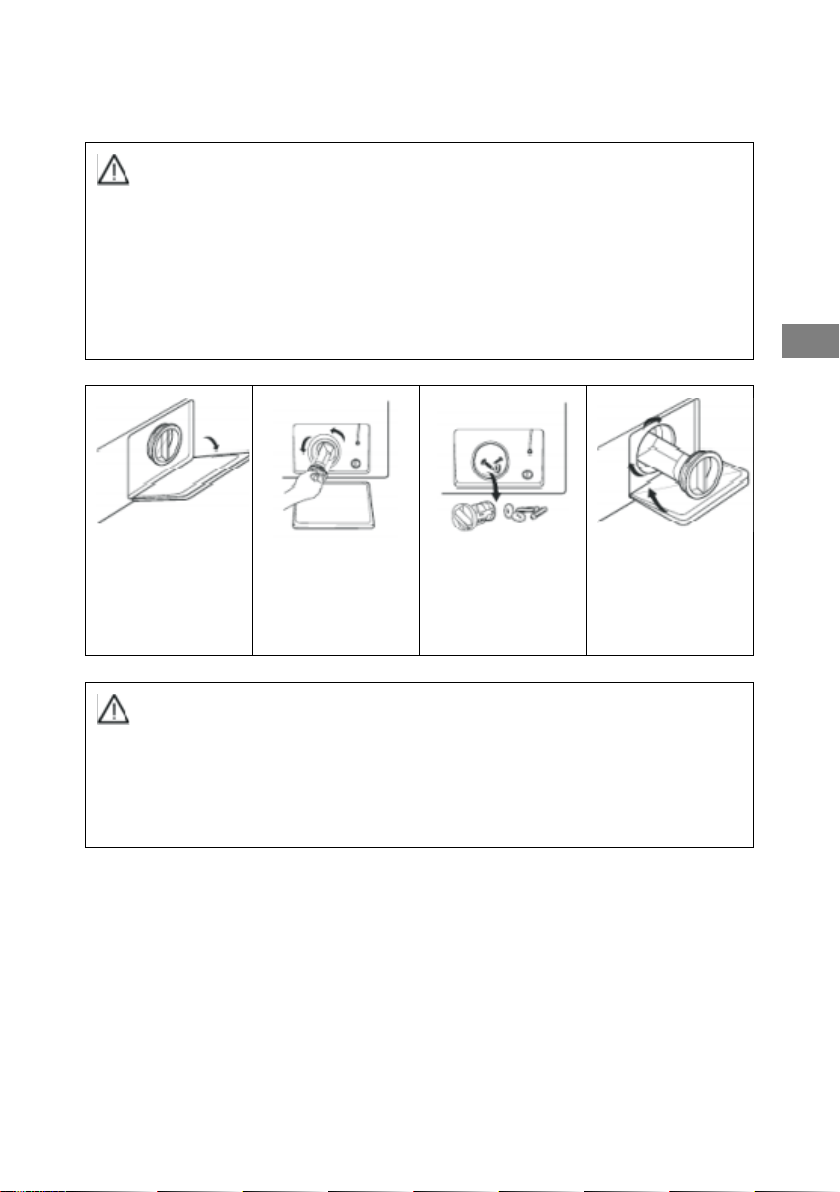
Cleaning the drain pump filter
Warning!
• Beware of hot water!
• Disconnect the appliance to avoid any electric shock hazard.
• The drain pump filter filters out lint and other small debris
present in the laundry.
• Clean the filter regularly to ensure proper washing machine
operation.
1. Open the
service flap
2. Remove the
filter by turning it
counter
clockwise
3. Remove any
debris
4. Refit the filter
then close the
service cover
Warning!
• Ensure that the filter is properly refitted to avoid any leakage.
• When the washing machine is running, never remove the filter.
This operation must only be performed with the washing
machine switched off.
Preventing scale build-up
If you live in an area with hard water, we recommend using a washing
machine descaling product. Regularly check for any scale build-up in
the drum. If necessary, run an empty drum washing cycle with a
descaling product. Refer to the instructions provided by on the product
packaging.

GB
Troubleshooting
The washing machine cannot start up or stops during operation.
First attempt to solve the problem. If you cannot, then contact the
service centre.
Description
Cause
Solution
Washing machine
cannot start up
The door is not properly
closed
Switch the washing
machine back on after
closing the door
Check whether any
clothes are trapped
Door doesn’t open
Washing machine's
safety protection
system is working
Disconnect the power,
reconnect it and switch
the machine back on
Water leakage
The connection
between the washing
machine and the water
supply hose or the drain
hose is not tight
Check the water pipes
and tighten the
connections
Clean the drain hose
Detergent residues in
the detergent
compartment
The detergent is
dampened and
agglomerated
Clean and dry the
compartment
Washing machine
lights or display do not
light up
The appliance is not
switched on. Circuit
problem. Connection
problem.
Check that the power is
on and that the power
cord is properly
connected.
Unusual noise
Make sure that the
transit bolts have been
removed
Make sure that the
washing machine is
installed on a solid and
level floor
29
GB
Description
Cause
Solution
E30
The door is not
properly closed
Close the door properly and restart the
washing machine
Check whether any clothes are
trapped
E10
Problem adding
water during
washing
Check whether the water pressure is
too low
Refit the water pipe in an upright
position
Check that the water supply filter is
not blocked
E21
Water drainage
takes too long
Check if the drain hose is blocked
E12
Water leakage
Run another programme
If error code E12 is still displayed, turn
off the water supply, disconnect the
washing machine and call your after
sales service.
EXX
Others
Do not hesitate to reset the washing
machine Contact our after sales
service if the issues remain
Note!
• Once this check is complete, start the washing machine. If the
problem occurs again or if the error codes are displayed again,
contact your after sales service.
• Any attempt made by the user or a non-professional to repair
the appliance may affect user safety and void the appliance
warranty.
GB
Performing your own repairs
Some repairs may be carried out by the user in certain cases. The
sav.groupebrandt.com website offers you the option of ordering
certain spare parts as well as bringing you access to technical data
and safety instructions to guide you through troubleshooting. In line
with the stipulations of Article L441-5 of the French Consumer Code
(Code de la Consommation), the manufacturer cannot be held liable
for any damage that occurs while performing your own repairs
insomuch as this damage is linked to improper procedures by the user
or any failure by the latter to follow the instructions for repairing the
product.
Availability of spare parts
The minimum length of time for making available spare parts listed in
European Regulation 2019-2023-EU and accessible, especially to the
appliance user, is 14 years under the terms set out in the above
regulation.
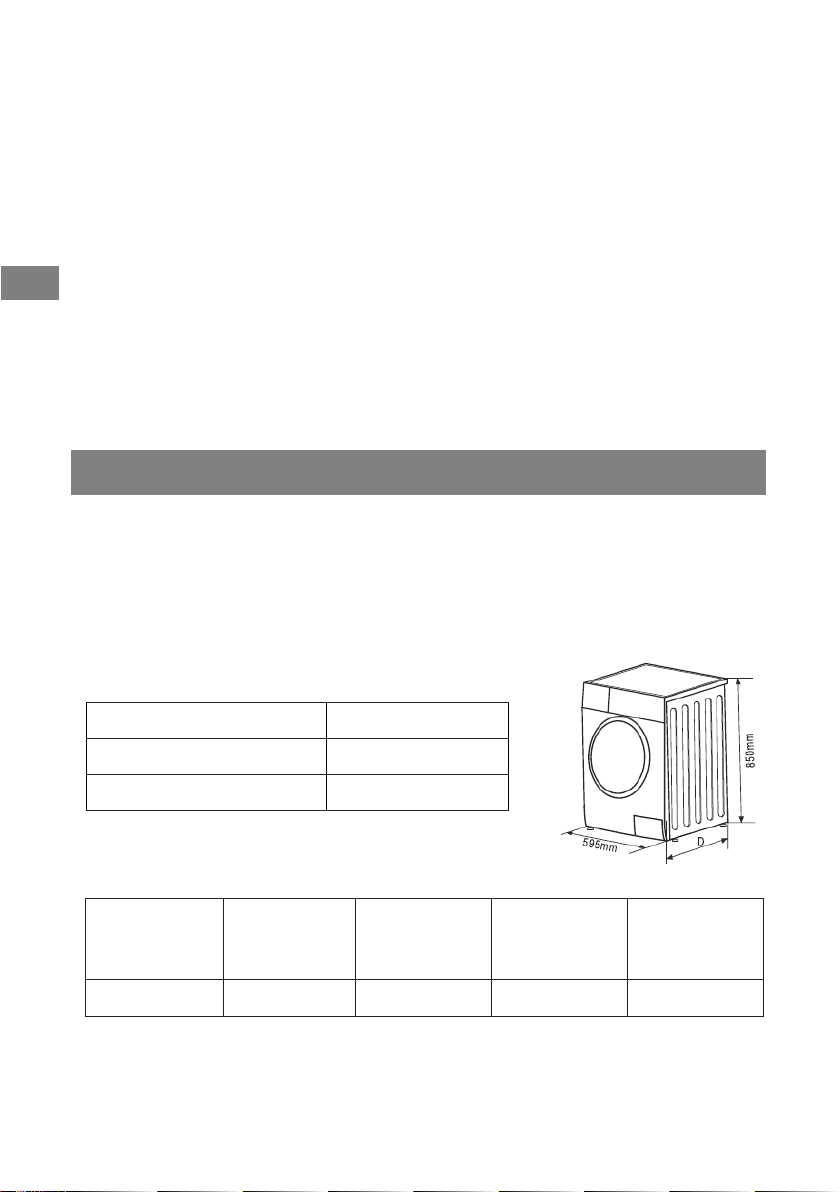
Technical specifications
Power supply
220-240V/50HZ
Maximum current
10 A
Standard water pressure
0.05 MPa-1 MPa
Model
Washing
capacity
Dimensions
(H*L*D in
mm)
Net weight
Rated power
WFB104QWA
10.0kg
595*565*850
72kg
1900W

31
GB
General information on regulation
EU 2019-2023
• When using the test programmes, wash the specified load using
the maximum spin speed.
• The actual parameters will depend on how the appliance is
used and may differ from the preset parameters.
• This domestic washing machine is equipped with a system for
managing energy consumption. The time spent in the mode left
to run is less than one minute.
• The most effective programs from a power and water
consumption point of view are generally those that run at low
temperature for a longer duration.
• Loading the domestic washing machine to the maximum
capacity stated by the manufacturer for each programme
contributes to saving power and water.
• The noise and remaining moisture content are influenced by the
spin speed: the higher the spin speed during the spin phase,
the higher the noise level and the lower the remaining moisture
content of the laundry.
• To access the data on your model, stored in the product
database in line with regulation (EU) 2019/2014 and data
relating to energy labelling, please connect to the dedicated
website at https://eprel.ec.europa.eu/
Find the reference of your appliance on the website by entering
the service reference shown on the ID plate on your appliance.
Another way to access this information is to flash the QR code
found on the energy label on your product.

GB
AFTER-SALES SERVICE
Any repairs to your appliance must be made by a qualified professional accredited to
work on the brand. When calling, please provide the full references of your appliance
(commercial reference, service reference, serial number), so that we can handle your
call more efficiently. This information can be found on the data plate.

33
GB
This symbol on the product or in the instructions
means that your electrical and electronic equipment
should be disposed at the end of its life separately
from your household waste. There are separate
collection systems for recycling in the European
Union.
For more information, please contact the local
authority or your retailer where you purchased the
product.