Loading ...
Loading ...
Loading ...

ENGLISH
2
3. OPERATION
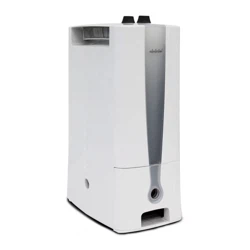
UNIT SET UP (Fig. F)
• Place the unit in an upright position on a stable, flat surface.
• Ensure that the unit is a safe distance away from a wall or fur-
niture (Fig. F1).
• Keep clothes at a safe distance of 40 cm from air outlet of the
unit to prevent water dripping into the unit.
CAUTION
• Keep suitable space as above. (F2)
• DO NOT insert small objects into the unit or this will damage it
and cause a hazard. (F3)
• DO NOT remove water tank when running or water may leak.
(F4)
•
Ensure that the water tank is fitted correctly, if the tank is full or
is not in place, the “Full tank / Check” lights and the machine
stops. (F4)
HUMIDISTAT
OPERATING STEPS:
1. By turning the knob (C1) clockwise, unit starts the operation
and the dehumidification is started.
2. As the knob turned closer to the indication of 'Cont.', the set-
ting room humidity become lower.
3. When the knob is turned to the rightmost position, the opera-
tion mode become continuous operation.
4. The knob (C1) is recommended to be set in the range of 'A'
(Fig. J).
CAUTION
In case that the knob is set in the range of 'B' (Fig. J), after the
automatic operation is stopped, it may take time to start the
operation again depends on the room environment.
5. STOP OPERATION
Turn the knob (C1) counterclockwise to switch off and the run-
ning lamp (C3) will be off.
POWER SELECTION SWITCH
OPERATING STEPS:
1. Turn the knob (C2) clockwise to select HIGH MODE (high
heating power and high fan speed). Select this mode for short-
turm rapid dehumidification
2. Turn the knob (C2) counterclockwise to select LOW MODE
(low heating power and low fan speed). Use this mode for nor-
mal daily use, energy saving and quiet operation.
IONISER OPERATION:
1. When the unit is on, the IONISER and the Ionizer lamp (C3) will
be on.
2. When the unit is off, the IONISER and the Ionizer lamp (C3) will
be off.
HORIZONTAL ADJUSTABLE LOUVER (Fig. G)
The air outlet can be adjusted forward or upward.
WIDE / SPOT ADJUSTABLE LOUVER (Fig. H)
Wide blowing (H1) ➞ Adjust the blades outwards for an expanded
airflow.
Spot blowing (H2) ➞ Adjust the blades inwards for a spot airflow.
CONTINUOUS DRAINAGE MODE (Fig. E)
For continuous drainage, use a hose with an inner diameter of
12mm and outer diameter of 14mm~16mm.
1. Remove the water tank.
2. Use a screwdriver to remove the knockout at the back. (E1)
Pushing down and hold the stopper (E4) for drainage pipe by
finger (Fig. E2). Attach the hose to the drainage pipe (E5)
through the hole (Fig. E3).
3. Remove the tank cover and restore the water tank into the
unit.
If the tank is not restored in the unit, full tank lamp will light
and cannot start operation.
4. The tubing should be lead to the drain with no sharp bends.
(E6, E7, E8)
NOTE:
1. The water tank must be in the correct position before tubing.
2. Remove the tubing before pulling out the water tank.
3. Remove the hose from the continuous drainage hole. Be sure
to put the tank cover on the water tank and restart operation.
4. EMPTY THE WATER TANK (Fig. D)
1. When the water tank is full, the Water full indicator lamp (C4)
will light and unit stops in a few minutes.
NOTE: DO NOT move the unit or remove the water tank, if the
unit is still operating, as water may leak, damage the
unit or cause an electric shock.
2. By gripping the bottom of the bucket, remove the water tank
(D1) and lift carefully with handle (D2)
3. Remove the cover of water tank first (D3), then pour the water
away (D4). Clean the water tank and restore the cover and the
water tank (D5) to the correct position.
NOTE:
• Clean the water tank with clean water if needed. DO NOT
use solvent, abrasive or hot water.
• DO NOT remove or damage the float in the tank, or the
unit cannot work correctly.
• The water tank cover must be well fitted in position.
• The water full indicator lamp lights if the water tank is not
well in the position.
CLEANING
CLEANING AIR INTAKE GRILLE (Fig. I)
If the filter is covered with dust, the airflow and the performance of
the unit will be affected. It is recommended to check and clean the
air filter every 2 weeks.
1. Turn off the unit and remove the filter from the unit. (I1)
2. Clean the nano-silver filter with a vacuum cleaner or wash with
water (under 40°C). (I2) If you wash with water, dry it com-
pletely at shaded area.
3. Replace the filter in position.
CLEANING SURFACE
1. Turn off the unit, wait for the fan to stop and unplug from the
power socket.
2. Clean the surface with a soft damp cloth.
3. Dry thoroughly with a towel after cleaning.
4. In order to avoid damage, do not wash the unit with water, or
let water drip into the air inlet or outlet.
CAUTION
• NEVER use gasoline, solvents, chemical products or polish as
they could damage the surface.
5. LONG-TERM STORAGE
At the end of each season, or when you do not plan to use your
unit for an extended period of time, the following procedures are
recommended.
1. Turn off the unit, wait for it to stop and unplug from the power
socket.
2. Clean and dry the water tank. Leave the unit to drain for ap-
proximately one day.
3. Clean the filter and the unit. Cover the unit to prevent it from
gathering dust. Store upright in a cool dry place. DO NOT ex-
pose to direct sunlight.
CAUTION
• ALWAYS store the unit in the vertical position.
• DO NOT put heavy objects on top of the unit.
Loading ...
Loading ...
Loading ...