Loading ...
Loading ...
Loading ...
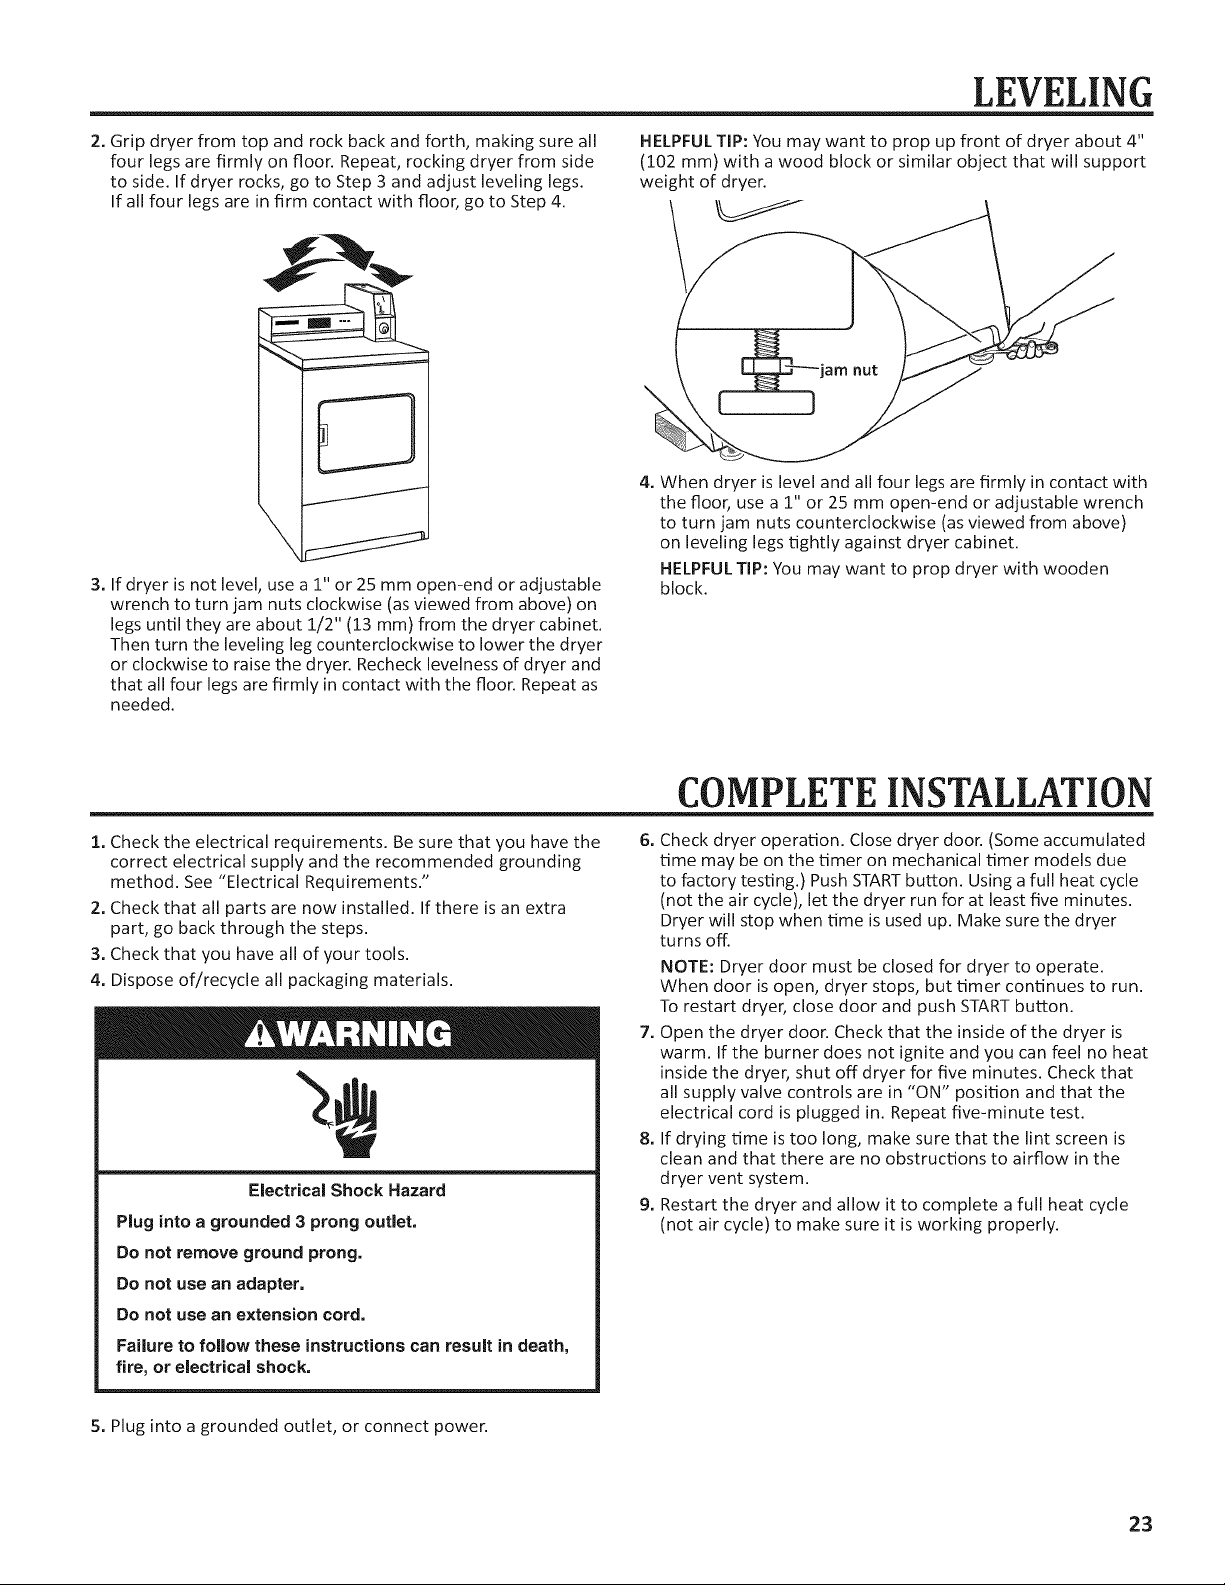
2.
Grip
dryer
from
top
and
rock
back
and
forth,
making
sure
all
four
legs
are
firmly
on
floor.
Repeat,
rocking
dryer
from
side
to
side.
If
dryer
rocks,
go
to
Step
3
and
adjust
leveling
legs.
If
all
four
legs
are
in
firm
contact
with
floor,
go
to
Step
4.
3.
If
dryer
is
not
level,
use
a
1"
or
25
mm
open-end
or
adjustable
wrench
to
turn
jam
nuts
clockwise
(as
viewed
from
above}
on
legs
until
they
are
about
1/2"
(13
mm)
from
the
dryer
cabinet.
Then
turn
the
leveling
leg
counterclockwise
to
lower
the
dryer
or
clockwise
to
raise
the
dryer.
Recheck
levelness
of
dryer and
that
all
four
legs
are
firmly
in
contact
with
the
floor.
Repeat
as
needed.
1.
Check
the
electrical
requirements.
Be
sure
that
you
have
the
correct
electrical
supply
and
the
recommended
grounding
method.
See
“Electrical
Requirements.”
2.
Check
that
all
parts
are
now
installed.
If
there
is
an
extra
part,
go
back
through
the
steps.
3.
Check
that
you
have
all
of
your
tools.
4.
Dispose
of/recycle
all
packaging
materials.
°
Electrical
Shock
Hazard
Plug
into
a
grounded
3
prong
outlet.
Do
not
remove
ground
prong.
Do
not
use
an
adapter.
Do
not
use
an
extension
cord.
Failure
to
follow
these
instructions
can
result
in
death,
tire,
or
electrical
shock.
5.
Plug
into
a
grounded
outlet,
or
connect
power.
LEVELING
HELPFUL
TIP:
You
may
want
to
prop
up
front
of
dryer
about
4"
(102
mm)
with
a
wood
block
or
similar
object
that
will
support
weight
of
dryer.
4,
When
dryer
is
level
and
all
four
legs
are
firmly
in
contact
with
the
floor,
use
a
1"
or
25
mm
open-end
or
adjustable
wrench
to
turn
jam
nuts
counterclockwise
(as
viewed
from
above}
on
leveling
legs
tightly
against dryer
cabinet.
HELPFUL
TIP:
You
may
want
to
prop
dryer
with
wooden
block.
COMPLETE
INSTALLATION
6.
Check
dryer
operation.
Close
dryer
door.
(Some
accumulated
time
may
be
on
the
timer
on
mechanical
timer
models
due
to
factory
testing.)
Push
START
button. Using
a
full
heat
cycle
(not
the
air
cycle),
let
the
dryer
run
for
at
least
five
minutes.
Dryer
will
stop
when
time
is
used
up.
Make
sure
the
dryer
turns
off.
NOTE:
Dryer
door
must
be
closed
for
dryer
to
operate.
When
door
is
open,
dryer
stops,
but
timer
continues
to
run.
To
restart
dryer,
close
door
and
push
START
button.
7.
Open
the
dryer
door.
Check
that
the
inside
of
the
dryer
is
warm.
If
the
burner
does
not
ignite
and you
can
feel
no
heat
inside
the
dryer,
shut
off
dryer
for
five
minutes.
Check
that
all
supply
valve
controls
are
in
“ON”
position
and
that
the
electrical
cord
is
plugged
in.
Repeat
five-minute
test.
8.
If
drying
time
is
too
long,
make
sure
that
the
lint
screen
is
clean
and
that
there
are
no
obstructions
to
airflow
in
the
dryer
vent
system.
9.
Restart
the
dryer
and
allow
it
to
complete
a
full
heat
cycle
(not
air
cycle)
to
make
sure
it
is
working
properly.
23
Loading ...
Loading ...
Loading ...