Loading ...
Loading ...
Loading ...

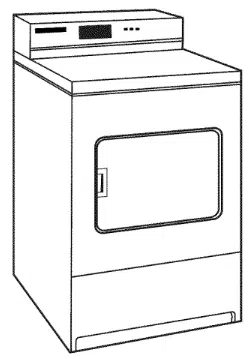
The
console
houses
the
electronic
control
board.
The
board
is
factory
set for
a
dry
time
of
45
minutes.
Consult
the
tech
sheet
found
inside
the
dryer
toe
panel
to
reset
dry
time
and
for
other
options.
The
card
reading
mechanism
is
not
included,
but
is
available
from
your
usual
industry
sources.
OPN
fe
Excessive
Weight
Hazard
Use
two
or
more
people
to
move
and
install
dryer.
Failure
to
do
so
can
result
in
back
or
other
injury.
1.
Prepare
dryer
for
leveling
legs
NOTE:
Slide
dryer
onto
cardboard
or
hardboard
before
moving
to
avoid
damaging
floor
covering.
Using
two
or
more
people,
move
dryer
to
desired
installation
location.
Take
tape
off
front
corners
of
dryer.
Open
dryer
and
remove
the
literature
and
parts
packages.
Wipe
drum
interior
with
a
damp
cloth
to
remove
any
dust.
Take
two
cardboard
corners
from
the
dryer
carton
and
place
them
on
the
floor
in
back
of
the
dryer.
Firmly
grasp
the
body
of
the
dryer
and
gently
lay
it
on
its
back
on
the
cardboard
corners.
Disconnect
power
before
making
electrical
connections.
INSTALLING
LEVELING
LEGS
2.
Screw
in
leveling
legs
Examine
leveling
legs
and
find
diamond
marking.
Screw
legs
into
leg
holes
by
hand.
Use
an
adjustable
wrench
or
1"
(25
mm)
hex-head
socket
wrench
to
finish
turning
legs
until
diamond
foot
marking
is
no
longer
visible.
Then
fit
a
covered
foot
boot
over
each
leg
foot.
To
avoid
damage
to
the
floor,
use
a
large
piece
of
cardboard
from
the
dryer
carton.
Stand
dryer
up on
the
cardboard.
Slide
the
dryer
until
it
is
close
to
its
final
location.
Leave
enough
room
for
electrical
connection
and
to
connect
the
exhaust
vent.
diamond
marking
17
Loading ...
Loading ...
Loading ...