Loading ...
Loading ...
Loading ...
6 WWW.SENIXTOOLS.COM
ASSEMBLY/ADJUSTMENT
ASSEMBLY
WARNING — Remove the battery before inspecting,
adjusting, performing maintenance, or
cleaning the unit.
CAUTION: Always wear protective gloves when
handling saw chains.
ASSEMBLY OF GUIDE BAR AND SAW CHAIN
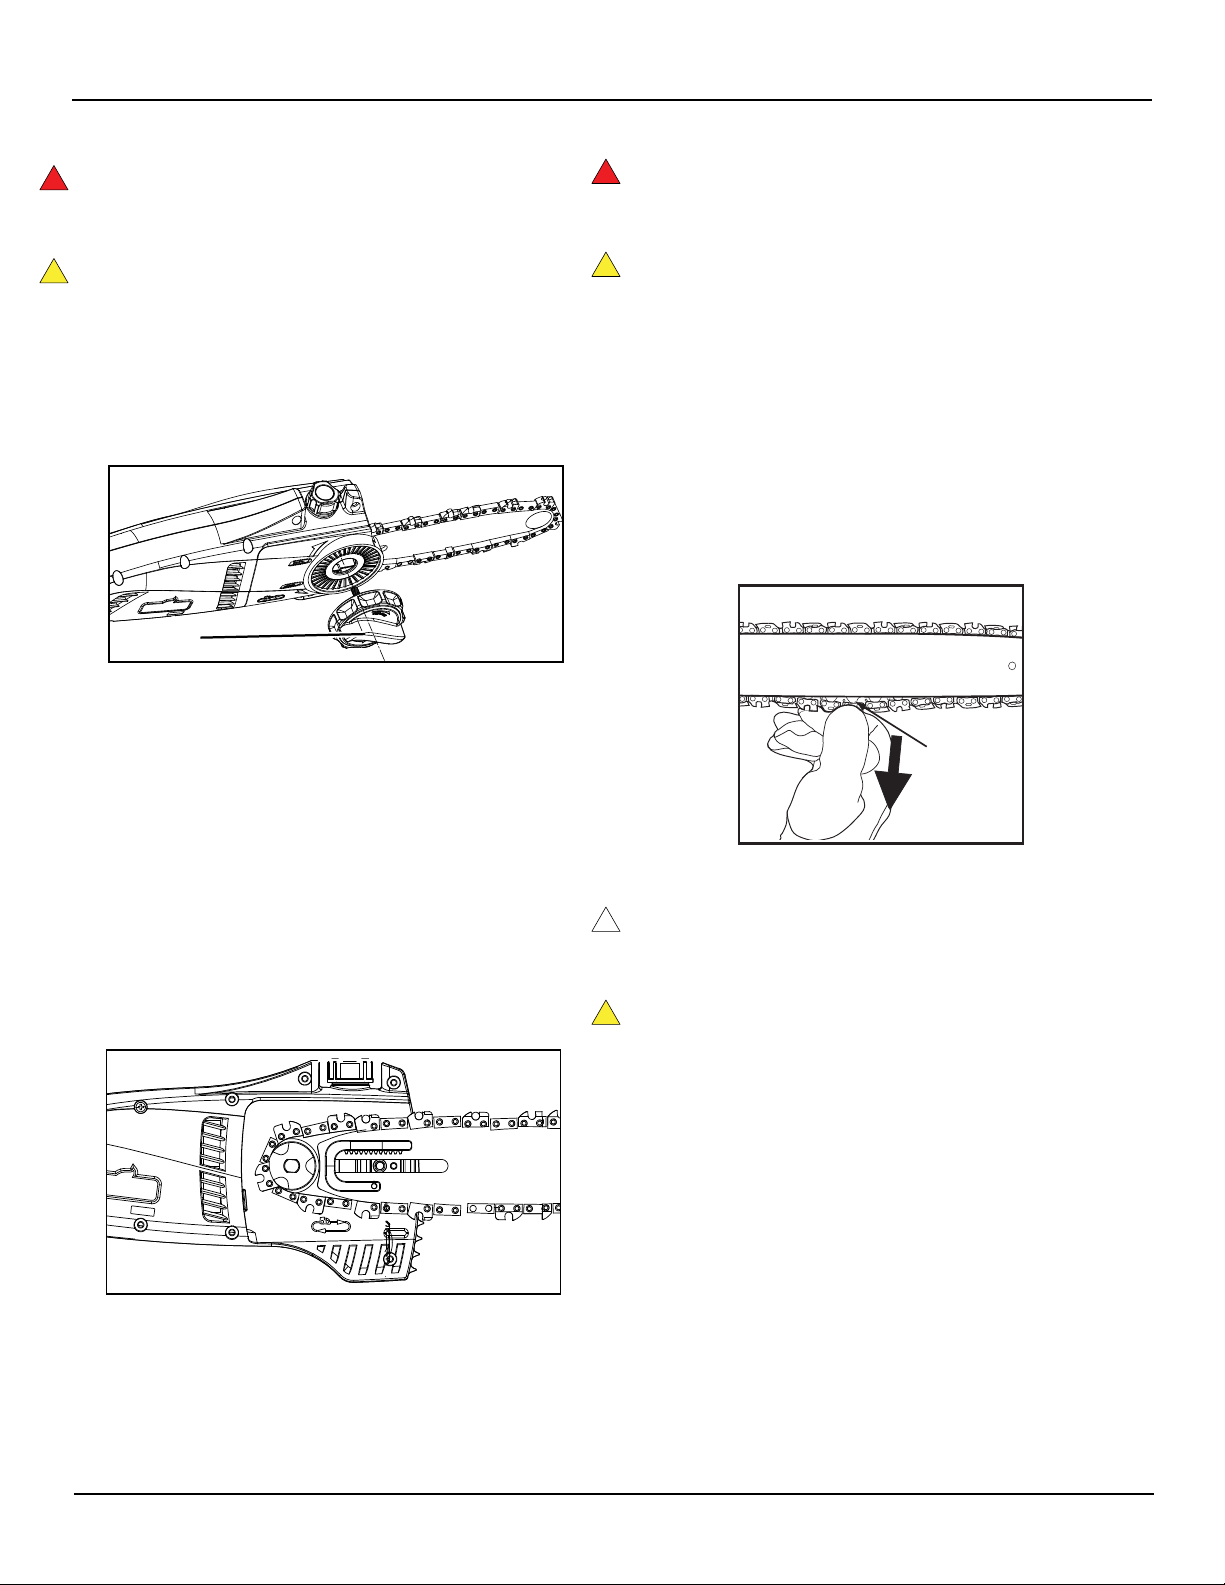
1. Loosen the cover release knob to release the chain
sprocket cover (Figure 1). Remove the chain
sprocket cover.
1
Figure 1 - Release knob
1 — Release knob
2. Place the chain in the groove of the outside edge of the
guide bar as shown.
Note: Make sure the chain’s direction of rotation is correct.
The blades on each cutting link on the upper side of
the cutting bar must be facing towards the tip of the
pole saw.
3. Insert the guide bar and chain into the mount on the
pole saw (Figure 2). In the process, guide the chain
around the pinion and hang the guide bar in the chain
tensioning bolts.
Figure 2 - Guide bar and chain installation
4. Adjust the chain tension. Mount and hand-tighten the
chain sprocket cover with the retaining nut.
TENSIONING THE CHAIN
WARNING — Remove the battery before inspecting,
adjusting, performing maintenance, or
cleaning the unit.
CAUTION: Always wear protective gloves when
handling saw chains.
1. Loosen the retaining nut of the chain sprocket cover by a
few rotations.
2. Adjust the chain tension by rotating the Tension
Adjustment Knob (the outermost knob on the cover
release knob). Clockwise rotation increases the chain
tension; counter-clockwise rotation reduces the chain
tension. The saw chain is correctly tensioned if it can be
raised approximately 2 mm from the center of the
guide bar.
2 mm
Figure 3 - Correct chain tension
IMPORTANT: Do not over-tension the chain: this will
lead to excessive wear and reduces the
life of both the bar and chain.
CAUTION: The saw chain must be tensioned properly
in order to ensure safe operation.
The chain tension is optimal if the saw chain can be lifted
(2 mm) from the center of the guide bar.
Because the saw chain heats up during operation, its
length can uctuate. Check the chain tension every 10
minutes of operation and adjust as necessary, particularly
for new saw chains.
TIP: The saw chain shortens when cooling down. Loosen
the saw chain after work is completed to elongate the
chain’s life and prevent possible damage.
!
!
!
!
!
!
Loading ...
Loading ...
Loading ...