Loading ...
Loading ...
Loading ...
a. Using a screwdriver or coin, turn the cap counterclockwise to
release from the pressure regulator. Be sure the O-ring gasket
stays in place.
b. Turn the cap over and place into the slots. Turn clockwise to
lock in position. The letters corresponding with the type of gas
being used should be visible on the exposed end of the cap.
lc. Convert the Pressure Regulator - Non-Self-Cleaning
Standing Pilot Models
HOLLOW END CAP SOLID END
TOWAROS_ _4 TOWA.OS
REGULATOR _ _ REGULATOR
FOR NATURALGAS _ _ FOR L.P. GAS
f_ 4p_ O-RING GASKET
%qJ (DO NOT REMOVE)
a.
b.
C.
d,
e.
f.
2,
a.
Remove the cap from the pressure regulator.
Remove the plunger from the cap.
Turn the plunger with the enlarged end down for LP/Propane
use. Turn the plunger with the small end down for Natural gas
use. (See illustration below.)
Replace the plunger inside the cap.
Replace the cap.
Remove the thermostat knob to access the selector key. Check
the selector key on the thermostat to be certain the pointer is
_" CAP
SMALL END . <_ _. ENLARGED END
TOWARDS TOWARDS
REGULATOR FOR REGULATOR FOR
NATU R__R GAS
turned to select the
proper fuel being used
(Natural or LP/
Propane). Replace the
thermostat knob.
Convert Surface
Burner Valves - All
Models
Lift and lock cooktop to
gain access to the
surface burner spuds.
_Oven GasSelector
jf
_lr _'Manifold Pipe
OFF NAT LP
Surface burner spuds for models with venturi burners are
located in the front of the burner box. For models with dual or
snap-in burners, the spuds are in the bottom of the burner box.
Using 1/2" wrench, adjust surface burner spud as follows. For
Natural to LP/Propane conversion tighten spud down clockwise
until snug (approximately 1 to 1-1/2 turns). This restricts the flow
of gas through the spuds to only that allowed by the hollow LP/
Propane metering pin. Do not over tighten.
For LP/Propane to Natural conversion, loosen spuds counter-
clockwise (approximately 1 to 1-1/2 turns). This increases the
flow of gas around the metering pin.
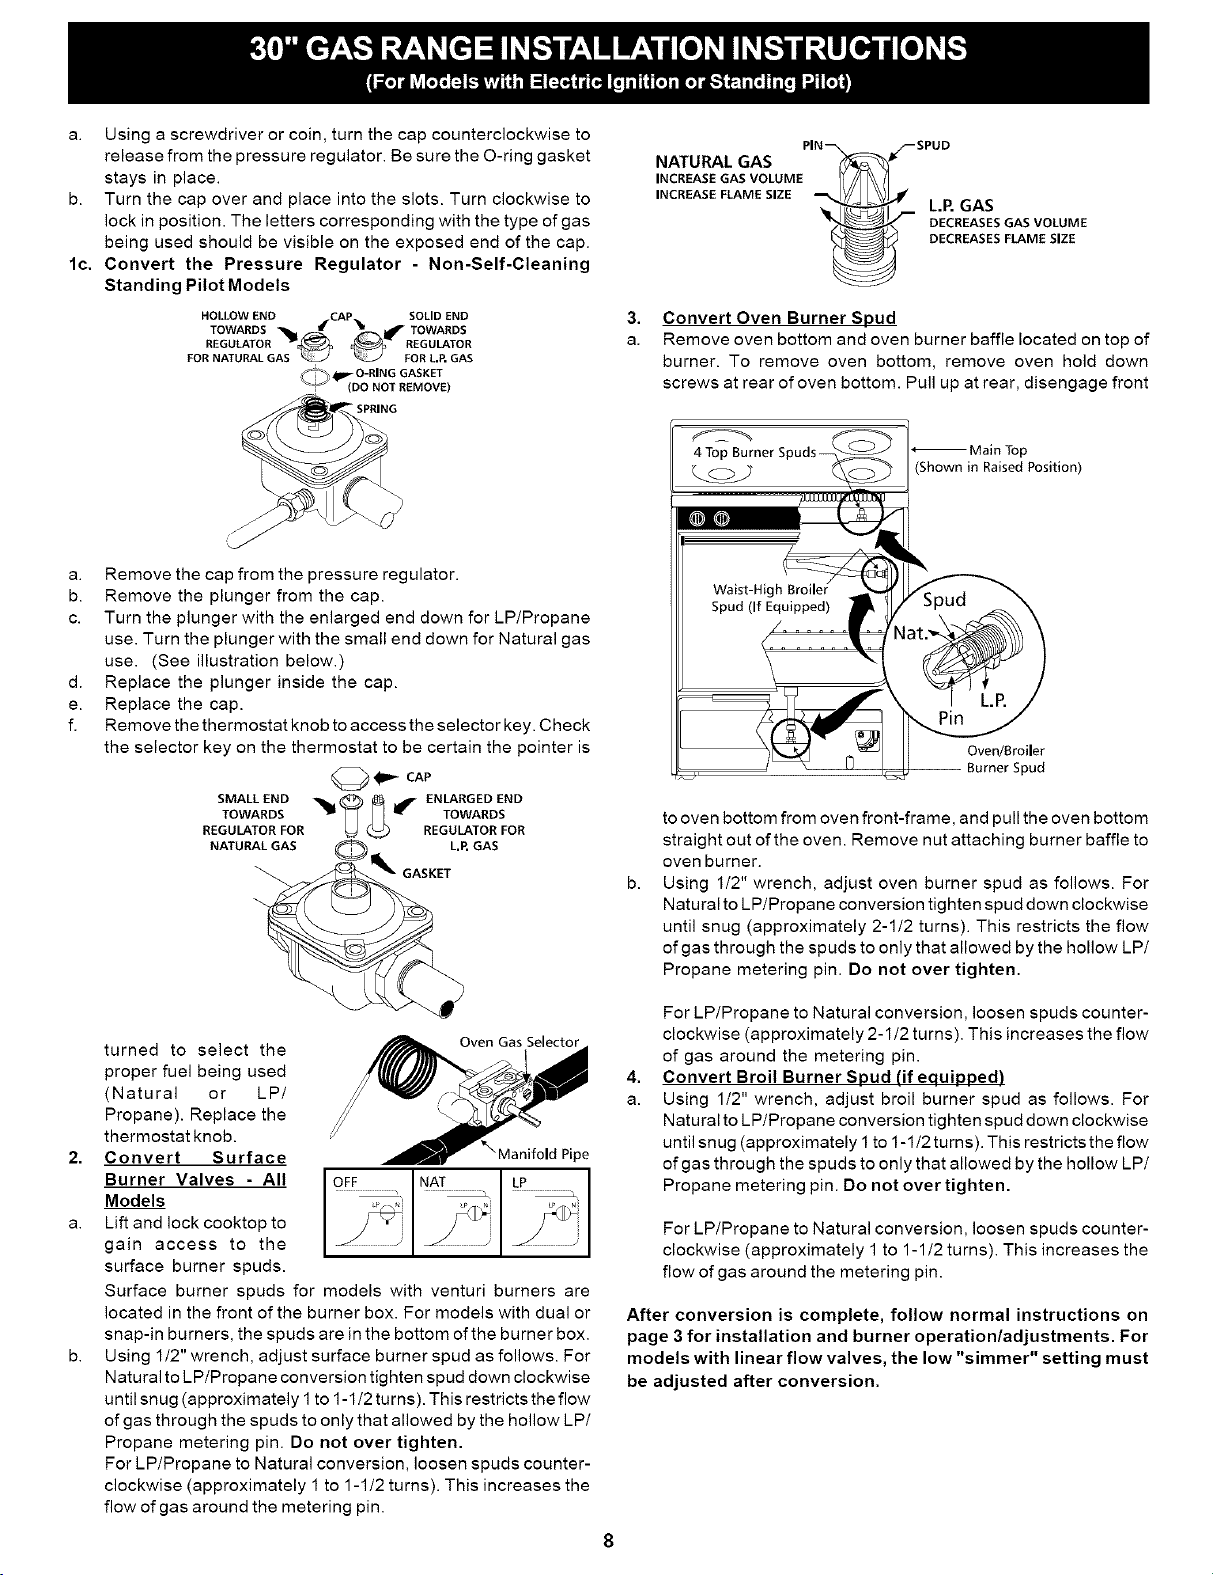
Convert Oven Burner Spud
Remove oven bottom and oven burner baffle located on top of
burner. To remove oven bottom, remove oven hold down
screws at rear of oven bottom. Pull up at rear, disengage front
4 Top *_ Main Top
_Oj)' (Shown in RaisedPosition)
Waist-High_
Spud (If Equipped) I
Oven/Broiler
pud
to oven bottom from oven front-frame, and pull the oven bottom
straight out of the oven. Remove nut attaching burner baffle to
oven burner.
Using 1/2" wrench, adjust oven burner spud as follows. For
Natural to LP/Propane conversion tighten spud down clockwise
until snug (approximately 2-1/2 turns). This restricts the flow
of gas through the spuds to only that allowed by the hollow LP/
Propane metering pin. Do not over tighten.
For LP/Propane to Natural conversion, loosen spuds counter-
clockwise (approximately 2-1/2 turns). This increases the flow
of gas around the metering pin.
Convert Broil Burner Spud (if equipped)
Using 1/2" wrench, adjust broil burner spud as follows. For
Natural to LPiPropane conversion tighten spud down clockwise
until snug (approximately 1 to 1-1/2 turns). This restricts the flow
of gas through the spuds to only that allowed by the hollow LP/
Propane metering pin. Do not over tighten.
For LP/Propane to Natural conversion, loosen spuds counter-
clockwise (approximately 1 to 1-1/2 turns). This increases the
flow of gas around the metering pin.
After conversion is complete, follow normal instructions on
page 3 for installation and burner operation/adjustments. For
models with linear flow valves, the low "simmer" setting must
be adjusted after conversion.