Loading ...
Loading ...
Loading ...
24
SERVICE AND MAINTENANCE
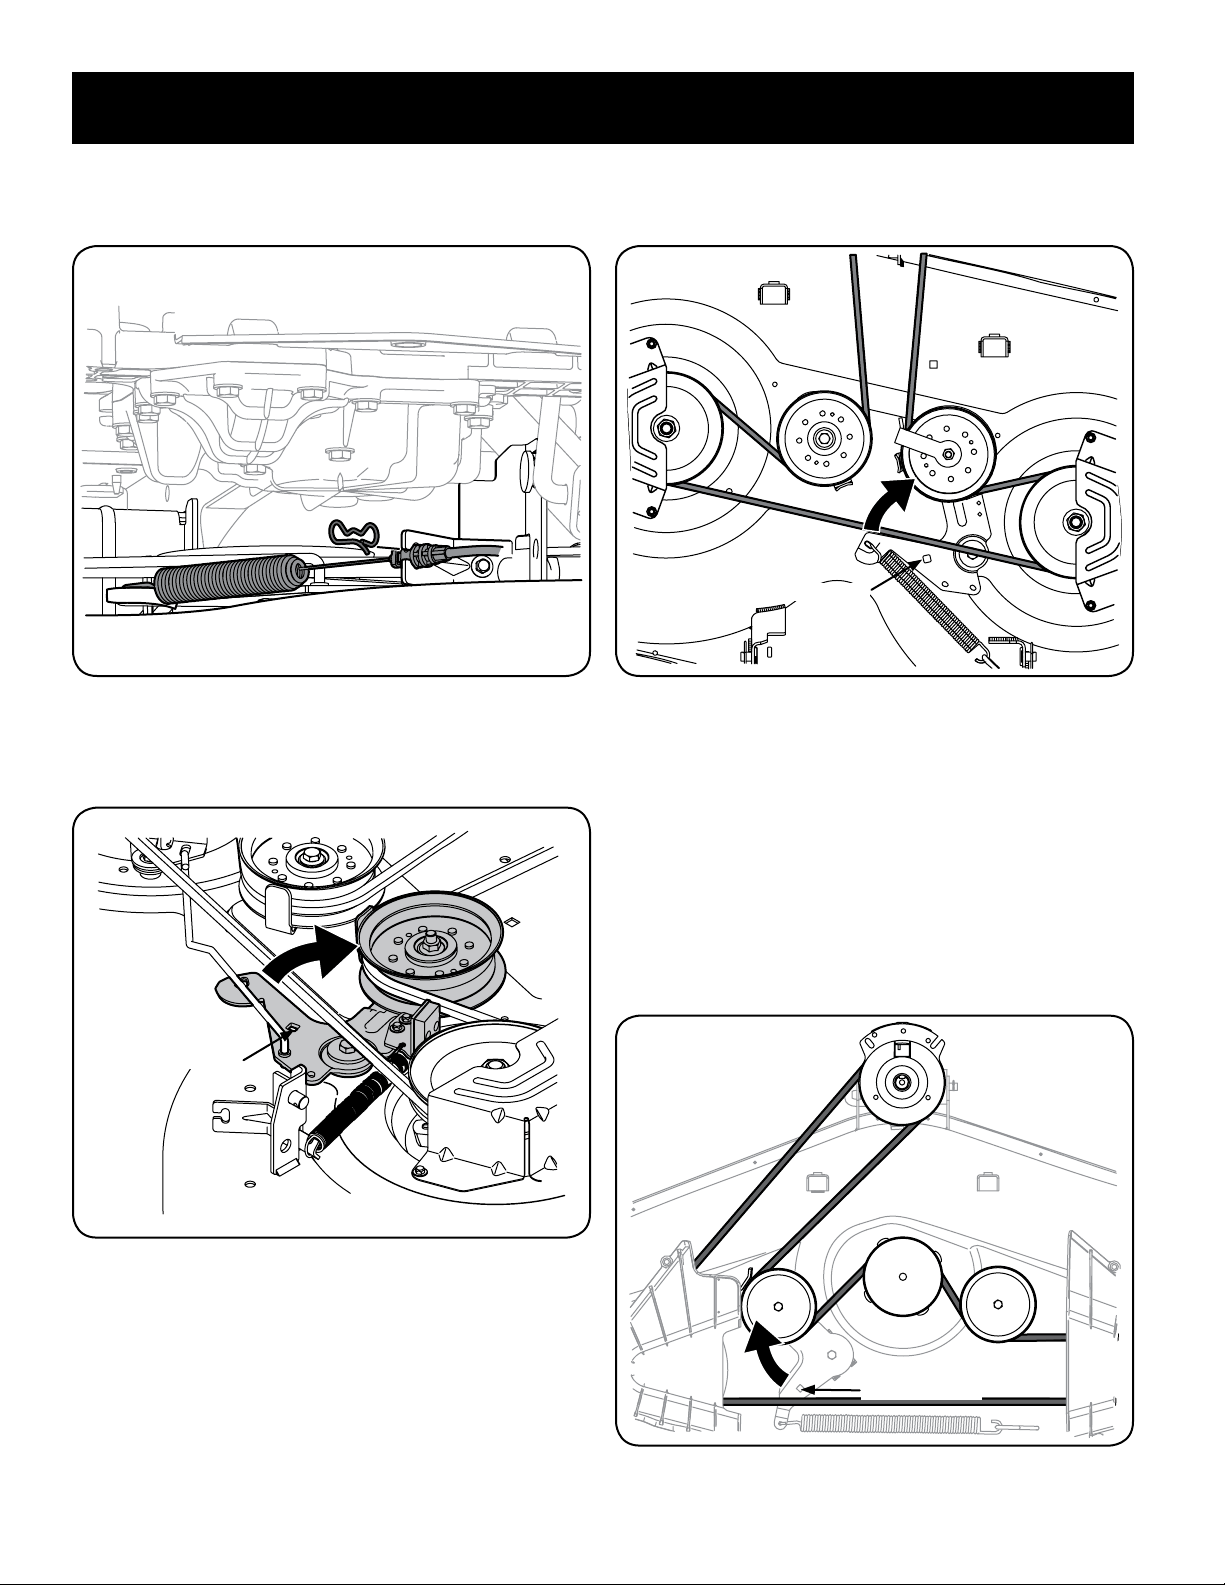
e. Remove the bow-tie pin that secures the PTO cable to the bracket on
the deck, pull back on the PTO cable, then slide it out of the bracket
and unhook the spring from the idler bracket. See Figure 23.
Figure 23
f. Working on the right side of the tractor, insert a ⁄” drive ratchet
wrench, set to tighten, into square hole found on the idler bracket.
See Figure 24.
Insert Wrench Here
Figure 24
g. Skip ahead to Step 2 on page 25.
46” Decks
1. To remove the cutting deck, proceed as follows:
a. Place the PTO in the disengaged (OFF) position and engage the parking
brake.
b. Lower the deck by moving the deck lift lever into the bottom notch
on the right fender.
c. Working on the right side of the tractor, insert a ⁄” drive ratchet
wrench, set to tighten, into square hole found on the idler bracket.
See Figure 25.
Insert Wrench Here
Figure 25
d. Skip ahead to Step 2 on page25.
54” Decks
1. To remove the cutting deck, proceed as follows:
a. Place the PTO in the disengaged (OFF) position and engage the parking
brake.
b. Lower the deck by moving the deck lift lever into the bottom notch
on the right fender.
c. Working on the right side of the tractor, insert a ⁄” drive ratchet
wrench, set to tighten, into square hole found on the idler bracket.
See Figure 26.
Insert Wrench Here
Figure 26
d. Continue with Step 2 on page 25.
Loading ...
Loading ...
Loading ...