© 2021 Brentwood Appliances, Inc.
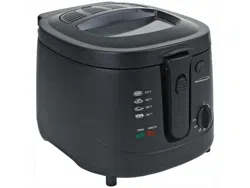
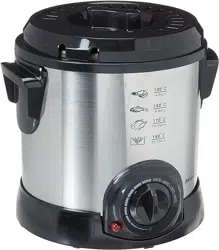
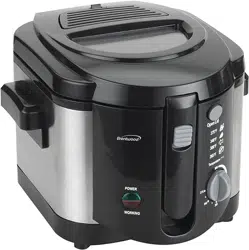
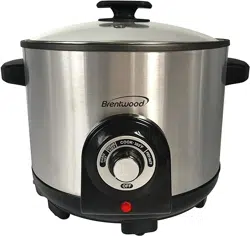
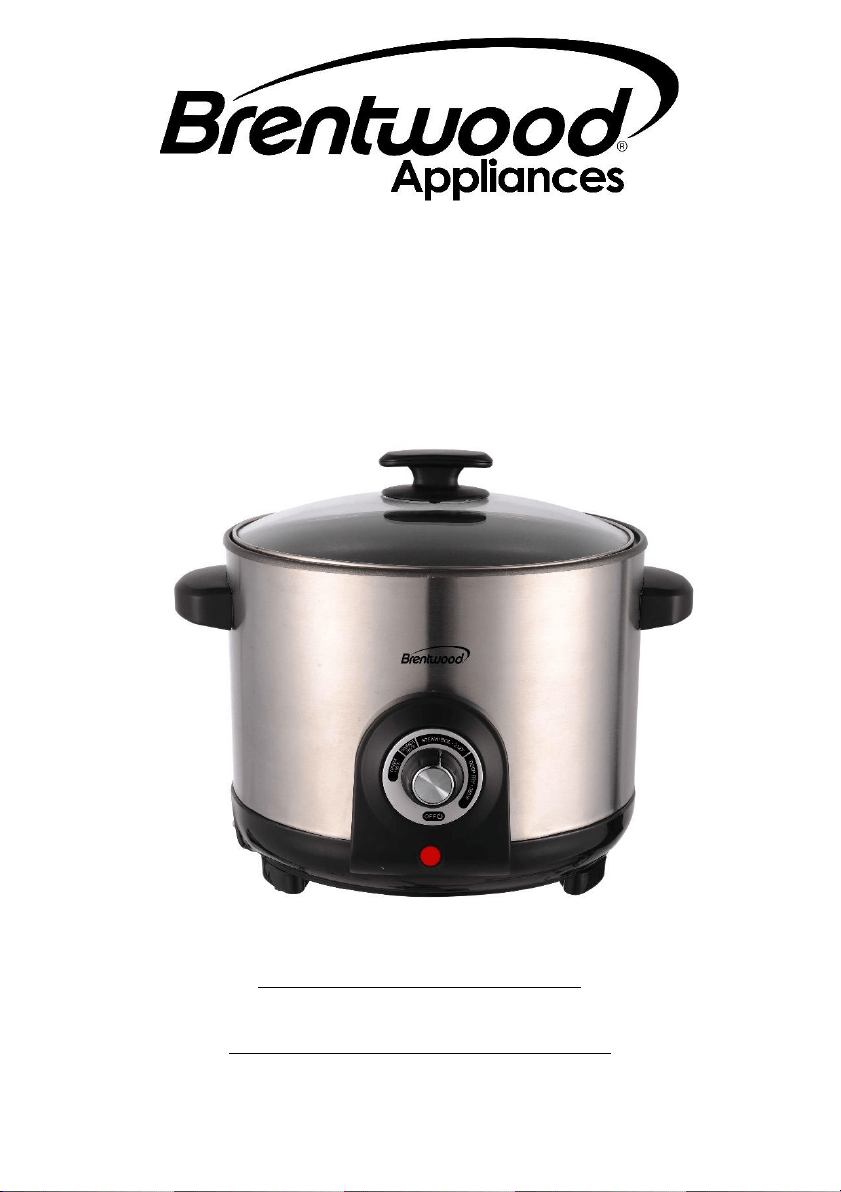
MULTI-FUNCTION DEEP FRYER
FREIDORA MULTIUSO
ITEM NO.: DF-706
Operating and Safety Instructions
FOR INDOOR HOUSEHOLD USE ONLY
Instrucciones de Operación y Seguridad
SOLO PARA USO DOMESTICO

2
IMPORTANT SAFEGUARDS
When using this or any other electrical appliance, always follow these basic safety
precautions, especially when children are present.
READ ALL INSTRUCTIONS
BEFORE USE
WARNING-To reduce the risk of fire, electric shock, serious personal injury and property
damage please note the following:
• This product is not intended for use by children. Keep the product out of reach of children
and pets. Extra caution is necessary when using this appliance near children.
• Always ensure the product is unplugged from the electrical outlet and allowed to cool
before assembling, disassembling, relocating, or cleaning it.
• Do not leave the product unattended while it is in use. Always unplug the product from
the electrical outlet when not in use.
• Do not immerse the Base, Power Cord, or Plug of this product in or expose the Power Cord
or Plug to water or other liquids.
• Do not touch hot surfaces. Use handles or knobs when handling product. Use protective
oven mitts or gloves when removing the Lid or handling hot containers to avoid burns or
personal injury.
• Take proper precautions to prevent burns, fire, or personal or property damage as this
appliance generates heat and steam during use.
• Do not use attachments not recommended or sold by the product manufacturer.
Attachments, when furnished, may become hot during use. Allow any attachments to
cool before handling them.
• Do not place on or near a hot gas or electric burner, in a heated oven, or other heated
surfaces.
• Use the product in a well-ventilated area. Keep at least 4-6 inches of space on all sides of
the product to allow adequate air circulation.
• Use appliance on a table or flat surface.
• Keep the product away from curtains, wall coverings, clothing, dishtowels, or other
flammable materials.
• Do not plug or unplug the product from the electrical outlet with a wet hand.
• This product is intended solely for non-commercial, non-industrial, household use in
cooking of food for human consumption; do not use the product outdoors or for any other
purpose.
• Do not operate the product empty.
• Do not let cord hang over edge of table or counter where it may be tripped over or pulled.
Do not allow cord to touch hot surfaces.
E
N
G
L
I
S
H
3
• Do not operate the product if it has a damaged or cut Power Cord or plug, if wires are
exposed, if it malfunctions, if it is dropped or damaged, or if the Motor Housing is dropped
in or exposed to water.
• This product has no user-serviceable parts. Do not attempt to examine or repair this
product yourself. Please review the Warranty Policy on Page 9.
• Do not put any stress on the power cord where it connects to the product, as the power
cord could fray and break.
SPECIAL INSTRUCTIONS:
• Do not move the Deep Fryer when there is hot oil in the appliance.
A short power supply cord is provided to reduce the risk of becoming entangled in or tripping
over a longer cord. An extension cord is not recommended for use with this product, but if
one must be used:
− The marked electrical rating must be at least as great as that of the product.
− If the product is of a 3-prong grounding type, the extension cord must be a grounding-type
3-wire cord.
− Arrange the extension cord so that it will not drape over the countertop or tabletop where
it can be tripped over or pulled.
WARNING: This product is equipped with a polarized plug (one blade is wider than the other
blade) to reduce the risk of electrical shock. This is a safety feature. The plug will fit into a
polarized outlet only one way. If you are unable to insert the plug into the electrical outlet,
try reversing the plug. If the plug still does not fit, contact a qualified electrician. Never use
the plug with an extension cord unless you can fully insert the plug into the extension cord.
Do not alter the plug. Do not attempt to defeat the safety purpose of the polarized plug.
Before First Use
IMPORTANT: Please check all packaging material carefully before discarding as there may be
accessory parts contained within the packaging material.
WARNING: Do not place any part of the product in a dishwasher.
1. Make sure the Fryer is unplugged.
2. To remove any dust that may have accumulated, wash the Fryer
Basket with warm soapy water and dry thoroughly. Wipe the interior
and exterior of the Deep Fryer with a damp towel. Dry thoroughly.
Note: NEVER immerse the appliance body, cord, or plug in water.
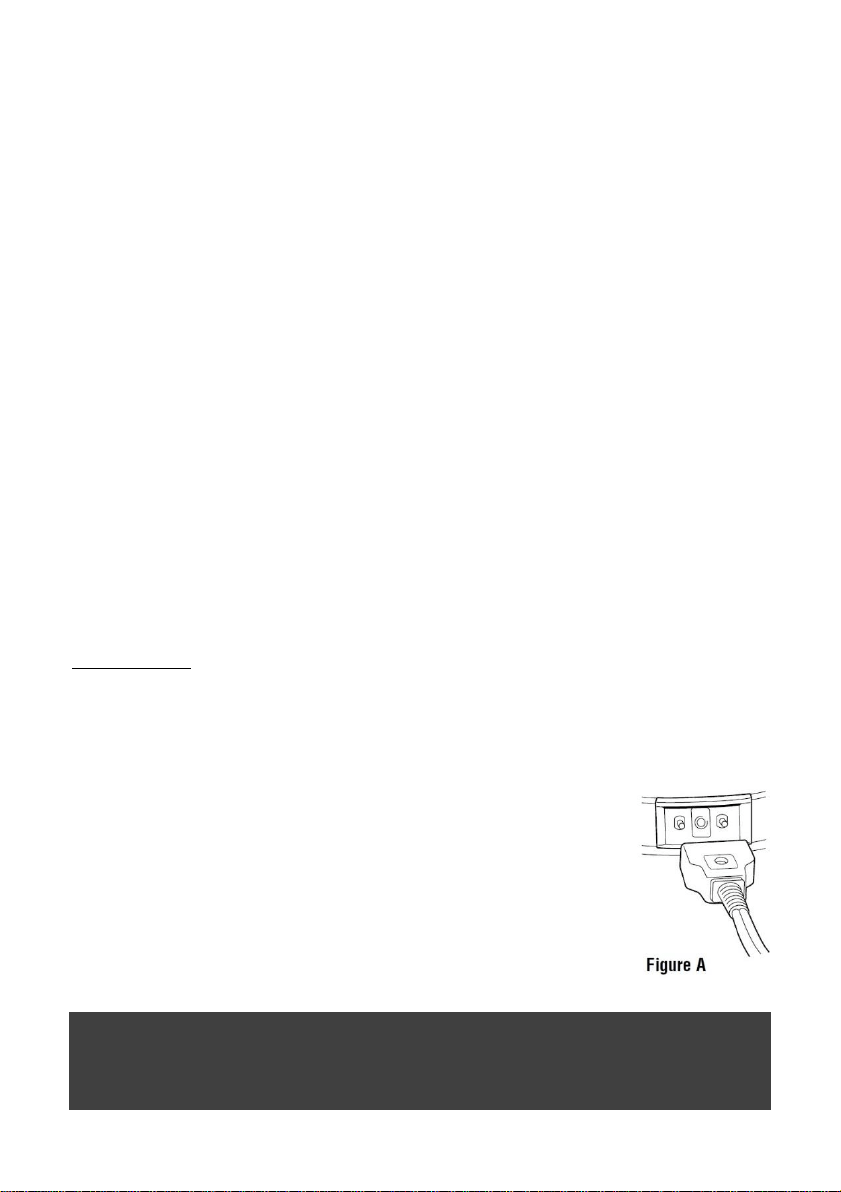
3. Attach the magnetic end of the cord directly into the fryer socket. See
Figure A) correct method is with wording “This side up” facing up.
4. Unlock Lid by pressing the Lid Release Button.
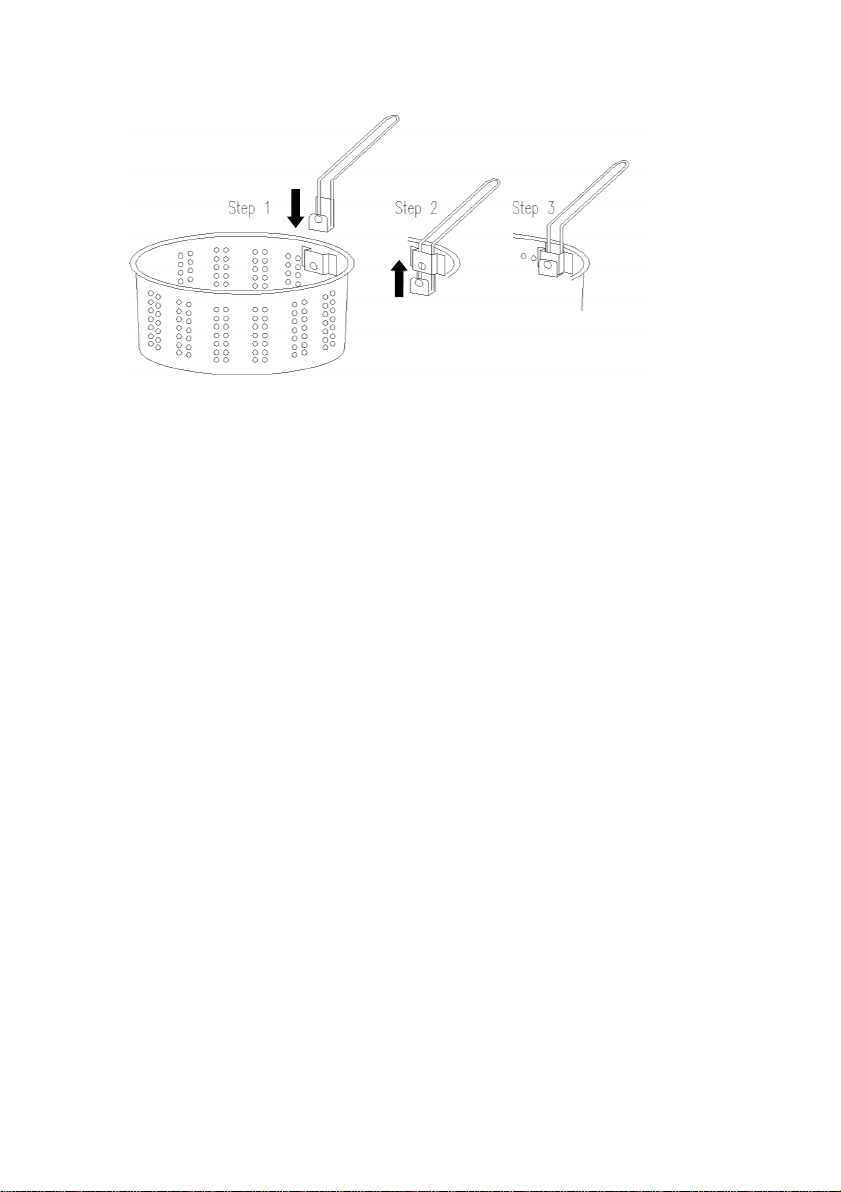
5. Remove the Frying Basket by inserting the basket handle into the
basket hook. See Section: Deep Frying, ‘B’, Step 1, Step 2, Step 3.
SAVE THESE INSTRUCTIONS
FOR FUTURE REFERENCE
4
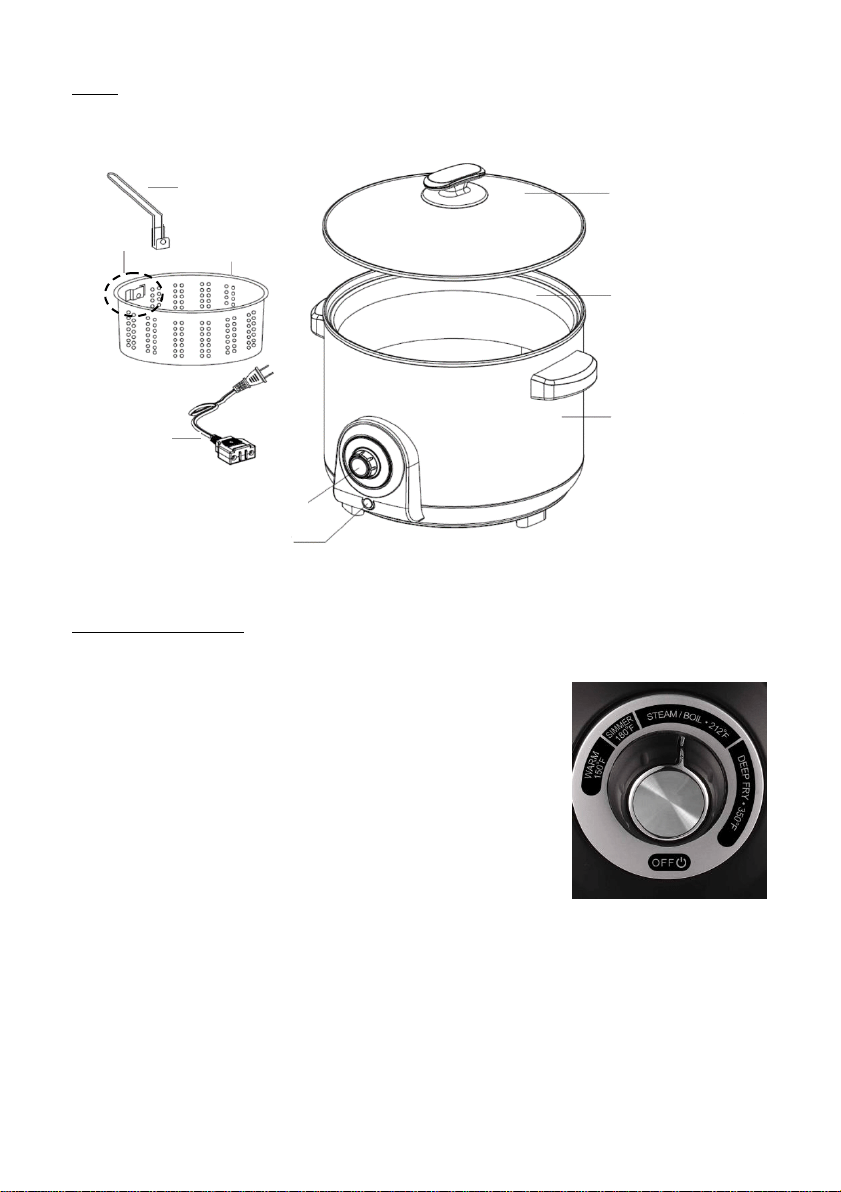
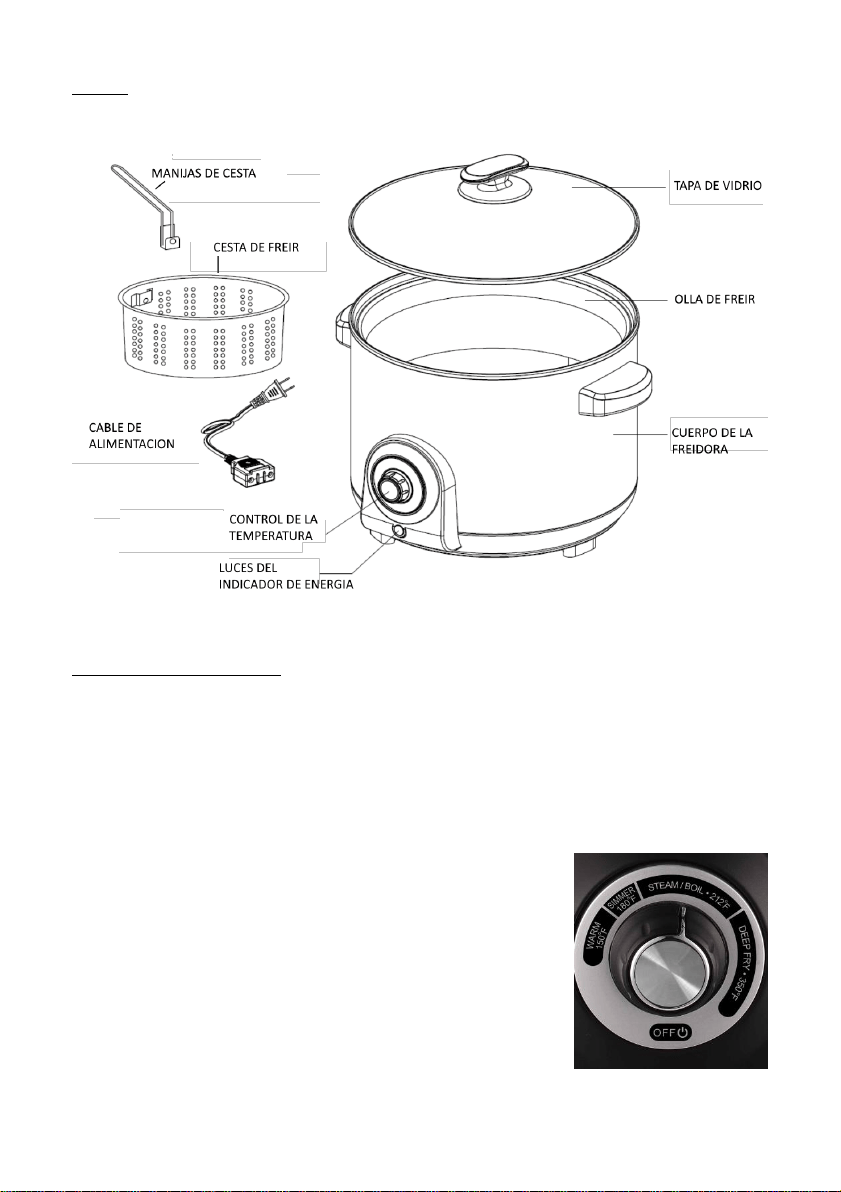
Parts:
Using Your Deep Fryer:
Please note measurement Information:
MAX CAPACITY FOR OIL: 1.5L / 6.3 CUPS / 1.58 QUARTS
FULL CAPACITY OF POT: 5L / 21.1 CUPS / 5.28 QUARTS
WARNING: Never turn on the fryer with an empty OIL
RESERVOIR and make sure it is on a flat, heat resistant surface.
Please adjust the function dial as the following illustration:
• Note: when the desired temperature is reached, the
indicator light may go on and off during the operation.
This is a normal situation as the thermostat is activated to
maintain the temperature.
GLASS LID
FRYING POT
BASKET
HANDLE
APPLIANCE
BODY
FRYING BASKET
POWER INDICATOR
TEMPERATURE CONTROL
POWER CORD
Basket
Hook
5
Deep Frying
A. Heating oil:
1. Pour the oil into the pot. Make sure the oil-filling level is between the MIN and MAX level
lines, which are located on the inside of the pot.
2. Turn the dial to the setting "DEEP FRY".
3. Close the lid of the multi-cooker.
4. Attach the cord to the unit by aligning the magnetic plug end of the cord assembly with
the plug face up, where marked with the words "THIS SIDE UP".
5. Plug another end of the cord assembly into a 120V wall outlet. The indicator light comes
on.
6. Preheat oil until the indicator light goes off. At this moment, the oil temperature is ready
for frying the foods.
Note:
• Use only blended vegetable oil, pure corn oil, or peanut oil.
• Do not use ground-nut oil, sunflower oil, soya oil, olive oil, lard or dripping.
• Never mix different oils and fats together.
• Do not mix the used oil with the new oil together if possible.
• Store the used oil in the pot with lid closed, without being plugged in, to keep it fresh
and clean.
B. Filling the frying basket:
1. Gently place the foods to be fried into the frying basket and do not exceed the capacity
of the basket. Never overfill.
Note:
• Moist foods, such as chipped potatoes, need to be blotted with a towel before frying.
Moist foods cause excess foaming, spattering, and crackling.
• Remove any ice crystals before putting the frozen foods into the hot oil. Frying frozen
foods will take a little longer time.

6
C. Frying food:
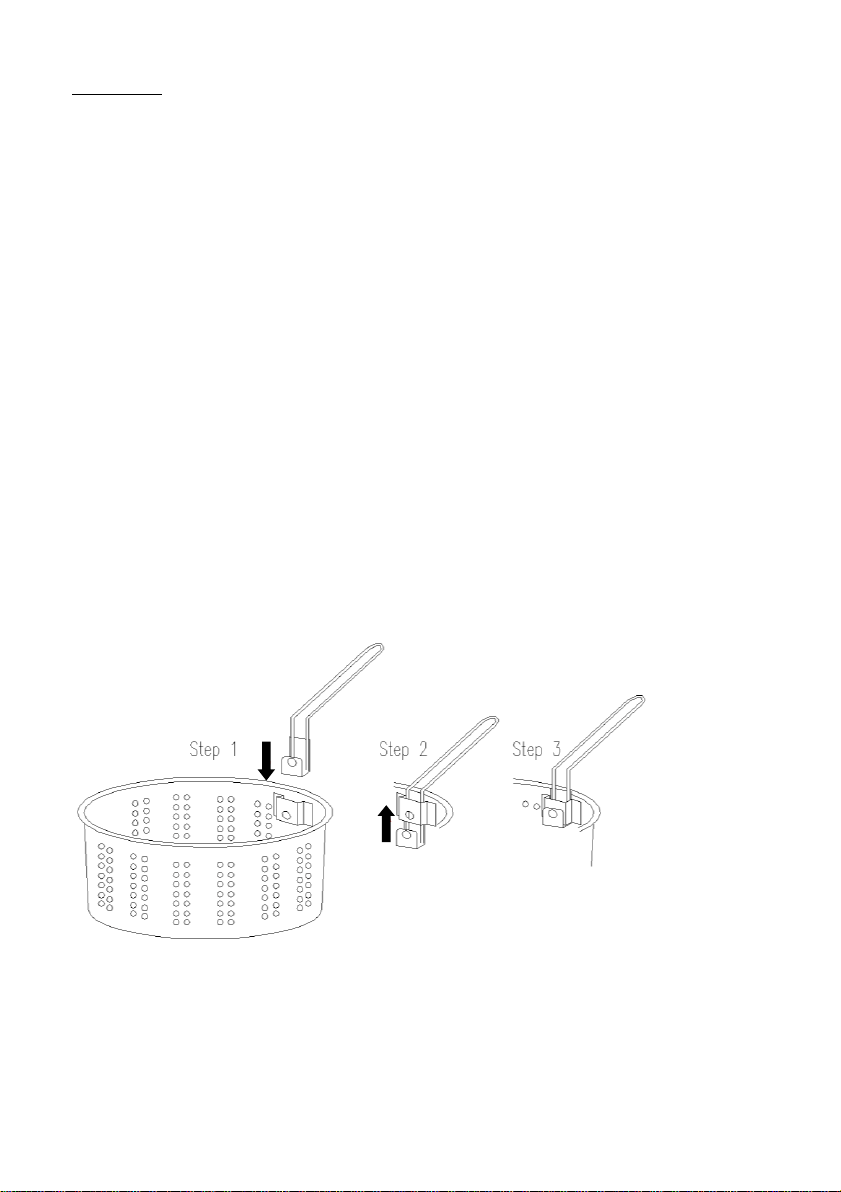
1. Insert the basket handle by sliding the end of the handle into the fixing groove of the
basket to hold the basket. See the following photos for the details.
2. Make sure that the indicator light goes out before frying food.
3. Hold the basket with foods and slowly lower it into the interior bottom of the pot. Then
take the basket handle off the basket.
4. Cover the pot with the glass lid, if you prefer, to avoid occasional spattering of hot oil.
5. Follow the food pack instructions or cooking guide on Page 8 for the frying time and in
the meanwhile, you can monitor the frying effect through the glass lid.
6. Wait a couple of minutes to let the oil vapor escape when food reaches desired
brownness. Turn off the unit and then open the glass lid.
7. Insert the basket handle into the basket groove. Lift the basket with fried food out of the
pot and place the fried food on the absorbent paper. Season to taste.
8. Unplug the cord from wall outlet and then from the unit when unit is not in use.
Caution:
• Do not plunge the basket quickly into hot oil.
• Do not touch the pot and glass lid when unit is hot. Grasp the plastic lid knob to open
the lid.
• Do not carry or move the unit when the oil is hot.
Note:
• If too much food is fried at the same time, the food will not get crisp.
• The pieces of food should be of equal size and thickness.
• Avoid cooking pieces of food that are extra thick.
Suggestion: It is time to replace the cooking oil if any of the following occur:
• The oil is dark in color.
• The oil has an unpleasant odor.
• The oil smokes when it is heated.
• The oil foams excessively during frying.
• After 8-12 uses.
Stewing
1. Remove the lid and basket.
2. Add some water or soup in the pot per the cooking instructions guide on Page 8.
3. Place the food into the pot. Cover the lid.
4. Turn the dial to the setting "SIMMER".
5. Adjust the dial to keep the liquid continuously appearing small bubbles when the liquid
is boiling.
6. Follow the cooking guide on Page 8 instructions for the stewing time. Taste food when
cooking time is up. Add more stewing time if the softer taste is needed.
Note:
• Frozen foods need to be defrosted before stewing.
• Avoid removing the lid during stewing.

7
• Make sure that the water or soup covers the food to be stewed.
Steaming
1. Add sufficient water into the pot, but don't overflow the steamer rack.
2. Place the food into the basket. And then cover the lid.
3. Turn the dial to the setting "STEAM/BOIL".
4. Follow the cooking guide on Page 8 for instructions on steaming time. Add more steam
time if softer food is preferred or food requires more steaming time.
Note:
• Frozen foods need more steaming time.
• Avoid removing the lid during steaming.
• Food may be placed before heating or after boiling depending on the instruction on the
cooking guide on Page 8.
• Add more boiling water, if needed, to extend the steaming time.
• Use aluminum foil in the basket to hold the food if you intend to retain the juice from the
food.
Cleaning Your Deep Fryer:
WARNING: Always turn the appliance to “OFF” and unplug the product, allow it to cool
before cleaning or storing it.
NOTICE: Always disconnect appliance from the outlet and then remove the Magnetic Plug
from the unit. The plug should always remain on during operation. If it becomes disconnected,
immediately unplug the cord from the wall outlet then reconnect the magnetic cord to the
socket.
1. Clean the outside of the Multicooker with a damp cloth, and then dry.
2. Clean the inside of the Multicooker and the basket when you change oil. Use a cloth, hot
water and soap. For stains use non-scratching cream cleaner.
3. Rinse and thoroughly dry the pot before refilling with oil.
4. Clean the lid in hot water and kitchen detergent solution.
5. Do not use abrasive powders, hard abrasive scourers, and wire wool or washing soda
crystals.
USEFUL FRYING TIPS:
After the frozen food thaw, please fill the food into the basket.
Always dry food well, especially chipped potatoes. If left damp they will not turn crisp.
All foods, except those with a high starch content (chips, doughnuts), should be coated
before frying. Typical coating is seasoned flour, breadcrumbs, or batter. When frying,
carefully time foods to avoid overcooking. The cooking time may vary according to the
quantity and thickness of the food being fried.
Remember a difference of one or two minutes can result in over cooked food.

8
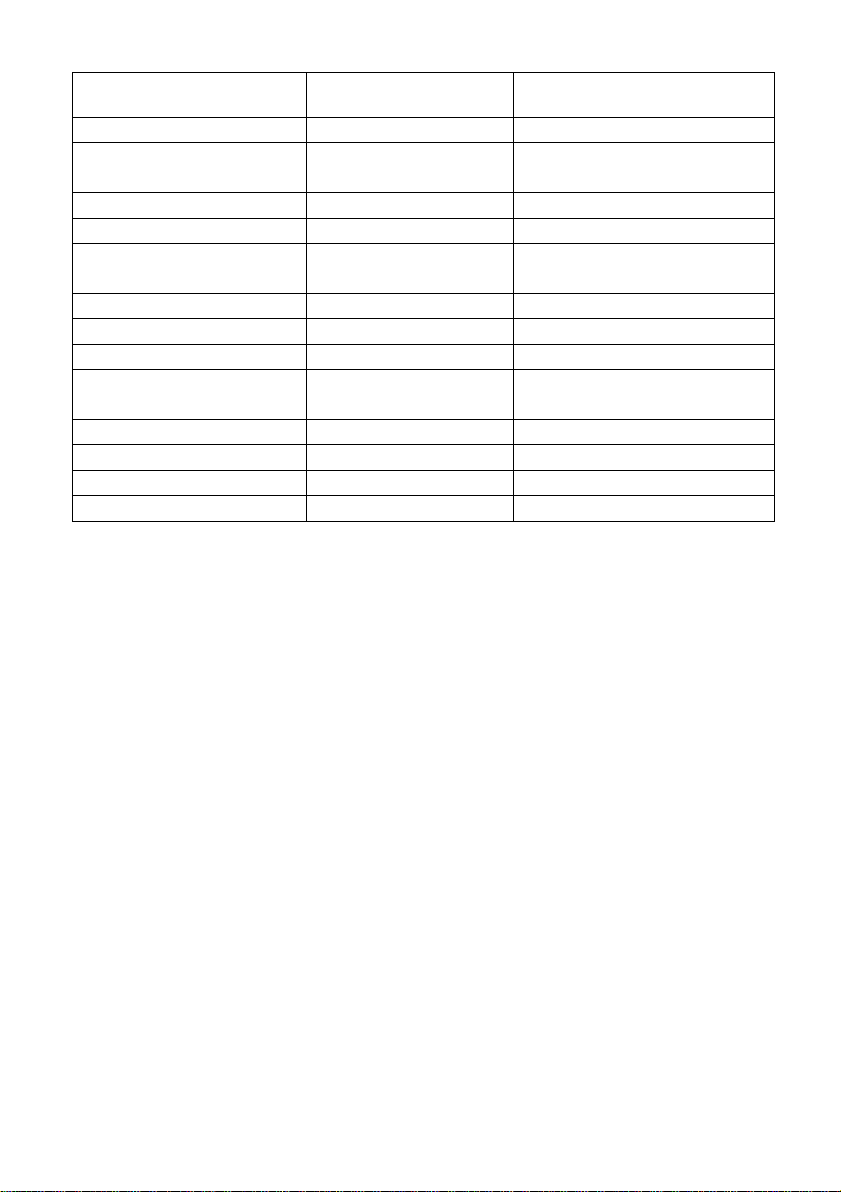
Frying Times and Temperature Guide:
The Frying times in this chart are a guide and should be adjusted to accommodate the
different quantitates, thickness, and taste.
Food Being Fried
Recommended
Temperature
Recommended Time (Minutes)
Apple Fritters
360° F
4-5
Chinese Spring Rolls (Frozen)
360° F
10-12
Chicken (Bone-In)
360° F
17- 20
Chicken Strips (Boneless)
375° F
6-8
Chicken Nuggets (Frozen)
360° F
4-5
Donuts
375° F
2-3 (until golden brown)
Fish (Battered)
375° F
4- 5
Fish (Fresh)
320° F
5-7
French Fries (Frozen)
Follow directions on
package
Package Time
French Fries (Homemade)
320° F
4-6
Onion Rings
375° F
2-4
Shrimp (Breaded)
375° F
3- 5
Vegetable Fritters
340° F
2-3
NOTE: MEASUREMENT INFORMATION
MAX CAPACITY FOR OIL: 1.5L / 6.3 CUPS / 1.58 QUARTS
FULL CAPACITY OF POT: 5L / 21.1 CUPS / 5.28 QUARTS

9
ONE YEAR LIMITED WARRANTY
Write down the following information about your appliance to better help you
obtain assistance or service if you ever need it.
CUSTOMER RECORD
Date of Purchase______________ Store/Dealer___________________________
Model/Item No: _______________________________
THIS WARRANTY APPLIES TO PRODUCTS PURCHASED AND USED IN THE CONTINENTAL
U.S. AND CANADA ONLY. This is the only express warranty for this product and is in
lieu of any other warranty or condition. This product is warranted to be free from
defects in material and workmanship for a period of one (1) year from the date of
original purchase. During this period, your exclusive remedy is repair or replacement
of this product, at our option; however, you are responsible for all costs associated
with returning the product to us and our returning a product or component under this
warranty to you. If the product or component is no longer available, we will replace
with a similar one of equal or greater value. This warranty does not cover glass, filters,
wear from normal use, use not in conformity with the printed directions, or damage
to the product resulting from accident, alteration, abuse, or misuse.
THIS WARRANTY EXTENDS ONLY TO THE ORIGINAL CONSUMER PURCHASER. KEEP
THE ORIGINAL SALES RECEIPT, AS PROOF OF PURCHASE IS REQUIRED TO MAKE A
WARRANTY CLAIM.
This warranty is void if the product is used for other than single-family household use
or subjected to any voltage and waveform other that a specified on the rating label
(E.G., 120V~60Hz). We exclude all claims for special, incidental, and consequential
damages caused by breach of express or implied warranty. All liability is limited to the
amount of the purchase price. Every implied warranty, including any statutory
warranty or condition of merchantability or fitness for a particular purpose, is
disclaimed except to the extent prohibited by law, in which case such warranty or
condition is limited to the duration of this written warranty. This warranty gives you
specific legal rights. You may have other legal rights that vary depending on where you
live. Some states do not allow limitations on implied warranties or special, incidental,
or consequential damages, so the foregoing limitations may not apply to you. To make
a warranty claim do not return this appliance to the store.
TO OBTAIN WARRANTY SERVICE AND/OR TROUBLESHOOTING INFORMATION:
Call Customer Service at 1-888-903-0060 in the U.S.
Monday through Friday: 9:00 am – 5:00 pm PT
U.S. Customers Please Email: warranty@brentwoodus.com
Canadian Customers Please Email: canada.warranty@brentwoodus.com
Go online at www.brentwoodus.com

10
PRECAUCIONES IMPORTANTES
Al usar este o cualquier otro electrodoméstico, siga las precauciones básicas de seguridad,
especialmente cuando niños están presentes.
LEA TODAS LAS INSTRUCTIONES
ANTES DE USAR
ADVERTENCIA-Para reducir el riesgo de incendio, choque eléctrico, lesiones personales
graves y daños a la propiedad, por favor tenga en cuenta lo siguiente:
• Este producto no está destinado para su uso por los niños. Mantenga el producto fuera del
alcance de los niños y las mascotas. Precaución adicional es necesario cuando se utiliza
este aparato cerca de niños.
• Asegúrese siempre de que el producto está desenchufado de la toma de corriente y se
deja enfriar antes de montar, desmontar, trasladar o limpiar.
• No deje el producto desatendido mientras está en uso. Siempre desenchufe el producto
de la toma de corriente cuando no esté en uso.
• No sumerja la base, el cable de alimentación o el enchufe de este producto ni exponga el
cable o el enchufe al agua u otros líquidos.
• No toque las superficies calientes. Use las asas o las perillas al manipular el producto. Use
guantes protectores o guantes de horno al retirar la tapa o el manejo de contenedores
calientes para evitar quemaduras o lesiones personales.
• Tome las debidas precauciones para evitar quemaduras, incendios o daños personales o
materiales como este aparato genera calor y vapor de agua durante el uso.
• No utilice accesorios no recomendados o vendidos por el fabricante del producto.
Accesorios, cuando equipados, pueden calentarse durante el uso. Permita que los
accesorios se enfríen antes de manipularlos.
• No coloque electrodoméstico sobre o cerca de una hornilla de gas o eléctrica, en un horno
caliente, u otras superficies calientes.
• Tenga mucho cuidado cuando mueva un aparato que contiene alimentos, agua u otros
líquidos.
• Utilice el producto en un área bien ventilada. Mantenga por lo menos 4-6 pulgadas de
espacio en todos los lados del producto para permitir la circulación de aire adecuada.
• Utilizar el aparato sobre una mesa o superficie plana. Mantenga el producto lejos de
cortinas, revestimientos de paredes, ropa, paños de cocina, u otros materiales inflamables.
• No enchufe ni desenchufe el producto de la toma de corriente con las manos mojadas.
• Este producto está destinado exclusivamente para el uso no comercial, no industrial,
cocción en el hogar de alimentos para el consumo humano, no use el producto en
exteriores o para cualquier otro propósito.
• No utilice el producto vacío. No permita que el cable cuelgue del borde de la mesa o
mostrador donde se puede tropezar con él ni tirar. No permita que el cable toque
superficies calientes.
E
S
P
A
Ñ
O
L
11
• No utilice el producto si tiene un cable de alimentación dañado o cortado o el enchufe, si
los cables están expuestos, en caso de mal funcionamiento, si se ha caído o dañado, o si la
armadura del motor se ha caído o este expuesta al agua.
• Este producto no tiene piezas que el usuario pueda reparar.
• No trate de examinar o reparar este producto usted mismo. Por favor lea la Póliza de
Garantía en la Pagina 9.
• No ponga presión sobre el cable de alimentación que se conecta al producto, ya que el
cable de alimentación podría desgastarse y romperse.
INSTRUCCIONES ESPECIALES:
• Un cable eléctrico corto es suministrado para reducir el riesgo de enredarse o tropezarse
con un cable más largo. Un cable de extensión no se recomienda para su uso con este
producto, pero si se debe utilizar:
− El voltaje eléctrico debe ser al menos tan grande como la del producto.
− Si el producto es de un tipo de conexión a tierra de 3 patas, el cable de extensión debe
ser un cable de toma de tierra de 3 patas.
− Coloque el cable de extensión de manera que no cuelgue del mostrador o de la mesa
donde alguien se pueda tropezar con él ni tirar.
ADVERTENCIA: Este producto está equipado con un enchufe polarizado (una pata es más
ancha que la otra) para reducir el riesgo de descarga eléctrica. Esta es una característica de
seguridad . El enchufe encajará en un tomacorriente polarizado de una sola manera. Si no
puede insertar el enchufe en la toma de corriente , intente invertir el enchufe. Si aún así no
encaja, comuníquese con un electricista calificado. No utilice nunca el enchufe con un cable de
extensión a menos que pueda insertar completamente el enchufe en el cable de extensión. No
altere el enchufe. No intente anular la característica de seguridad del enchufe polarizado.
Antes del Primer Uso:
IMPORTANTE: Por favor, revise todo el material de empaque con cuidado antes de tirar ya
que puede haber partes accesorias contenidas en el material de empaque.
1. Asegúrese que la freidora este desconectada.
2. Para quitar el polvo que se haya acumulado, lavar la cesta de la
freidora con agua tibia y jabón y secar bien. Limpie el interior y el
exterior de la freidora con una toalla húmeda. Secar a fondo.
3. Conecte el extremo magnético del cable directamente a la toma de
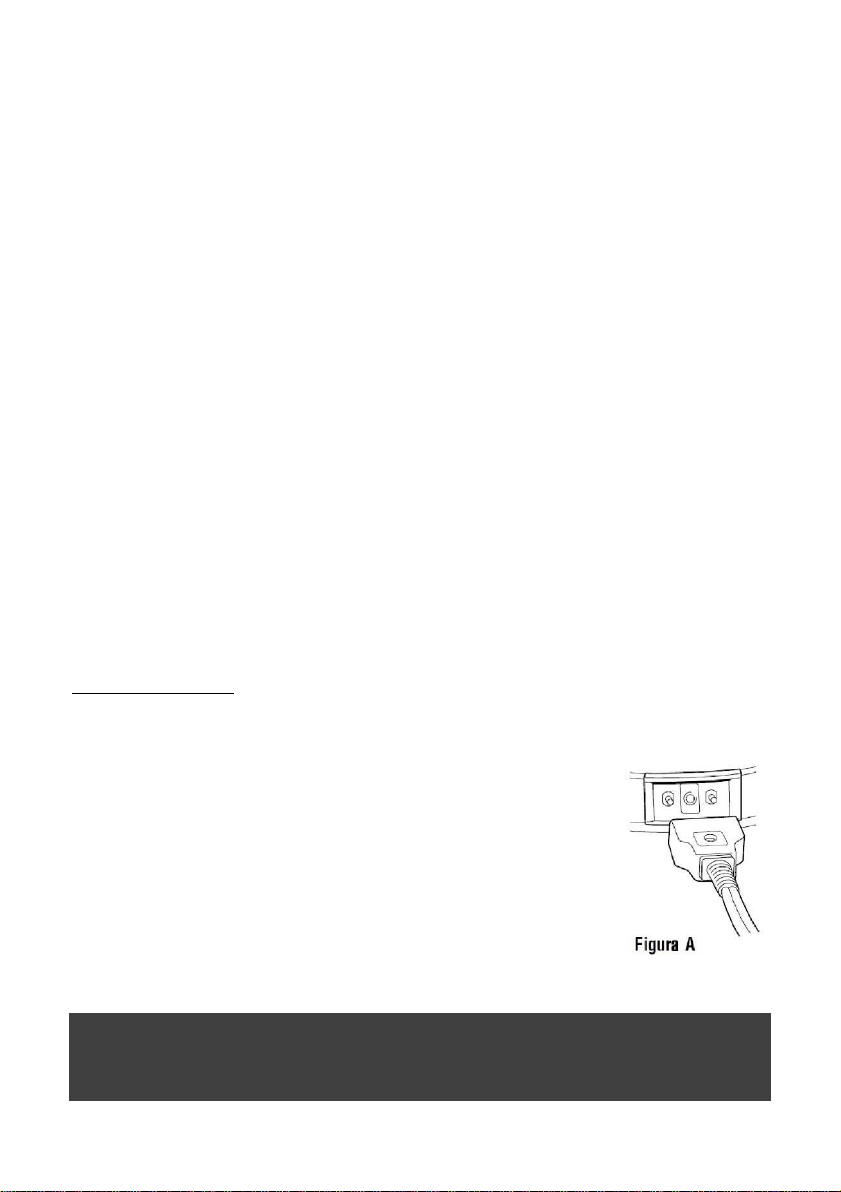
la freidora. Consulte la figura A) método correcto es con la frase
"Este lado hacia arriba" ira hacia arriba.
4. Desbloquear la tapa presionando el botón de liberación de la tapa.
5. Retire la cesta freidora pulsando el botón de liberación de la manija
y levante la cesta para freír.
GUARDE ESTAS INSTRUCCIONES
COMO REFERENCIA
12
Partes:
Utilización de su Freidora:
CAPACIDAD MÁXIMA DE PETRÓLEO: 1,5L / 6,3 TAZAS / 1,58 CUARTOS DE GALÓN
CAPACIDAD TOTAL DE LA OLLA: 5L / 21,1 TAZAS / 5,28 CUARTOS DE GALÓN
ADVERTENCIA: Nunca encender la freidora con el depósito de aceite vacío y asegúrese
de que está en una superficie plana y resistente al calor.
Favor, ajuste el selector de función como la siguiente ilustración:
Nota: Cuando se alcanza la temperatura deseada,
la luz indicadora puede encenderse y apagarse
durante la operación. Esta es una
situación normal como el termostato
se activa para mantener la temperatura.

13
Freír
A. Aceite de Calefacción:
1. Vierta el aceite en la olla. Asegúrese de que el nivel de aceite de llenado este
entre las líneas de MAX y MIN nivel, situado en el interior de la olla.
2. Gire el selector a ajustes "Deep Fryer".
3. Cerrar la tapa del Freidora.
4. Conecte el cable a la unidad alineando el extremo del enchufe magnético del
conjunto de cables con el tapón hacia arriba, donde marca con las palabras "ESTE
LADO HACIAARRIBA".
5. Conecte otro extremo del conjunto de cable a una toma de corriente de 120V.
6. La luz indicadora se encender.
7. Precaliente el aceite hasta que la luz indicadora se apague.
8. En este momento, la temperatura del aceite está listo para freír los alimentos.
Nota:
• Utilice solo mezcla de aceite vegetal, aceite de maíz por, aceite de cacahuete.
• No utilice aceite de cacahuete, aceite de girasol, aceite de soja, aceite de oliva,
manteca de cerdo 0 goteo.
• Nunca mezcle diferentes aceites y grasas juntas.
• De ser posible no mezcle el aceite usado con el aceite nuevo juntos.
• Guarde el aceite usado en la olla con la tapa cerrada, sin estar enchufado, para
mantenerlo fresco y limpio.
B. Llenando la Cesta de Freír:
Coloque con cuidado los alimentos a freír en la cesta de freír y no exceda la
capacidad de la cesta. Nunca llene en exceso. Revise la información de medición
para la capacidad máxima y completa.
Nota:
• Los alimentos húmedos, como rodajas de patatas, tienen que ser secados con
toalla antes de freír.
• Los alimentos húmedos provocan un exceso de espuma, salpicaduras, y
chisporroteo.
• Retire cualquier cristal de hielo antes de colocar los alimentos congelados en el
aceite. Freír los alimentos congelados se llevará un poco más de tiempo.
14
C. Freír los Alimentos:
1. Inserte el mango del cesto deslizando el extremo del mango en la ranura de
fijación de la cesta para contener la cesta. Ver las fotos siguientes para los
detalles.
2. Asegúrese de que la luz indicadora se apaga antes de freír los alimentos.
3. Mantenga la cesta con alimentos y baje lentamente en el interior del fondo de la
olla. Luego tomar la canasta la manija fuera de la canasta.
4. Cubra la olla con la tapa de vidrio, si se prefiere, para evitar salpicaduras
ocasionales de aceite caliente.
5. Siga las instrucciones del paquete de alimentos 0 libro de cocina para el tiempo
de fritura y monitorear par su parte el efecto de fritura a través de la tapa de
vidrio.
6. Espere un par de minutos para que el vapor de aceite de escapar cuando el
alimento tiene el oscuro deseado. Apague la unidad y abra la tapa de vidrio.
7. Inserte el mango del cesto en el surco cesta. Levante la canasta con alimentos
fritos fuera de la olla y coloque la comida frita en el papel absorbente.
8. Sazone al gusto.
9. Desconecte el cable del tomacorriente y luego desde la unidad cuando la unidad
no esta en uso.
Precaución:
• No sumergir el cesto rápidamente en aceite caliente.
• No toque la olla y tapa de vidrio cuando la unidad está caliente. Sujete la perilla
de plástico para abrir la tapa.
• No transporte ni mueva la unidad cuando el aceite esté caliente.
Nota:
• Si pone mucha comida frita a la vez, la comida no conseguirá el nivel de crujiente.
• Las piezas de comida deben ser del mismo tamaño y grosor.
• Evite cocinar trozos de comida que son extra grueso.

15
D. Aceite a Utilizar y Filtrado:
Después de cada uso, siempre colar el aceite para eliminar los residuos acumulados.
• Colocar el papel de filtro en la canasta.
• Coloque la canasta hasta el borde de la olla.
• Verter aceite a través del filtro de papel en el bote.
• Deseche el papel de filtro y descargar la canasta fuera de la unidad.
Nota: Es el momento de sustituir el aceite de cocina si presenta alguno de los
siguientes:
• El aceite es de color oscuro.
• El aceite tiene un olor desagradable.
• El aceite humea cuando se calienta.
• Durante la fritura el aceite espumea en exceso.
• Después de 8 - 12 usos.
Guisar:
1. Retire la tapa y cesta.
2. Añadir un poco de agua o caldo en la olla de acuerdo a las instrucciones del libro
de cocina.
3. Coloque la comida en la olla. Cubra la tapa.
4. Gire el selector a el ajuste "hervir a fuego lento (Simmer)".
5. Ajuste el dial de mantener los líquidos que aparecen continuamente pequeñas
burbujas cuando el líquido está en ebullición.
6. Siga las instrucciones de libro de cocina por el tiempo guisado.
7. Pruebe la comida cuando el tiempo de cocción corresponde. Añadir más tiempo al
guisado si se necesita el sabor más suave.
Nota:
• Los alimentos congelados deben ser descongelados antes de guisar.
• Evite retirar la tapa durante el guisado.
• Asegúrese de que el agua o la sopa podrán abarcar los alimento que sean guisados.
Cocer al Vapor
1. Coloque la vaporera en la olla y poner la cesta en la parte superior de la vaporera.
2. Agregar suficiente agua en la olla, pero no desbordar la rejilla de vapor.
3. Coloque los alimentos en la canasta. Y luego cubra la tapa.
4. Gire el sector a el ajuste "Vapor (steam/boil)".
5. Siga las instrucciones de libro de cocina para el tiempo de cocción.
Añadir más tiempo de vapor si se necesita el sabor más suave o que los alimentos
con raíz se cuesan al vapor.
Nota:
• Los alimentos congelados necesitan más tiempo de vapor.
• Evite retirar la tapa durante vaporiza.

16
• La comida puede ser colocada antes del calentamiento o después de la ebullición en
función de las instrucciones del libro de cocina.
• Añadir más agua hirviendo, si es necesario, para extender el tiempo de cocción.
• Use papel de aluminio en la canasta para sostener el alimento y de retener los jugos
de los alimentos.
Limpieza de la Freidora:
ADVERTENCIA: Siempre apague el aparato en "Apagado” (OFF) y desenchufe el
producto, deje que se enfríe antes de limpiarlo o almacenarlo.
AVISO: Siempre desconecte aparato de la toma y luego retire el enchufe magnético de
la unidad. El enchufe debe permanecer siempre puesto durante el funcionamiento. Si
se desconecta, desenchufe inmediatamente el cable de la toma de pared y vuelva a
conectar el cable magnético a la toma.
1. Limpie el exterior de la Freidora con un paño húmedo y luego secar.
2. Limpie el lado de la Freidora y la canasta cuando se cambia el aceite.
3. Use un paño, agua caliente y detergente. Para las manchas utilizar crema
limpiadora antirasguños.
4. Enjuague y seque bien la olla antes de llenar con aceite.
5. Limpie la tapa en agua caliente y detergente de cocina.
6. No utilice polvos abrasivos, estropajos abrasivos duros, y cristales de lana de
alambre o cristales de soda.
CONSEJOS ÚTILES PARA FREIR:
Después de la descongelación de alimentos congelados, por favor llene los alimentos
en la canasta.
Siempre alimentos bien secos, sobre todo las patatas. Si se dejan húmedas no se
volverán crujientes.
Todos los alimentos, excepto los que tienen un alto contenido de almidón (patatas
fritas, donas), deben ser recubiertos antes de freír. Recubrimiento típico es harina
sazonada, pan rallado. Cuando fría, mida con cuidado el tiempo para evitar la cocción
excesiva de alimentos. El tiempo de cocción puede variar según la cantidad y el grosor
de los alimentos que se fríen.
Recuerde que una diferencia de uno o dos minutos puede resultar en sobrecocción de
los alimentos.
Tiempos de Fritura y Guía de Temperatura:
Los tiempos de fritura en esta tabla son una guía y se deben ajustar para adaptarse a
las diferentes cantidades, grosores y sabores.
17
Alimentos a freírse
Temperatura
Recomendada
Tiempo Recomendado (Minutos)
Buñuelos de manzana
360° F
4-5
Rollos primavera Chinos
(Congelados)
360° F
10-12
Pollo (Con hueso)
360° F
17- 20
Tiras de Pollo (Sin hueso)
375° F
6-8
Nuggets de pollo
(Congelados)
360° F
4-5
Donas
375° F
2-3 (hasta dorarse)
Pescado (con mantequilla)
375° F
4- 5
Pescado (Fresco)
320° F
5-7
Papas Fritas (Congeladas)
Siga las indicaciones
del paquete
Tiempo del Paquete
Papas fritas (Caseras)
320° F
4-6
Aros de Cebolla
375° F
2-4
camarón (Empanizado)
375° F
3- 5
Buñuelos de Vegetales
340° F
2-3
CAPACIDAD MÁXIMA DE PETRÓLEO: 1,5L / 6,3 TAZAS / 1,58 CUARTOS DE GALÓN
CAPACIDAD TOTAL DE LA OLLA: 5L / 21,1 TAZAS / 5,28 CUARTOS DE GALÓN

18
© 2021 Brentwood Appliances, Inc.