Loading ...
Loading ...
Loading ...
18 - INSTALLATION 91477A830/B
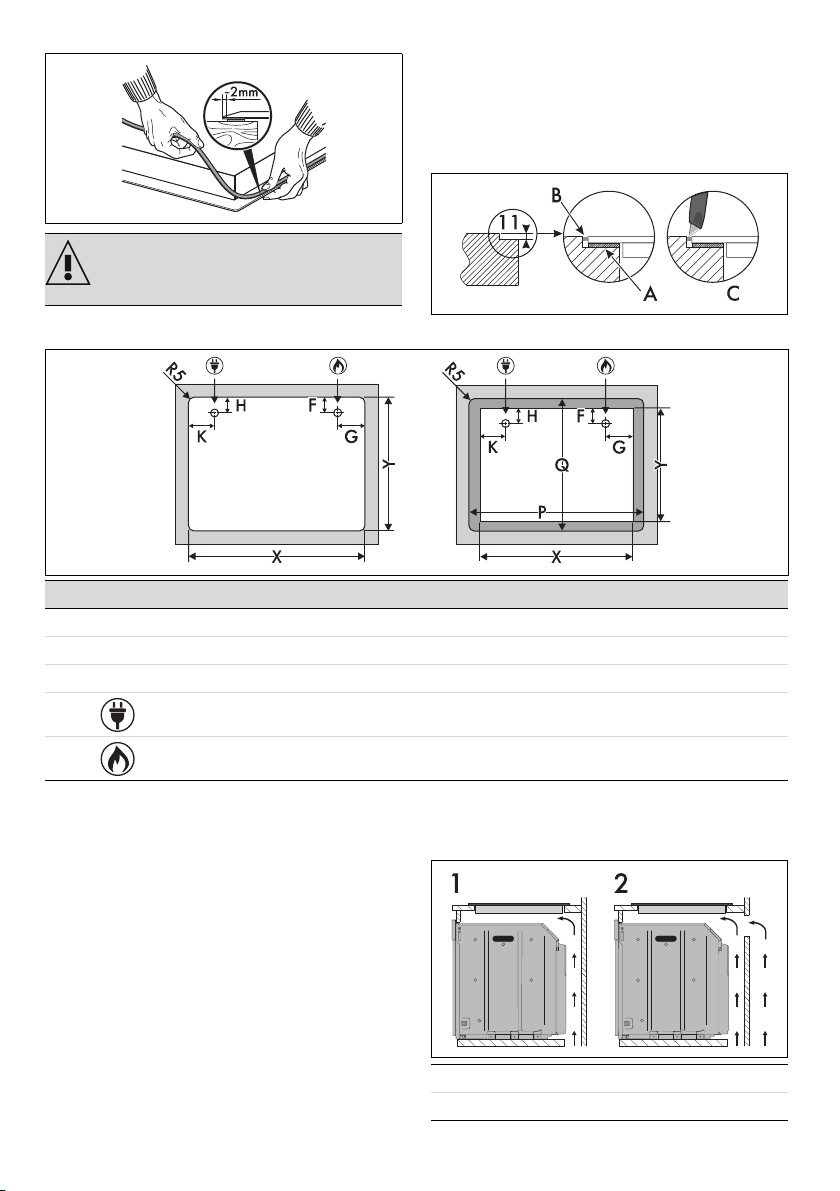
edge of the hob before assembly. In the case of flush mounting, after placing the
adhesive seal (A) on the glass surface and after
positioning and securing the hob, fill the edges
with insulating silicone (B) and wipe off any
excess. If for any reason the hob needs to be
removed, cut the silicone using a cutter before
attempting to remove it (C).
Semi-flush and flush mounting (mm)*
* The image on the left shows the semi-flush opening, while the one on the right shows the flush
opening. Models C 90 cm can only be installed semi-flush.
Mounting
Over built-in oven unit
The clearance between the hob and the kitchen
units or other built-in appliances must be enough
to ensure sufficient ventilation and air discharge.
If installed above an oven, a space must be left
between the bottom of the hob and the top of
the appliance installed below.
Do not use silicone to secure the hob.
This would make it impossible to remove
the hob without damaging it.
P Q X Y F G K H
Mod. A 60 cm 603 513 560 - 564 482 - 486 36 65 130 40
Mod. B 72 cm 723 513 560 - 564 482 - 486 39 285 191 41
Mod. C 90 cm 903 513 844 - 848 482 - 486 42 63 322 41
Electrical connection
Gas connection
1 Opens on bottom
2 Opens on bottom and back
Loading ...