Loading ...
Loading ...
Loading ...
5
Unpacking
Carton Contents:
• Reel mower body
• Upper handle bar (2)
• Lower handle bar (2)
• Handle knob and bolt (3)
• Paper test strips (20)
• Hex wrench
• Manual with registration card
1. Carefully remove the manual reel mower and check to see
that all of the above items are supplied.
2. Inspect the product carefully to make sure no breakage or
damage occurred during shipping. If you nd damaged or
missing parts, DO NOT return the unit to the store. Please
call the Snow Joe
®
+ Sun Joe
®
customer service center at
1-866-SNOWJOE (1-866-766-9563).
NOTE: Do not discard the shipping carton and packaging
materials until you are ready to use your new manual reel
mower. The packaging is made of recyclable materials.
Properly dispose of these materials in accordance with
local regulations.
IMPORTANT! The equipment and packaging materials are
not toys. Do not let children play with plastic bags, foils,
or small parts. These items can be swallowed and pose a
suocation risk!
Assembly
Fitting the Handle
NOTE: Do not tighten the knobs completely until assembly
is complete.
1. Secure the two lower handle bars to the upper handle
bars using the two knobs and bolts provided. Tighten the
knobs on each side to ensure a secure t (Fig. 1).
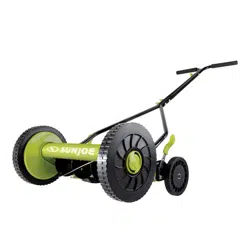
2. Attach the two upper handle bars to each other using
one bolt and knob provided. Tighten the knob to ensure a
secure t (Fig. 2).
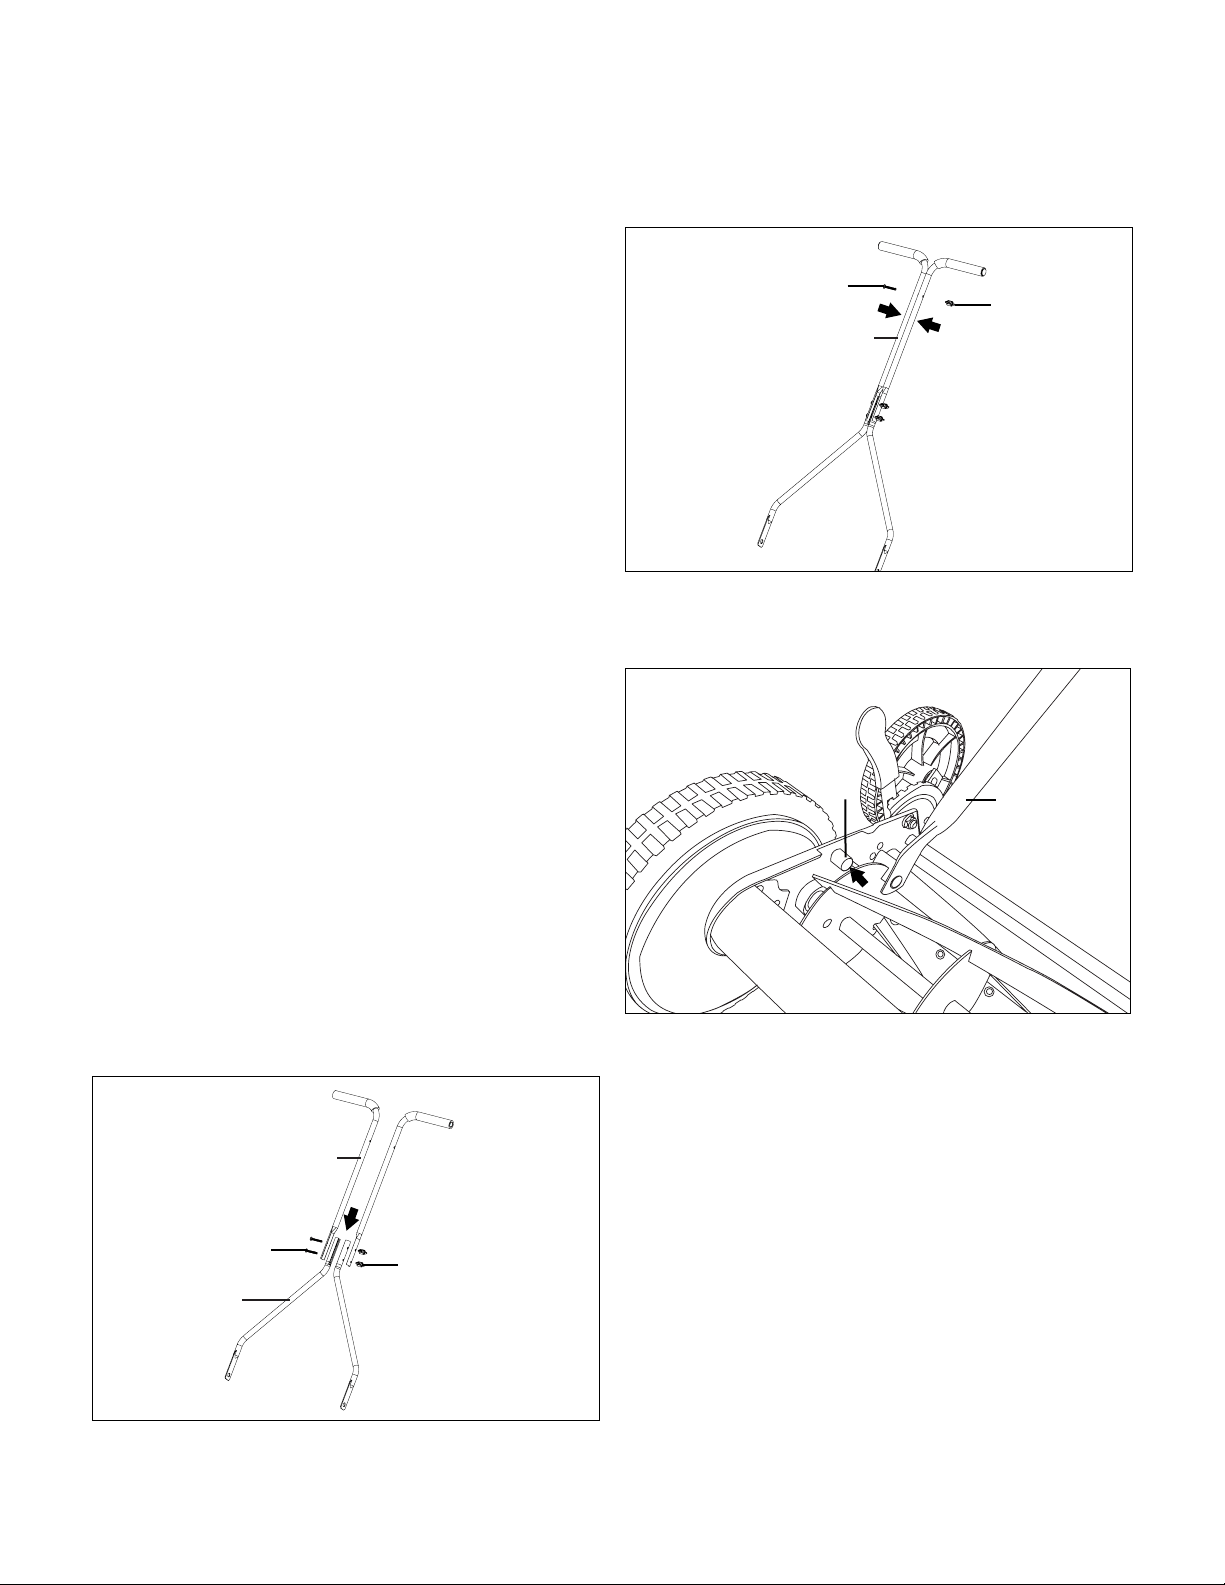
3. After assembling the handle, line up the holes at the lower
end of each handle arm with the short posts that extend
from the side plates of the mower base (Fig. 3).
4. Pull both sides of the lower handle bars over the posts
on the mower body. Press inward on the handle bars to
ensure a secure t over the posts.
Operation
Cutting Height Adjustment
1. The cutting height of the 14 in. (35.6 cm) reel mower can
be adjusted from 1.1 in. to 2.9 in. (27 mm to 73 mm) by
moving the 9-position height adjustment levers to the
desired setting. The height adjustment levers are located
next to the smaller wheels.
2. In order to set the mower to its lowest cutting position,
pull the adjustment levers on both sides, one at a time,
and set them to position A (Fig. 4).
3. In order to set the mower to its highest cutting position,
move the adjustment levers on both sides to position B
(Fig. 4).
NOTE: The two adjustment levers MUST be set to the
same position (height).
Upper handle bar
Lower
handle
bar
Knob
Bolt
Fig. 1
Upper handle bar
Knob
Bolt
Fig. 2
Fig. 3
Post
Lower
handle
bar
Loading ...
Loading ...
Loading ...