
Table of Content
1.SPECIFICATION 1
2.MACHINE OVERVIEW 2
3.PR EPA IR I NG 3
Power source requirement 3
Prepairing 3
Safety 3
4.INSTALLATION 4
Install the beater 4
Install the dispenser door 4
Install the drip tray and rear seal drip pan 5
Install the air pumps 5
5.OPERATION 7
Refrigeration 7
Standby 7
Pre-cooling 8
Cleanout 8
Mix low alert 8
6.ADVANCED OPERATION 10
Parameter adjusting 10
Motor current display 10
Restore factory setting 10
7.MAINTENANCE 11
Wash the machine 11
Wash it step by step 11
Troubleshooting Bacterial Count 12
Regular Maintenance Checks 12
8.ICE CREAM RAW MATERIALS 14
9.TROUBLESHOOTING GUIDE 15
2
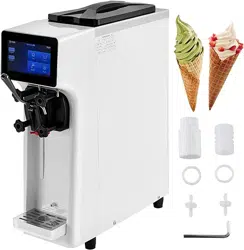
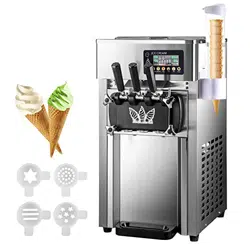
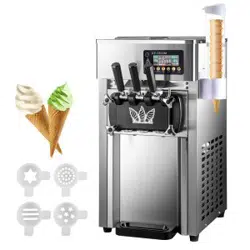
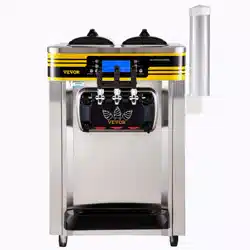
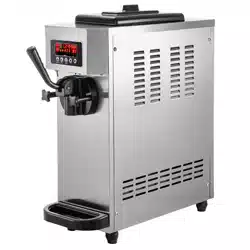
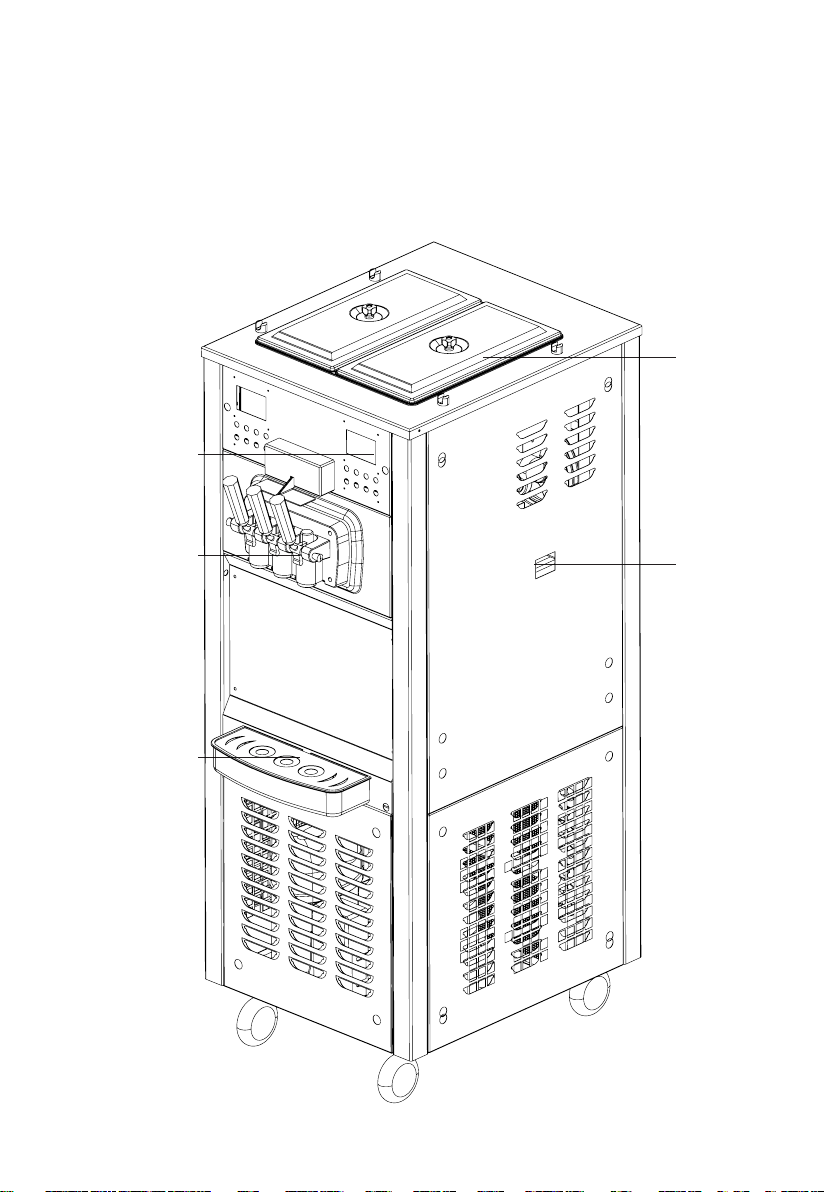
2. MACHINE OVERVIEW
hopper
rear seal
drip pan
display & keypads
dispenser door
drip pan
3
Power source requirement
• Power source MUST match the specification.
• This machine MUST be properly grounded! Failure to do so
can result in severe personal injury from electrical shock.
• The machine MUST NOT share wire or power jack with other
appliances.
• We recommend using wires thicker than 4mm2. Small wire
may cause damage to motor and compressor.
• DO NOT operate the machine with fuse larger than
specification, and DO NOT power on before trouble removed.
• We DO NOT take responsible for damage caused by
unqualified power source or wire.
Prepairing
• Please reset the machine more than 12 hours before
producing if the machine is moved from one place to another.
• Minimum clearance of 20cm is requried around the machine.
The clearance should be extended to 50cm when machines
are working together.
Safety
• Only trained personnel should operate the machine.
• Power source MUST be disconnected before repairing or
maintenance.
• Please confirm all the stainless steel panel and dispenser
door are fixed before power on.
• DO NOT operate the machine unless all service panels and
access doors are restrained with screws.
• DO NOT put any objects or fingers into spout doors or
cylinder.
3.PREPAIRING
4
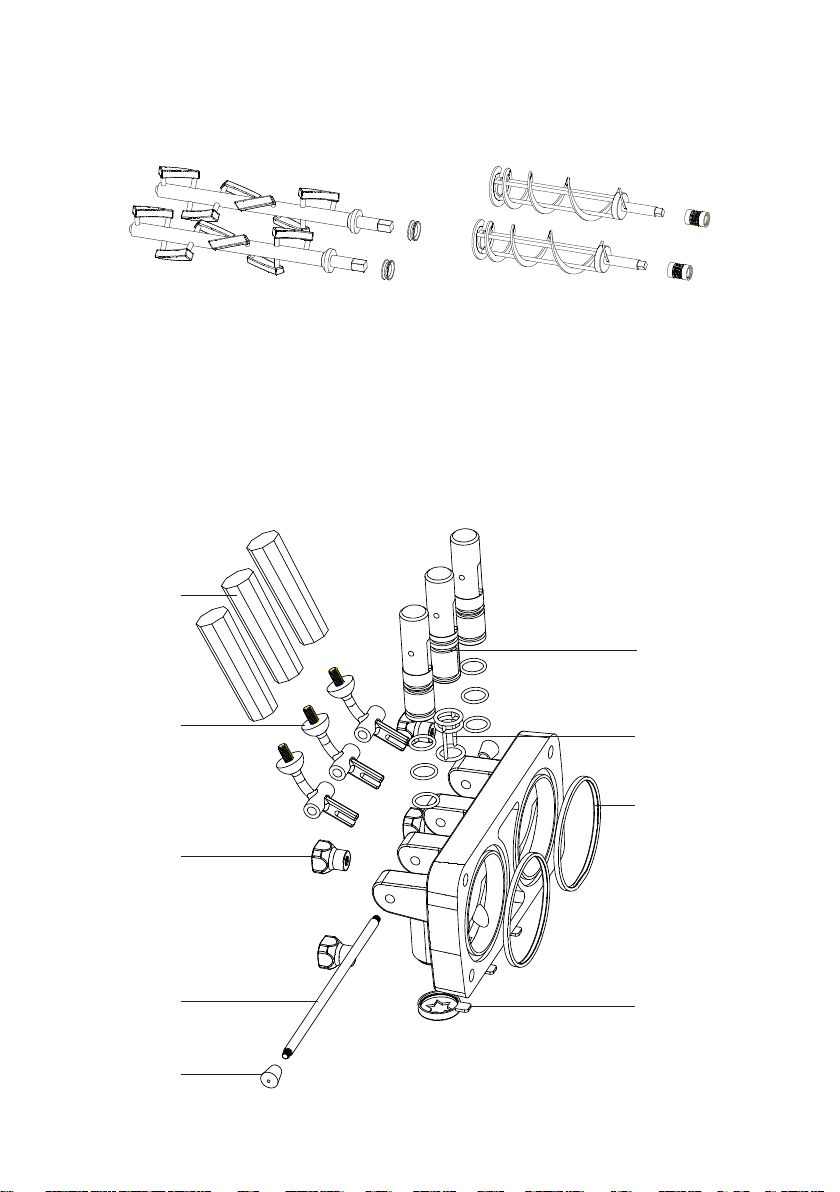
plastic handle
stainless steel
handle
screw
stainless steel
plunger
screw
plastic plunger
O-ring
seal
design cover
4.INSTALLATION
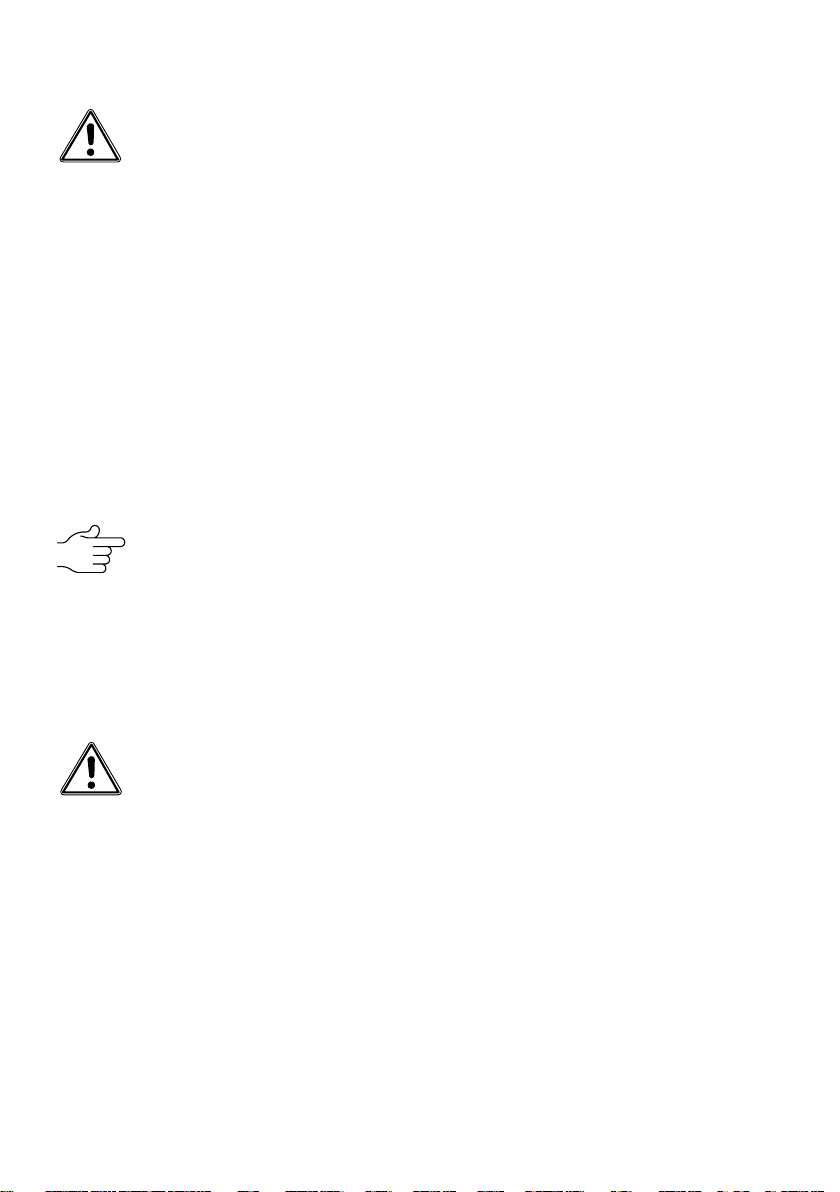
Install the beater
The beaters are depend on models
1. Assemble the beater with seal at the bottom, and lubricate both
ends of the beater
2. Put the beaters into the cylinder, and make sure that the hexagonal
end is put into the hole of axis guide of reducer.
Install the dispenser door
5
1. Put O-rings on the plastic plungers with lubricant(the middle
plunger should be paired with O-O-ring).
2. Install the plungers into the holes of the dispenser.
3. Fix the stainless steel plunger with the stainless steel handle
through the holes on dispenser door and screw tight.
4. Fix the design cover on the bottom of the dispenser.
5. Fix the dispenser door assembly on the machine and fasten it with
screws using the spanner. Please DO NOT lubricate the seal of the
dispenser door
6. Fix the plastic handles onto the stainless ones
Install the drip tray and rear seal drip pan
Please refer to section MACHINE OVERVIEW
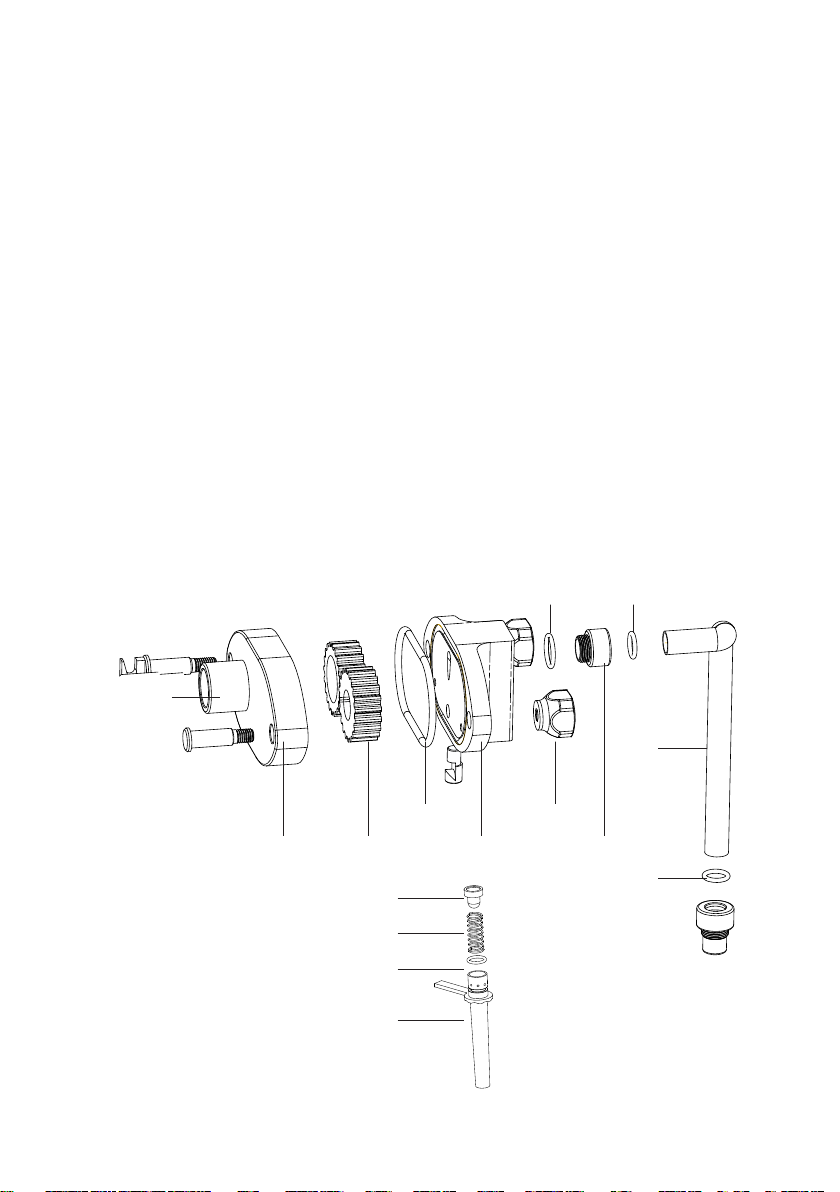
Install the air pumps(optional, machines with air pumps)
pump
shell
gear
seal
pump
cover
attaching
bolts
screw
connect tube
O-ring
O-ring
rubber plug
spring
O-ring
sucking tube
O-ring
6
1. Put the initiative and driven gear into the air pump shell.
2. Put seal on the air pump cover, cover with the shell and screw with
attaching bolts.
3. Install rubber plug, spring, O-ring and sucking tube on the bottom
of the air pump sequently.
4. Install two O-rings on the back of the air pump and one O-ring at
the front.
5. Install O-ring on the connect bolt, and assemble the bolt inside the
hole in the front of the air pump.
6. Install O-ring on the tube, and connect the two connect bolts with
the tube.
Rotate the handle on sucking tube to adjust overrun. (From top view),
clockwise for more and counterclockwise for less. Handle on the left is
biggest and on the right is smallest.
Note
• The two air pumps are exchangeable integrally, but DO NOT
exchange any parts inside the pumps with one another.
• There MUST be no impurities in the mixture, failure to do
this may damage the pumps. It is recommend to filter and
cleansing the material before using.
• If the pump does not work on powering on, take off the
connect tube and inject a little liquid into the pump to help its
starting.
7
5.OPERATION
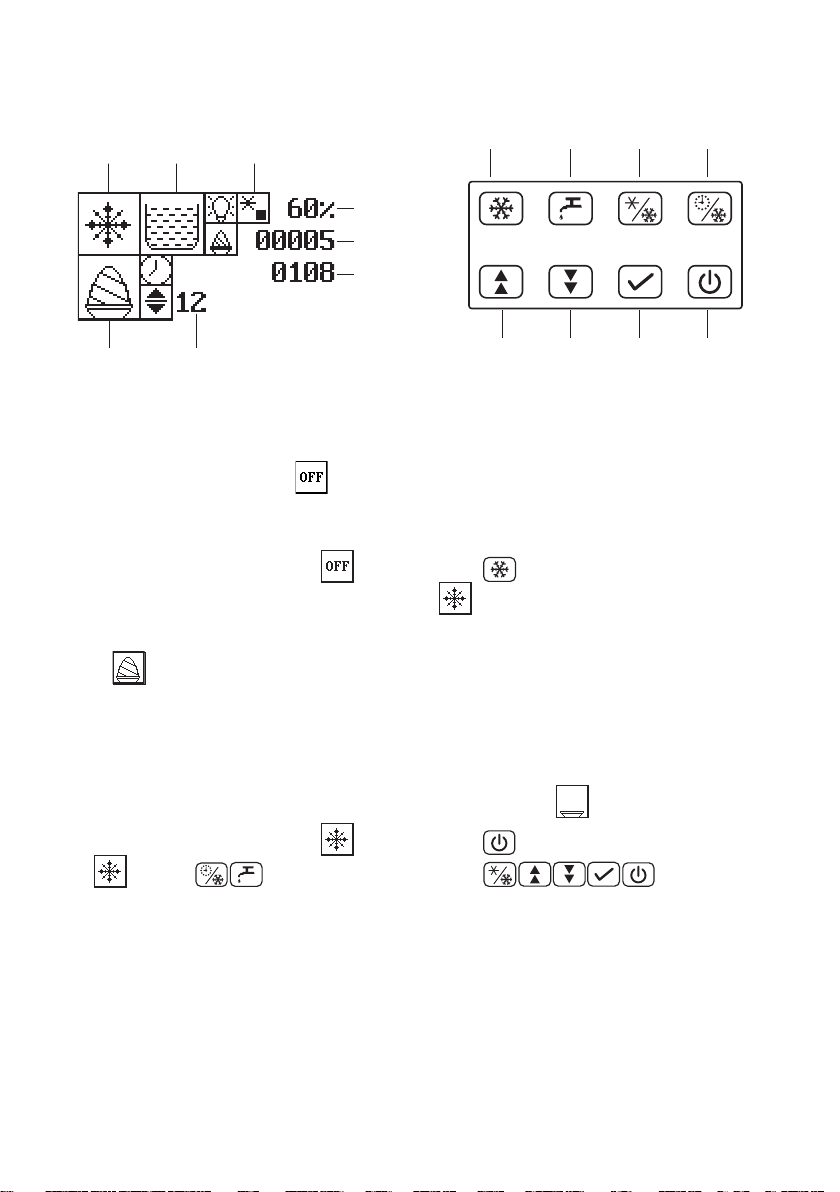
The machine state is , when it connects to power source.
Refrigeration
When the machine is in state, press key, it will start to
refrigerate and the state will turn to be .
When temperature reaches preset value, the ice-cream state will turn
to be , refrigeration will be stopped and ice cream is ready. You may
make ice cream by pull down the handle.
After making several cones of ice cream or 300 seconds after stop
refrigerating, the machine will restart to refrigerate. We do suggest users
not to make ice cream when the ice cream state is .
When the machine is in state, press key to stop refrigerating.In
the state, are unavailable, while are
available.
Standby
Standby mode maintains the mixture fresh in the hopper as well as ice
cream in the cylinder, especially in the night. It is useful for users who
need to switch the machine into refrigeration state immediately from the
standby mode.
LCD panel
refrigeration cleanout
pre-
cooling
standby
up down conrm off
button
ice cream
state
parameter
machine
state
mix level
pre-cooling
state
Percent
Display
ice cream
count
count
down
8
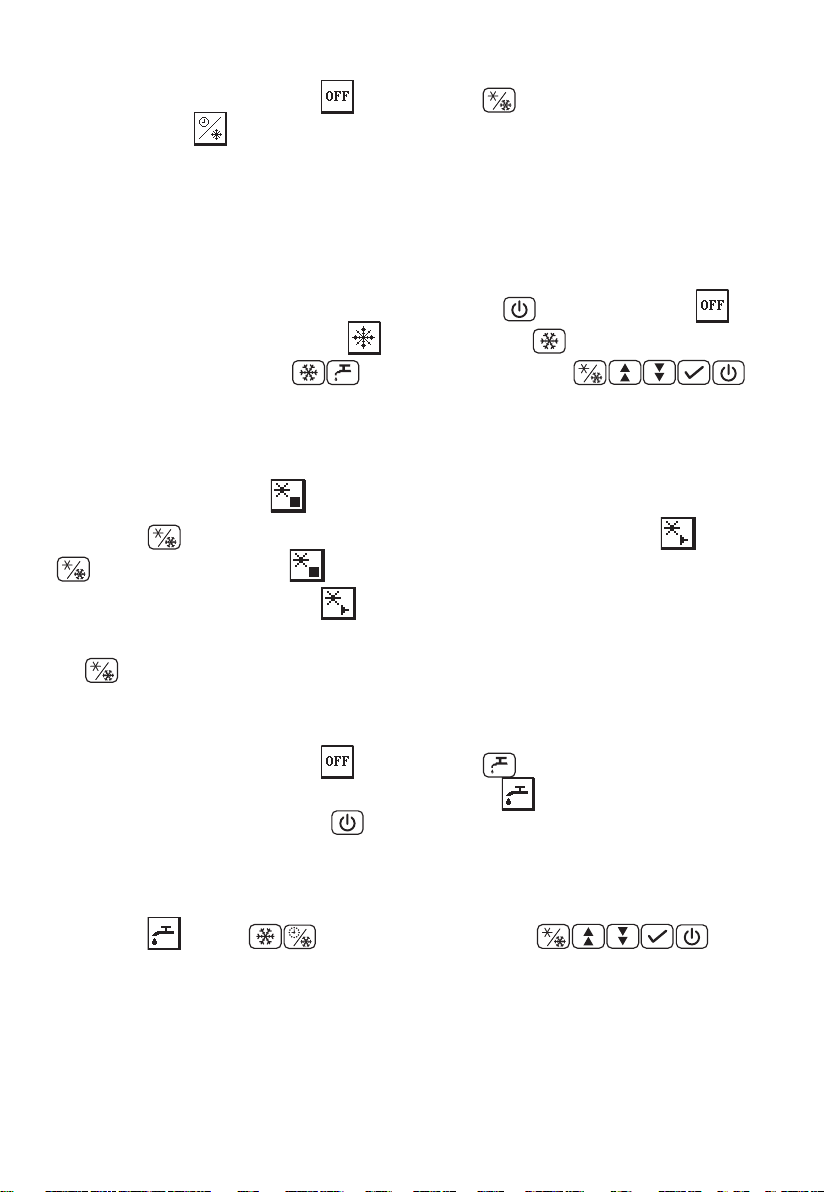
When the machine is in state, press key, it will turn into
standby state .
In standby state, the machine will refrigerate every 3600 seconds to
keep the mixture in cylinder below the preset temperature.
We DO NOT recommend users to make ice cream in standby state.
Please swith to refrigeration mode before making ice cream.
When the machine in standby state, press key to turn into
state. It is easily to swith into state by press key.
In the standby state, are unavailable, while are
available.
Pre-cooling(machines with pre-cooling function)
Pre-cooling is OFF , when the machine is powered on by default.
Press key, pre-cooling turns on, and the state turns to . Press
again to turn it OFF .
When pre-cooling is ON , pre-cooling compressor starts to work to
keep temperature of mix below 5C in hoppers.
key is available in any case once the machine is powered on.
Cleanout
When the machine is in state, press key, the machine will start
to wash and the machine state will turn to be . During this time, the
motor is running until press key again.
Please refer to section 6 MAINTENANCE for full procedure of the
cleanout.
In the state, are unavailable, while are
available.
Mix low alert(machines with mix low sensor)
Mix low alert will be turned on when mix level is below the preset value

9
and the head of liquid level sensor drops down. At that moment, red light
in the front will twinkle and mix level state will turn to on the LCD
panel. (Buzzer beeps 3 times every 2 minutes, if the machines equipped
with buzzers.)
You have to pour flesh material into the hopper. Alert will be canceled
once the liquid level sensor rises up. Mix level state will turn to on the
LCD panel.

10
6.ADVANCED OPERATION
Parameter adjusting
You may adjust the hardness of the ice cream by adjusting the machine
parameter.
The parameter is displayed on the middle bottom of LCD panel. It
ranges from 1 to 20, and the default value is 10. The bigger the value
sets, the lower temperature is, and the harder ice cream is.
Hold or for 3 seconds to enter parameter adjusting mode.
Press key to increase the value, to decrease it and press key
to confirm.
Restore factory setting
Hold key for 5 seconds to restore factory setting. By default, ice
cream count is 0 and parameter value is 10.

11
7.M A IN T ENA NCE
Wash the machine
• We recommend to sterilize and wash the machine everyday
in regular use.
• Before washing, please wait at least 30 minutes after stop
refrigerating, otherwise beaters and motor may be damaged
because of the hard ice in the cylinders. For saving time, you
may pour some hot water(about 80C) into the hopper to melt
the ice, if you want to save times.
Wash it step by step
1. Before cleaning, clean up ice cream in the cylinder and material in
the hopper by pull down the handles.
2. Take off air pumps equipped on the machines. (Refer section
INSTALLATION to assemble pumps after cleaning)
3. Pour some clean water with fungicide into the hoppers, and wash
the machine by CLEANOUT function. After CLEANOUT, pull down
the handle to clean up water inside.
4. Shut down the power(disconnected from the power source).
5. Take off the dispenser door, disassemble it, wash it and assemble
it again.(Please refer to section "Install the dispenser door".)
6. Take off the beaters with O-ring, and install them after cleaning
and drying.
7. Install the air pumps and dispenser door after drying.
8. Clean up the hopper.
9. Take off the rear drip pan and clean it. Check and replace the
O-ring on the beater if there is too much leakage.

12
Troubleshooting Bacterial Count
• Thoroughly clean and sanitize the machine regularly, including
complete disassembly and brush cleaning.
• Use all brushes for thorough cleaning. The brushes are specially
designed to reach all mix passageways.
• Use the smaller, white bristle brush to clean the mix inlet hole
which extends from the mix hopper down to the rear of the freezing
cylinder.
• Use the black bristle brush to thoroughly clean the rear of the
freezing cylinder. Be sure to have a generous amount of cleaning
solution on the brush.
• IF LOCAL HEALTH CODES PERMIT THE USE OF RERUN, make
sure the mix rerun is stored in a sanitized, covered stainless steel
container and is used the following day. DO NOT prime the machine
with rerun. When using rerun, skim off the foam and discard. Mix the
rerun with fresh mix in a ratio of 50/50 during the day's operation.
• On a designated day of the week, run the mix as low as feasible and
discard after closing. This will break the rerun cycle and reduce the
possibility of high bacteria and coliform counts.
• Properly prepare the cleaning and sanitizing solutions. Read and
follow label directions carefully. Too strong of a solution may
damage the parts and to weak of a solution will not do an adequate
job of cleaning or sanitizing.
Regular Maintenance Checks
• Check the rear shell bearing for signs of wear (excessive mix
leakage in rear drip pan) and be certain it is properly cleaned.
• Using a screwdriver and cloth towel, keep the rear shell bearing

13
and the female hex drive socket clean and free of lubricant and mix
deposits.
• Dispose of O-rings or seals if they are worn, torn, or fit too loosely,
and replace with new ones.
• If an overload condition occurs frequently, maybe the belt is worn,
torn, or fit too loosely. Dispose of the belt and replace with new
ones.
• Follow all lubricating procedures as outlined in ASSEMBLY.
• Check the condenser for an accumulation of dirt and lint. A dirty
condenser will reduce the efficiency and capacity of the machine.
Condensers should be cleaned monthly with a soft brush. Never
use screwdrivers or other metal probes to clean between the fins.
Failure to comply may result in electrocution.
• This machine is equipped with an auxiliary refrigeration system,
check the auxiliary condenser will reduce the refrigeration capacity
of the mix hopper. Condensers must be cleaned monthly with a
soft brush. Never use screwdrivers or other metal probes to clean
between the fins. Failure to comply may result in electrocution.

14
8.ICE CREAM RAW MATERIALS
• If you are using ice cream powder, the recommended weight
ratio of power and water is 1:2.5(Or follow the instruction of
your powder). The weight ratio MUST NOT exceed 1:3, too
much water in the mixture will result in damaging the beater
and motor.
• Check if there is enough mixture in the hopper and the
mixture flows into the cylinder smoothly. Not enough mixture
in the cylinder may be frozen inside and result in damaging
the beater and motor.
• Keep the mixture fresh in the machine. It is not recommend
that key the mixture in cylinder for more than 1 hour. Staying
a long time in the cylinder will make the flavour bad.
• DO NOT pour in the mixture with temperature higher than
45C when machine is in refrigeration state.
• Keep the mixture level above the 1/3 height of the hopper.

15
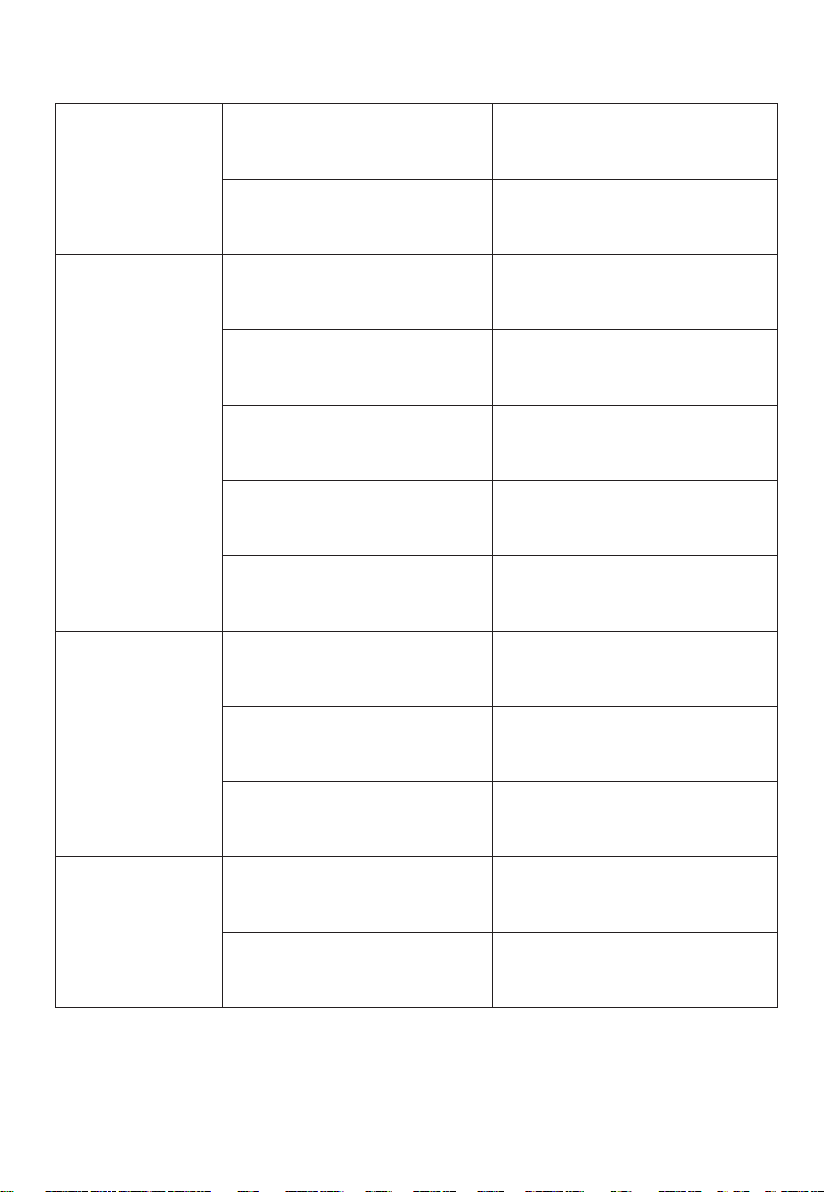
9.TROUBLESHOOTING GUIDE
PROBLEM PROBABLE CAUSE REMEDY
The machine
does not start
The machine is not
connected to power
source
Check the power source,
fuse
The machine is in OFF
state
Press function keys to
turn on the functions
Wash function
failed
Motor or its capacitor
failed
Repair or change the
motor or its capacitor
Motor in protect mode
Restart the machine after
the ice melting inside
Refrigeration
function failed
Compressor or motor in
protect mode
Check the voltage,wires
match the specification
Starting device of
compressor failed
Change the starting
device
Motor does
not stop
Microswitch failed
Adjust or change the
microswitch
Refrigeration
performance
lower
Refrigerant leaks
Call an expert and refill
the refrigerant
Jam in condenser
Clean the condenser with
brush
Fan failed Check the fan and circuit
The mix in the
hopper is too
warm
The pre-cooling function
is off
Turn on the pre-cooling
function
Thermostat failed
Adjust or change the
thermostat
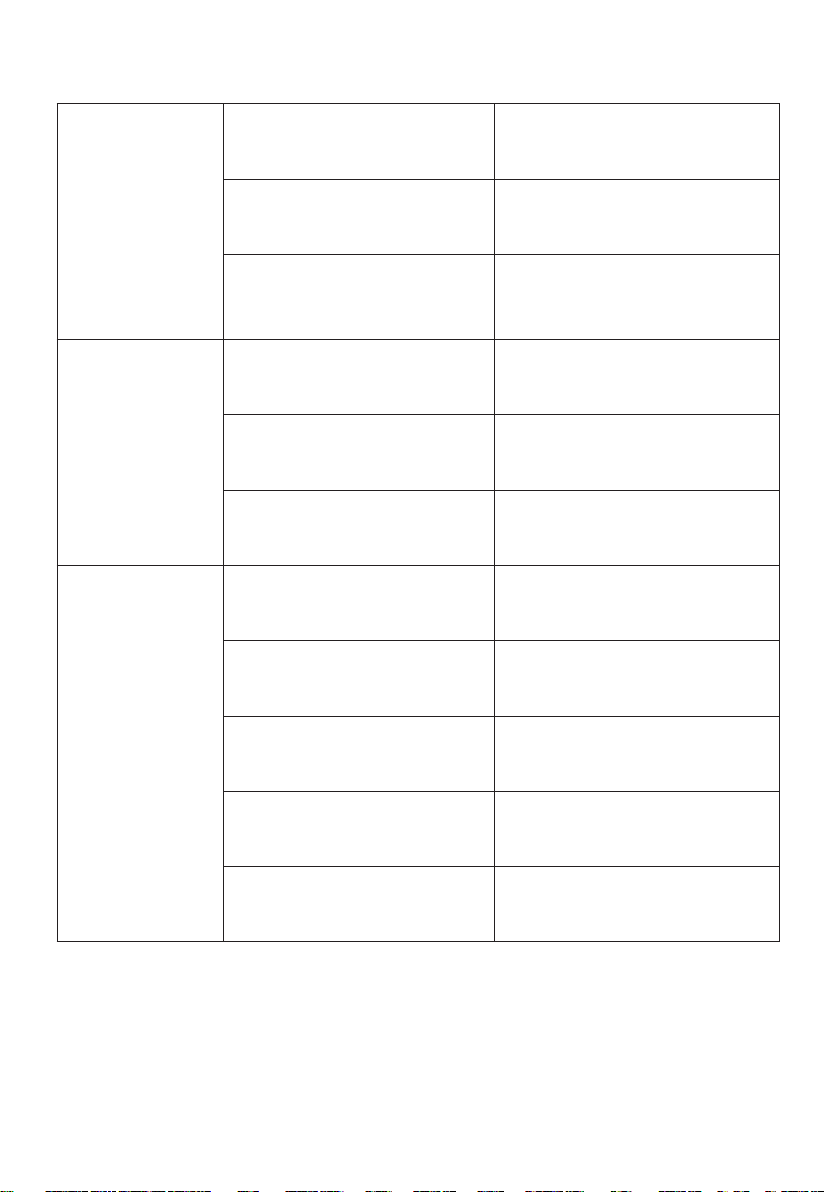
16
Compressor
does not stop
The parameter is too
high
Decrease the parameter
Improper weight ratio of
powder and water
Follow the recommended
ratio
No product
being
dispensed
Low on mix
Add mix to the mix
hopper
Jam in the connect tube Clean and adjust the tube
Improper weight ratio of
powder and water
Follow the recommended
ratio
The power is off or not
in refrigeration state
Turn on the power and
swith refrigeration state
Butterfat build in the air
pump
Disassemble and clean
the air pump
The product is
too soft
Improper weight ratio of
powder and water
Follow the recommended
ratio
The parameter is too
low
Increase the parameter
The current of motor is
high
Check the motor and
wiring
The product is
too thick
Improper weight ratio of
powder and water
Follow the recommended
ratio
The parameter is too
high
Decrease the parameter
17
Excessive mix
leakage
Leakage from dispenser
door
Lubricate properly or
replace the seal
Leakage from the
plungers
Lubricate properly or
replace the O-ring
Leakage in rear seal
drip pan
Lubricate properly or
replace the seal of the
beater
Frozen in the
cylinder
Lack of mix in the
cylinder
Check mix level, connect
tube and air pump
The belt of motor is
loose
Adjust or change the belt
The parameter is
improper
Reset the parameter and
set it to the suitable value
Air pump
failed
Air pump is installed
improperly
Re installed the pump
Seal or O-ring inside
the pump failed
Lubricate properly or
replace the seal/O-ring
Spring failed inside Replace the spring
Loosely between air
pump cover and shell
Screw the bolts
Gear damaged inside Replace the gear