
Loading ...
Loading ...
Loading ...
Quick Start Guide
12 DXL1K Owner’s Manual
3. Insert the other end of the power cord into
an AC outlet.
WARNING
• The DXL1K has been designed for grounded use. To
avoid electrical shock and damage to connected devices,
be sure to ground the unit using the included power cord.
If you have any questions regarding proper connections,
please contact your nearest Yamaha dealer.
• Use only the included power cord. Otherwise, heat may
be generated or an electrical shock may be caused.
Notice
Even when the power switch is turned off, a minimal
amount of electric current is still flowing to the unit. If you
plan not to use the unit for an extended period of time, be
sure to unplug the power cord from the AC outlet.
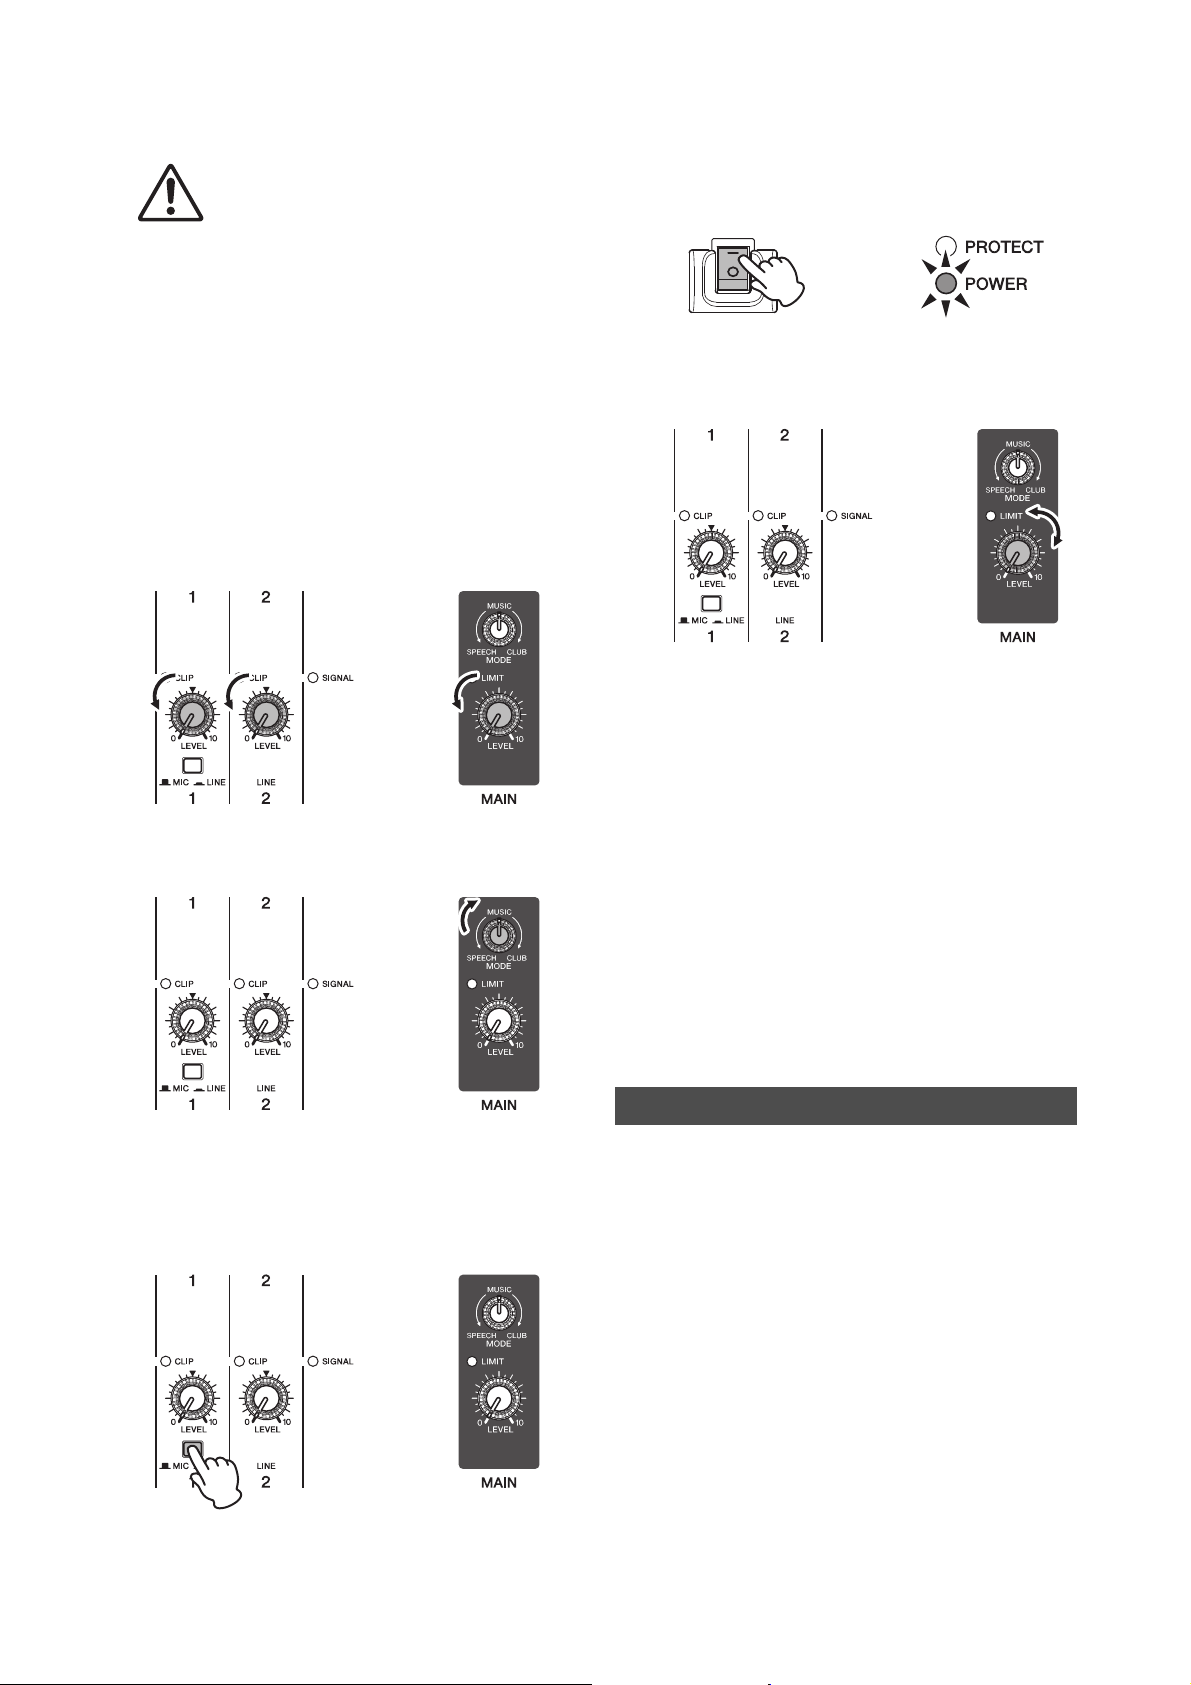
4. Turn the [LEVEL] controls (white knobs) and
[MAIN LEVEL] control (red knob) to the
minimum (zero).
5. Set the [MODE] control (yellow knob) to the
MUSIC position.
6. If a microphone is connected to channel 1,
set the [MIC/LINE] switch to the MIC (N)
position. If a musical instrument or audio
device is connected to channel 1, set the
[MIC/LINE] switch to the LINE (O) position.
7. Turn on the power to the connected musical
instrument or audio device first, then turn on
the power to this unit.
The [POWER] LED lights up.
8. Use the [MAIN LEVEL] control to adjust the
volume to an appropriate level.
9. While playing your musical instrument or
singing into the microphone, use the
[LEVEL] controls to adjust the volume of the
corresponding channels.
10. Use the [MAIN LEVEL] control to adjust the
overall volume.
If you can hear sound and the volume seems appropriate,
setup is complete. If not, please refer to the checklist in
the “Troubleshooting” (page 14) section.
NOTE
To avoid any loud, unexpected noises from the speaker, first turn
off the power to this unit, and then turn off the connected sound
source (such as a musical instrument or audio device).
When the volume is too loud
Turn the [LEVEL] control for the corresponding channel to
the minimum (zero). Set the [MIC/LINE] switch to the LINE
(O) position, then slowly raise the [LEVEL] control until
the desired volume is reached.
When the volume is too low
Turn the [LEVEL] control for the corresponding channel to
the minimum (zero). Set the [MIC/LINE] switch to the MIC
(N) position, then slowly raise the [LEVEL] control until
the desired volume is reached.
Adjusting the volume
Loading ...
Loading ...
Loading ...