Loading ...
Loading ...
Loading ...
9
Charging Operation
mWARNING! Only charge batteries indoors where the
temperature is between 41°F (5°C) and 104°F (40°C).
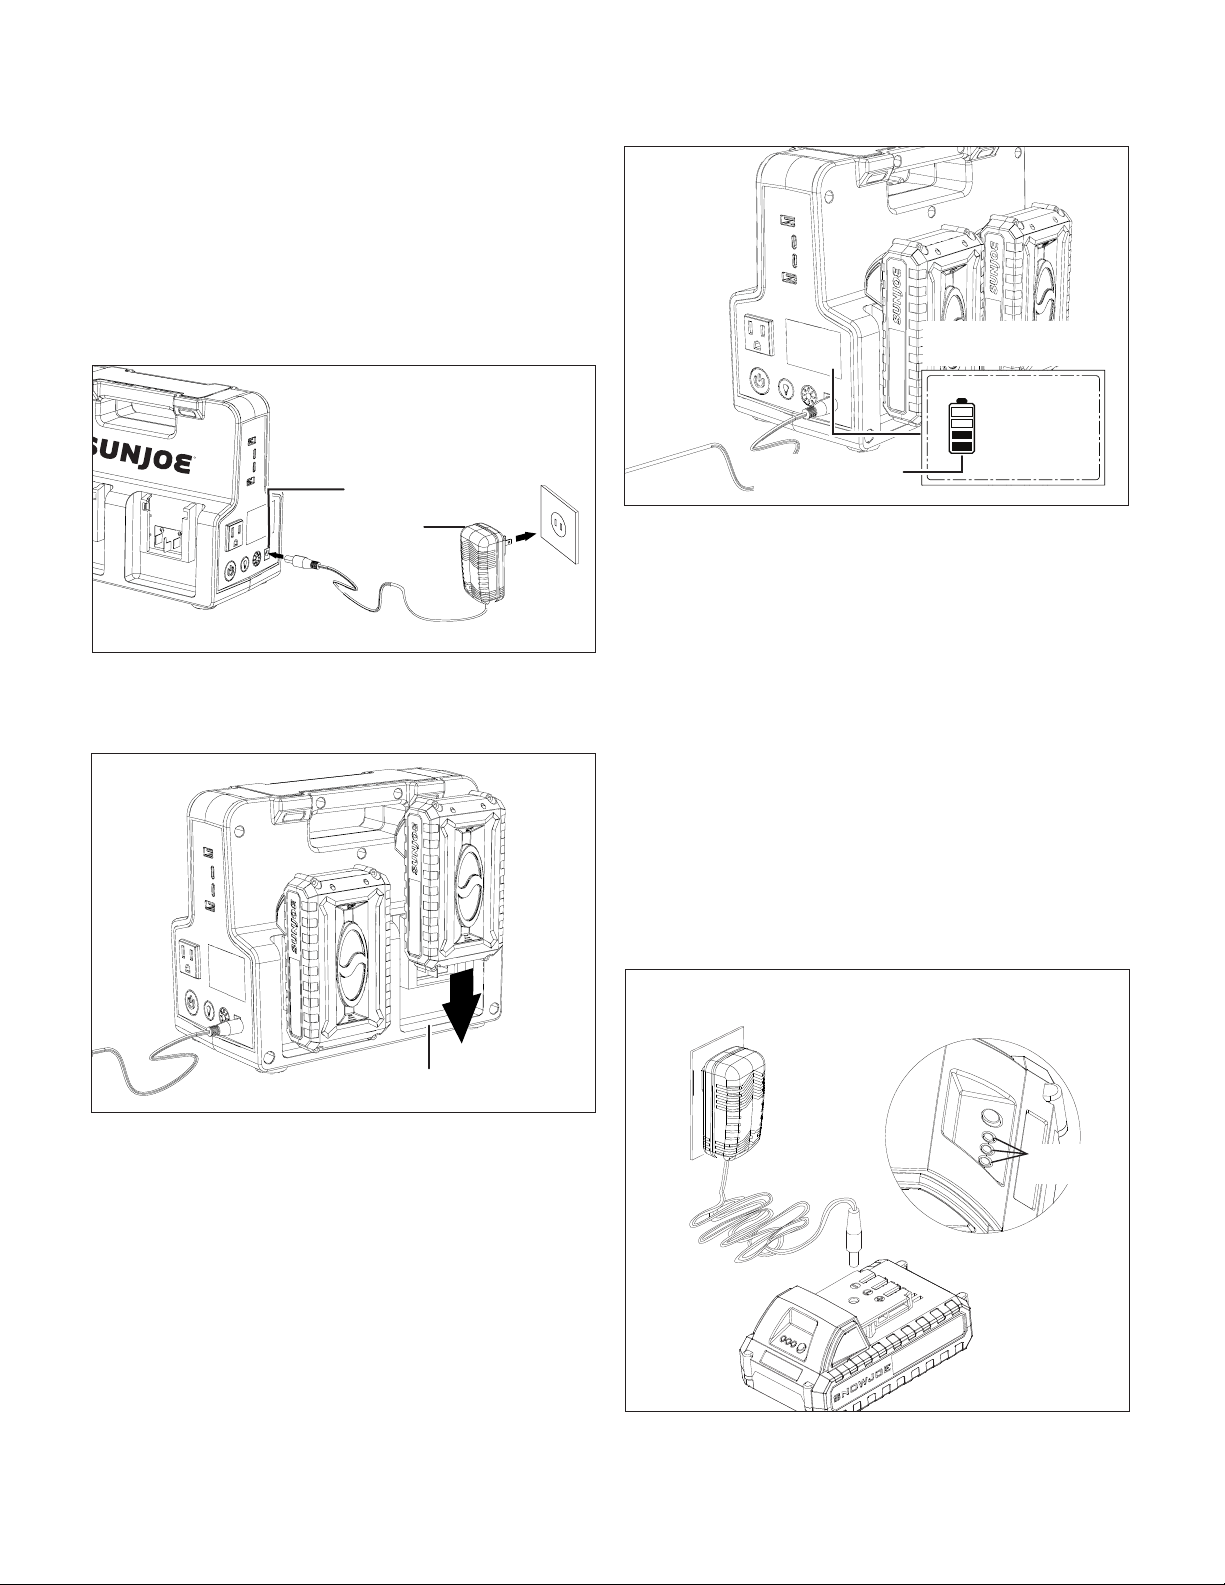
1. Check that the mains voltage is the same as that marked
on the rating plate of the battery charger. Then, insert
the charger adapter into the electrical wall outlet. Insert
the charger plug into the charging socket on the power
station, as shown (Fig. 2).
2. Insert 1 – 4 battery pack(s) in the battery compartment(s)
securely (Fig. 3). The charging will begin as soon as the
battery pack(s) is/are mounted properly.
3. During the charging process, the battery charging status
icon on the LCD screen will lit up and ash to indicate the
charging process (Fig. 4).
4. Based on the battery pack(s) inserted in the power station,
the charging time may vary. When charging is complete,
remove the battery pack(s) and unplug the charger from
the outlet and the power station.
NOTE: If the batteries being charged have the same power
capacity, the power station will charge all batteries together. If
the batteries being charged have dierent power capacities,
the power station will charge the lowest one rstly. When all of
the batteries are of the same capacity level, the power station
will charge all batteries together until they are full.
5. The iON+ 24V System batteries can also be charged
directly with the included iON+ 24V lithium-ion charger.
Simply plug the charger adapter into an appropriate
AC power outlet and connect the charger plug into the
charging socket of the battery to start charging. The
battery indicator LEDs will twinkle and illuminate one by
one during the charging process. Unplug the charger
immediately when the 3 LEDs are all illuminated (Fig. 5).
Fig. 2
R
Charger
Charging socket
Battery compartment
Fig. 3
LCD Screen
(Charging mode)
Fig. 4
Battery charging
status
Fig. 5
Battery
indicators
Loading ...
Loading ...
Loading ...