Loading ...
Loading ...
Loading ...
12 Section 4— Service
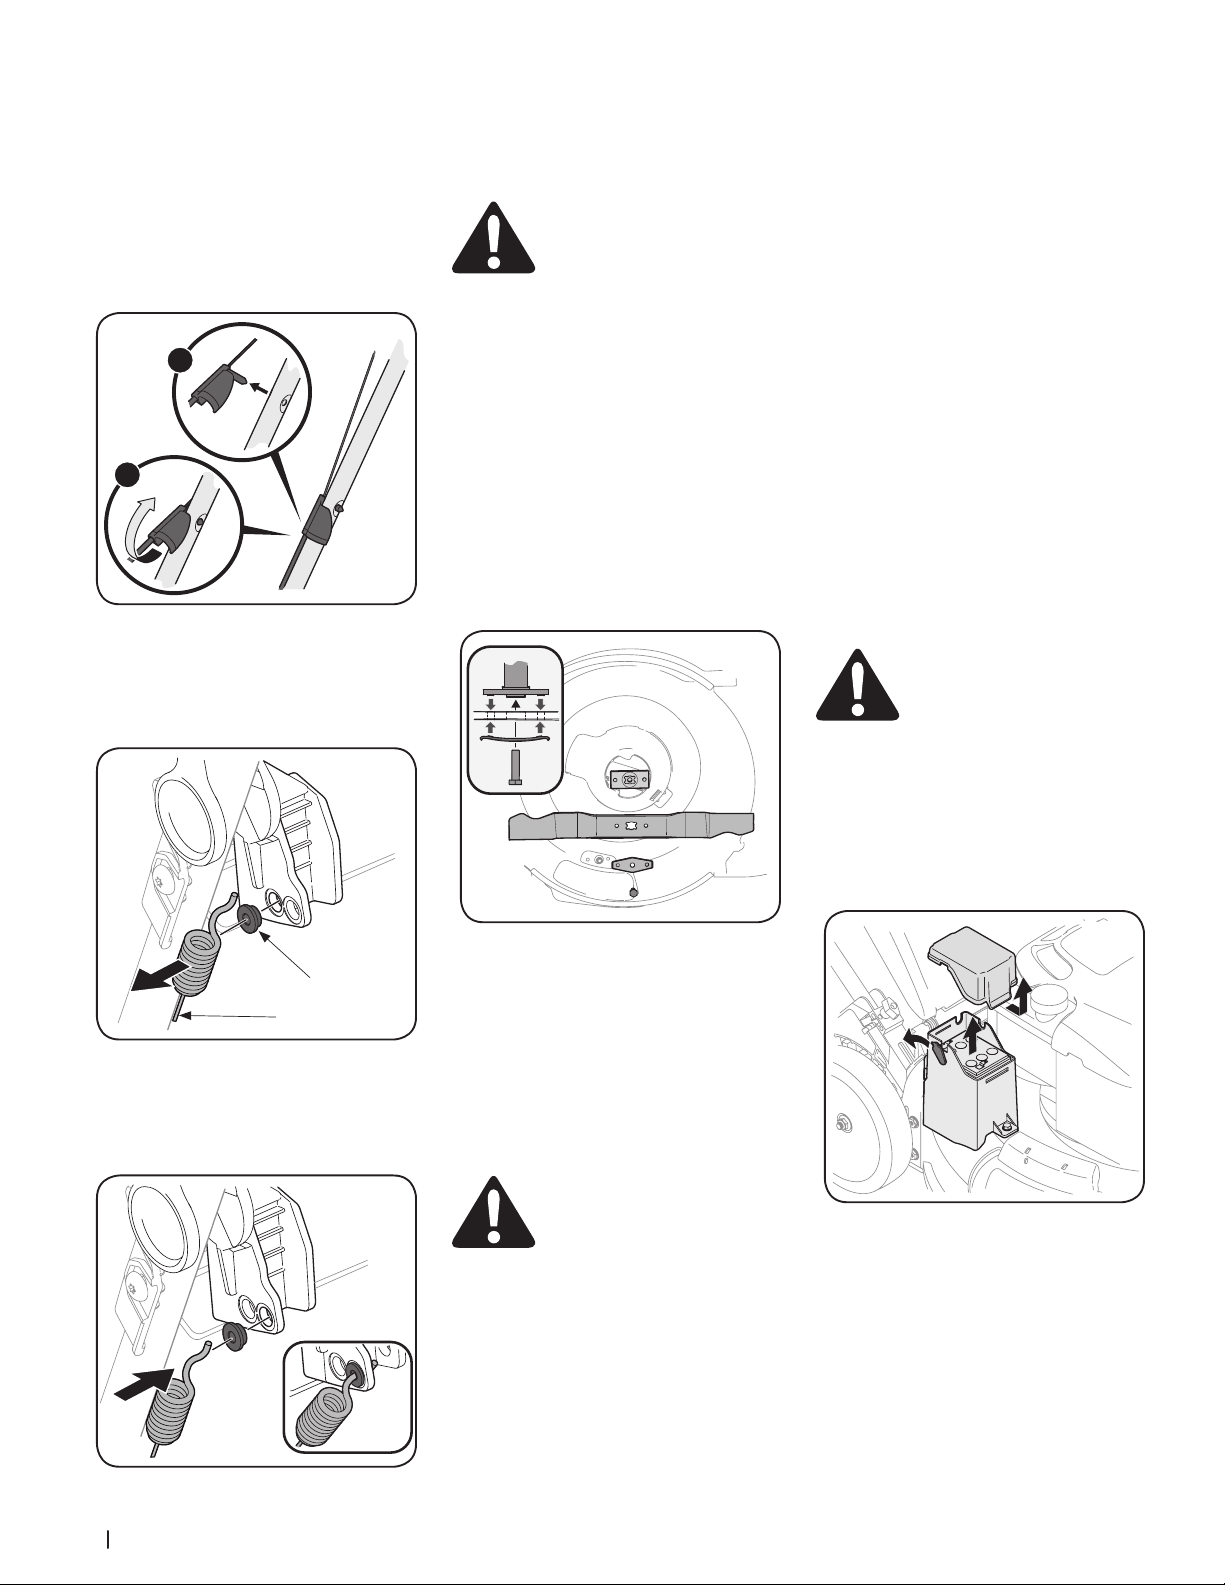
Drive Adjustment
(If Equipped with Premium Drive)
The drive system consists of pulleys, a belt ,
and a cable linking the transmission to the
drive handle. As these components wear,
adjustment may be needed. To adjust the drive
linkage perform the following:
1. Rotate the drive cable fitting located on
the left upper handle upward.
See Figure 4-3.
1
2
Figure 4-3
2. Pull the fitting away from the handle.
3. Unhook the cable and remove the metal
bushing from the plastic drive handle.
See Figure 4-4.
Metal Bushing
Cable
Figure 4-4
4. Replace bushing in the lower hole and
reattach the cable through the bushing
and lower hole in the handle.
See Figure 4-5.
Figure 4-5
5. Reinsert the drive cable fitting into the
upper handle and rotate it downward.
6. Start the mower and check the function
of the drive handle.
Blade Care
WARNING: When removing the
cutting blade for sharpening or
replacement, protect your hands
with a pair of heavy gloves or use
a heavy rag to hold the blade.
Periodically inspect the blade adapter for
cracks, especially if you strike a foreign object.
Replace when necessary. Follow the steps
below for blade service.
1. Allow the engine to run until it is out of
fuel. Do not attempt to pour fuel from
the engine. Disconnect spark plug wire.
Refer to Engine Operator’s Manual.
2. Turn mower on its side making sure
that the air filter and the carburetor are
facing up.
3. Remove bolt (a) and blade bell
support (b) which hold the blade
and the blade adapter to the engine
crankshaft. See Figure 4-6.
(a)
(c)
(d)
(b)
Figure 4-6
4. Remove blade (c) and adapter (d) from
the crankshaft. See Figure 4-6.
5. Remove blade from the adapter for
testing balance. Balance the blade on
a round shaft screwdriver to check.
Remove metal from the heavy side until
it balances evenly. When sharpening the
blade, follow the original angle of grind.
Grind each cutting edge equally to keep
the blade balanced.
WARNING: An unbalanced
blade will cause excessive
vibration when rotating at high
speeds. It may cause damage to
mower and could break causing
personal injury.
6. Lubricate the engine crankshaft and the
inner surface of the blade adapter with
light oil. Slide the blade adapter (d) onto
the engine crankshaft. Place the blade
on the adapter such that the side of the
blade marked “Grass Side” (or with part
number) faces the ground when the
mower is in the operating position. Make
sure that the blade is aligned and seated
on the blade adapter flanges.
See Figure 4-6 inset.
7. Place blade bell support (b) on the
blade (c). Align notches on the blade bell
support with small holes in blade.
8. Replace hex bolt (a) and tighten hex
bolt to torque: 450 in-lb (min.), 600 in-lb
(max.).
To ensure safe operation of your mower,
periodically check the blade bolt for correct
torque.
Belt Care
NOTE: Several components must be removed
in order to change the mower’s belt. See an
authorized Service Dealer to have your belt
replaced.
Replacing Battery (If Equipped)
WARNING: Batteries contain
sulfuric acid which may cause
burns. Do not short circuit or
damage batteries in any way. Do
not put batteries in fire as these
may burst or release toxic
materials.
1. Unhinge cover seal and remove battery
cover.
2. Remove positive and negative leads
from battery, and pull up on battery to
remove. See Figure 4-7.
Figure 4-7
3. Replace with new battery. Connect the
positive lead (red) to the positive side
of the battery pack, then connect the
negative lead (black) to the negative
side. See Figure 4-8.
Loading ...
Loading ...
Loading ...