www.infocus.com
User manual
Advanced LCD Series
2021.06.v1.0
• Beforeusingtheproduct,pleasereadtheseinstructionscarefully,and
keptthemsafeforfuturereference.
• OSDoptionsandpicturesshowninthisdocumentmaydierslightlyfrom
yourproduct.
• Changestothismanualmaybemadewithoutnotice.
English
RegulatoryModel
P160
XGAModels IN1004,IN1014
P161
XGAModels IN1024,IN1034,IN1044
P162
WXGAModels IN1026,IN1036,IN1046
P163
WUXGAModels IN1029,IN1039,IN1049,IN1059

www.infocus.com
Disclaimer
2
Disclaimer
InFocusmakesnorepresentationsorwarrantieswithrespecttothismanualand,
tothemaximumextentpermittedbylaw,expresslylimitsitsliabilityforbreachof
anywarrantythatmaybeimpliedtothereplacementofthismanualwithanother.
Furthermore,InFocusreservestherighttorevisethispublicationatanytimewithout
incurringanobligationtonotifyanypersonoftherevision.
Theinformationprovidedinthisdocumentationcontainsgeneraldescriptionsand/
ortechnicalcharacteristicsoftheperformanceoftheproductscontainedherein.This
documentationisnotintendedasasubstituteforandisnottobeusedfordetermining
suitabilityorreliabilityoftheseproductsforspecicuserapplications.Itistheduty
ofanysuchuserorintegratortoperformtheappropriateandcompleteriskanalysis,
evaluationandtestingoftheproductswithrespecttotherelevantspecicapplication
orusethereof.NeitherInFocusnoranyofitsaliates,subsidiariesorlicenseesshall
beresponsibleorliableformisuseoftheinformationthatiscontainedherein.Ifyou
haveanysuggestionsforimprovementsoramendmentsorhavefounderrorsinthis
publication,pleasenotifyus.
Allpertinentstate,regional,andlocalsafetyregulationsmustbeobservedwhen
installingandusingthisproduct.Forreasonsofsafetyandtohelpensurecompliance
withdocumentedsystemdata,onlythemanufacturershallperformrepairsto
components.Failuretoobservethisinformationcanresultininjuryorequipment
damage.
InFocusshallnotbeliableforanydamagesorproblemsarisingfromtheuseofany
optionsoranyconsumableproductsotherthanthosedesignatedasoriginalInFocus
productsorInFocusapprovedproductsbyInFocus.
InFocusshallnotbeheldliableforanydamageresultingfromelectromagnetic
interferencethatoccursfromtheuseofanyinterfacecablesotherthanthose
designatedasInFocusapprovedProductsbyInFocus.
Copyright©2021InFocus
Allrightsreserved.Nopartofthispublicationmaybereproduced,distributed,or
transmittedinanyformorbyanymeans,includingphotocopying,recording,orother
electronicormechanicalmethods,withoutthepriorwrittenpermissionofthepublisher.
Forpermissionrequestsandforrequestsforimprovementsoramendmentstoour
usersguidesorotherliteraturecontactusviaourwebsitecontractpage.
https://infocus.com/support/contact/

www.infocus.com
Features and design
3
ThisProjectorisdesignedwiththemostadvancedtechnologyforportability,durability,
andeaseofuse.Thisprojectorhasbuilt-inmultimediafeatures,andsupporttheLCD
technologybyusingthecolourdepthof1.07billioncolour.
Simple computer system setting
Theprojectorhasamulti-scansystemto
conformtoalmostallcomputeroutput
signalsquickly.UptoWUXGAresolution
canbeaccepted.
Useful functions for presentations
Thedigitalzoomfunctionallowsyouto
focusonthecrucialinformationduringa
presentation.
Light source mode
Brightnessoftheprojectionlampcanbe
selected.
Logo function
TheLogofunctionallowsyouto
customizethescreenlogo.Youcan
captureanyimageonthescreen.
Multilingual menu display
Thescreenmenuoftheprojectoris
availablein26languages:English,
German,French,Italian,Spanish,Polish,
Swedish,Dutch,Portuguese,Japanese,
SimpliedChinese,TraditionalChinese,
Korean,Russian,Arabic,Turkey,
Finland,Norway,Denmark,Indonesia,
Hungary,CzechRepublic,Kazakhstan,
Vietnamese,Thai,Farsi.
Convenient Maintenance Functions
Lampandltermaintenancefunctions
provideforbetterandproper
maintenanceoftheprojector.
Security function
TheSecurityfunctionhelpsyouto
ensuresecurityoftheprojector.With
theKeylockfunction,youcanlockthe
operationonthecontrolpanelorremote
control.PINcodelockfunctionprevents
unauthorizeduseoftheprojector.
Auto setup function
Thisfunctionenablesinputsource
search,AUTOPCadjustandAUTO
KeystonebysimplepressingtheAUTO
buttonontheremotecontrol.
Colourboard function
Adjusttheprojectorslightandcolour
outputsettingswhenprojectingontoa
colouredsurfaceorscreen.
Power management
ThePowermanagementfunctionreduces
powerconsumptionandmaintainsthe
lamplife.
Closed caption
Closed captionsareatextversionof
thespokenpartofamovie,orcomputer
presentation.Closed captioningwas
developedtoaidhearing-impaired
people,butit'susefulforavarietyof
situations.Youcanturnthefeatureonor
oandswitchthechannels.
Caution
• Thescreenmenuandimagesinthemanualmayslightlydierfromtherealproduct.
• Themanualissubjecttochangewithoutpriornotice.
Features and design

www.infocus.com
Content
4
Content
Disclaimer.........................................................................................................2
Featuresanddesign.........................................................................................3
Content.............................................................................................................4
Safetyoperationguideline................................................................................7
Safety instructions .......................................................................................................7
Chemical Substances table ......................................................................................... 8
Air ventilation .............................................................................................................12
Place your projector correctly .................................................................................... 12
Moving your projector ...............................................................................................13
Compliance....................................................................................................14
Accessory.......................................................................................................15
Nameandfunctionofyourprojector.............................................................16
Front, Top .................................................................................................................16
Rear .......................................................................................................................... 16
Bottom .....................................................................................................................16
Terminals ...................................................................................................................17
Keypad controls and indicator lights .......................................................................... 19
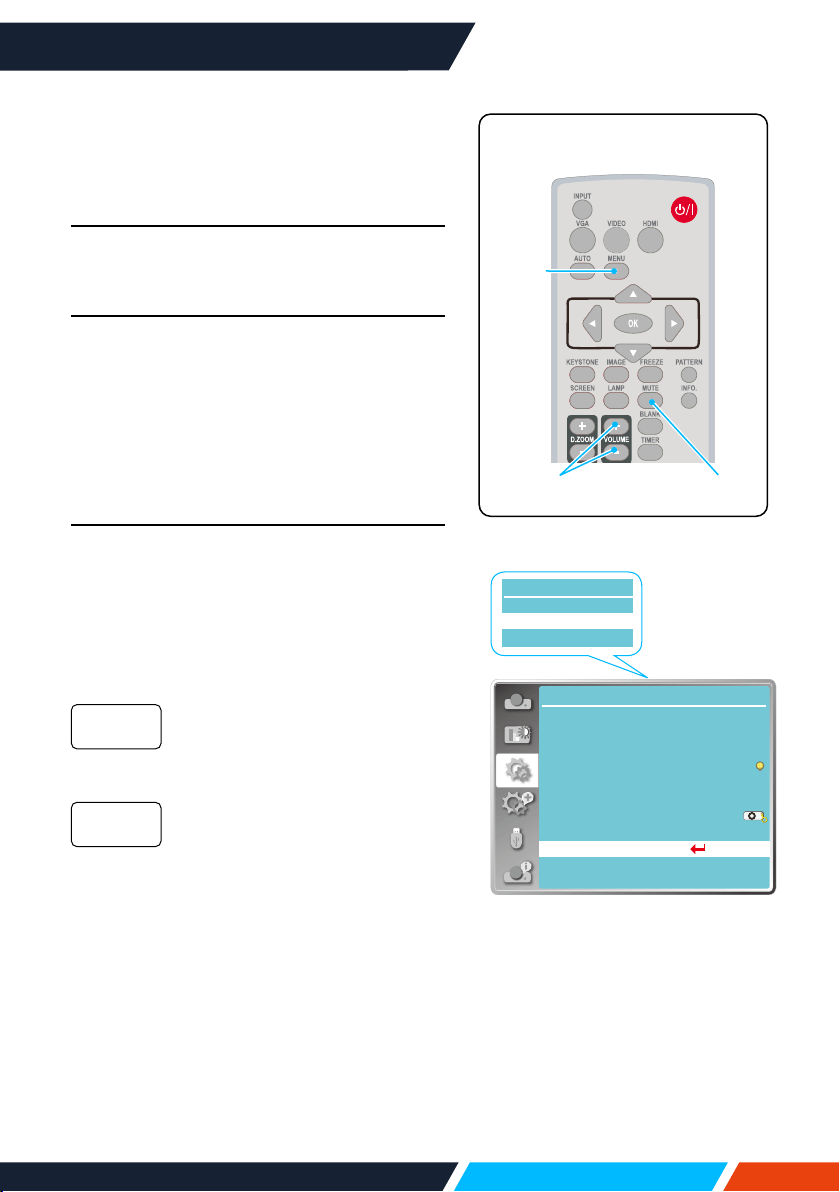
Remote control .........................................................................................................20
Installing batteries in the remote control ....................................................................21
Remote control operation range ................................................................................21
Installation......................................................................................................22
Set up your projector ................................................................................................22
Adjust the projected image .......................................................................................25
Connect to PC (digital and analogue RGB) ................................................................ 26
Connect to video equipment .....................................................................................27
Connect to audio equipment ..................................................................................... 28
Connect to USB (USB-A – USB-B or USB-C – USB-B) ............................................. 29
Connect the AC power cord .....................................................................................32
Basicoperation.............................................................................................33
Power on your projector ........................................................................................... 33
Power o your projector ............................................................................................34
How to operate the OSD ...........................................................................................35
Menu item overview ..................................................................................................36
Adjust the Projector Zoom and Focus .......................................................................37
Auto setting function .................................................................................................38
Keystone adjustment ................................................................................................38
Volume adjustment ...................................................................................................39
Remote control operation .......................................................................................... 40
Input selection ...........................................................................................................42
Display............................................................................................................44
Auto PC adj. ............................................................................................................44
Fine sync ..................................................................................................................44
H Position .................................................................................................................44
V position .................................................................................................................. 45
H.Size .......................................................................................................................45
Aspect ......................................................................................................................45

www.infocus.com
Content
5
Project way ...............................................................................................................46
Menu position ..........................................................................................................47
Background display .................................................................................................48
System .....................................................................................................................48
Colouradjust..................................................................................................50
Image mode .............................................................................................................50
Colour adjust (For PC.) .............................................................................................. 51
Colour adjust (For Video) ........................................................................................... 52
Setting............................................................................................................53
Direct power on ........................................................................................................53
Standby mode ..........................................................................................................53
High land ..................................................................................................................54
Light source mode ....................................................................................................54
Cooling fast ...............................................................................................................55
Closed caption .......................................................................................................... 55
Key lock .................................................................................................................... 56
Iris ............................................................................................................................. 56
Sound ....................................................................................................................... 56
HDMI setup ...............................................................................................................57
Expand.......................................................................................................... 58
Language ..................................................................................................................58
Auto setup ................................................................................................................59
Keystone ...................................................................................................................59
Logo .........................................................................................................................64
Security .....................................................................................................................65
Power management .................................................................................................. 67
Filter counter .............................................................................................................68
Test pattern ..............................................................................................................69
Factory default ..........................................................................................................69
Network ....................................................................................................................70
MemoryViewer..............................................................................................71
Set slide .................................................................................................................... 71
Slide transition eect .................................................................................................71
Sort order .................................................................................................................72
Rotate ....................................................................................................................... 72
Best t ......................................................................................................................72
Repeat ......................................................................................................................72
Apply ........................................................................................................................72
Info................................................................................................................73
Networkcontrol.............................................................................................. 74
Network control operation ......................................................................................... 74
Enter through a web browser ....................................................................................76
Usefulfunction...............................................................................................83
Memory Viewer function ............................................................................................ 83
USB display function ................................................................................................. 86

www.infocus.com
Content
6
Maintenanceandcleaning.............................................................................88
WARNING light indicator ...........................................................................................88
Clean the lens ...........................................................................................................89
Clean casing of your projector ................................................................................... 89
Clear the lter ............................................................................................................ 89
Reset the lter counter ..............................................................................................90
Lamp replacement ....................................................................................................90
Lamp model ..............................................................................................................90
Appendix........................................................................................................93
Troubleshooting ........................................................................................................93
Menu tree .................................................................................................................96
Light indicator status ............................................................................................... 100
Compatible computer screen ..................................................................................101
Terminal conguration .............................................................................................103
Dimensions .............................................................................................................105
Technical Specications ..........................................................................................107
RS232 control mode ...............................................................................................110
Gettinghelp..................................................................................................114
Contacting InFocus .................................................................................................114
Restrictionofuse......................................................................................... 116
NetworkService........................................................................................... 117
Important Statement on Network Service ............................................................... 117
Regional&countryspecicnotices.............................................................118
Disposing of your used product In the European Union ..........................................118
RF interference (for USA only) .................................................................................118
Lamps ....................................................................................................................119
Manufacturer, EU importer and EU Authorised Representative in accordance with EU
directives ................................................................................................................120
EUDeclarationofConformity.......................................................................121
UKDeclarationofConformity......................................................................125
WARRANTY..................................................................................................129
www.infocus.com
Safety operation guideline
7
Safety operation guideline
Safety instructions
Thisdocumentandyourprojectoremploycertainsymbolstoillustratehowtouse
yourprojectorsafely.Theyaredescribedbelow:Pleasegetyourselffamiliarwiththem
beforegoingthroughthisdocument.
Caution
Ignoringmessagesindicatedbythissymbolmayleadtopersonal
injuriesordeaths.
Note
Ignoringmessagesindicatedbythissymbolmayleadtopersonal
injuriesorpropertydamage.
Highvoltageinsidewithrisksofelectricshock.
RG2
RG2.DONOTstareintothebeam.
Please read this manual carefully before installing and operating your
projector.
Yourprojectorcomeswithanumberofconvenientfeaturesandfunctions.Youmay
makethemostofthesefeaturesandkeepyourprojectoringoodworkingconditions
byusingitcorrectly.Invalidoperationofyourprojectormaynotonlyshortenitslife
cyclebutalsomayleadtoproductfailure,re,orotherincidents.
Incaseofanyoperationabnormality,refertothismanualtocheckyouroperation
andconnectionsandtrysolutionsgiveninthe“Troubleshooting”sectionatendof
thismanual.Iftheproblempersists,callyourdealerorourservicecentreswhichare
listedatthebackofthismanual.
Yourprojector’slampisaconsumableandwillgetdimmerafterlong-termuse.It’s
normalforanolderlamptobedimmerthananewerone.Pleasepoweronandoyour
projectorbystrictlyfollowingstepsgivenin“Poweronyourprojector”and“Power
oyourprojector”sectionofthismanual.Executeregularmaintenanceandcleaning
accordingtoinstructionssetforthin“Maintainingandcleaningyourprojector”section
ofthismanual.Failtodosomayshortenlifecycleofyourprojectoranditslamps
sharplyorevendamageyourprojectoranditslampsbeforelong.
www.infocus.com
Safety operation guideline
8
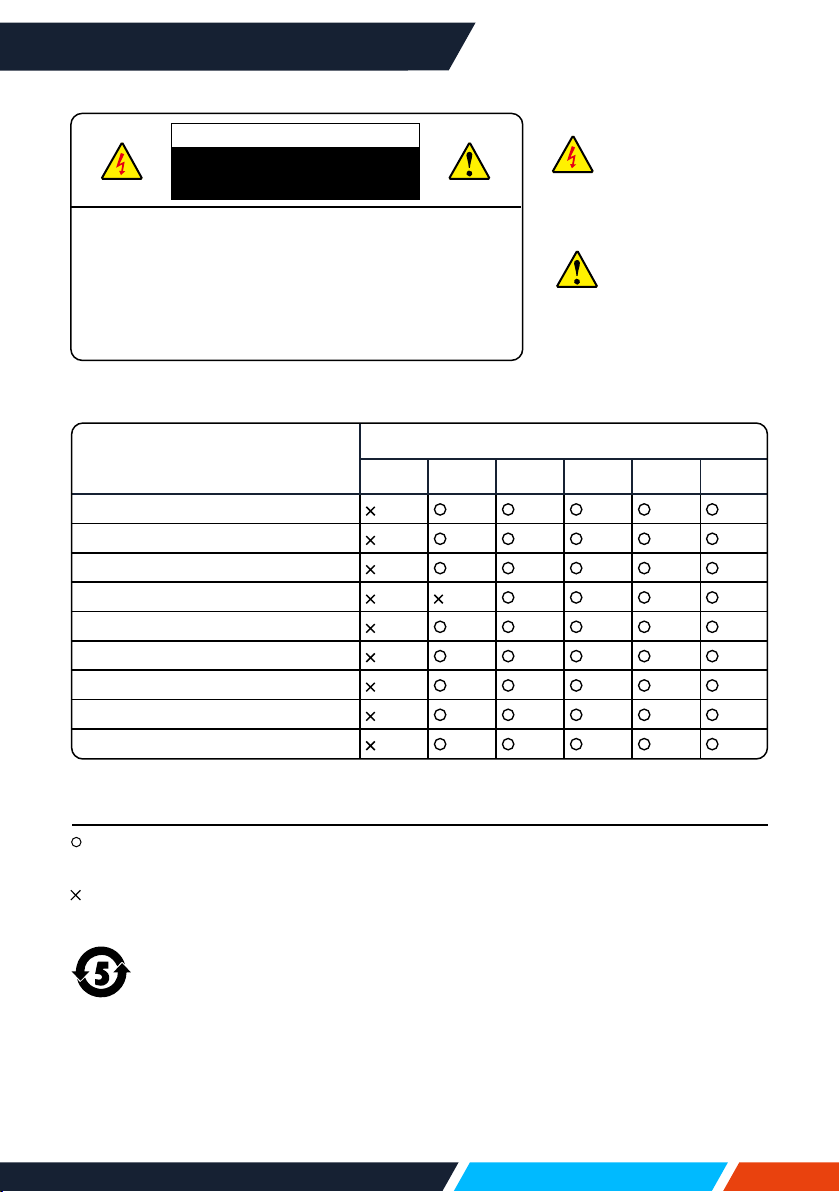
Caution
Dangerofelectricshock
DONOTopenthis.
Note:DONOTremovethecasing(orbackcover)
asthismayresultinelectricshock.Usersshallnot
executeanymaintenanceworkoncomponents
withinyourprojectorexceptreplacinglamps.Call
qualifiedmaintenancepersonnelincaseofany
maintenancerequirements.
Highvoltageinside
withrisksofelectric
shock.
Operationand
maintenance
tipsaboutthese
components.
Componentname
Harmfulsubstances
Pb Hg Cd
Cd(vi) PBB PBDE
PCB
Opticalcomponents
Projectionlens
Projectionlamp
Outercasing
Internalmechanicalparts
Speaker
Remotecontrol
Annex
Chemical Substances table
This table is made according to SJ/T 11364 specications.
Thecontentsoftoxicandhazardoussubstancesinallhomogeneousmaterialsof
thispartisbelowthelimitrequirementinGB/T26572.
Thecontentsoftoxicandhazardoussubstancesinatleastoneofthehomogeneous
materialsofthispartisabovethelimitrequirementinGB/T26572.
Thedateofproductscompatiblewiththeprojectionlampwithinthe
environmentalprotectionperiodisveyears
www.infocus.com
Safety operation guideline
9
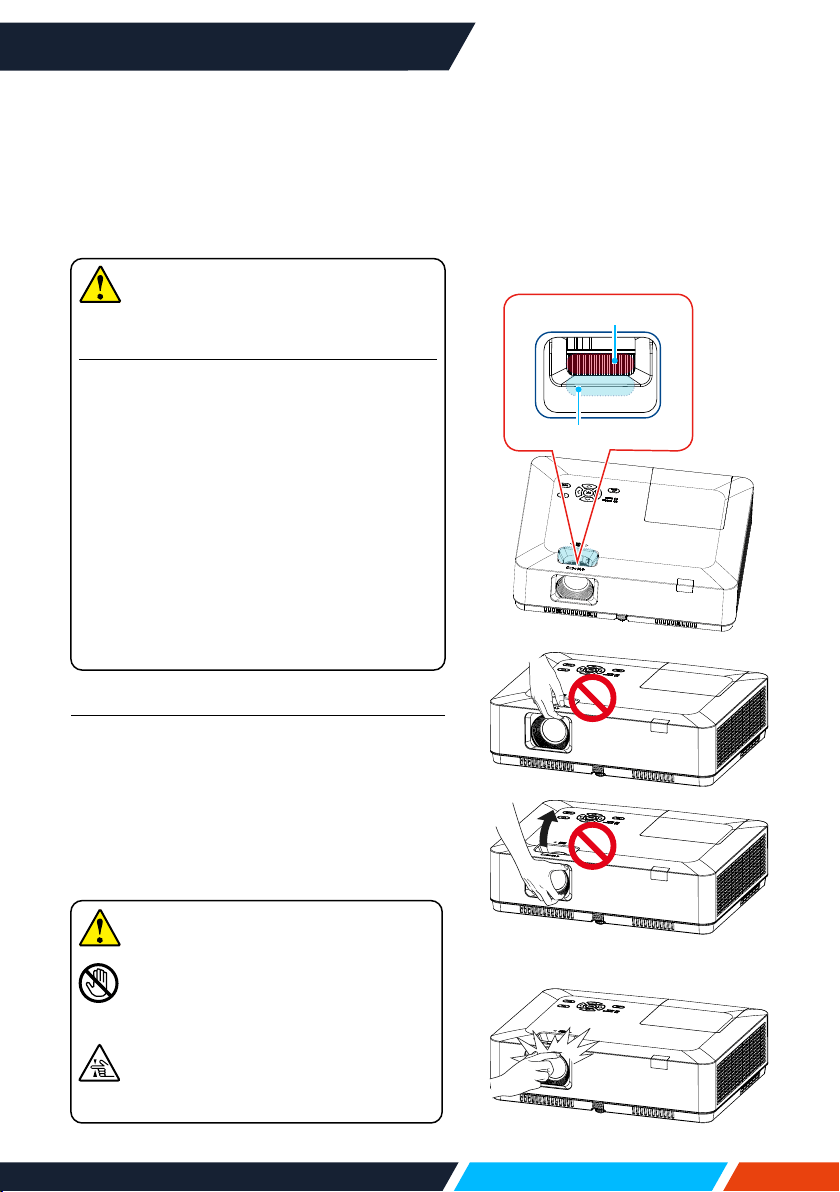
Safety precautions:
• GROUNDyourprojector.
• Thelensofyourprojectorprojectsstronglight.DONOTlookatthelightbeam
directly.Youmayhurtyoureyesight.Thisisespeciallythecasewithchildren.
• UnplugtheACpowerplugifyourprojectorwillnotbeusedforlongtime.
• DONOToverloadthesocketofpowercordasitmayleadtoreorelectricshock.
DONOTplaceobjectsontheprojectororitspowercordorplacetheprojectwhere
thepowercordmaybetrippedover.
• Disconnectthepowerplugbeforecleaningyourprojector.DONOTapplyliquidor
spraystoyourprojector.DONOTwipeyourprojectorwithwetcloth.
• Pleasefollowwarningsandinstructionsgiveninlabelsattachedtoyourprojector.
Unplugyourprojectorwhenexperiencingathunderstormweather,isunmanned,or
notinuseforlongperiodstopreventdamagecausedbylightningandpowersurges.
• DONOTuseaccessorieswithoutrecommendationbythemanufacturerasitmay
resultinpotentialrisks.
Caution
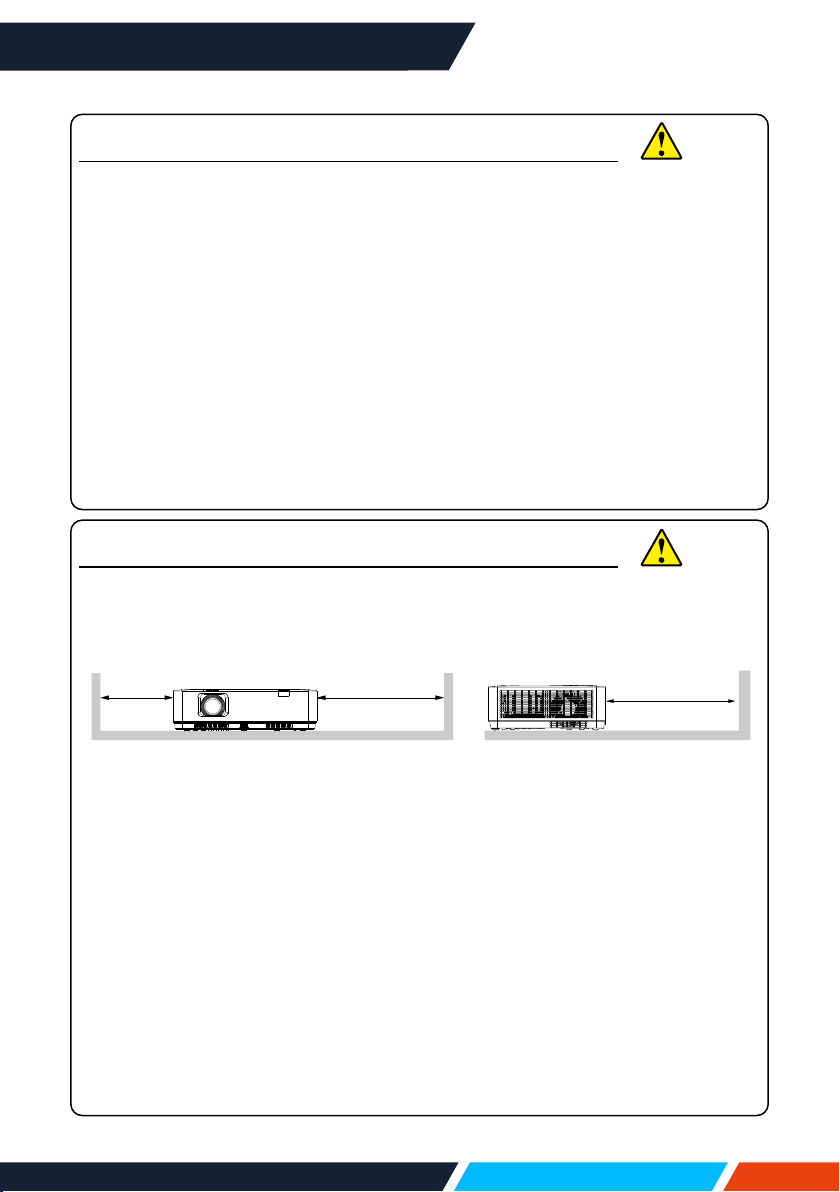
Precautions on air outlet:
• Keepadequateclearancearoundyourprojectorforitsventilationandcooling.See
gurebelowfortheleastclearancerequirements.TheleastclearanceisaMUST
whenyourprojectorisplacedwithinacabinetorotherclosedenvironment.
Sidesandbottom Rear
Greaterthan
500mm
Greaterthan
1000mm
Greaterthan
1000mm
• DONOTcovertheairoutletofyourprojector.Poorventilationnotonlyshortens
lifecycleofyourprojectorbutalsomayleadtorisks.
• Slotsandopeningsatrearandbottomofyourprojectoraredesignedfor
ventilationandtostopyourprojectorfromoverheatingandtoensureitssteady
operation.
• DONOTcovertheairoutletwithclothorotherobjects.DONOTplaceyour
projectoronthesurfaceofbed,sofa,carpets,orsimilarobjectasthismayblock
theairoutletsatitsbottom.
• DONOTplaceyourprojectorinclosedenvironment,e.g.abookcase,unlessitis
wellventilated.
• Keepanymatterfromfallingintoyourprojectorthroughtheairoutletsastheymay
touchhighvoltagepartsandleadtoreorelectricshockbyshortcircuits.DONOT
splashliquidtoyourprojector.
Caution
www.infocus.com
Safety operation guideline
10
Precautions on location of your projector:
• Placeyourprojectorinaproperlocationoritmayresultinre.
• DONOTexposeyourprojectorinrainorhighhumidityenvironmentsoritmay
resultinreorelectricshock.DONOTyourprojectornearwaterorsplashing
water.DONOTplaceanywatercontainer,e.g.owervase,atopyourprojector.
• DONOTplaceyourprojectorinenvironmentsofsoot,moistureorsmoke,e.g.
yourkitchen,oritmayleadtoproductfailureoraccidents.Yourprojectormaybe
damagedbycontactwithoilorchemicals.
• DONOTplaceyourprojectornearexhaustpipeorairconditioningequipment.
• DONOTplaceyourprojectornearradiatororheatingpipes.
• DONOTplaceyourprojectoronaunstabletruck,rack,ortable.Itmayfalland/
orleadtopersonalinjuriesandpropertydamages.Pleaseusecartorrack
recommendedbythemanufacturerorincludedwithyourproduct.Pleasefollow
stepsgivenintheinstallationguidelinesincludedwiththewallorceilingmount.
Useinstallationcomponentsapprovedbythemanufacturer.
• Becarefulwhenmovingyourprojectorwhenmountedonacart.Abruptstops,
pushingtoohardandruggedsurfacesmaytoppleyourprojectoraswellasthecart.
Caution
FOR EU USERS
ThesymbolmarkandrecyclingsystemsdescribedbelowapplytoEU
countriesanddonotapplytocountriesinotherareasoftheworld.
Yourproductisdesignedandmanufacturedwithhighqualitymaterialsand
componentswhichcanberecycledand,orreused.
Thesymbolmarkmeansthatelectricalandelectronicequipment,batteriesand
accumulators,attheirend-of-life,shouldbedisposedofseparatelyfromyour
householdwaste.
Note
Ifachemicalsymbolisprintedbeneaththesymbolmark,thischemicalsymbol
meansthatthebatteryoraccumulatorcontainsaheavymetalatacertain
concentration.
Thiswillbeindicatedasfollows:Hg:mercury,Cd:cadmium,Pb:leadInthe
EuropeanUnionthereareseparatecollectionsystemsforusedelectricaland
electronicequipment,batteriesandaccumulators.
Please,disposeofthemcorrectlyatyourlocalcommunitywastecollection,recycling
centre.
Pleasehelpustoconservetheenvironmentwelivein!
www.infocus.com
Safety operation guideline
11
Contains mercury
For
moreinformationonsafehandlingprocedures,themeasurestobetakenincase
ofaccidentalbreakageandsafedisposaloptionsvisit:ec.gc.ca/mercure-mercury/.
Disposeoforrecycleinaccordancewithapplicablelaws.
Caution
Precautions on using your projector:
• DONOTprojectthesameimageforlongtimeasresidualimagesmaybelong
periodsofdisplayed.ThiseectiscalledghostingandisinherenttoLCDdisplay
technology.
• Usepowerasindicatedintagsattachedtoyourprojector.Ifyouhavedoubtsover
availablepowertype,consultyourdealerorlocalpowercompanyrst.
• DONOTopenorremovethecasingasthismayleadtoelectricshockorother
damages.CallqualiedmaintenancepersonnelorInFocuscustomerservicecase
ofanymaintenancerequirements.
• Incaseofthefollowing,unplugthepowercordandcallqualiedmaintenance
personnelforserviceimmediately:
a. Damagedorbrokenpowercordorplug
b.Liquidsplashedinyourprojector
c. Yourprojectorexposedtorainorwater
d.Ifyourprojectorfailstoworkasexpectedbyfollowingoperationinstructions,
adjustitaccordingtogiveninstructions.Otherinvalidoperationsmaydamage
yourprojector,whichrequiresthetechniciantospendmoretimebefore
returningitbacktonormal.
e. Theprojectorfallsoritscasingisdamaged.
f. Incaseofanyabnormalchangeinyourprojectorduringitsuse,then
maintenanceserviceswouldberequired.
• Incasecomponentsreplacementisrequired,ensuretouseaInFocusauthorised
servicecentre.Useofunauthorizedpartsmayleadtore,electricshockor
personalinjury.
• Afterthecompletionofmaintenanceorrepairwork,getthemaintenancepersonnelto
runroutinesafetychecktoensureyourprojector’ssafetyoperationstatus.
Note
Information for users in the European Union
Thisisadevicetoprojectimagesontoascreen,etc.,andisnotintendedforuseas
indoorlightinginadomesticenvironment. Directive2009,125,EC.
NOTE FOR CUSTOMERS IN THE US
HgLAMP(S)INSIDETHISPRODUCTCONTAINMERCURYANDMUSTBE
RECYCLEDORDISPOSEDOFACCORDINGTOLOCALSTATEORFEDERALLAWS.
www.infocus.com
Safety operation guideline
12
Airintake
Air ventilation
Openingsinthecasingaredesignedfor
ventilationandoverheatingprevention.
DONOTblockorcovertheseopeningsto
keepyourprojectorinnormaloperation
andfromoverheating.
Note
Heat exhaust at the air outlet.
Keep the following in mind when
using or installing your projector:
– DONOTplaceammablematerials
orsprayersnearyourprojector.
– Keeptheairoutletonemeteraway
fromotherobjects.
– DONOTtouchtheareacloseto
theairoutletespeciallythemetal
components,e.g.screws.Thisarea
andpartswillgetveryhotonceyour
projectorstartsoperating.
– DONOTplaceanyobjectontop
yourprojector.Theymaynotonlybe
damagedbutalsoleadtoreafter
beingoverheated.
Coolingfansaredesignedforcooling
yourprojector.Fanspeedisauto
adjustedsubjecttointernaltemperature
ofyourprojector.
Airoutlet(Forheatexhaust)
Place your projector correctly
Useyourprojectoratspeciedlocation
incorrectway.Invalidprojectorlocation
mayshortenlife-cycleoflampsoreven
leadtosevereincidentsorre.
Note
Precautions on ceiling mount
installation:
• Getqualiedtechniciantoinstallthe
ceilingmountracket.
• Warrantyofyourprojectordoesnot
coverhazardsanddamagecaused
byusingorincorrectlyinstalled
ceilingmount.
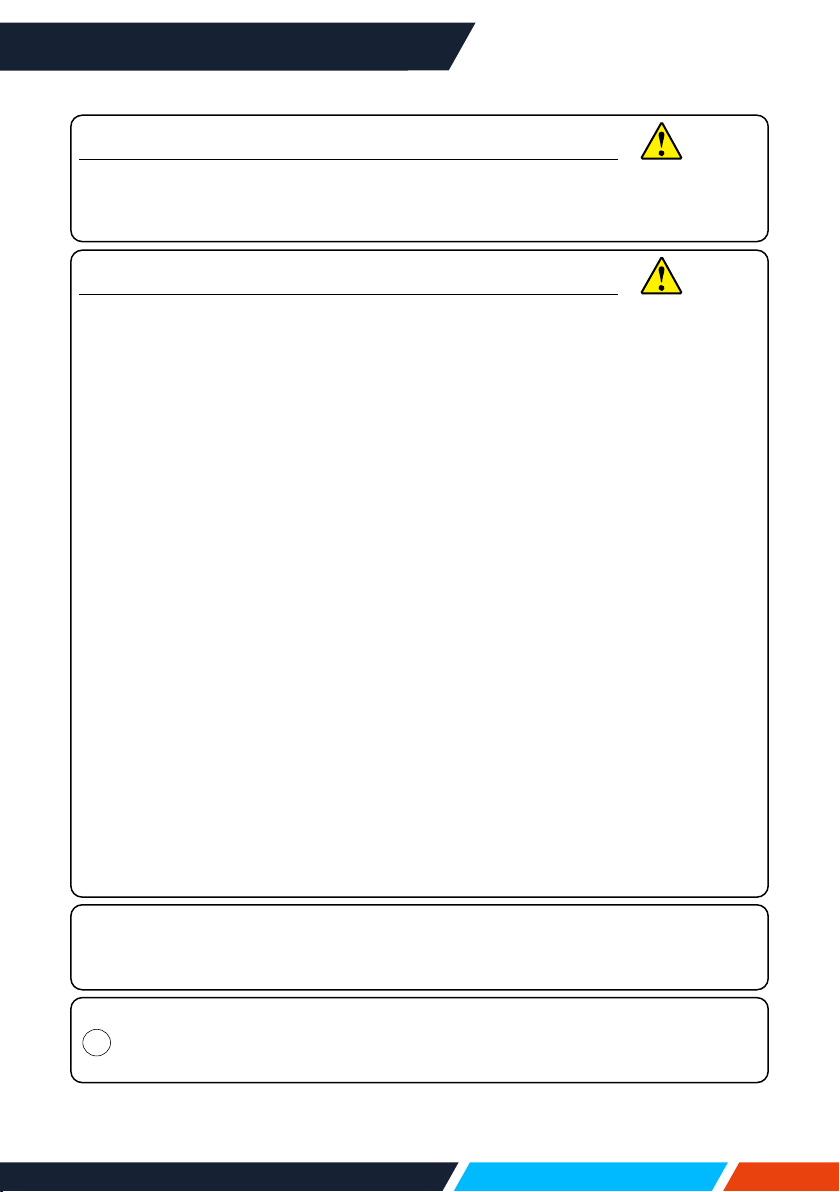
DONOTtiltyourprojector
morethan10degrees.
DONOTtiltyourprojector
morethan10degrees.
DONOTputtheprojector
onaverticalprojection.
DONOTputtheprojector
upsidedowntomakea
projection.
DONOTputtheprojector
oneithersidetoprojectan
image.
Note
Avoid installing your projector as
illustrated below:
www.infocus.com
Safety operation guideline
13
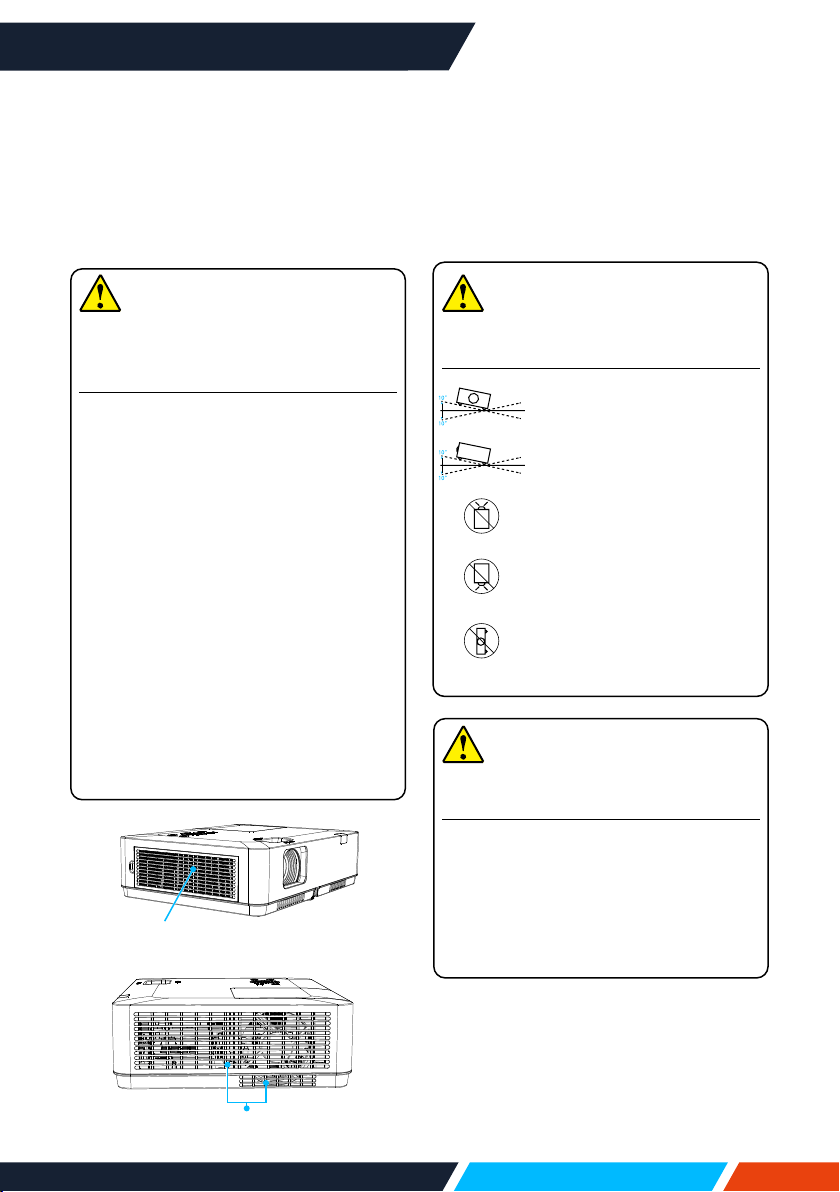
Moving your projector
Whenmovingyourprojectorcloseits
adjustmentlegsastheymaydamagethelens
andcasing.Keepyourprojectorinsuitablebox
whenitisnottobeusedforalongtime.
Note
Precautions on moving or shipping
your projector:
• DONOTdropyourprojectorasitmayget
damagedorfailedinoperation.
• Focus.
• Prohibitexpressorothershippingservice
providerpersonnelfromshippingyour
projectorwithimproperboxes.Your
projectormaybecomedamaged.Please
consultyourdealersforshippingyour
projectorbyexpressorothershipping
serviceproviders.
• Placeyourprojectorinboxonlyafterit
hasfullycooleddown.
Precautions on dealing with your projector:
DONO
Tliftormoveyourprojectorbyholding
thelens,zoomorfocusringasitmaydamage
thelensandyourprojector.
Becarefulwhenhandlingyourprojector.DO
NOTdropit,subjectittoexternalforces,or
placeobjec
tsatopit.
DONOTholdthelensorarea
aroundit.
Zoom
Focus
Theprojectionlensismanually
adjustedfromthetopoftheprojector.
Precautionsonusingyourprojector:
• DONOTtouchthelenswhenitis
workingasyourngersmaygethurt.
• DONOTletchildrentouchthelens.
Note

www.infocus.com
Compliance
14
FCC
Note
ThisequipmenthasbeentestedandfoundtocomplywiththelimitsforaClass
Bdigitaldevice,pursuanttoPart15oftheFCCRules.Theselimitsaredesigned
toprovidereasonableprotectionagainstharmfulinterferenceinaresidential
installation.Thisequipmentgenerates,uses,andcanradiateradiofrequency
energy,andifnotinstalledandusedinaccordancewiththeinstructions,maycause
harmfulinterferencetoradiocommunications.However,thereisnoguaranteethat
interferencewillnotoccurinaparticularinstallation.Ifthisequipmentdoescause
harmfulinterferencetoradioortelevisionreception,whichcanbedetermined
byturningtheequipmentoandon,theuserisencouragedtotrytocorrectthe
interferencebyoneormoreofthefollowingmeasures:
– Reorientorrelocatethereceivingantenna.
– Increasetheseparationbetweentheequipmentandreceiver.
– Connecttheequipmentintoanoutletonacircuitdierentfromthattowhichthe
receiverisconnected.
– Consultthedealeroranexperiencedradio,TVtechnicianforhelp.
UseofshieldedcableisrequiredtocomplywithclassBlimitsinSubpartBofPart
15ofFCCRules.
Donotmakeanychangesormodicationstotheequipmentunlessotherwise
speciedintheinstructions.Ifsuchchangesormodicationsshouldbemade,you
couldberequiredtostopoperationoftheequipment.
Compliance
www.infocus.com
Accessory
15
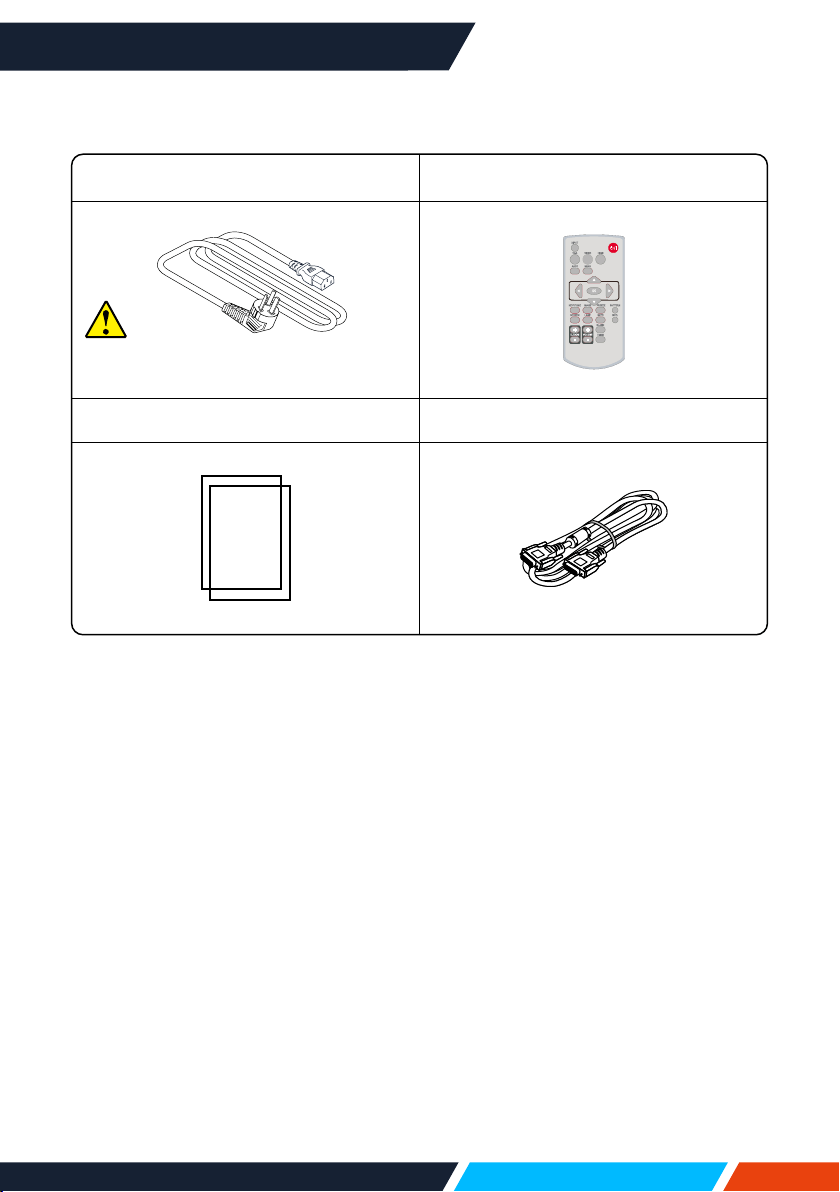
Accessory
Includedaccessoriesareasfollows:
ACpowercord Remotecontrolwithoutbatteries
Quickstartguide VGAcable
Note
AregionalspecicACpowercord
isprovidedwithyourprojector.

www.infocus.com
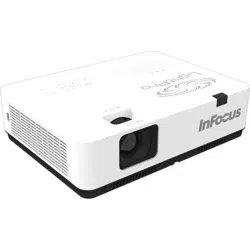
Name and function of your projector
16
Zoomring
Focusring
Keypadcontrolpanel
Filter
IRreceiver(front)
Projectionlens
Speaker
Anti-theftlockslot
ACPowerCordport
IRreceiver(back)
Kensingtonsecurityslot
1
2
3
4
5
6
7
8
9
10
11
Note
Do not place your hands or
other objects near the vent:
• Ventwillshedheat.Donot
putyourhandsorface,or
thermolabileobjectsplaced
neartheoutlet.Youneedkeep
atleastadistanceof3'(1m)
away,oritmaycauseitburning
ordamage.
Note
• Kensingtonsecurityslotisfora
Kensingtonlockusedtodeter
theftoftheprojector.
• Kensingtonisaregistered
trademarkofACCOBrands
Corporation.
Name and function of your projector
Adjustablefrontfoot
12
Rear
11
10
9
8
7
Bottom
12
Front/Top
1
3
56
2
4
www.infocus.com
Name and function of your projector
17
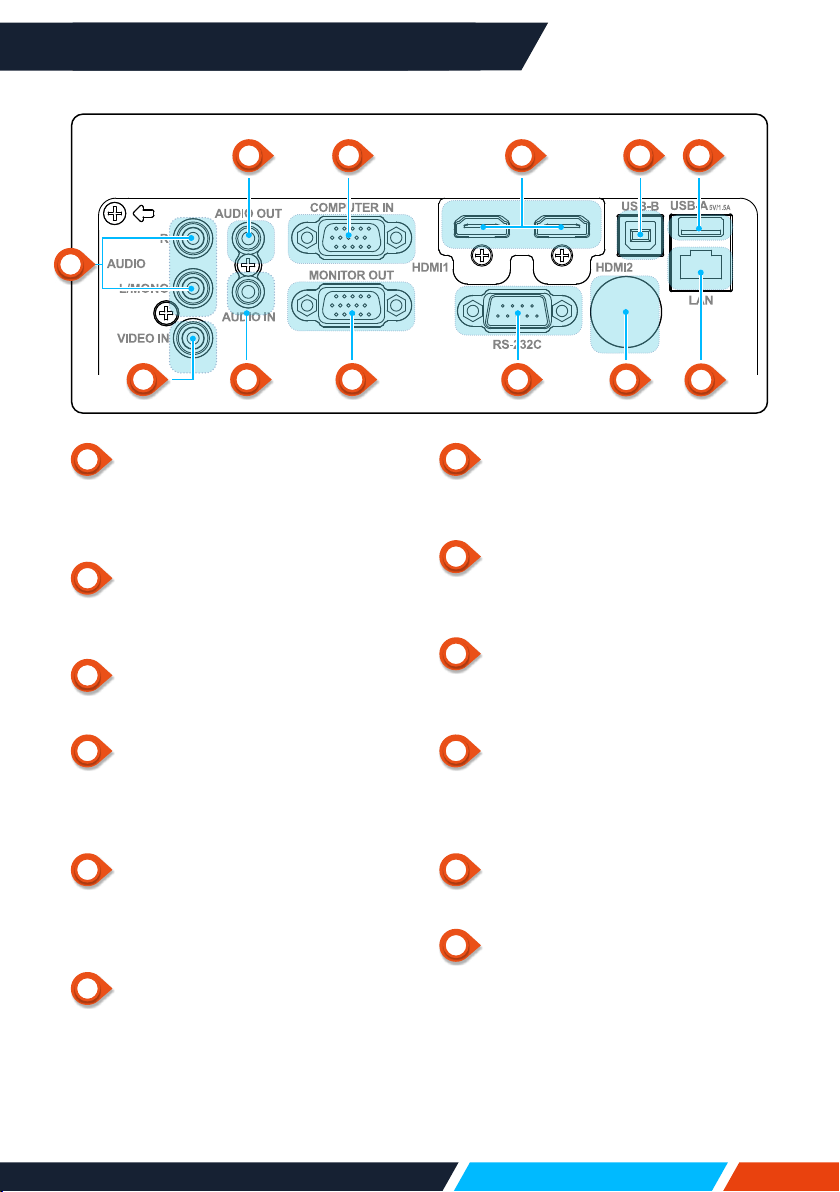
1
Mono(L/R)terminal
AMonoaudiosignal(Asingleaudio
terminal)shouldbeconnectedtothe
AUDIO(R/L)interface.
2
AUDIOOUTterminal
Connectexternalaudiodevicestothis
terminal.
3
COMPUTERIN
ConnectRGBtothisterminal.
4
HDMI1,HDMI2connector
ConnectHDMI1digitaloutputsignals
orHDMI2digitaloutputsignalstothese
terminals.
5
USB-Bconnector
Whenusingthe"USBdisplay"function,
connectyourcomputertothisterminal
viatheUSBcable.
6
USB-Aconnector
WhenusingtheMemoryViewerfunction,
inserttheUSBstickorHDDdirectlyto
thisterminal.
Terminals
7
VIDEOINterminal
Connectvideooutputsignaltothis
terminal.
8
AUDIOINterminal
ConnectaudiosignalofthePCtothis
terminal.
9
MONITOROUTterminal
Formonitoroutput,outputthesignal
fromtoothermonitors.
10
RS-232C
WhenusingtheRS232functionalto
operatetheprojector,connecttheserial
communicationtothisterminal.
11
IR(rear)
ReceivestheremotecontrolIRsignal.
12
LANterminal
ConnectaRJ45cabletothisterminal
whenusingnetworkcontroltooperate
yourprojector.
• ForIN1029,IN1039,IN1049,IN1059,IN1024,
IN1034,IN1044,IN1026,IN1036,IN1046
32
1
10987
11
12
54 6
www.infocus.com
Name and function of your projector
18
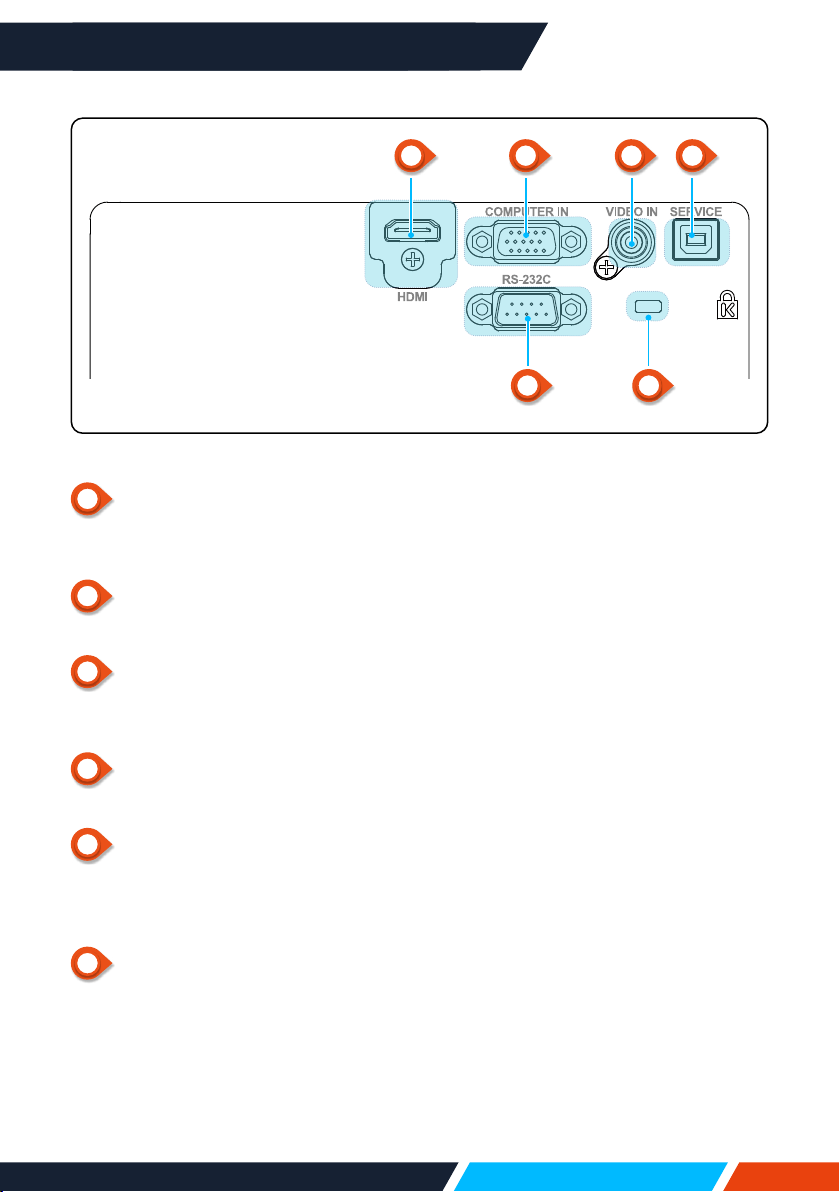
1
HDMIconnector
ConnectHDMIdigitaloutputsignalsto
thisterminal.
2
COMPUTERIN
ConnectRGBtothisterminal.
3
VIDEOINterminal
Connectvideooutputsignaltothis
terminal.
4
SERVICEterminal
Upgradefeaturesonly.
5
Kensingtonsecurityslot
Whenusingthe"Kensingtonsecurity
slot"function,itwillhelpuserstodeter
theftoftheprojector.
6
RS-232C
WhenusingtheRS232functionalto
operatetheprojector,connecttheserial
communicationtothisterminal.
• ForIN1004,IN1014
Terminals
1 2
6 5
3 4
www.infocus.com
Name and function of your projector
19
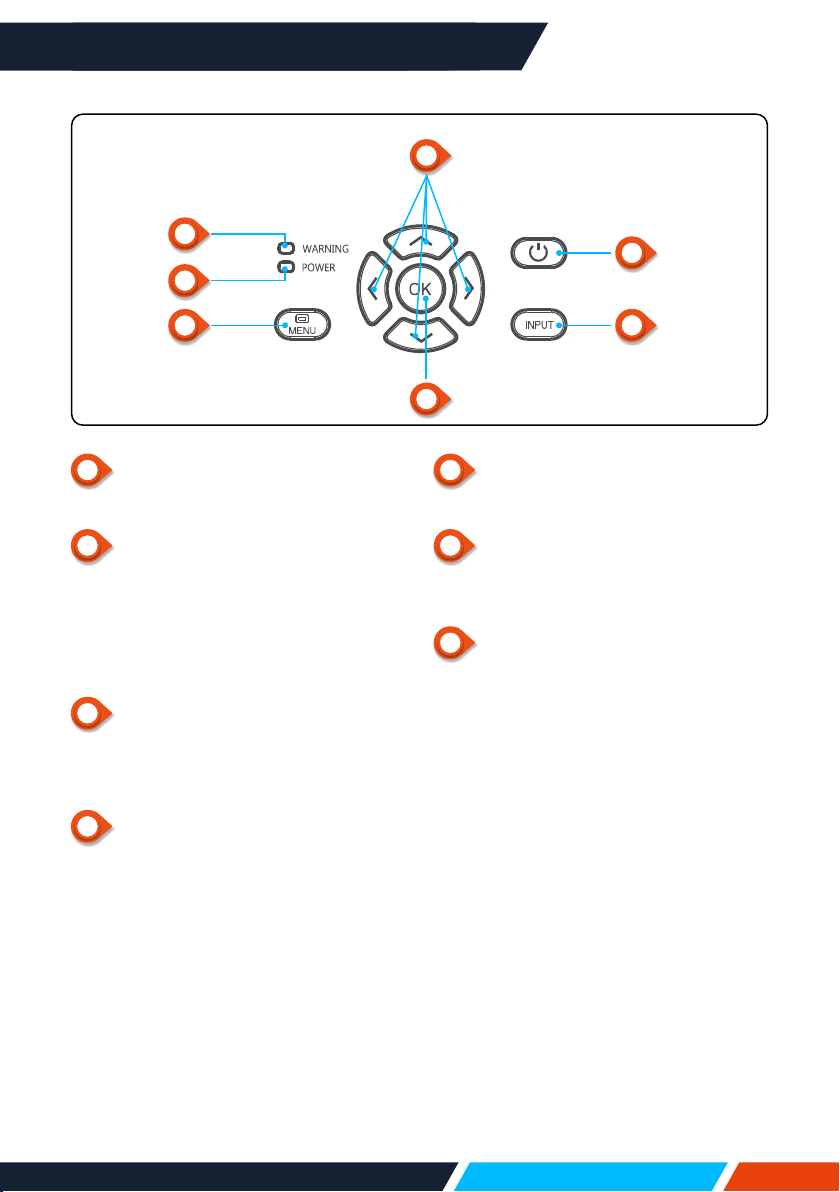
1
POWER
Turnonorotheprojector.
2
Arrow
/UP/DOWN/VOL-/VOL+/
– Selectitemsoradjustthedatainthe
OSDmenu.
– Shifttheimageinthe"Digitalzoom
+/-"mode.
– Adjustthevolume.
3
WARNINGindicator
– Theindicatorisashingred,whenthe
internaltemperatureoftheprojector
exceedstheoperatingrange.
4
POWERindicator
– Thepowerindicatorturnssteadyred,
whentheprojectorisinstandbymode.
– Thepowerindicatorturnssteady
green,duringnormalprojector
operation.
– Thepowerindicatorisashing
green,whentheprojectorisinpower
managementmode.
– Thepowerindicatorisashingred,
whentheprojectorisincoolingmode.
– Thepowerindicatorturnssteady
greenyellow,whentheprojectorpower
isabnormal.
Keypad controls
and indicator lights
5
MENU
OpenorclosetheOSDmenu.
6
OK
– EntertheOSDmenu.
– SelectoptionsintheOSDmenu.
7
INPUT
OpenorclosetheINPUTmenu.
1
3
4
5
7
2
6
www.infocus.com
Name and function of your projector
20
Remote
control
1
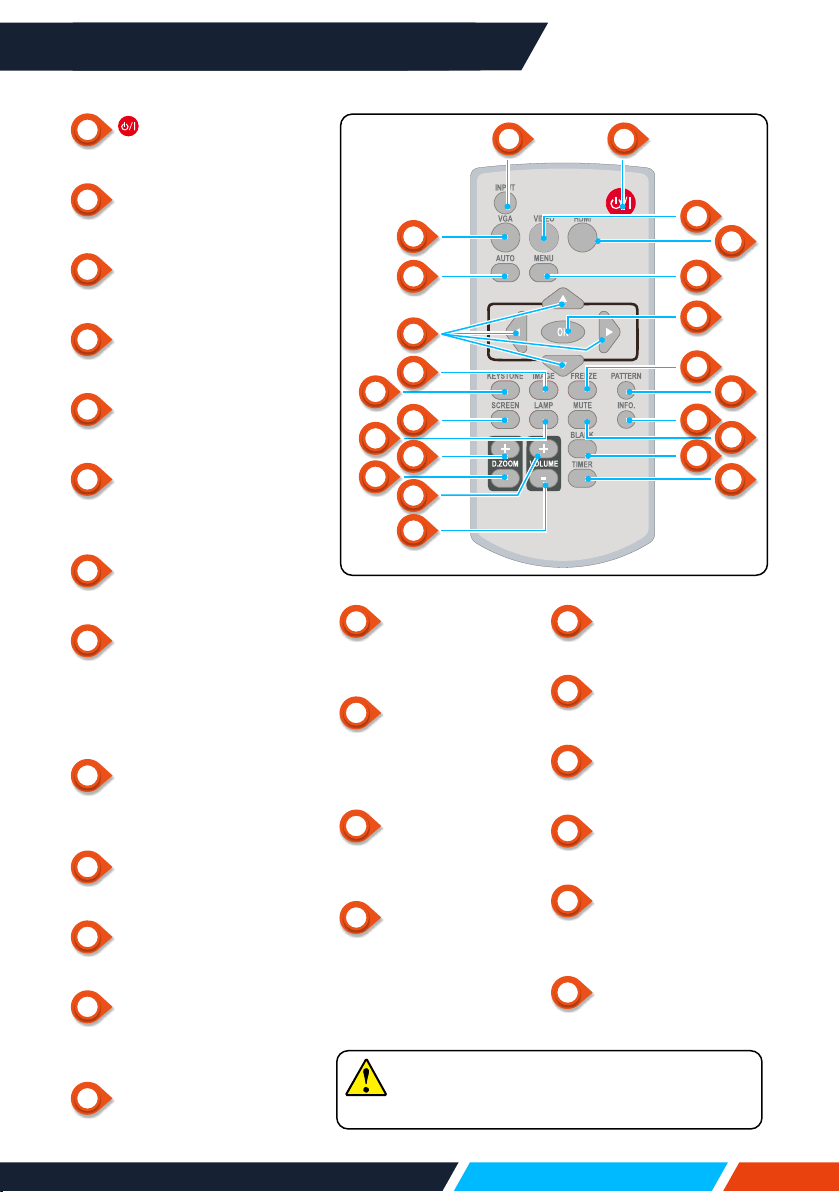
POWER
Poweronoroyourprojector.
2
INPUT
OpenorclosetheINPUTmenu.
3
VGA
SelectVGAinputsource.
4
AUTO
Enterautoadjustmentmode.
5
VIDEO
SelectVIDEOinputsource.
6
HDMI
SelectHDMI1,HDMI2input
source.
7
MENU
OpenorclosetheOSDmenu.
8
Arrow
– Selectitemsoradjustdata
intheOSDmenu.
– Selectdisplayareain
digitalzoom+/-mode.
9
OK
EntertheOSDmenuorselect
optionsinit.
10
IMAGE
Selectimagemode.
11
KEYSTONE
Keystonecalibration.
12
SCREEN
Enterthescreensize
adjustmentmenu.
13
LAMP
Selectlampmode.
14
FREEZE
Freezeprojected
images.
15
PATTERN
Selectbuilt-intest
patternofyour
projector.
16
INFO
Displaycurrentstatus
infoofyourprojector.
17
MUTE
Turnothesound
Temporarily.
18
D.ZOOM+
Zoominprojectedimage.
19
D.ZOOM-
Zoomoutprojectedimage.
20
VOLUME+
Increasevolume.
21
VOLUME-
Decreasevolume.
22
BLANK
Makethescreenblank
temporarily.
23
TIMER
Enablethetimerfunction.
PATTERNbuttonontheremotecontrol
isinvalidwhenyouchooseUSBdisplay,
memoryviewerornetworkasinputsignal.
12
3
5
7
9
14
16
22
6
15
17
23
4
8
10
10
18
20
21
11
13
19
www.infocus.com
Name and function of your projector
21
Please follow the following rules for safety operation:
• UsetwoofAAAbatteriesofthesamebrand.
• Replacebothbatteriesatthesametime.
• Donotmixnewandoldbatteriesasonepair.
• Keepyourremotecontrolawayfromwaterorotherliquids.
• Donotexposeyourremotecontroltoenvironmentswithhighhumidityor
temperature.
• Donotdropyourremotecontrol.
• Incaseofanybatterysolutionleakinginthecompartment,clearitthoroughly
beforeplacingnewbatteriesinit.
• Usingbatteryofothertypesthanwhatspeciedonthismanualmayleadtorisks
ofexplosion.
• Pleasedisposeyouroldbatterybyfollowinginstructionsgivenintagofthebattery
orlocalregulations.
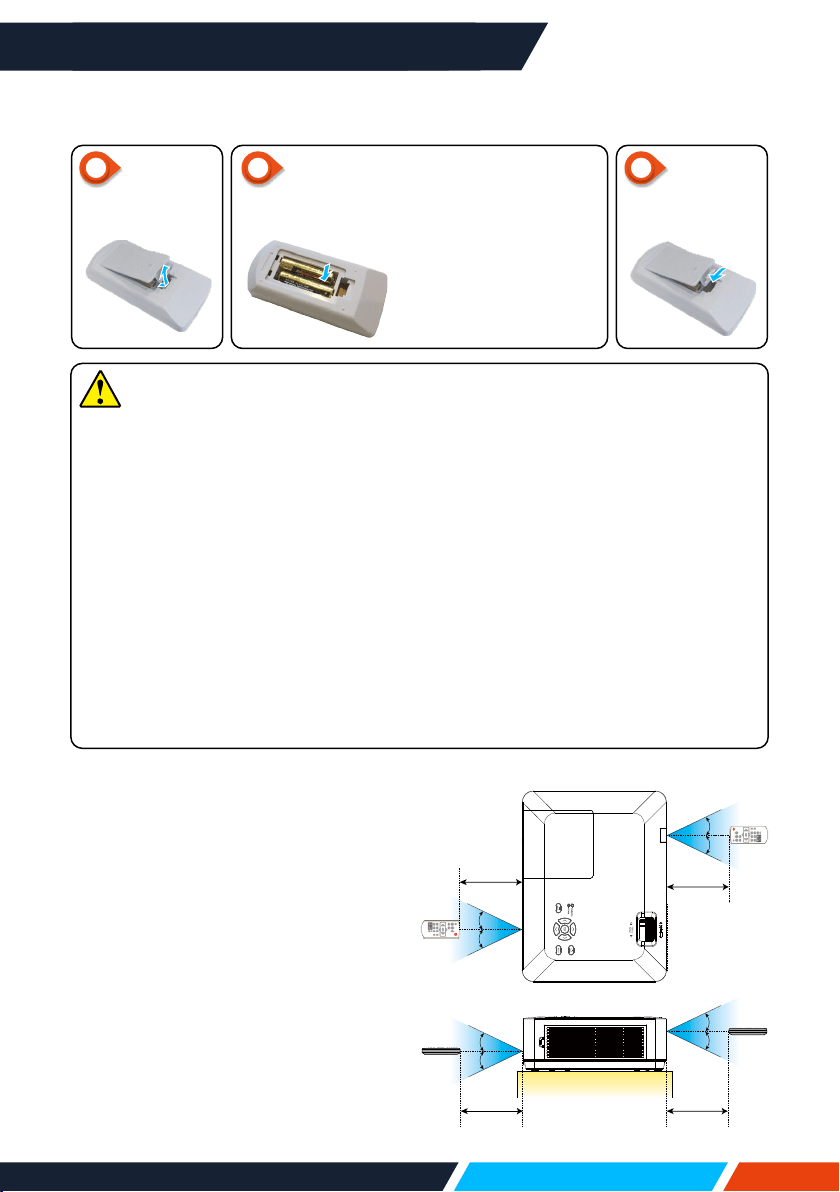
Installing batteries in the remote control
Remote control operation range
PointyourremotecontroltotheIR
receiverofyourprojector.
Maximumoperationrangeofyour
remotecontrolis+/-30°andwitha
ofradius6metersor+/-8metersin
straightline.
30°
30°
30°
30°
8M
8M
30°
30°
8M8M
30°
30°
TwoAAAbatteries
Placebatterieswithits
anodeandcathode(+
and-)incorrectdirec
-
tion.Keepbothpoles
ingoodconnectionto
thecontactswithinthe
compartment.
Insert
newAAA
batteries.
Openthe
battery
cover.
Putthe
cover
back.
1 2 3
www.infocus.com
Installation
22
Installation
Set up your projector
Ambientbrightnessmayaectyourprojectionimagequality.Fortheoptimalimage,it
isrecommendedtocontrolthebrightnessinyourenvironment.
Valuesshowningurebelowareapproximatesonly.Theymaydierfromtheactual
ones.
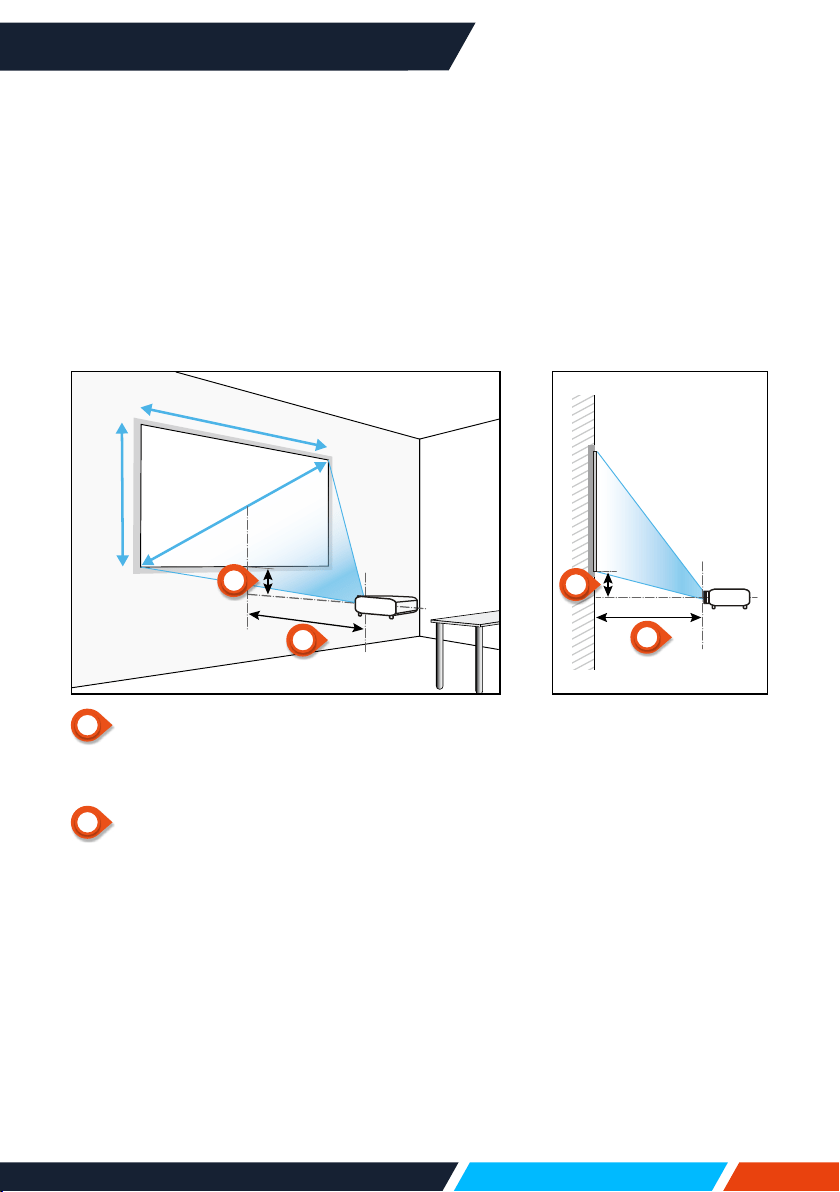
Thefurthertheprojectorisawayfromthescreen,thelargertheprojectionsizewillbe.
Usethefollowingtabletoinstalltheprojectorinthebestpositionfromthescreen.The
valuesprovidedareforreferenceonly.
1
Projectiondistance
Thevalueindicatesthedistancefromthe
screentothefrontedgeoftheprojector.
2
Lensoset
Thevalueindicatesthedistancefromthe
opticalaxisoftheprojectionlenstothelower
edgeoftheprojectedarea.
*Theresultsarethevaluescalculatedbу
standarddesignedspecications,however,
theydon'tprovideanyguarantees.
Heigh
Screensize
Width
1
1
2
2
www.infocus.com
Installation
23
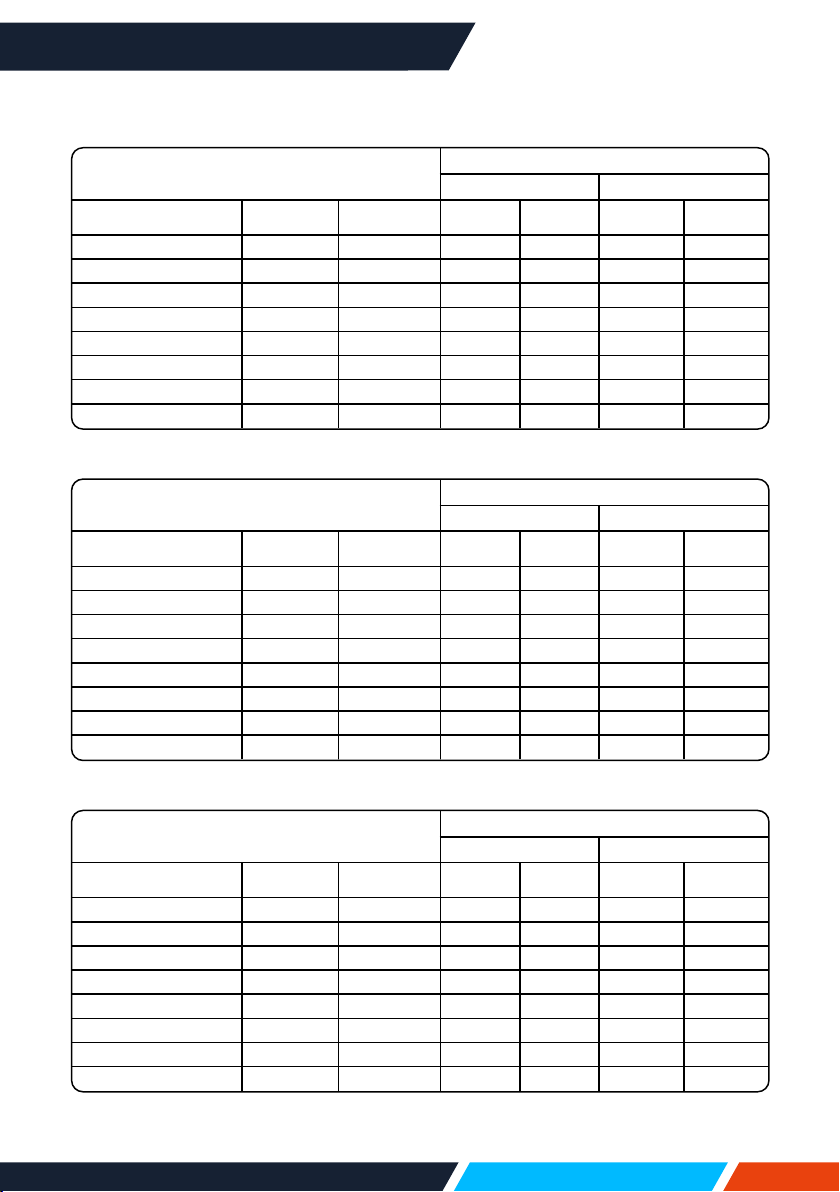
IN1004, IN1014
Screensize
Projectiondistance
Standard4:3 Compatible16:9
Screensize(inch) Width(m) Height(m) Wide Tele Wide Tele
30” 0.610 0.457 0.887 1.069 0.968 1.167
60” 1.219 0.914 1.797 2.161 1.960 2.356
80” 1.626 1.219 2.404 2.889 2.621 3.149
100” 2.032 1.524 3.010 3.617 3.282 3.943
150” 3.048 2.286 4.527 5.438 4.934 5.926
200” 4.064 3.048 6.044 7.258 6.587 7.909
250” 5.080 3.810 7.559 9.078 8.239 9.892
300” 6.096 4.572 9.077 10.899 9.892 11.874
IN1024, IN1034, IN1044
Screensize
Projectiondistance
Standard4:3 Compatible16:9
Screensize(inch) Width(m) Height(m) Wide Tele Wide Tele
30” 0.610 0.457 0.812 1.347 0.885 1.467
60” 1.219 0.914 1.630 2.702 1.776 2.944
80” 1.626 1.219 2.178 3.610 2.373 3.933
100” 2.032 1.524 2.728 4.523 2.972 4.927
150” 3.048 2.286 4.114 6.820 4.482 7.430
200” 4.064 3.048 5.514 9.141 6.008 9.959
250” 5.080 3.810 6.929 11.486 7.549 12.513
300” 6.096 4.572 8.358 13.855 9.106 15.094
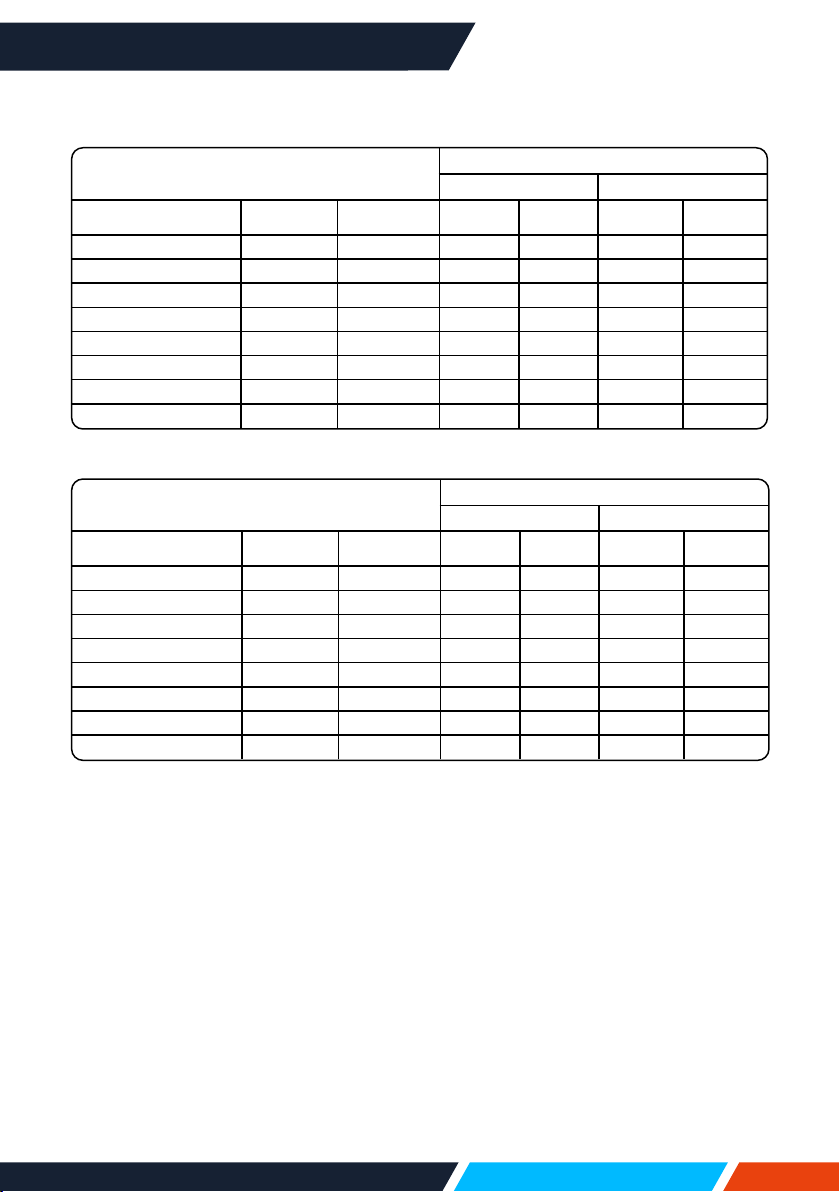
IN1026
Screensize
Projectiondistance
Standard16:10 Compatible16:9
Screensize(inch) Width(m) Height(m) Wide Tele Wide Tele
30” 0.646 0.404 0.942 1.137 0.969 1.169
60” 1.292 0.808 1.910 2.299 1.963 2.363
80” 1.723 1.077 2.554 3.073 2.626 3.159
100” 2.154 1.346 3.199 3.848 3.289 3.956
150” 3.231 2.019 4.811 5.785 4.946 5.946
200” 4.308 2.692 6.423 7.721 6.602 7.937
250” 5.385 3.365 8.035 9.658 8.259 9.927
300” 6.462 4.039 9.647 11.595 9.916 11.917
www.infocus.com
Installation
24
IN1046, IN1039, IN1059
Screensize
Projectiondistance
Standard16:10 Compatible16:9
Screensize(inch) Width(m) Height(m) Wide Tele Wide Tele
30” 0.646 0.404 0.812 1.347 0.835 1.384
60” 1.292 0.808 1.630 2.702 1.675 2.777
80” 1.723 1.077 2.178 3.610 2.239 3.711
100” 2.154 1.346 2.728 4.523 2.804 4.648
150” 3.231 2.019 4.114 6.820 4.228 7.009
200” 4.308 2.692 5.520 9.150 5.673 9.405
250” 5.385 3.365 6.936 11.498 7.129 11.817
300” 6.462 4.039 8.367 13.869 8.599 14.255
IN1036, IN1029, IN1049
Screensize
Projectiondistance
Standard16:10 Compatible16:9
Screensize(inch) Width(m) Height(m) Wide Tele Wide Tele
30” 0.646 0.404 0.872 1.053 0.896 1.082
60” 1.292 0.808 1.769 2.129 1.818 2.188
80” 1.723 1.077 2.365 2.845 2.431 2.924
100” 2.154 1.346 2.962 3.563 3.044 3.662
150” 3.231 2.019 4.455 5.356 4.578 5.505
200” 4.308 2.692 5.947 7.149 6.113 7.348
250” 5.385 3.365 7.440 8.943 7.647 9.191
300” 6.462 4.039 8.932 10.736 9.181 11.035
www.infocus.com
Installation
25
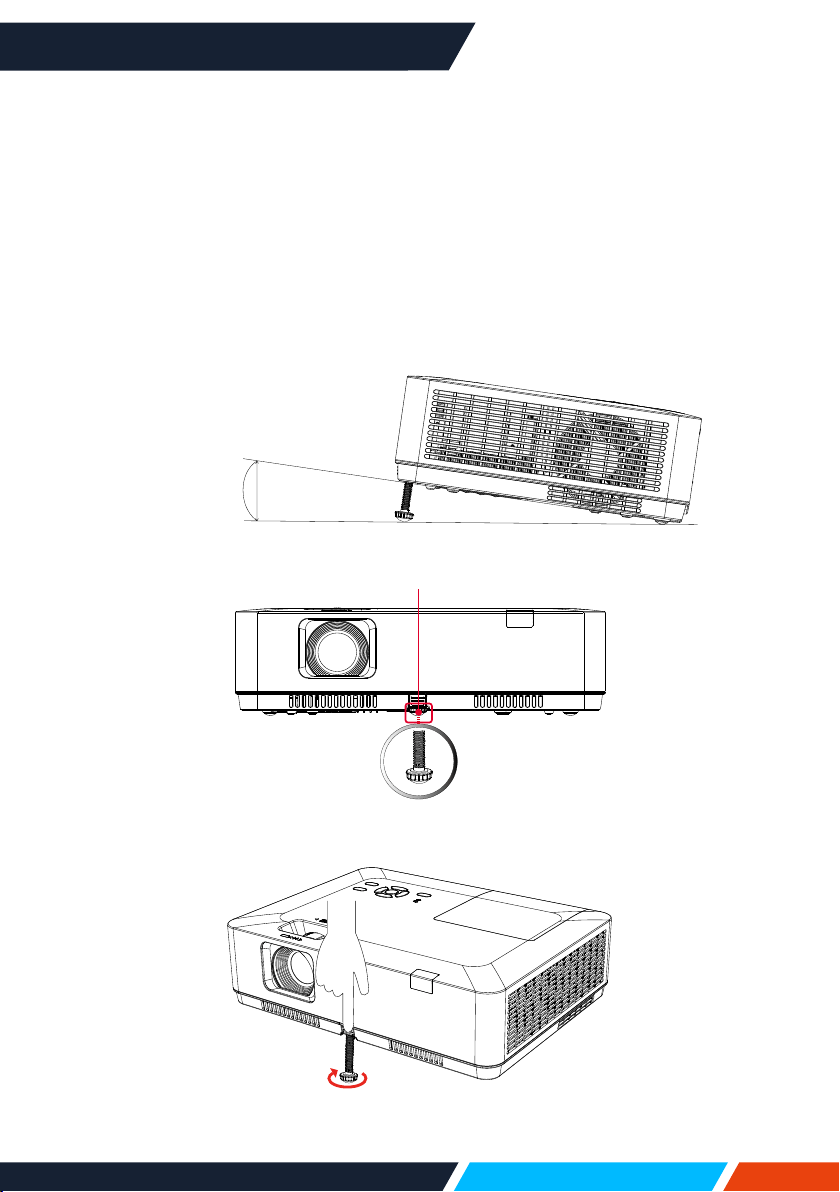
Adjust the projected image
Adjustthepositionoftheprojectedimage:
1. Placetheprojectorsothatitisperpendiculartothescreen,Image(1).
2. Raisethefrontoftheprojectorandpressthefootlockontheprojector.
Loosenthefootlockcanlocktheadjustablefoot.Rotatetheadjustablefootto
adjusttheheight.
RotatingtheadjustablefootinthedirectionshownintheImage(2)toextendit,and
rotatingintheoppositedirectionretractsit,thusadjustingtheverticalprojection
angle.
Image(2)
MaxAngle
(10°)
Maxlength
41mm
Image(1)
Adjustablefeetlock
www.infocus.com
Installation
26
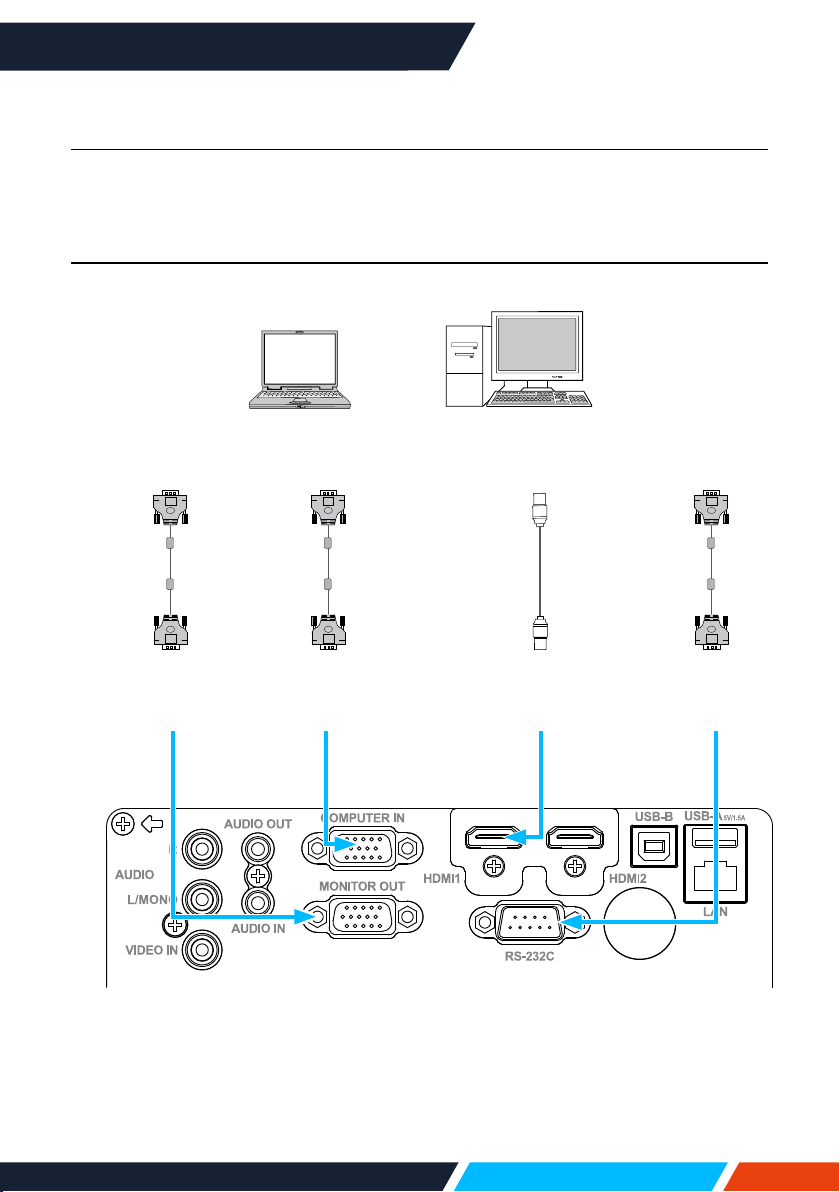
Connect to PC (digital and analogue RGB)
Cablesforconnection:
VGA
SignalOutput
VGA
SignalInput
HDMIDigital
SignalInput
HDMIdigital
SignalOutput
Serialcable
(Crosstype)
RS232
Input
RS232
Output
VGA
SignalInput
VGA
SignalOutput
• ForIN1029,IN1039,IN1049,IN1059,IN1024,IN1034,IN1044,IN1026,
IN1036,IN1046
• VGAcable
• HDMIcable*
• Crossoverserialcable*
*Thiscableisnotincludedwiththeprojector
www.infocus.com
Installation
27
VIDEO
InputSignal
VIDEO
OutputSignal
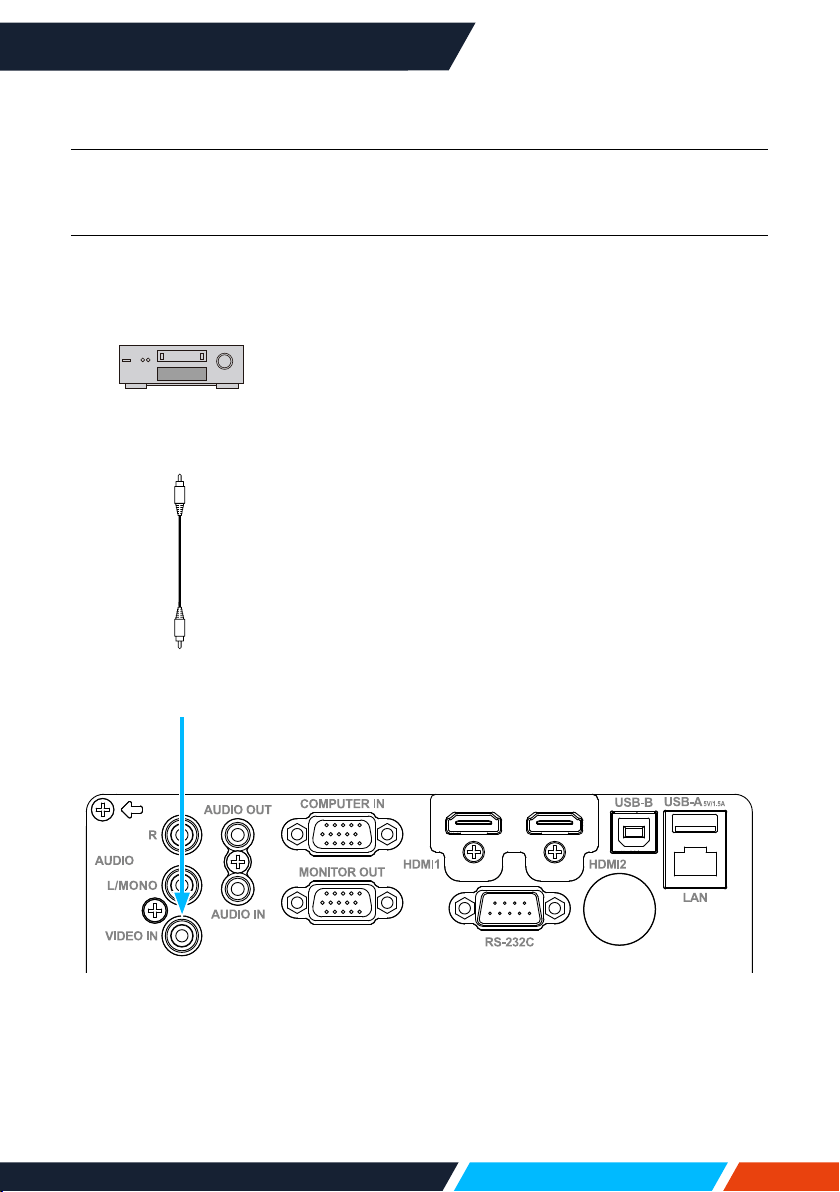
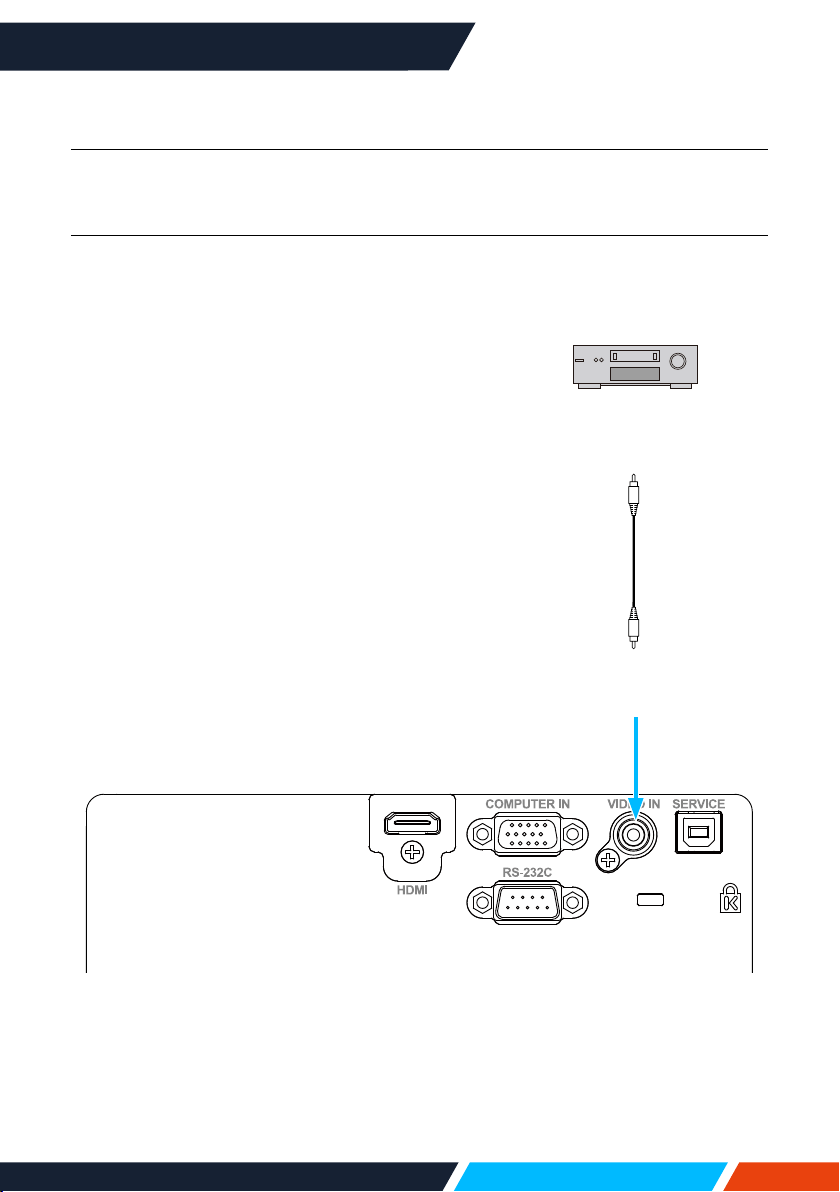
Connect to video equipment
• ForIN1029,IN1039,IN1049,IN1059,IN1024,IN1034,IN1044,IN1026,
IN1036,IN1046
Cablesforconnection:
• VIDEOcable*
*Thiscableisnotincluded
www.infocus.com
Installation
28
Connect to audio equipment
Externalaudiodevices
Audiocable
(Stereo)
AudioIN
Audiooutput
Audiocable
(Stereo)
Audiooutput
Audioinput
(R)
(R)
(L)
(L)
Audio
cable
Note
Theleftandright
channelsare
combinedwhen
onlytheL(Mono)
isinserted.
• ForIN1029,IN1039,IN1049,IN1059,IN1024,IN1034,IN1044,IN1026,
IN1036,IN1046
Cablesforconnection:
• Audiocable*
*Thiscableisnotincluded
Audiooutput
AudioIN
(R) (L)
AudioIN
Audiooutput
(R) (L)
www.infocus.com
Installation
29
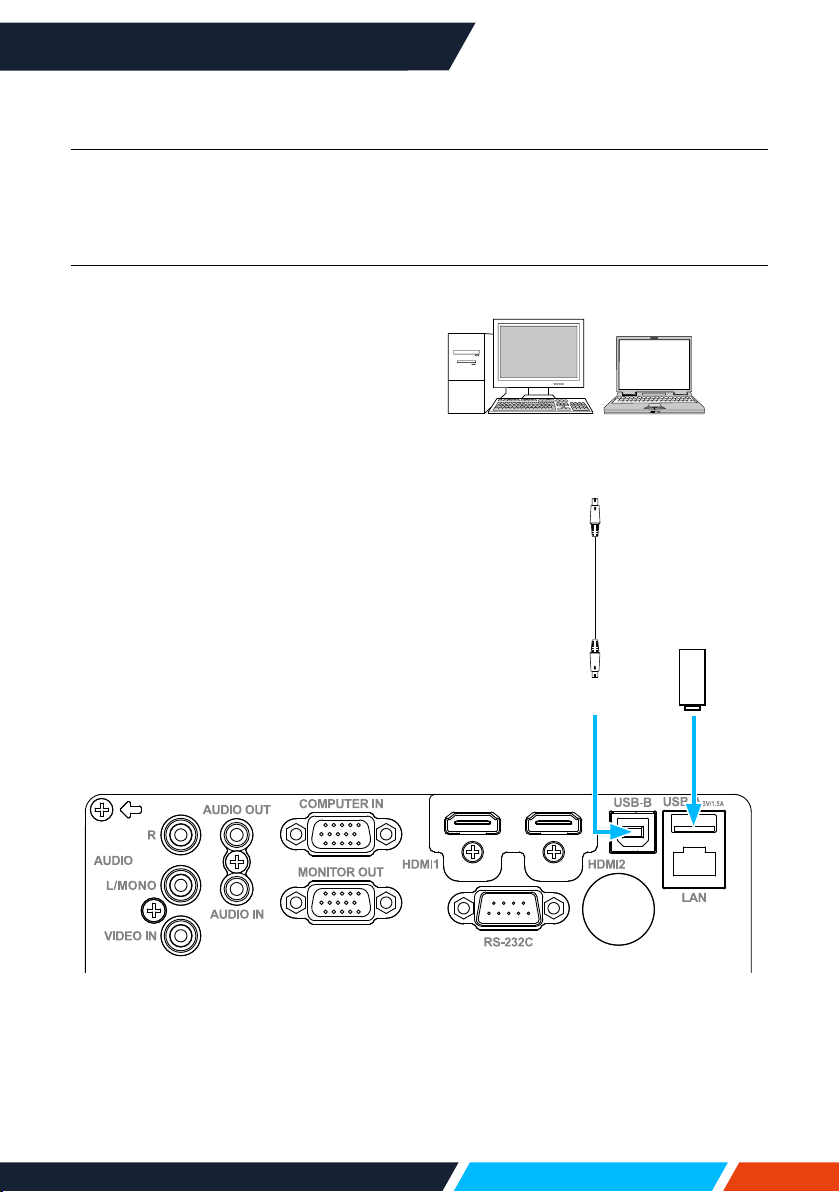
Cablesforconnection:
• USB-AtoUSB-Bcable*
• USB-CtoUSB-Bcable*
*Thiscableisnotincluded
Connect to USB (USB-A – USB-B or USB-C – USB-B)
USB-Astorage
device
USB-Binput
USB-AorUSB-C
output
• ForIN1029,IN1039,IN1049,IN1059,IN1024,IN1034,IN1044,IN1026,
IN1036,IN1046
www.infocus.com
Installation
30
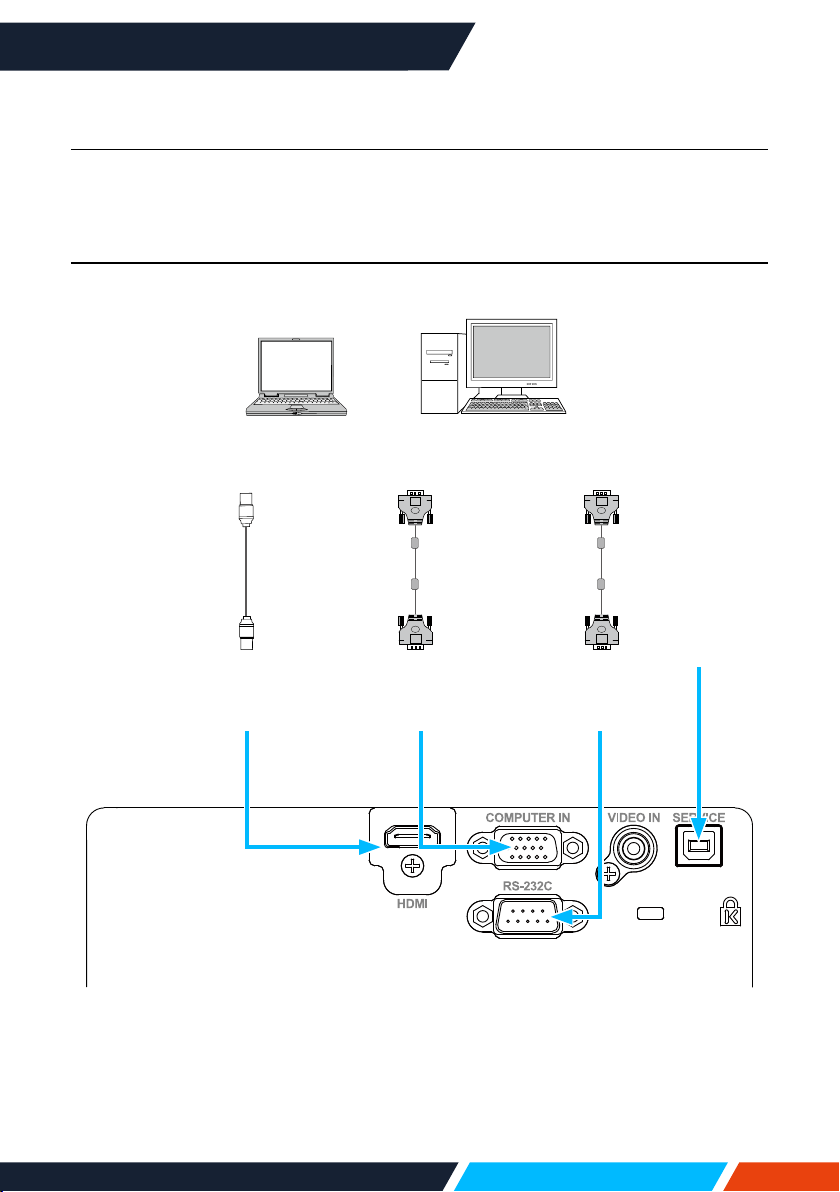
Connect to PC (Digital and Analogue RGB)
HDMIdigital
SignalInput
HDMIdigital
SignalOutput
Serialcable
(crosstype)
RS232
input
RS232
output
VGA
SignalInput
VGA
SignalOutput
Onlythe
main
program
upgrades
function
• ForIN1004,IN1014
Cablesforconnection:
• VGAcable
• HDMIcable*
• Crossoverserialcable*
*Thiscableisnotincluded
www.infocus.com
Installation
31
VIDEO
InputSignal
VIDEO
OutputSignal
Connect to video equipment
• ForIN1004,IN1014
Cablesforconnection:
• VIDEOcable*
*Thiscableisnotincluded
www.infocus.com
Installation
32
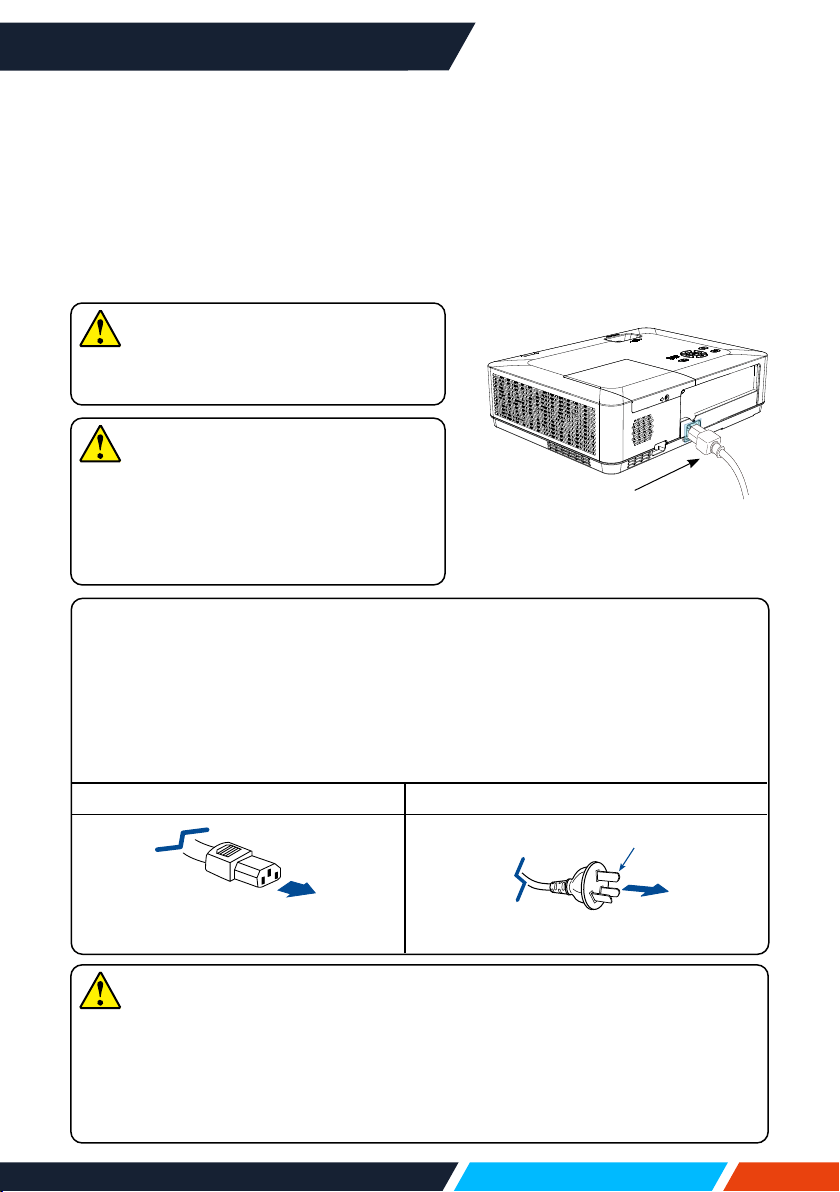
Precautions on power cord
YourACpowercordshouldmeetregulationsofthecountry,districtwhereyour
projectorisused.
Pleasemakesurethetypeofthepowerplugiscompliantwiththosegiveningure
below.MakesureyouareusingavalidACpowercord.
IncasetheincludedACpowercorddoesnotcomplywiththeACpowersocketin
yourlocation,callyourdealerforareplacement.
Theprojectorside ConnecttotheACpowersocket
Connecttopowercordconnectorof
yourprojector
ConnecttoACpowersocket
Groundingend
Connect the AC power cord
TherequiredstandardvoltageofyourprojectorisAC100-240V.Itadaptstodierent
inputvoltageautomatically.Yourprojectorusesasingle-phasepowercordwithneutral
groundcabling.
Donotuseanyothertypeofpowercordsoryoumayfacetherisksofelectricshock.
Incaseyouhaveanydoubtonthetypeofpowercordyouareusing,pleasecallyour
dealerorservicecentreforhelp.Beforepoweringonyourprojector,getallexternal
equipmentconnectedinadvance.
Note
Forsafetyreasons,unplugtheACpower
cordwhenyourprojectorisnotinuse.Your
projectorwillconsumeasmallamountof
powerwhenitisconnectedtoACpower
gridandinstandbymode.
Note
KeepyourACpowersocketclosetoyour
projectorforeasypluggingandunplugging.
Note
• Useofinvalidpowercordmayhamperproductperformanceorevenleadto
electricshock,re,andotherincidents.Alwaysuseacompliantpowercord
ensureproductperformanceandoperationsafety.
• Thefrequentlyusedcablesare:ACpowercord,VGAcable,audiocable,video
cable,andserialcontrolcable.
ConnectincludedACpower
cordtoyourprojector.
www.infocus.com
Basic operation
33
Basic operation
Power on your projector
1. Connectallexternalequipmenttoyour
projector(e.g.computerorcamera)before
poweringiton.
2. ConnectACpowercordofyourprojectorto
anACpowersocket.ThePowerindicator
turnsoninred.
3. PressthePowerbuttononthetopcontrol
panelortheremotecontrol.
ThePowerindicatorlightsingreenandthe
coolingfanstartsrunning.
4. Ifyourprojectorissetupaspasswordpro-
tected,thepassworddialogueboxdisplays.
Enteryourpasswordasinstructedbelow.
What is a password (PIN)?
APersonalIdenticationNumber(PIN)isanIDcodeusedforsecuritypurposes
andtoallowauthorisedusedoftheprojector.Apassword(PIN)settingmayhelp
preventingyourprojectorfromunauthorizeduse.
Youpassword(PIN)codeisa3-digitnumber.Tondoutmoreaboutprotectingyour
projectorwithapassword(PIN),pleaserefertothePINCodeLockfunctioninthe
Settingmenufordetails.
Precautions on password (PIN) operation:
Youcannotoperateapassword(PIN)protectedprojectorwithoutcorrectpassword
(PIN)Pleasesetupanewpassword(PIN)andkeepyouroperationmanualinsafe
place.Incasethepassword(PIN)islostorforgotten,callyourdealerorservicecentre.
Enter password (PIN)
Press
buttontoselectanumber,press
buttontoenteritandmovethecursor.The
numberyoutypedisdisplayedas“
”.Toedit
numberyouhaveentered,press
buttonto
movethecursortothenumberyouwantto
change,press
buttontoselectthecorrect
one.
Repeatthissteptotypeina3-digitnumber.
Movethecursortosetafteryouhavetyped
the3-digitnumber.Pressthe<OK>buttonand
nowyouarereadytouseyourprojector.
Ifthepasswordisinvalid,thepassword
displayedas“
”willbeinred.Pleasetry
againwithavalidone.
:---- :Input PIN code
OK
:Back
MENU
PIN code
0 1 2 3 4 5 6 7 8 9
Set Cancel
:
MOVE
:
Select
OK
:
Reset
MENU
1 2 3 4 5 6 7 8 90
* *
PIN code
Set
Cancel
MovethecursortoSetbutton,
thenpressthe<OK>button.
15
Note
Incasethe“LogoSelect”option
issettoOFF,thennowelcome
imagewilldisplayonscreen.
Youcandonothingbutpowering
oyourprojectorduringtheperiod
welcomeimageisdisplayed.
www.infocus.com
Basic operation
34
Power o your projector
1. PressthePowerbuttonatthetopcontrol
panelortheremotecontrol,the“Powero?”
messagedisplays.
2. PressthePowerbuttonagainin4seconds
afterthe“Powero?”messageprompted
toyou.ThePOWERindicatorashesred
whilethecoolingfancontinuesrunning.(You
maysetupnoiselevelandspeedofthefan.)
Unplugthepowercorduntilthefanstops
running.Failuretodosomayshortenlife
cycleofyourprojectororleadtopoweron
failuresoroperationabnormalities.
3. ThePOWERindicatorstopsashingonce
theprojectorhasbeencooleddowntoready
forpoweronagain.
Tomaintainthelifecycleofthelamp,onlypoweroyourprojectorafterithas
beenturnonforatleastveminutes.
Donotleaveyourprojectorturnedonforextendedperiodsoftime.Asitmay
hurtthelifecycleofyourlamp.Poweroyourprojectoratleastonceevery
24hoursandhaveitidleforanhour.
Powero?
“Powero?”message
disappearsin4seconds.
Note
• Ifthe“Directpoweron”functionissetto“On”,yourprojectorwillpowerononce
itisconnectedtoanACpowersocket.
• Speedofthecoolingfanspeedvariesbasedontheinternaltemperatureofyour
projector.
• Donotplaceyourprojectorinanyboxbeforeitisfullycooleddown.
• IncasethePOWERindicatorashesorturnsred,refertothe“WARNINGlight
indicator”forinstructions.
• ThePOWERindicatorasheswhenthelampiscoolingdown.Donotpoweron
yourprojectoratthistime.PoweronyourprojectoronlyafterthePOWERindicator
turnsred.
• Unplugthepowercordafteryourprojectorhasbeenturnedo.Thefanstops
running.
• ThePOWERindicatorturnsredwhenyourprojectorisreadyforpoweronagain.
Ittakeslesstimetorestartyourprojectorafteritwaspoweredointhestandard
poweroprocedurethanthatofthenon-standardone.
www.infocus.com
Basic operation
35
OSDMenu
Display
Auto PC adj.
Fine sync
H position
V position
H.Size
Aspect Wide
Front
Upper left
Blue
Project way
Menu position
Background display
System
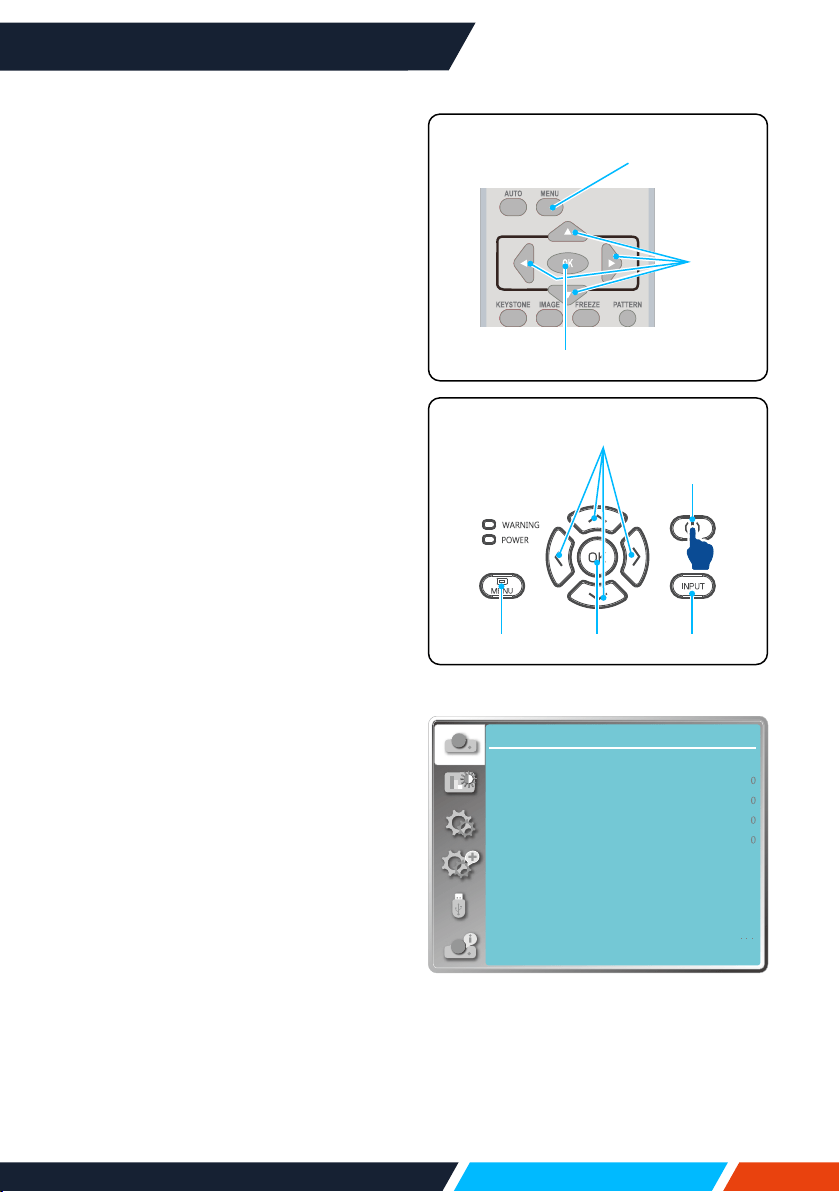
How to operate the OSD
Youcanadjustorsetuptheprojector
viatheon-screenmenu.
Themenuhasamultilayerstructure.
eachmainmenuisdividedintoseveral
sub-levelmenus,withfurtherlevels
beloweachsub-level.
Pleaserefertotheappropriatesection
ofthismanualfortheprocedureon
adjustmentandsettings.Pressthe
MENUbuttonontheprojectorkeypad
orremotecontrolandtheOSDdisplays.
1. PresstheMENUbuttononthe
projectorkeypadorremotecontrol
andtheOSDdisplays.
2. Press
buttontoactonorselect
onemainmenuitem.Press
button
or<OK>buttontoenterasubmenu.
3. Press
buttontoselectrequired
submenu,thenpress<OK>buttonor
buttontosetuporenteranoption.
4. Press
buttontoselectsettings
ornavigateoptions,thenpress<OK>
buttontoactontheitemandexit.
5. Press
buttontoreturntomain
menu.PresstheMENUbuttonon
remotecontrolorcontrolpanelto
exittheOSD.
OK
MENU
Remote
control
OK
POWER
MENU INPUT
Topcontrol
panel
www.infocus.com
Basic operation
36
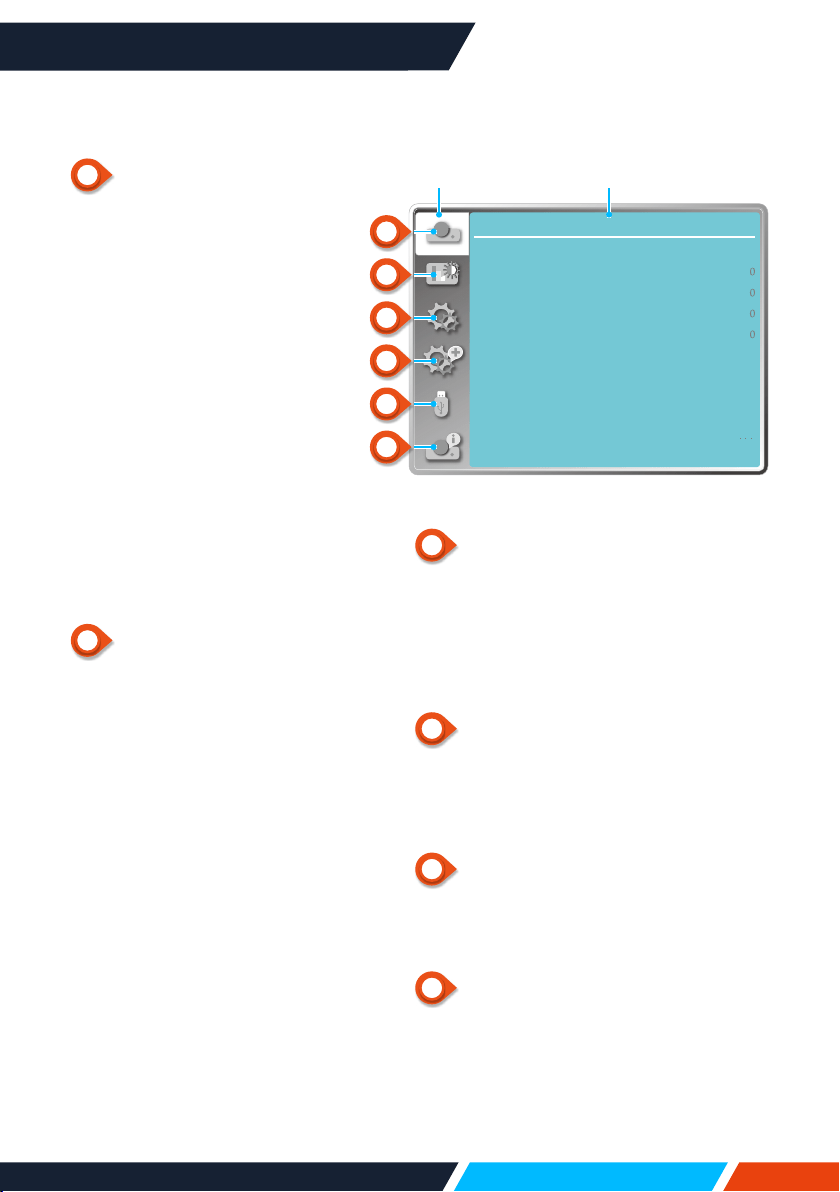
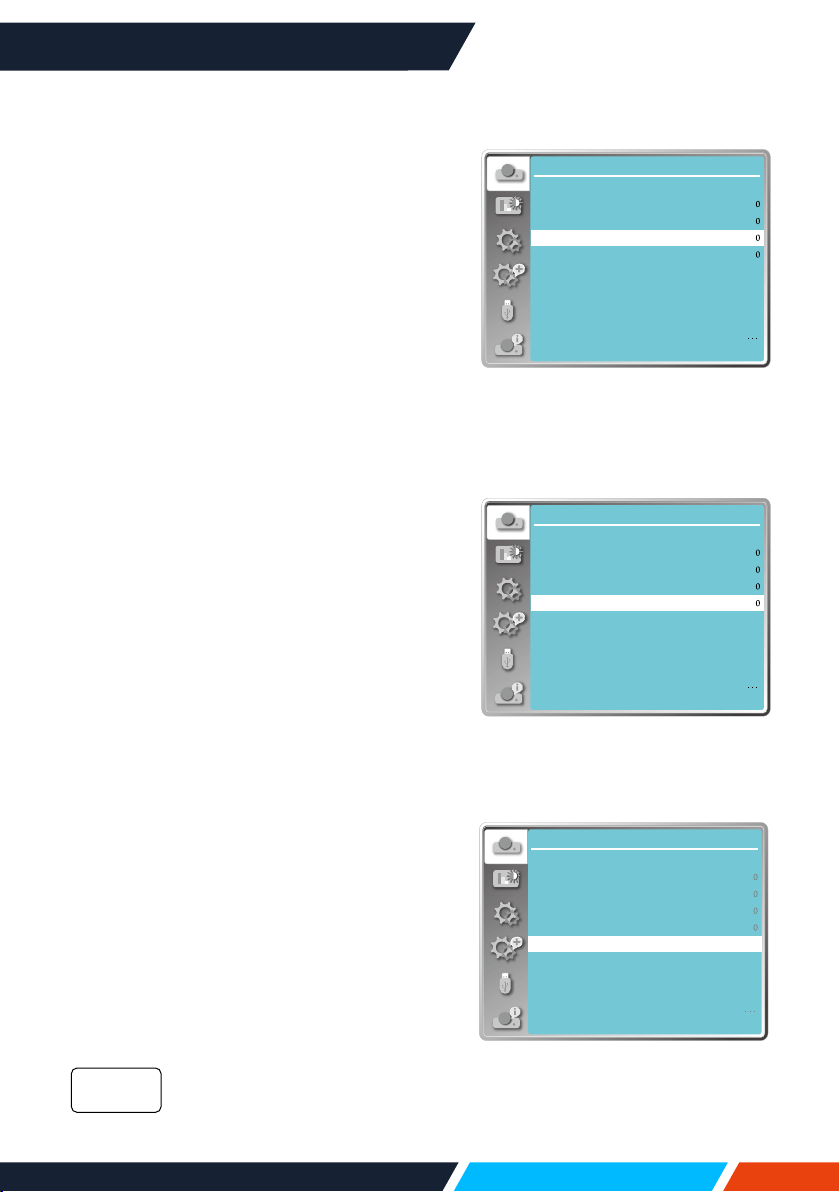
Menu item overview
Display
Auto PC adj.
Fine sync
H position
V position
H.Size
Aspect Wide
Front
Upper left
Blue
Project way
Menu position
Background display
System
Mainmenu Submenu
1
Displaymenu
• SelectAutoPCadj.,Finesync,
Hposition,Vposition,H.Sizeto
adjusttheparameterstomatch
theVGAformat.
• Aspect:Normal,Wide,Full,
Advanced.
• Projectway:chooseFront,Rear,
Ceiling/Front,Ceiling/Rear,Auto
ceiling/FrontandAutoceiling/
Rear.
• Menuposition:Setscreenmenu
displaypositiononthescreen.
• Backgrounddisplay:Sets
thebackgroundcolourofthe
projectionscreen.
• System:Selectthecompatible
systemsignalformatwithinput
source.
2
Colouradjustmenu
AvailableoptionsintheImage
modemenuareDynamic,
Standard,Cinema,Blackboard
(Green),Colorboard,UserImage.
• ForAVsignalinput,theavailable
colouradjustoptions:contrast,
brightness,colour,tint,white
balance(red,green,blue)and
sharpness.
• ForPCsignalinput,theavailable
colouradjustoptions:contrast,
brightness,colourtemp.,white
balance(red,green,blue)and
sharpness.
3
Settingmenu
Congurationofthebasicfunction
operationontheprojector:Directpower
on,Standbymode,Highland(High
Altitude),Lightsourcemode,Coolingfast,
Closedcaption,Keylock,Iris,Soundand
HDMIsetup.
4
Expandmenu
AvailableadjustoptionsareLanguage,
Autosetup,Keystone,Logo,Security,
Powermanagement,Filtercounter,Test
pattern,Network,Factorydefault.
5
MemoryViewermenu
SelectparameterofSetslide,Slide
transitioneect,Sortorder,Rotate,Bestt,
Repeat,Apply.
6
Info.menu
Displayinformationabouttheprojector.
1
2
3
4
5
6
www.infocus.com
Basic operation
37
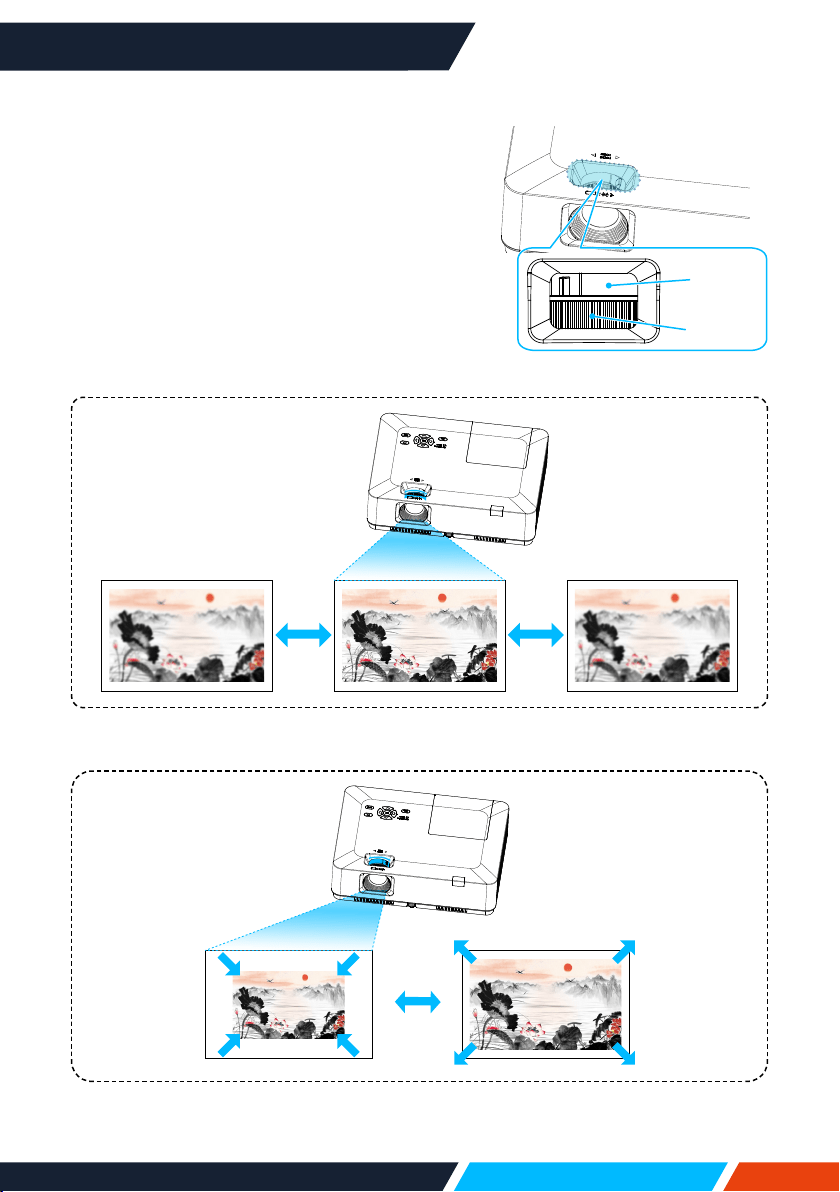
Adjust the Projector Zoom and Focus
1. Rotatethezoomringfromthecentre,rotate
thepicturetothelefttozoomoutorrotate
thepicturetotherighttozoomin.
2. Rotatethefocusringtoadjustthefocal
lengthoftheimage,andadjustittobe
clearaccordingtothedisplaycontentof
thescreen.
AdjusttheprojectorZoom
AdjusttheprojectorFocus
FOCUS
ZOOM
www.infocus.com
Basic operation
38
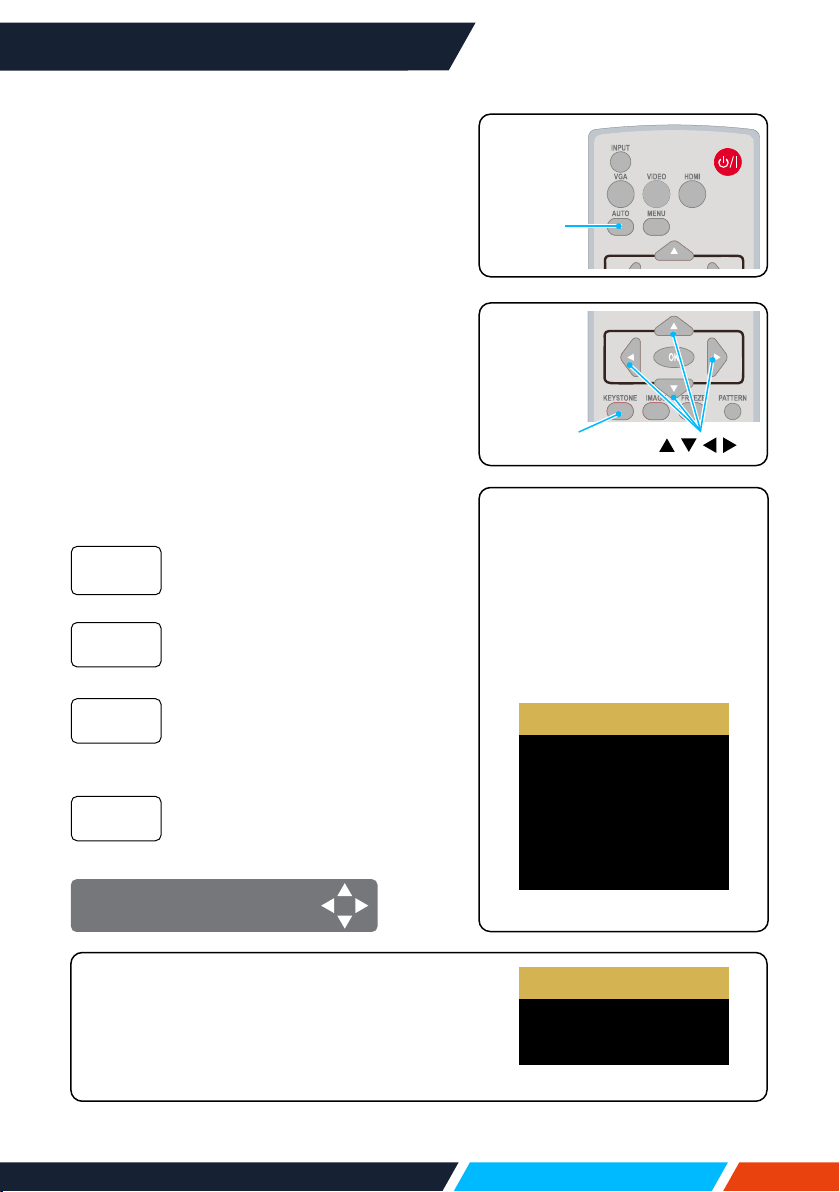
Auto setting function
PresstheAUTObuttononyourremotecontrol
toautoexecutesettingsgivenintheAuto
SetupontheExpandmenu(includingInput
search,AutoPCadj.andAutokeystone).
Keystone adjustment
Youmayadjustkeystonedistortionofimage
inyourprojectorwiththeH/Vkeystone
adjustment.Followstepsbelowtoadjust
keystonedistortionofprojectedimage
manually.
PresstheKEYSTONEbuttononyourremote
control.Thekeystoneadjustmentdialogue
boxdisplays(includingH/Vkeystone,corner
correction,curvedcorrection,resetvalue),
press
buttontoadjustkeystone
distortion.
Adjusttheprojectedimagewhen
theprojectorisonthehorizontal
orverticalkeystonedistortion.
Adjusttheprojectedimage
whentheprojectoriskeystone
distortionoffourcorners.
Adjusttheprojectedimagewhen
theprojectorlinearityisuneven
ortheprojectedimagesbent
verticallyandhorizontally.
Thecorrectionvalueswillbe
restoredtothefactorydefaults.
H/V
Keystone
Corner
correction
Curved
correction
Resetvalue
H/VKeystoneadjust
Remote
control
KEYSTONE
Remote
control
AUTO
• Thearrowmarklookswhite
whenthereisnokeystone
adjustmentinexistence.
• Thearrowmarkindicatingthe
adjustmentdirectionturnsred.
• Thearrowmarkdisappears
whenthemaximumadjustment
limitreaches.
H/V Keystone
4-Corner correction
6-Corner correction
Curved correction
Grid Image Tune
Reset value
• ForWUXGAresolution
H/V Keystone
4-Corner correction
Reset value
• Thekeystonepromptboxwilldisappearif
youpressthekeystonebuttonagainwhenit
isdisplaying.Pressthe<OK>buttonagainto
switchthefourcorrectionitems.
• Theadjustablerangeissubjecttosourceof
signalinput.
• ForXGA&WXGAresolution
www.infocus.com
Basic operation
39
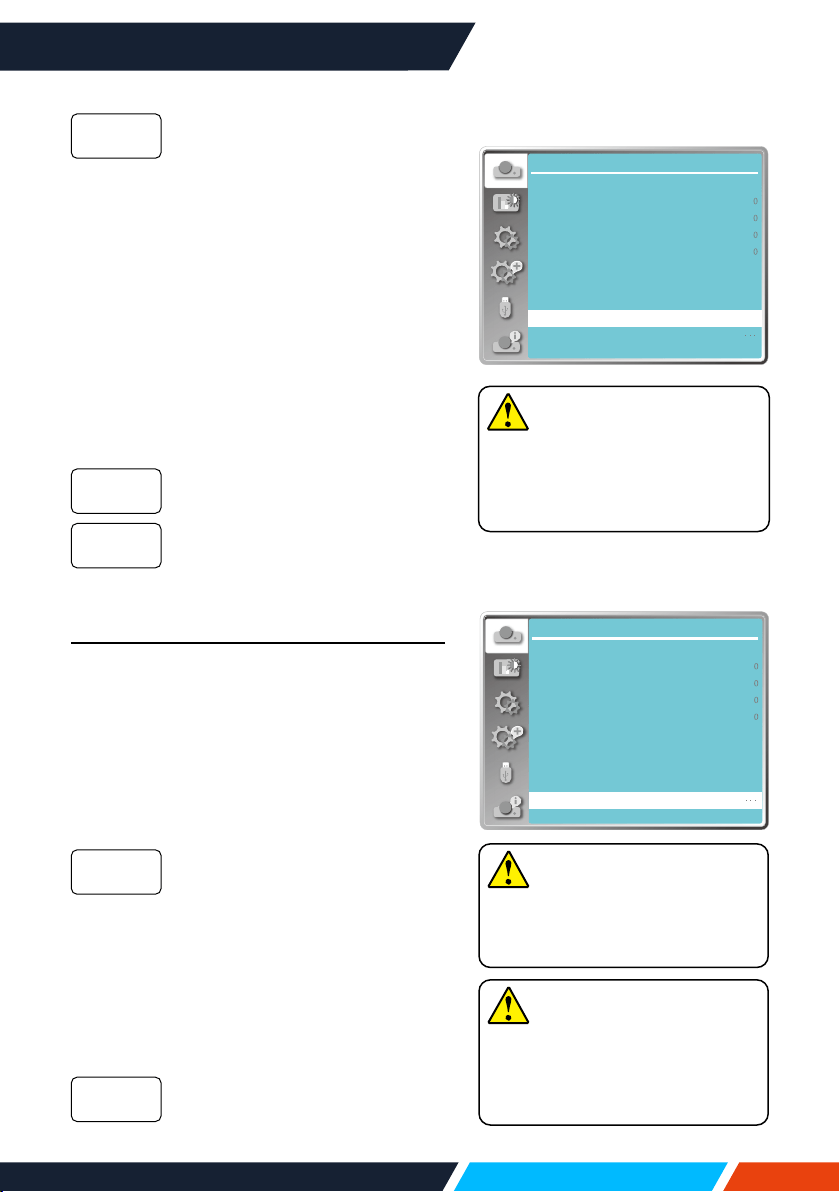
Soundmenu
Volume adjustment
Forquickadjustmentofthevolumesettings
pleaseusetheremotecontrol.
Volume
PresstheremotecontrolVolume+/-buttons
toadjustthevolume.
MUTE
Pressthemutebuttonontheremotecontrol
toselect"ON",youcantemporarilyturno
thesound.Pressthemutebuttonagainto
select"O"orpresstheVolume+/-keysto
re-opentheaudioeects.
Mutefunctionisalsoeectiveforaudiooutput
interfaces.
Menu operation
1. PresstheMENUbuttononthetopcontrol
panelorremotecontrolandtheOSD
displays.Press
buttontoentersetting
menu,thenpress<OK>or
button.
2. Press
buttontoselectsound,press
<OK>or
buttontoenter.
3. Press
buttontoselectvolumeormute.
Press
buttontoincrease
volume.
Press
buttontodecrease
volume.
Press
buttontoswitchtoOn
orO.
4. Press<OK>buttontoselect.
Volume
Mute
Direct power on
Light source mode
...
Setting
Standby mode
High land
Cooling fast
Closed caption
Key lock
Iris
Sound
HDMI Setup
Off
Eco
Off
Normal
Off
On
Setting
Volume
Mute
Sound
Menu
Volume+/-
Mute
Remotecontrol

www.infocus.com
Basic operation
40
Remote control operation
Useyourremotecontrolforcommon
operations.
Freeze (FREEZE)
PresstheFREEZEbuttononremotecontrolto
freezeimageandmutetheaudio.Freezeicon
appearsonthescreen.PresstheFREEZE
buttonoranybuttontocancelthefreeze
function,thentheimagereplayandthesound
isrestored.
Mute (MUTE)
Pressthemutebuttonontheremotecontrol
toturnothesound.Toremovethemute
function,pleasepressthemutebuttonor
Volume+/-buttontocancelthemutefunction.
VOLUME +/- (VOLUME +/-)
PresstheVolume+/-onremotecontrolto
increaseordecreasevolume.
IMAGE (IMAGE)
PresstheIMAGEbuttononremotecontrolto
selectrequiredimagemode.
LAMP (LAMP)
PresstheLampbuttononremotecontrolto
changescreenbrightness.
Normalbrightness.
Lowerthebrightnessandreduce
energyconsumption,thus
prolongingthelampservicelife.
INFO. (INFO.)
Presstheinformationbuttonontheremote
controltodisplaytheinformationofthe
projectedimageandtheprojector'soperating
status.
Normal
ECO
Mute INFO.
Image
Lamp
Volume+/-
Freeze
Note
Forsomeotherbuttons'
description,pleaserefertothe
nextpage.
Remotecontrol
www.infocus.com
Basic operation
41
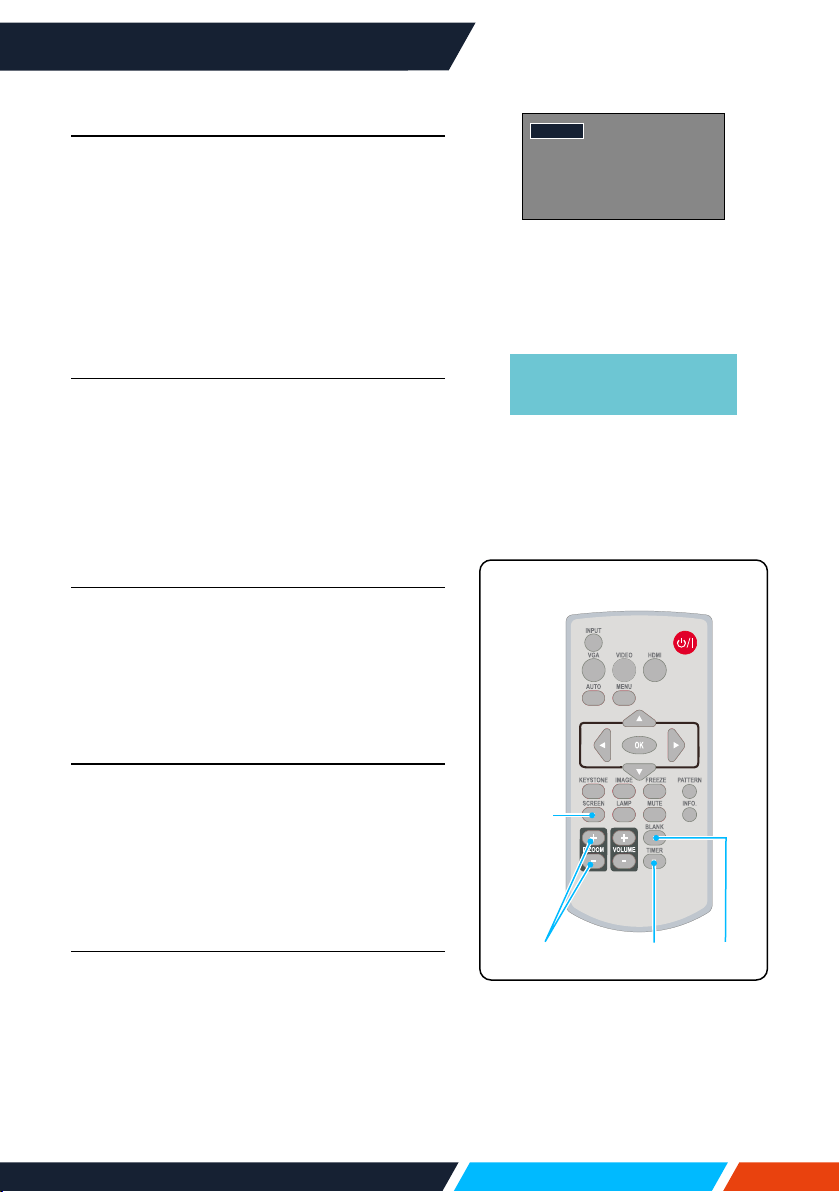
Blank (BLANK)
PresstheBLANKbuttononremotecontrol;
ablankscreendisplaystoreplaceexisting
image.PresstheBLANKbuttonoranyother
buttontorestoretheimage.
PresstheBLANKtotoggleswitchyourscreen
asshownbelow:
BLANK
Normal
BLANK
Normal
......
Timer (TIMER)
PresstheTIMERbuttononremotecontrol.A
timeranimation(00:00)displaysontheupper
rightconnerandstartstiminginformatof
(00:00-59:59).
PresstheTIMERbuttontostoptiming.Press
theTIMERbuttonagaintodisablethetiming
function.
Digital Zoom + (D.ZOOM+)
PresstheD.ZOOM+buttononremotecontrol
toentertheDigitalZoommode.
WhenOSDmenudisappear,thescreen
displaydigitalzoom+information.
*OnlyforinputasVGA,RGBHV,andthe
screensizesettingasNormalorWide.
Digital Zoom - (D.ZOOM-)
PresstheD.ZOOM-buttononremotecontrol
toentertheDigitalZoommode.
WhenOSDmenudisappear,thescreen
displaydigitalzoom-information.
Pressanyotherkeytoexitthedigitalzoom+/-
mode.
Screen size selection (SCREEN)
PresstheSCREENbuttononremotecontrol
toselectrequiredscreensizemode.
PresstheSCREENbuttonontheremote
controltoselectthesizeofthescreento
returntothenormalscreensize.
TheBLANKscreendisappears
ifnobuttonsarepressed
in2seconds.
BLANK
Timer
Screen
Zoom+/- Blank
Remotecontrol
02
:
02
Timerdisplay
www.infocus.com
Basic operation
42
Inputmenu
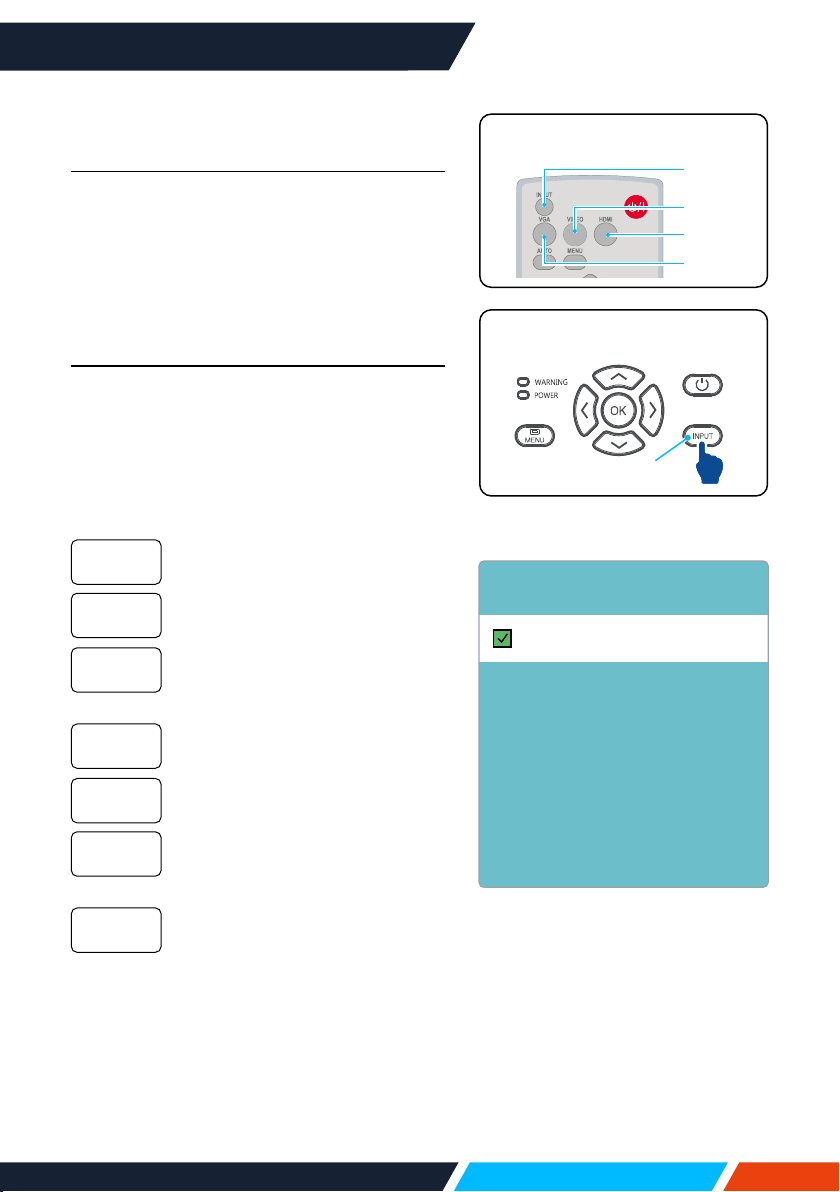
Input selection
Basic operation
PresstheINPUTbuttononthecontrolpanel
orontheremotecontroltoselectoneofthe
followinginput:VGA,Video,HDMI1,HDMI2,
MemoryViewer,Network,USBDisplay.
Alternatively,youmaypresstheVGA,HDMI
VIDEObuttononremotecontroltoselect
VGA,HDMI1,HDMI2,VIDEO.
Menu operation
1. PresstheINPUTbuttononremotecontrol
toentertheInputmenu.
2. Press
buttontoselectoneofthe
followinginput:VGA,video,HDMI1,
HDMI2,MemoryViewer,Network,USB
Display,andthenpressthe<OK>buttonto
selecttheinputsource.
SelectinputVGAifaPCis
connectedtotheVGAINterminal.
SelectinputHDMI1ifadeviceis
connectedtotheHDMIterminal.
SelectinputHDMI2ifadevice
isconnectedtotheHDMI2
terminal.
SelectinputVideoifaPCis
connectedtotheVideoterminal.
SelectinputNetworkifadevice
isconnectedtotheLANterminal.
SelectinputMemoryViewerifa
deviceisconnectedtotheUSB-A
terminal.
SelectinputUSBDisplayifa
deviceisconnectedtotheUSB-B
terminal.
VGA
HDMI1
HDMI2
Video
Network
Memory
Viewer
USBDisplay
VGA
HDMI 1
HDMI 2
Video
Network
Memory Viewer
USB Display
Input
Remotecontrol
HDMI
VGA
Video
TopControlPanel
Input

www.infocus.com
Basic operation
43
Note
• Ifthe"Inputsearch"functionintheautosetupoptionissetto"On",onceyou
presstheAUTObutton,theprojectorwillsearchforinputsignalsautomatically.
Theautosearchingfunctionmaybeinvalidforinputof"USBDisplay","Memory
Viewer"and"Network".
• Thefollowingfunctionwillbeinvalid:FREEZE,ASPECT,IMAGE,AUTOSETUP,
PATTERNandSCREEN,once"USBDisplay","MemoryViewer","Network"has
beenselectedassignalinput.
• ForfurtherdetailsaboutMemoryViewerfunction,pleaseturntopage83-85.
• ForfurtherdetailsaboutUSBDisplayfunction,pleaseturnto86-87.
www.infocus.com
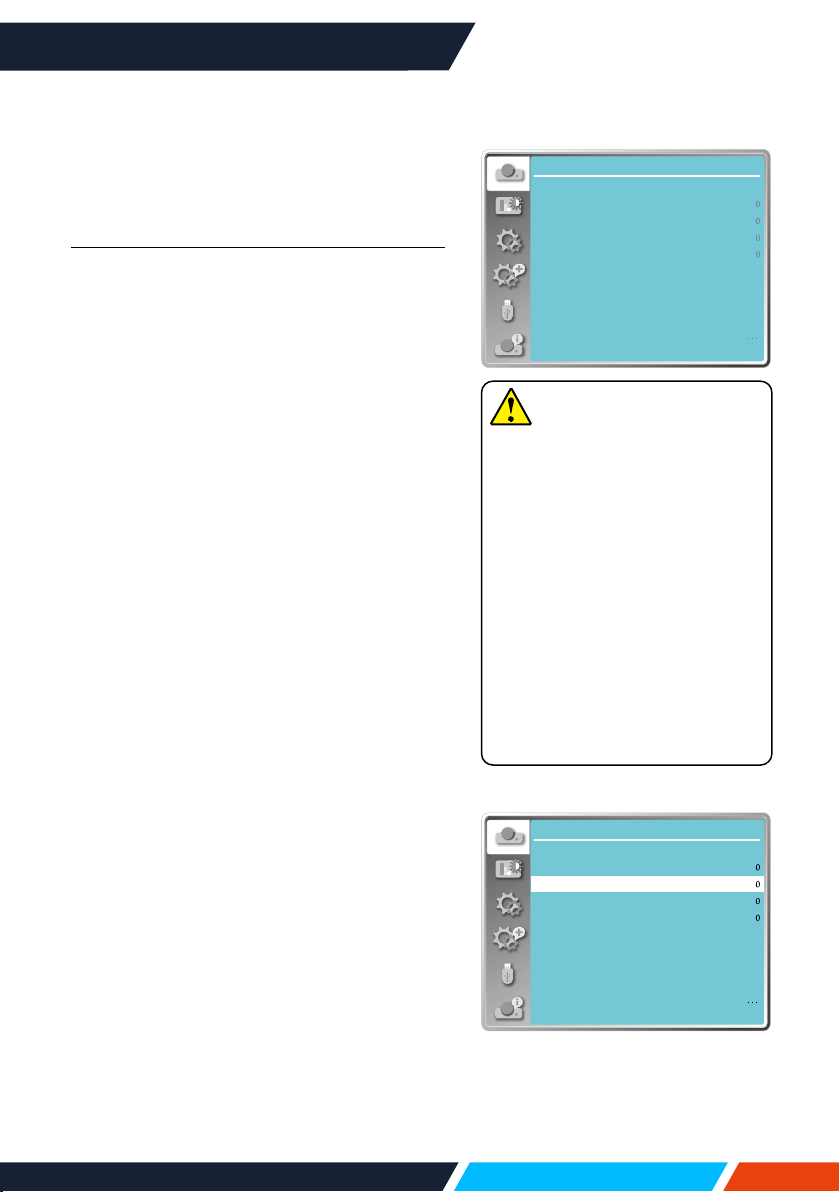
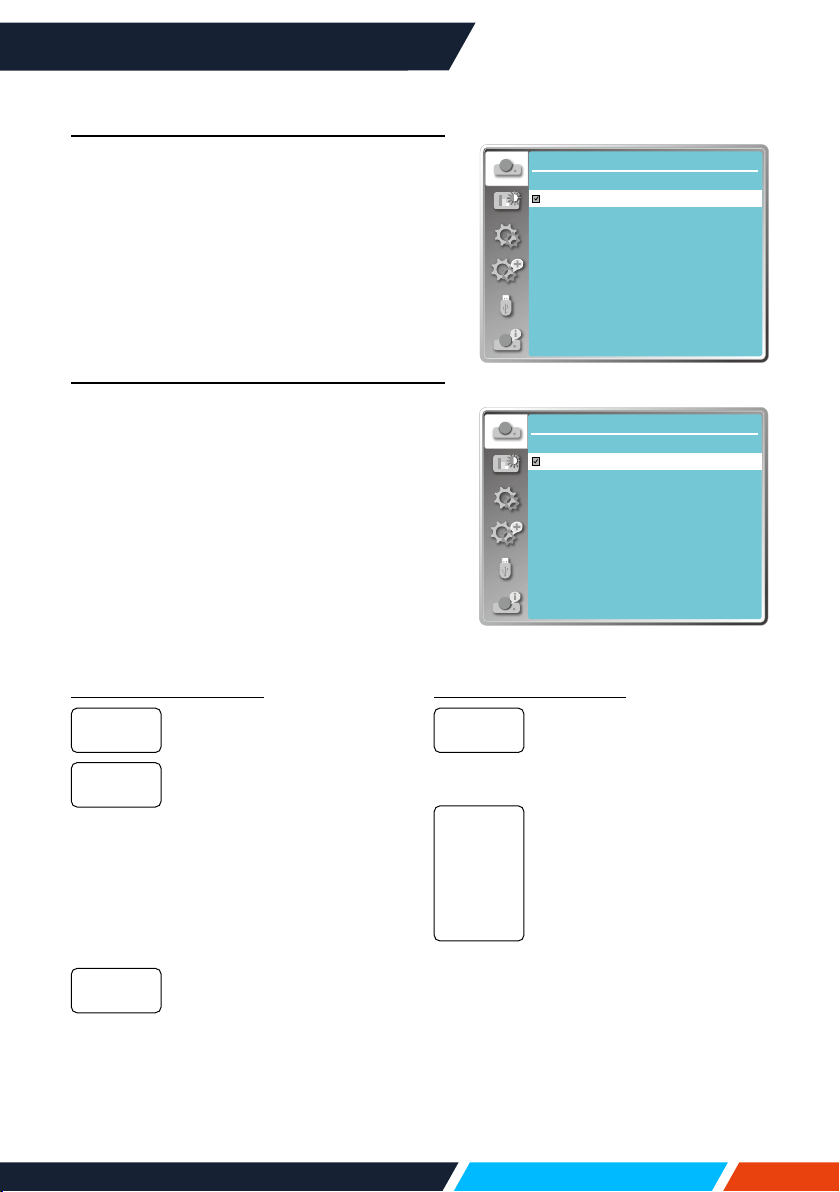
Display
44
Display
Auto PC adj.
SelectAutoPCAdj.functiontoadjustFine
sync,Hposition,Vposition,Hsizetobe
compatiblewiththecomputerautomatically.
Menu operation
AutoPCadj.
Press<MENU>buttonontheremotecontrol
oronthetopcontrolpaneltodisplaytheOSD
menu.Press
buttontoselectthedisplay
menu,thenpress<OK>or
button.
1. Press
buttontoselect[AutoPCadj.]
menu.
2. Press<OK>button.
Fine sync
(OnlyforPCsignalinput)
Adjustimagetothebeststatewhentheimage
jitters,ortheimageoutlinedims.
1. Press
buttontoselect[Finesync]
menu.
2. Press<OK>button.
3. Press
buttontoadjustFinesync.
Adjustmentrangeisfrom0to+31.Please
adjusttotheleastinterferencestate.
H Position
(OnlyforPCsignalinput)
Onthepremisethattherelativepositionof
bothprojectorandthescreenissetupright,
youcanmovetheimagehorizontalposition,
ifthepositionoftheprojectedimageonthe
screenisdeviated.
1. Press
buttontoselect[Hposition]
menu.
2. Press<OK>button.
3. Press
buttontoadjustimageH
position.
Adjustmentrangeisfrom-5to+5.
Display
Auto PC adj.
Fine sync
H position
V position
H.Size
Aspect Wide
Front
Upper left
Blue
Project way
Menu position
Background display
System
Note
• Theprojectorwillperform
AutoPCAdjustmentfunction
automatically,whenitssignalis
inputforthersttime.
• AutoPCAdjustmentfunction
mayfailtoworkifcomputer
modelsisnotcompatiblewith
theinputsignal.
• AutoPCAdjustmentfunction
mayfailtoworkifyouselect
thefollowingsystemsignal
format:480i,576i,480p,576p,
720p,1080i,1080p,orsignals
fromtheHDMIterminal.
AutoPCadj.menu
Display
Auto PC adj.
Fine sync
H position
V position
H.Size
Aspect Wide
Front
Upper left
Blue
Project way
Menu position
Background display
System
Hpositionmenu
www.infocus.com
Display
45
V position
(OnlyforPCsignalinput)
Onthepremisethattherelativepositionof
bothprojectorandthescreenissetupright,
youcanmovetheimageverticalposition,if
thepositionoftheprojectedimageonthe
screenisdeviated.
1. Press
buttontoselect[Vposition]
menu.
2. Press<OK>button.
3. Press
buttontoadjustimage
Vposition.
Adjustmentrangeisfrom-5to+5.
H.Size
(OnlyforPCsignalinput)
Youcanadjustandreducetheinterference
causedbypatternsoftheprojectedvertical
stripes.Thefollowingprojectedpatternsmay
causeacircularpattern(Noise).Adjustthe
amountofinterferencetotheminimum.Users
canpointtheclocktoadjustimages.
1. Press
buttontoselect[H.Size]menu.
2. Press<OK>button.
3. Press
buttontoadjustH.Sizelevel.
Adjustmentrangeisfrom-15to+15
.
Aspect
Adjusttheimagetotthescreensize,while
keepingaspectofinputsignal'sunchanged.
Press<MENU>buttonontheremotecontrol
oronthetopcontrolpaneltodisplaytheOSD
menu.Press
buttontoselectthedisplay
menu,thenpress<OK>or
button.
1. Press
buttontoselect[Aspect]menu.
2. Press<OK>button.
3. Press
buttontoselecttherequireditem.
Usethemaximumsizetoproject
whilekeepingtheaspectofinput
signal'sunchanged.
Normal
Display
Auto PC adj.
Fine sync
H position
V position
H.Size
Aspect Wide
Front
Upper left
Blue
Project way
Menu position
Background display
System
Aspectmenu
Display
Auto PC adj.
Fine sync
H position
V position
H.Size
Aspect Wide
Front
Upper left
Blue
Project way
Menu position
Background display
System
Vpositionmenu
Display
Auto PC adj.
Fine sync
H position
V position
H.Size
Aspect Wide
Front
Upper left
Blue
Project way
Menu position
Background display
System
H.Sizemenu

www.infocus.com
Display
46
Projectimagesattheaspectof
16:9.
Projectimagestothemaximum.
• OnlyforPC(VGA)signalinput.
Splicingscreen.
• OnlyforPC(VGA)signalinput.
1. Press
buttontoselect[Aspect]menu.
2. Press<OK>button.
3. Press
buttontoselect[Advanced]
menu.
4. Press<OK>button.
5. Press
buttontoselecttherequireditem.
SettheHtotal,andimageswill
beverticaldivisionbytheset
value.
Adjustmentrangeisfrom1to5
ofwidescreen.
SettheVtotal,andimageswill
behorizontaldivisionbytheset
value.
Adjustmentrangeisfrom1to5
ofwidescreen.
Settheprojectorinhorizontal
position.
Adjustmentrangeisfrom1tothe
currentHtotalvalue.
Settheprojectorinhorizontal
position.
Adjustmentrangeisfrom1tothe
currentVtotalvalue.
Project way
Selectthisfunctiontosettheplacementor
installationoftheprojector.
Pleasechangethesettingsinthismenu
option,iftheOSDdisplaysinverselyor
reversely.
Press<MENU>buttonontheremotecontrol
oronthetopcontrolpaneltodisplaytheOSD
menu.Press
buttontoselecttheDisplay
menu,thenpress<OK>or
button.
Wide
Full
Advanced
Htotal
Vtotal
PositionH
PositionV
Display
Auto PC adj.
Fine sync
H position
V position
H.Size
Aspect Wide
Front
Upper left
Blue
Project way
Menu position
Background display
System
Projectwaymenu
www.infocus.com
Display
47
Display
Auto PC adj.
Fine sync
H position
V position
H.Size
Aspect Wide
Front
Upper left
Blue
Project way
Menu position
Background display
System
Menupositionmenu
1. Press
buttontoselect[Projectway]
menu.
2. Press<OK>button.
3. Press
buttontoswitch.
Whentheprojectorisinstalledon
thetableandprojectedinfrontof
thescreen.
Whentheprojectorisinstalled
onthetableandprojectedinrear
ofthescreen(usingtranslucent
screen).
Whenusethebrackettoliftthe
projector(optional)infrontofthe
screen.
Whenusethebrackettoliftthe
projector(optional)inrearofthe
screen(usingtranslucentscreen).
Whentheprojectorisprojectedin
frontofthescreen.
Whentheprojectorisprojectedin
rearofthescreen.
Menu position
Selectthisfunctiontosetthemenuposition.
Press<MENU>buttonontheremotecontrol
oronthetopcontrolpaneltodisplaytheOSD
menu.Press
buttontoselectthedisplay
menu,thenpress<OK>or
button.
1. Press
buttontoselect[menuposition]
menu.
2. Press<OK>button.
3. Press
buttontochangemenuposition.
Themenudisplayontheupper
leftcornerofthescreen.
Themenudisplayontheupper
rightcornerofthescreen.
TheOSDdisplayinthecentreof
thescreen.
Themenudisplayonthelower
leftcornerofthescreen.
Front
Rear
Ceiling/
Front
Ceiling/
Rear
Autoceiling/
Front
Autoceiling/
Rear
Upperleft
Upper
right
Centre
Lowerleft
www.infocus.com
Display
48
Themenudisplayonthelower
rightcornerofthescreen.
Background display
Selectthisfunctioncanadjustsbackground
colour.
Press<MENU>buttonontheremotecontrol
oronthetopcontrolpaneltodisplaytheOSD
menu.Press
buttontoselectthedisplay
menu,thenpress<OK>or
button.
1. Press
buttontoselect[Background
display]menu.
2. Press<OK>button.
3. Press
buttontoselectrequireditem.
Theentireprojectionareadisplay
blue.
Theentireprojectionareadisplay
black.
System
System selection
Thescanningsystemandautocomputer
adjustmentfunctionwilldetectthesignal
format.IfaPCisselectedastheinputsignal
source,yourprojectorwilldetectandadaptto
itssignalformatautomatically.Theprojected
imagecanbedisplayedwithoutanysetup
operation.
Yourprojectorwilldisplayoneofthefollowing:
Ifyourprojectorfailedto
identifysignalsnotshownin
thesignalsformattable,the
“Auto”messagewilldisplayin
theSystemSignalFormatmenu.
TheAutoPCAdjustingfunction
willmakenecessaryadjustment
toyourprojectortoprojectvalid
images.Ifimagesaredisplayed
incorrectly,adjustitmanually.
NoPCsignalsdetected.Check
theconnectionbetweenPCand
yourprojector.
Lowerright
Blue
Black
Auto
-----
Display
Auto PC adj.
Fine sync
H position
V position
H.Size
Aspect Wide
Front
Upper left
Blue
Project way
Menu position
Background display
System
Backgrounddisplaymenu
Note
Thisfunctionwillbeinvalid
onceyouselectinputsignalas
USBdisplay,MemoryVieweror
Network.
Note
Yourprojectormaysavedata
generatedbytheAutoPC
Adjustingfunction.
Display
Auto PC adj.
Fine sync
H position
V position
H.Size
Aspect Wide
Front
Upper left
Blue
Project way
Menu position
Background display
System
SystemSignalFormatmenu
Note
Thecomputersystemmenuwill
bedisabledifHDMI1,HDMI2,
MemoryViewer,Network,USB
Displayhavebeenselected.
www.infocus.com
Display
49
Select the computer system manually
1. PresstheMENUbuttononremotecontrol
andtheOSDdisplays.Press
buttonto
pointtotheInputicon,press
buttonor
<OK>buttonandtheInputmenudisplays.
2. Press
buttontoselectSystemSignal
Format,thenpress<OK>button.
3. Press
buttontoselectrequiredsystem
signalformat,thenpress<OK>buttonto
conrmyourselection.
Video
Selectthisfunctiontosetresolutionofinput
signaltobecompatiblewiththePC.
SetVideo/S-videoinputsignalcoloursystem
orComponentinputsignalscanningmode.
1. Press
buttontoselect[System]menu.
2. Press<OK>button.
3. Press
buttontoselectwantedsystem.
Display
System
1024x768,75HZ
- - - -
- - - -
- - - -
1280x768,75HZ
SystemforPCsignal
Display
System
AUTO
PAL
SECAM
NTSC
NTSC4.43
PAL.M
PAL.N
PAL60
SystemforVideosignal
RGB input signal
Displaythecompatiblename
inputsignalname.
Whenprojectorhasno
compatiblesignalwithone
fromconnectedPC,thePC
canadjustautomatically
torunandAutoappearon
thesystem.Iftheimageis
notprojectedoutcorrectly,
pleaseadjustittomatch
yourcomputermanually.
Nosignalinputcomefrom
PC.Pleasecheckthe
connections.
Video input signal
Whenprojectorselectthe
inputsignalcoloursystem
automatically.Set[PAL-M]
or[PAL-N]manually.
Whenprojectorcannot
displayimagescorrectly
in[Auto],pleaseset
inputsignalcoloursystem
manually.
1024x768
60HZ,itp
Auto
-----
Auto
[PAL]
[SECAM]
[NTSC]
[NTSC4.43]
[PAL-M]
[PAL-N]
[PAL60]

www.infocus.com
Colour adjust
50
Colour adjust
Color adjust
Image mode
Contrast
Brightness
Color temp.
Red
Green
Blue
Sharpness
32
32
Mid
32
32
32
0
Standard
Imagemode(ForPC)
Colorboard
Red
Blue
Green
Yellow
Color adjust
Colourboard
Select colour Adjustment to set the image
mode and adjust the quality of the projected
image.
Image mode
Direct operation
PresstheImagemodebuttononremote
controltoselectrequiredimagemode.
Menu operation
Press<MENU>buttonontheremotecontrol
oronthetopcontrolpaneltodisplaytheOSD
menu.Press
buttontoselectthecolour
adjustmenu,thenpress<OK>or
button.
1. Press
buttontoselect[Imagemode]
menu.
2. Press<OK>button.
3. Press
buttontoselectrequireditem.
Animagemodesuitablefor
viewinginbrightroom.
Thedefaultmodeofyour
projector,fornaturalcolour
reproduction.
Enrichedgreyscaleforviewing
movies.
Animagemodedesignedfor
displayingonablackboard
(Green).Itboostsqualityofimage
projectedonblackboard(Green).
Thisisdesignedforaboard
ingreenratherthanblackas
indicatedbyitsname.
Aimagemodesuitableforimage
projectingonsurfaceofwallin
red,blue,yelloworgreen.
Press<OK>buttontoenter
colourboardmenu,thenpress
buttontoselectred,blue,
yelloworgreen.Press<OK>
button.
Defaultimagemodesetbyusers
intheImageAdjustmenu.
Dynamic
Standard
Cinema
Blackboard
(Green)
Colourboard
UserImage
Image
Remotecontrol
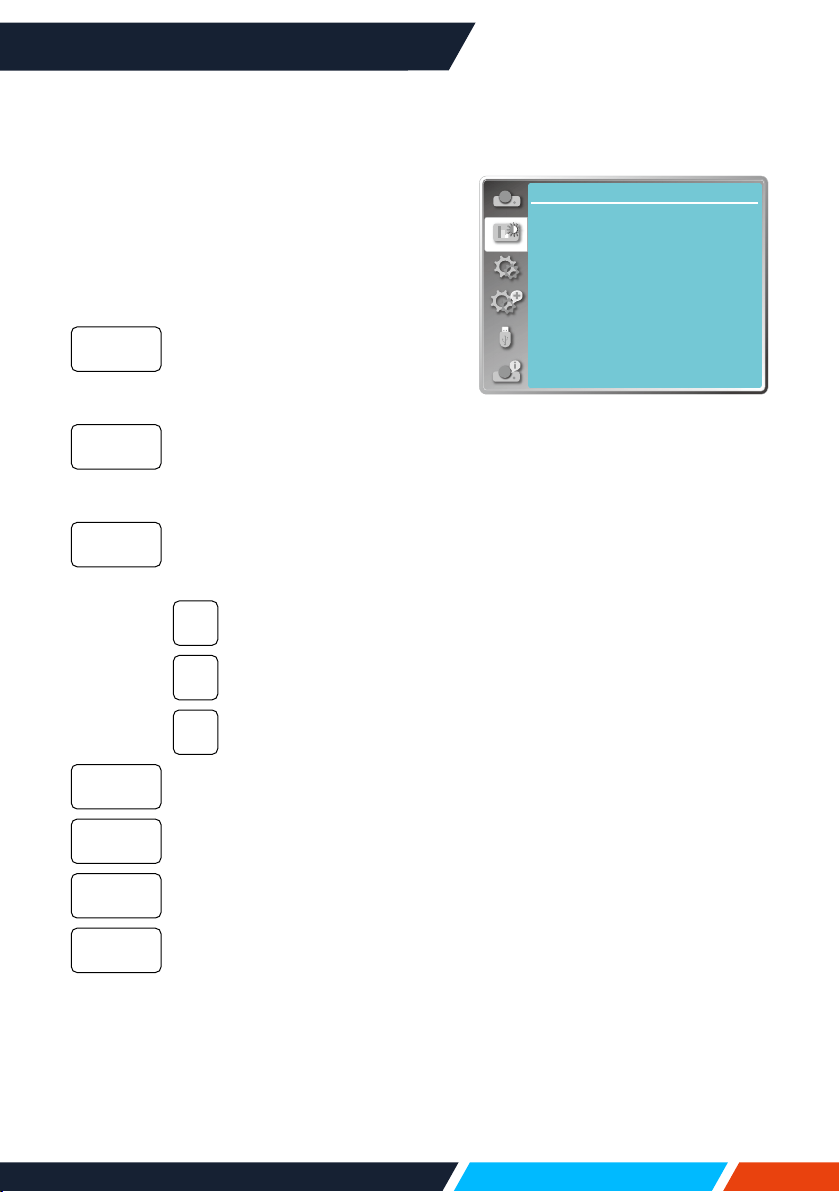
www.infocus.com
Colour adjust
51
Colour adjust (For PC.)
Press<MENU>buttonontheremotecontrol
oronthetopcontrolpaneltodisplaytheOSD
menu.Press
buttontoselecttheColour
adjustmenu,thenpress<OK>or
button.
1. Press
buttontoselectrequireditem.
2. Press<OK>button.
3. Press
buttontoadjustsetpoint.
Press
buttontodecrease
contrast,rangefrom0-+63.
Press
buttontoincrease
contrast,rangefrom0-+63.
Press
buttontodecrease
brightness,rangefrom0-+63.
Press
buttontoincrease
brightness,rangefrom0-+63.
Press
buttontoselect
requiredcolourtemperature(Low,
Mid.andHigh)
Becomebluegradually.
Suitablenaturalcolour.
Becomeredgradually.
Press
buttontodecreasered
tintand
buttontoincreaseit.
Press
buttontodecreasegreen
tintand
buttontoincreaseit.
Press
buttontodecreaseblue
tintand
buttontoincrease.
Press
buttontosoftenimage
and
buttontosharpen,range
from0-+15.
Contrast
Brightness
Colour
temp.
High
Mid
Low
Red
Green
Blue
Sharpness
Color adjust
Image mode
Contrast
Brightness
Color temp.
Red
Green
Blue
Sharpness
32
32
MID
32
32
32
0
Standard
Colouradjust(ForPC)
www.infocus.com
Colour adjust
52
Colour adjust (For Video)
Press<MENU>buttonontheremotecontrol
oronthetopcontrolpaneltodisplaytheOSD
menu.Press
buttontoselecttheColour
adjustmenu,thenpress<OK>or
button.
1. Press
buttontoselectrequireditem.
2. Press<OK>button.
3. Press
buttontoadjustsetpoint.
Press
buttontodecrease
contrast,rangefrom0-+63.
Press
buttontoincrease
contrast,rangefrom0-+63.
Press
buttontodecrease
brightness,rangefrom0-+63.
Press
buttontoincrease
brightness,rangefrom0-+63.
Press
buttontodecrease
saturation,press
buttonto
increasesaturation.
Press
buttontoselect
requiredtint.
Press
buttontodecreasered
tintand
buttontoincreaseit.
Press
buttontodecreasegreen
tintand
buttontoincreaseit.
Press
buttontodecreaseblue
tintand
buttontoincrease.
Press
buttontosoftenimage
and
buttontosharpen,range
from0-+15.
Contrast
Brightness
Color
Tint
Red
Green
Blue
Sharpness
Note
• Tintandcolouroptionare
availableifyouchooseVideo,
S-videoorcomponentas
signal,whileothersignalsresult
intwooftheminvalid.
Color adjust
Image mode
Contrast
Brightness
Color
32
32
32
Tint
Red
Green
Blue
Sharpness
32
32
32
32
0
Standard
Colouradjust(ForVideo)
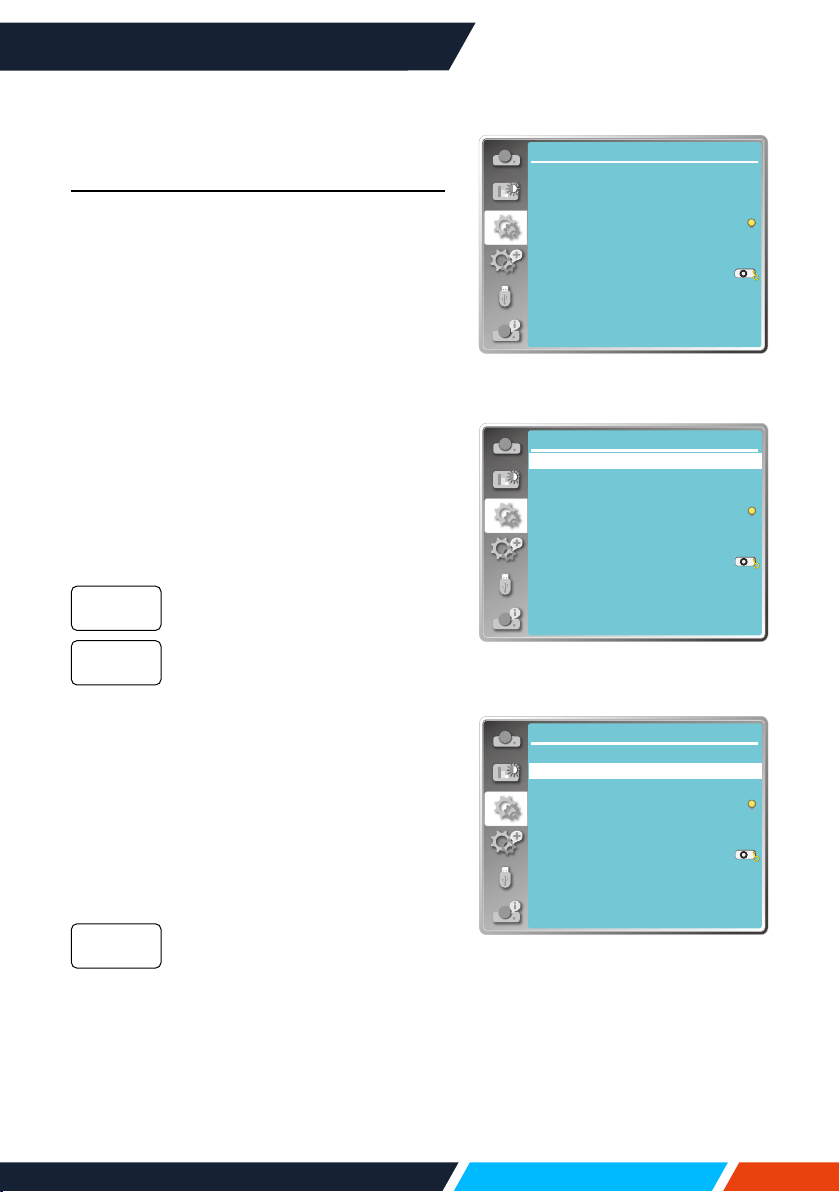
www.infocus.com
Setting
53
Setting
The projector has Setting function, you can
select other functions as described below.
Menu operation
Press<MENU>buttonontheremotecontrol
oronthetopcontrolpaneltodisplaytheOSD
menu.Press
buttontoselectthesetting
menu,thenpress<OK>or
button.
1. Press
buttontoselectrequireditem.
2. Press<OK>button.
3. Press
buttontosetoptions.
Direct power on
SetthepowermodeON,whenthepowercord
isconnectedtoapoweroutlet.
1. Press
buttontoselect[Directpower
on]menu.
2. Press<OK>button.
3. Press
buttontoselectrequireditem.
Getintostandbymode.
Startupimmediately.
Standby mode
Setpowerconsumptioninstandbymode,no
matterwheneveryourprojectorisoperated
throughnetwork.
1. Press
buttontoselect[Standby
mode]menu.
2. Press<OK>button.
3. Press
buttontoadjustlevels.
Somefunctionwillbedisabled
onceyourprojectorisinECO
standbymodetoreducepower
consumption.NetworkandRS-
232Cserialcommunication
willbeunavailableexceptthe
POWERoncommandduringthat
mode.
O
On
ECO
Setting
Direct power on
Standby mode
High land
Light source mode
Cooling fast
Closed caption
Key lock
Iris
Sound
HDMI Setup
Off
Eco
Off
Normal
Off
On
Settingmenu
Direct power on
Light source mode
Setting
Standby mode
High land
Cooling fast
Closed caption
Key lock
Iris
Sound
HDMI Setup
Off
Eco
Off
Normal
Off
On
Standbymode
Setting
Standby mode
High land
Cooling fast
Closed caption
Key lock
Iris
Sound
HDMI Setup
Off
Eco
Off
Normal
Off
On
Direct power on
Light source mode
Directpoweron
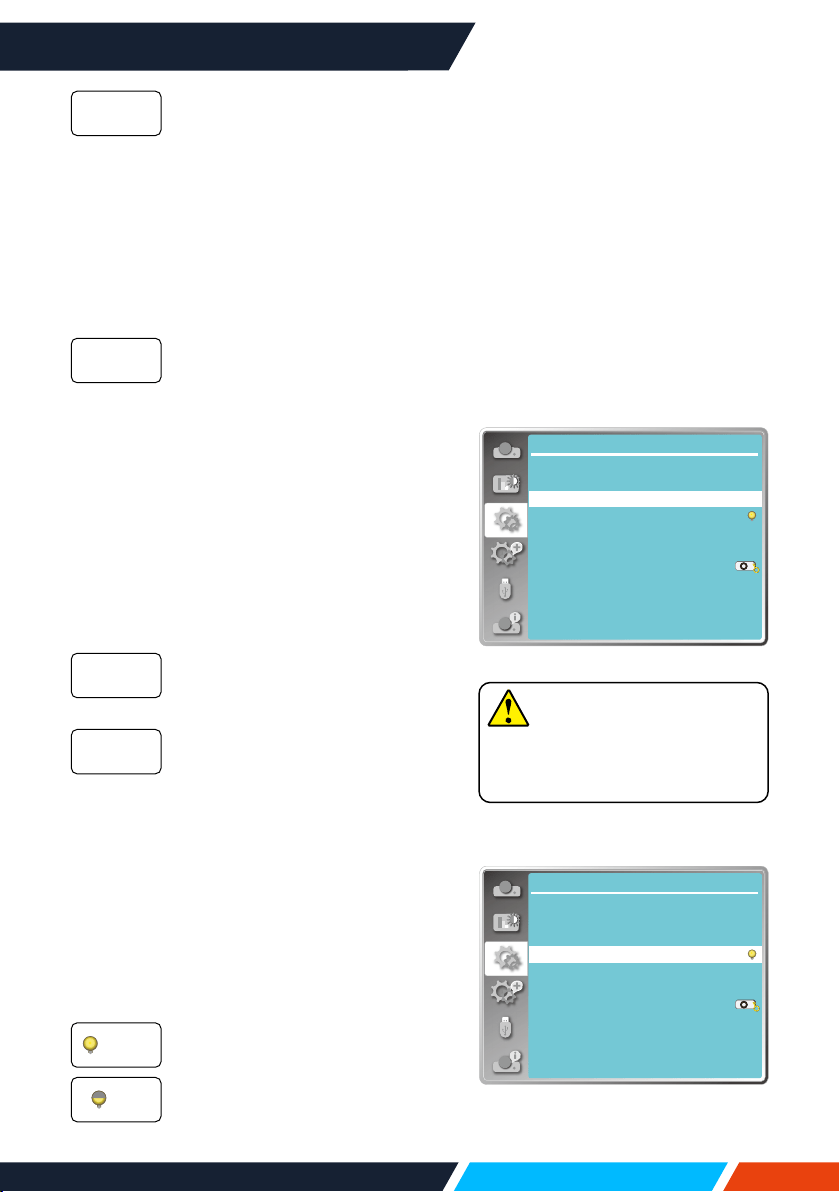
www.infocus.com
Setting
54
Inordertoreducepower
consumption,somefunctions
instandbymodewillbelimited.
Undernetworkstandby,network
functionisnotavailableand
RS-232Cserialcommunication
(exceptbootcommand)function
isnotavailable.
• Standbymodenetworkwake-up
functioncanonlyusethe"Wake
OnLAN"tool.
InordertoreducepowerEven
instandbymode,thereareno
restraintonnetworkfunctionand
serialcommunicationfunction.
High land
Thisprojectorprovidesfancontrolfunctionin
thesettingsmenu.Youcanchangethesetting
aboutspeedofcoolingfanaccordingtothe
altitudeyourprojectorisoperatingat.
1. Press
buttontoselect[Highland]menu.
2. Press<OK>button.
3. Press
buttontoselectrequiredmenu.
Normalspeed.Settheoptiono
whenoperatingtheoperator,if
thealtitudeisnottoohigh.
Fasterthanwheninomode.Set
theoptiononwhenoperatingthe
operatorinhighland.
Light source mode
Changelampbrightnessaccordingtothe
environmentandaimyourprojectoris
operating.
1. Press
buttontoselect[Lightsource
mode]menu.
2. Press<OK>button.
3. Press
buttontoswitchrequiredmenu.
Normalbrightness.
Lowerthebrightnessandreduce
energyconsumption,thus
prolongingthelampservicelife.
Network
Normal
O
On
Normal
ECO
Note
• SethighlandoptionONwhen
youoperatetheoperatoratan
altitudeof1400-2000meters.
Direct power on
Light source mode
Setting
Standby mode
High land
Cooling fast
Closed caption
Key lock
Iris
Sound
HDMI Setup
Off
Eco
Off
Normal
Off
On
Highland
Setting
Standby mode
High land
Cooling fast
Closed caption
Key lock
Iris
Sound
HDMI Setup
Off
Eco
Off
Normal
Off
On
Direct power on
Light source mode
Lightsourcemode
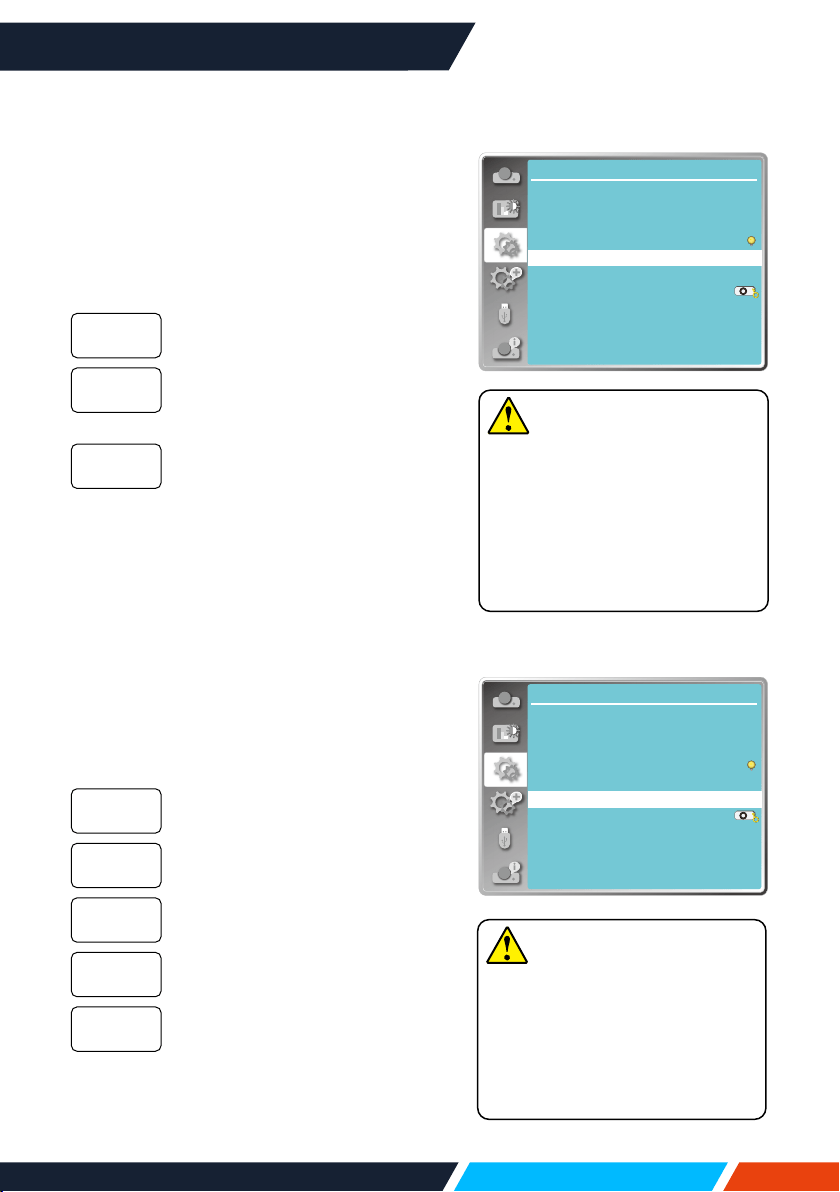
www.infocus.com
Setting
55
Note
• Whensettheoption0seconds,
usercannotrestarttheprojector
immediatelyafterturningoit.
• Whilesometimes,thelamp
maytakealongertimetocool
othanusualtolightagainfor
hightemperature.
Note
Theicondisplaygreyifthe
Closedcaptionfunctionisinvalid.
• TheClosedcaptionfunction
isinvalidwhentheOSDmenu
andTimerdisplayonthe
screen.
Cooling fast
Afteryourprojectorispoweredo,select
coolingfanspeedtoshortenthecoolingtime.
1. Press
buttontoselect[Coolingfast]
menu.
2. Press<OK>button.
3. Press
buttontoswitchrequiredmenu.
Runninginnormalway.
Runningfasterthaninnormal
modewithshortertimebuta
loudersound.
Selectthisfunctionallowyouto
unplugtheACpowerdirectlyafter
theshutdown,withoutwaitingfor
theprojectorcoolingo.
Closed caption
ClosedCaptionisusedfordisplayingthe
programsoundorotherinformationonthe
screen.Selectthisfunctiontoswitchchannel
withinputsignalofclosedcaption.
1. Press
buttontoselect[Closed
caption]menu.
2. Press<OK>button.
3. Press
buttontoswitchrequiredmenu.
Noclosedcaption.
DisplayCC1data.
DisplayCC2data.
DisplayCC3data.
DisplayCC4data.
Normal
60Sec
0Sec
O
CC1
CC2
CC3
CC4
Direct power on
Light source mode
Setting
Standby mode
High land
Cooling fast
Closed caption
Key lock
Iris
Sound
HDMI Setup
Off
Eco
Off
Normal
Off
On
Coolingfast
Direct power on
Light source mode
Setting
Standby mode
High land
Cooling fast
Closed caption
Key lock
Iris
Sound
HDMI Setup
Off
Eco
Off
Normal
Off
On
Closedcaption
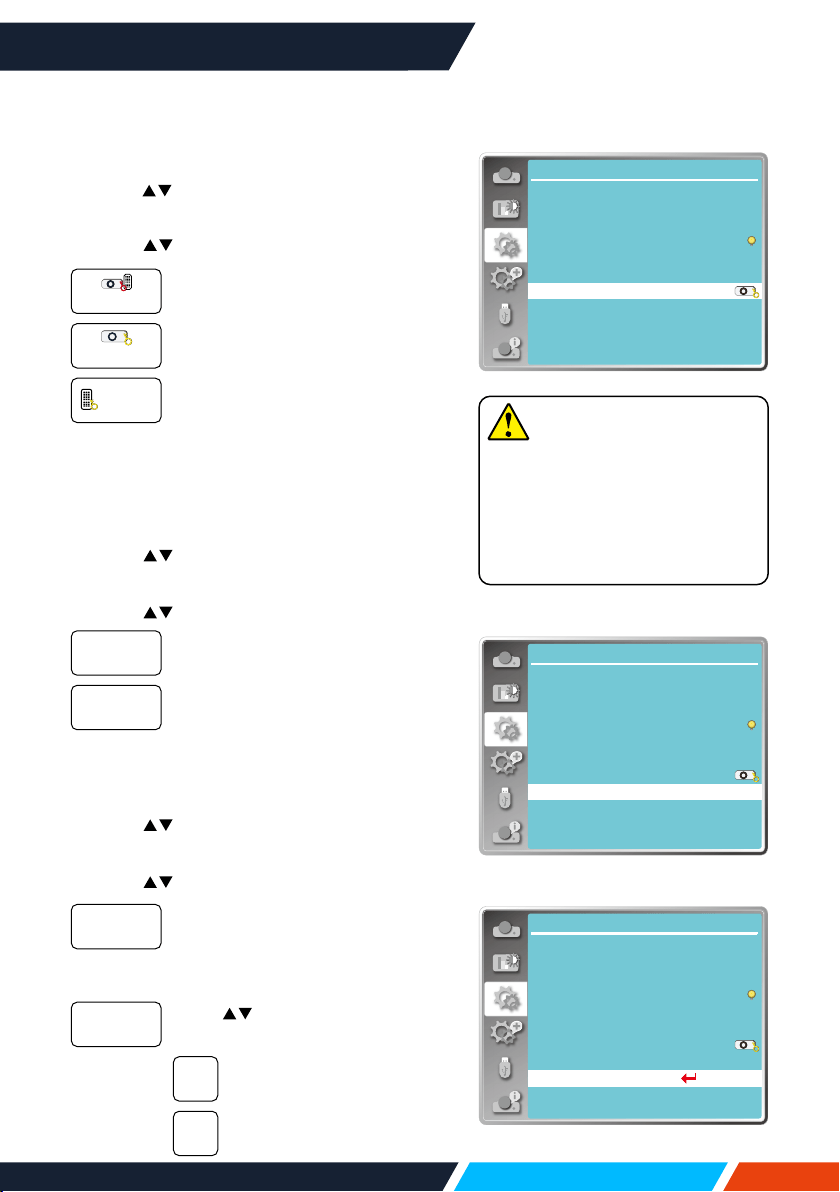
www.infocus.com
Setting
56
Key lock
Selectthisfunctiontolockandunlockthe
controlpanelorremotecontrolkeypad.
1. Press buttontoselect[Keylock]menu.
2. Press<OK>button.
3. Press
b
uttontoswitchrequiredmenu.
Thecontrolpanelorremote
controlkeypadareeective.
Controlpanelkeypadisinvalid.
Remotecontrolkeypadisinvalid.
Iris
Selectthisfunctiontocorrectandcompensate
signalautomaticallyonthebasisoftheimage,
togetthebestcontrastimage.
1. Press
buttontoselect[iris]menu.
2. Press<OK>button.
3. Press
buttontoadjustlevels.
Nocorrection.
Correctiris.
Sound
Selectthisfunctiontoadjustthesound.
1. Press
buttontoselect[Sound]menu.
2. Press<OK>button.
3. Press
buttontoswitchrequiredmenu.
Press
buttontoincrease
volume,rangefrom0~+25.
Press
buttontodecrease
volume,rangefrom0~+25.
Press
buttontoswitchonor
oMutefunction.
Noaudiooutput.
Audiooutput.
Normal
Projector
Remote
control
O
On
Volume
Mute
On
O
Note
• Ifyoulockthetopofthecontrol
panel,butwithoutaremote
controlorsomethingwrong
withtheremotecontrol,please
contactyourdealerorservice
centre.
Direct power on
Light source mode
Setting
Standby mode
High land
Cooling fast
Closed caption
Key lock
Iris
Sound
HDMI Setup
Off
Eco
Off
Normal
Off
On
Keylock
Direct power on
Light source mode
...
Setting
Standby mode
High land
Cooling fast
Closed caption
Key lock
Iris
Sound
HDMI Setup
Off
Eco
Off
Normal
Off
On
Sound
Direct power on
Light source mode
Setting
Standby mode
High land
Cooling fast
Closed caption
Key lock
Iris
Sound
HDMI Setup
Off
Eco
Off
Normal
Off
On
Iris
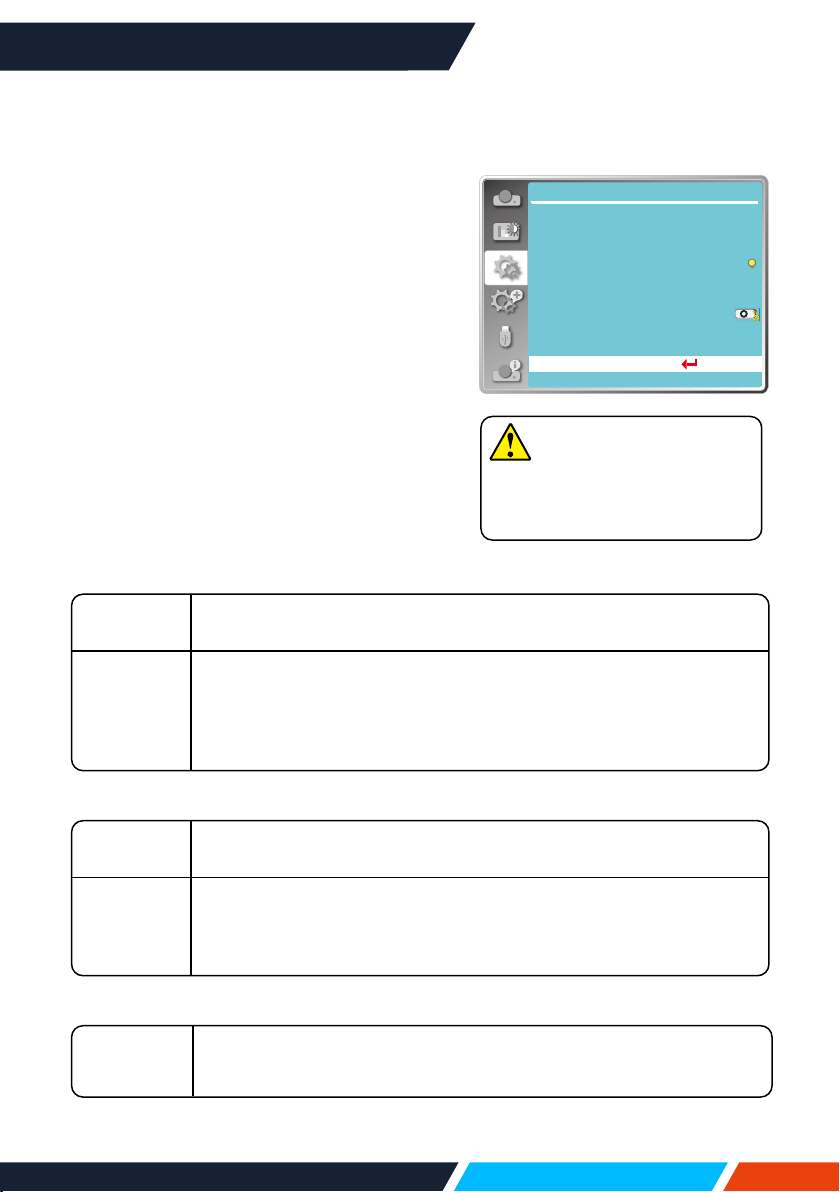
www.infocus.com
Setting
57
Note
• HDMIoptioncanbechosen
onlyinHDMI1andHDMI2
channel.
HDMI setup
Whentheexternaldeviceisconnectedtothe
HDMIterminaloftheprojector,andtheimages
cannotbeprojectednormally,pleaseswitch
ontheImageorSoundsetting.
Press<MENU>buttonontheremotecontrol
oronthetopcontrolpaneltodisplaytheOSD
menu.Press
buttontoselectthesetting
menu,thenpress<OK>or
buttontoenter
thesub-menu.
1. Press
buttontoselect[HDMIsetup]
menu.
2. Press<OK>button.
• Display[HDMIsetup]instantly.
3. Press
buttontoselect[Image]or
[Sound].
• Press<OK>button.
Image
[64-940]
Whenexternaldevice(suchas:abluraydiscplayer)isconnectedto
theHDMIsetupterminal.
[0-1023]
Whentheoutputofanexternaldevice(suchasacomputer),viaa
conversioncableorasimilarcable,isconnectedtotheHDMIsetup
terminal.
Selectthisoptionwhentheoutputofthepcoranyotherdeviceis
connectedtotheHDMIsetupterminalalso.
Sound
[HDMI]
WhenconnecttotheHDMIcabletotransmitimagesandaudiowhile
theusersdonotneedconnecttoaudiosignalseparately.
[Computer]
Whentheoutputofanexternaldevice(suchasacomputer),viaa
conversioncableorasimilarcable,isconnectedtotheHDMIterminal.
TheaudiosignalwouldbeoutputaccordingtheconnectionofAUDIO
INterminal.
HDMI EQ setup
Mode0-3
ChangetheHDMIreceptionlevelaccordingtotheAVdevice
connectedtotheHDMIinputterminal.Ifnoiseappearsintheimageor
theimagedoesnotappear,changethesettings.
Direct power on
Light source mode
...
Setting
Standby mode
High land
Cooling fast
Closed caption
Key lock
Iris
Sound
HDMI Setup
Off
Eco
Off
Normal
Off
On
HDMISetup

www.infocus.com
Expand
58
Expand
The projector has Expand function, you can
select other functions as described below.
Menu operation
Press<MENU>buttonontheremotecontrol
oronthetopcontrolpaneltodisplaytheOSD
menu.Press
buttontoselecttheexpand
menu,thenpress<OK>or
button.
1. Press
buttontoselectrequireditem.
2. Press<OK>button.
3. Press
buttontosetoptions.
4. Press<OK>button.
Language
Userscanselectedthelanguagedisplayedon
thescreen.
1. Press
buttontoselect[Language]
menu.
2. Press<OK>button.
3. Press
buttontoselectrequired
language.
4. Press<OK>button.
Thenameofmenus,setting,theOSD,button
etc.,candisplayedbytheselectedlanguage.
Yourprojectorcomeswithmultiplelanguage
support.Youmayselectrequiredonefrom
them,suchas:English,German,French,
Italian,Spanish,Polish,Swedish,Dutch,
Portuguese,Japanese,SimpliedChinese,
TraditionalChinese,Korean,Russian,Arabic,
Turkey,Finland,Norway,Denmark,Indonesia,
Hungary,CzechRepublic,Kazakhstan,
Vietnamese,Thai,Farsi.
Expand
Language
Auto setup
Keystone
Logo
Security
Power management
Filter counter
Test pattern
Network
Factory default
Expandmenu
Language
Network
...
Expand
Language
Auto setup
Keystone
Logo
Security
Power management
Filter counter
Test pattern
Factory default
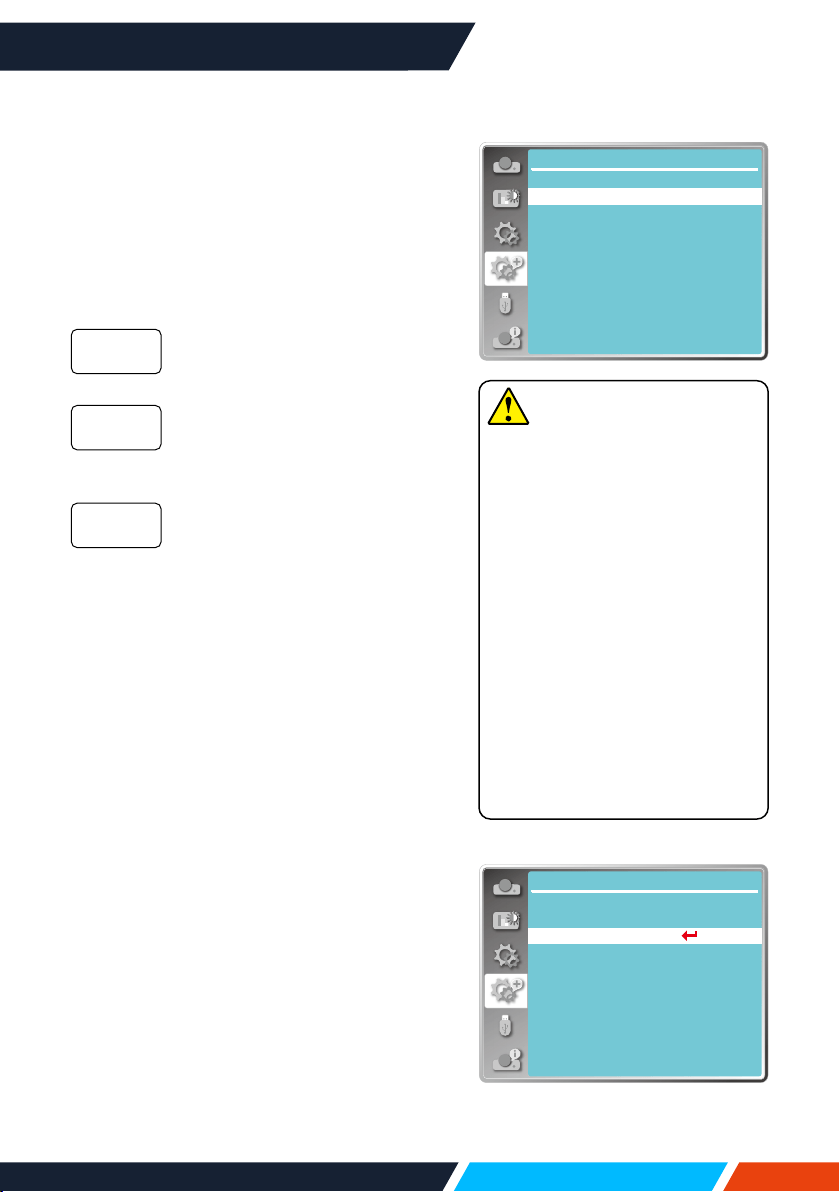
www.infocus.com
Expand
59
Auto setup
PresstheAUTObuttononyourremotecontrol
toexecutethefollowingfunctions:Input
search,AutoPCadj.,andAutokeystone.
1. Press
buttontoselect[Autosetup]
menu.
2. Press<OK>button.
3. Press
buttontoselectrequireditems.
Selectthisfunctiontodetectthe
signal,thenprojectimagesand
inputsignalsautomatically.
Selectthisfunctiontoadjust[Fine
sync],[HPosition],[VPosition]
and[H.Size]automatically,when
projectorinputanaloguesignals.
Selectthisfunctiontocorrect
verticaldistortionoftheprojected
imageautomatically.
Keystone
Selectthisfunctiontostoreorresetthe
keystoneorsomerelatedsettingafter
unpluggingtheACpower.
Press<MENU>buttonontheremotecontrol
oronthetopcontrolpaneltodisplaytheOSD
menu.Press
buttontoselecttheexpand
menu,thenpress<OK>or
buttontoenter.
1. Press
buttontoselect[Keystone]
menu.
2. Press<OK>button.
3. Press
buttontoselectrequireditem.
4. Press<OK>button.
Inputsearch
AutoPCadj.
Auto
keystone
Expand
Auto setup
On
On
Off
Input search
Auto PC adj.
Auto keystone
Autosetup
Network
...
Expand
Language
Auto setup
Keystone
Logo
Security
Power management
Filter counter
Test pattern
Factory default
Keystone
Note
• Oneofinputsearch,AutoPC
adj.andAutokeystoneoption
shouldbesettoOnatleast.
• Pleaseadjusttheprojector
manually,iftheimageis
displayedabnormalevenif
youhaveselectautokeystone
function.
• WhenyousetProjectwayas
Ceiling/FrontorCeiling/Rear,
Autokeystonefunctionisinvalid.
• WhenyousetProjectwayas
Autoceiling/frontorAuto
ceiling/rear,andusersputtheir
projectorinceilingstate,theAuto
keystonefunctionwillbeinvalid.
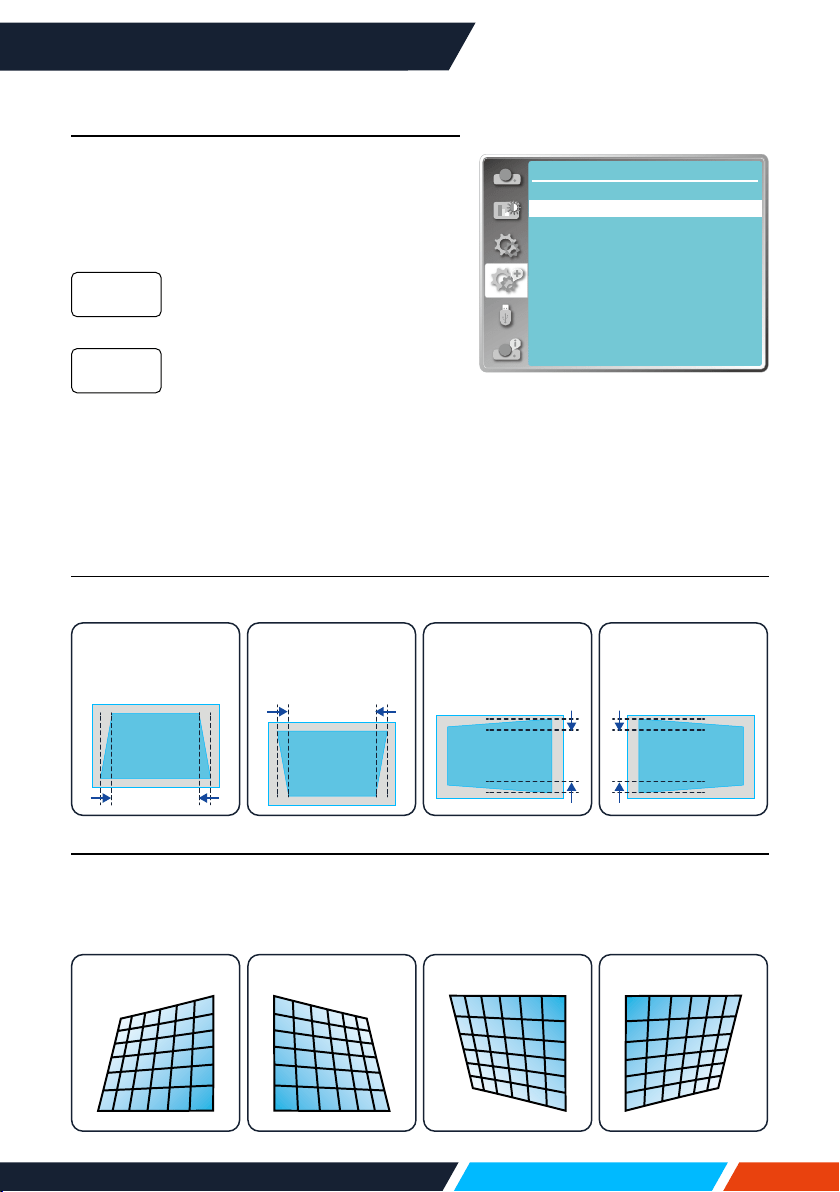
www.infocus.com
Expand
60
Keystone
Selectthisfunctiontostoreandresetkeystone
afterclosingtheprojectororunpluggingtheAC
power.
• Thisfunctionisonlywhentheoptionabout
autokeystoneisnotsetOn.
Storekeystoneafterclosingthe
projectororunpluggingtheAC
power.
Keystonefunctionwillbecancelled
afterclosingtheprojectoror
unpluggingtheACpowerwhenthe
standbymodeissettoECO.mode.
Whenthestandbymodeissetto
normal,keystonewillbecancelled
ifyouunplugtheACpower;while
itwillbestoredwhenclosingthe
projector.
Store
Reset
H/V Keystone
Selectthisfunctiontocorrecttheprojectedimageshorizontallyorvertically.
Press
button
toreduceupper
width
Press
button
toreducebottom
width
Press
buttonto
reduceleftwidth
Press
buttonto
reducerightwidth
4-Corner correction
Se
lectthisfunctiontocorrecttheprojectedimagesoffourcornersdistorted.
Press
buttontokeystoneatfourcornersofthescreen.Thefourcornersare
loopedinsequenceshownbelow:
Topleft Topright BottomrightBottomleft
Expand
Keystone
StoreKeystone
H/V Keystone
Curved correction
Reset value
Corner correction
Keystonesub-menu

www.infocus.com
Expand
61
6-Conner correction (Only for WUXGA series)
Selectthisfunctiontocorrecttheprojectedimagesofsixcornersdistorted.
Press
buttontokeystoneatsixcornersofthescreen.Thesixcornersare
loopedinsequenceshownbelow:
Top
left
Top
right
Top
middle
Bottom
middle
Bottom
left
Bottom
right
Curved correction (Only for WUXGA series)
Selectthisfunctiontocorrecttheprojectedimageswithlinearityunevenorvertical
andhorizontalbendingdeformation.Press
buttontoadjustoptions.
Item Operation Adjustment
Curved
correction
X/Ygain
Press
Extendleftandrightvertically.
Press
Sagleftandrightvertically.
Press
Reachupanddownhorizontally.
Press
Sagupanddownhorizontally.
Curved
correction
Xoset
Press
Correcttheverticallinesontheleft.
Expandthetopanandbottomwhile
maintainingthecentralarea.
Press
Correcttheverticallinesontheright.
Expandthetopanandbottomwhile
maintainingthecentralarea.
Press
Correctthehorizontallineontheleft.
Expandthetopandbottomwhile
maintainingthecentralarea.
Press
Correctthehorizontallineontheright.
Expandthetopandbottomwhile
maintainingthecentralarea.

www.infocus.com
Expand
62
Item Operation Adjustment
Curved
correction
Xoset
Press
Correctthehorizontallineontheleft.
Expandthetopandbottomwhile
maintainingthecentralarea.
Press
Correctthehorizontallinetotheright.
Expandthetopandbottomwhile
maintainingthecentralarea.
Press
Correctthehorizontallineontheleft.
Expandthetopandbottomwhile
maintainingthecentralarea.
Press
Correctthehorizontallinetotheright.
Expandthetopandbottomwhile
maintainingthecentralarea.
Curved
correctionY
oset
Press
Correctverticallinesonbothsides.
Expandthelowercornerswhile
maintainingthecentralandupper
regions.
Press
Correctverticallinesonbothsides.
Expandthetopcornerswhile
maintainingthecentralandupper
regions.
Press
Correctverticallinesonbothsides.
Expandthelowercornerswhile
maintainingthecentralandupper
regions.
Press
Correctverticallinesonbothsides.
Expandthetopcornerswhile
maintainingthecentralandupper
regions.
Press
Correctverticallinesonbothsides.
Expandthelowercornerswhile
maintainingthecentralandupper
regions.
Press
Correctverticallinesonbothsides.
Expandtheuppercornerwhile
keepingthecentralandlowerregions
unchanged.

www.infocus.com
Expand
63
Grid image tune (Only for WUXGA series)
Selectthisfunctiontoadjustthelocalpointsoftheprojectedimage.
1. Press
buttontoselect[Gridimagetune]option.
2. Press<OK>button.
Reset value
Selectthisfunctiontomakeadjustmentvaluebacktothefactorydefault.
1. Press
buttontoselect[Resetvalue]option.
2. Press<OK>button.
• Releasekeystonemode.
Note
• AfteradjustingvaluesaboutH/Vkeystone,ifusersadjustconnercorrection,
valuesaboutH/Vkeystonewillbereset,andafteradjustingvaluesaboutconner
correction,ifusersadjustaboutH/Vkeystone,valuesaboutconnercorrectionwill
beresetalso.
• CurvedcorrectionXosetandcurvedcorrectionyosetcannotbeadjusted
individually.AdjustcurvedcorrectionXosetandcurvedcorrectionyosetafter
adjustingtheX/Ycurvedcorrection.
• Maximumkeystonerangeupto±30°verticallyand±30°horizontally.However,
theimagequalitywilldeteriorate,andbecomemorediculttofocus.installthe
projectorwiththeminimalcorrectionvalue.
• ThescreensizewillbechangedwithvariousH/Vkeystoneadjustments.
• Keystonemayinuenceimageaspect.
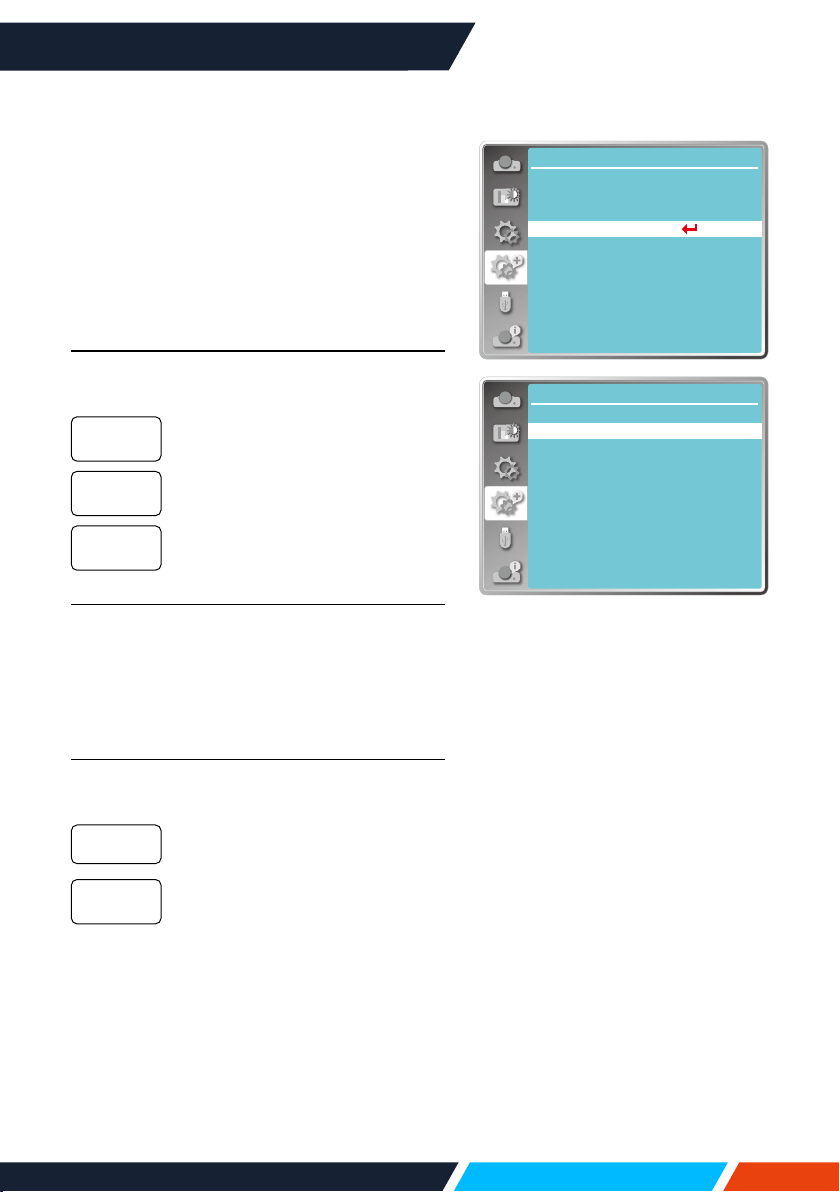
www.infocus.com
Expand
64
Logo
(includingLogoandLogoPINCodelocksetup)
YoumayusethisfunctiontoselectLogo
screen,LogoPINCodelock,changepower
onpassword,andsetupdefaultlogoscreen.
1. Press
buttontoselect[Logo]menu.
2. Press<OK>button.
3. Press
buttontoselectrequireditems.
Logo Select
Selectthistosetupthelogoscreenwhen
poweronyourprojector:
Displayfactorydefaultlogo
screen.
Displaycapturelogoscreen.
Displaycountdownlogoscreen.
Capture
Youcancaptureaprojectedimageasstart
logo.Select"Capture"andpressthe<OK>
buttononremotecontrolorcontrolpanel.
Conrmationdialogboxappears,select"Yes"
tostartcapturing.
Logo PIN Code lock
Thisfunctionhelpspreventingunauthorized
personnelfromchangingtheLogoscreen.
TheLogoscreenmaybechanged
withtheLogomenu.
Youmaynotalterthelogoscreen
withouttheLogoPINCode.
Tochangethelogoscreenpassword
protection,press<OK>key,andtheLogoPIN
Codechangepop-updialogueboxprompts.
Followstepsbelowtoenteralogoscreen
password.
• Pressarrow
buttontoselectanumber,
thenpress<OK>buttontoenteritand
movethecursor.Thenumberyoutypedis
displayedas“*”.Toeditnumberyouhave
Default
User
O
O
On
Network
...
Expand
Language
Auto setup
Keystone
Logo
Security
Power management
Filter counter
Test pattern
Factory default
Logomenu
Expand
Logo
Default
Off
Logo select
Capture
Logo PIN code change
Logo PIN code lock
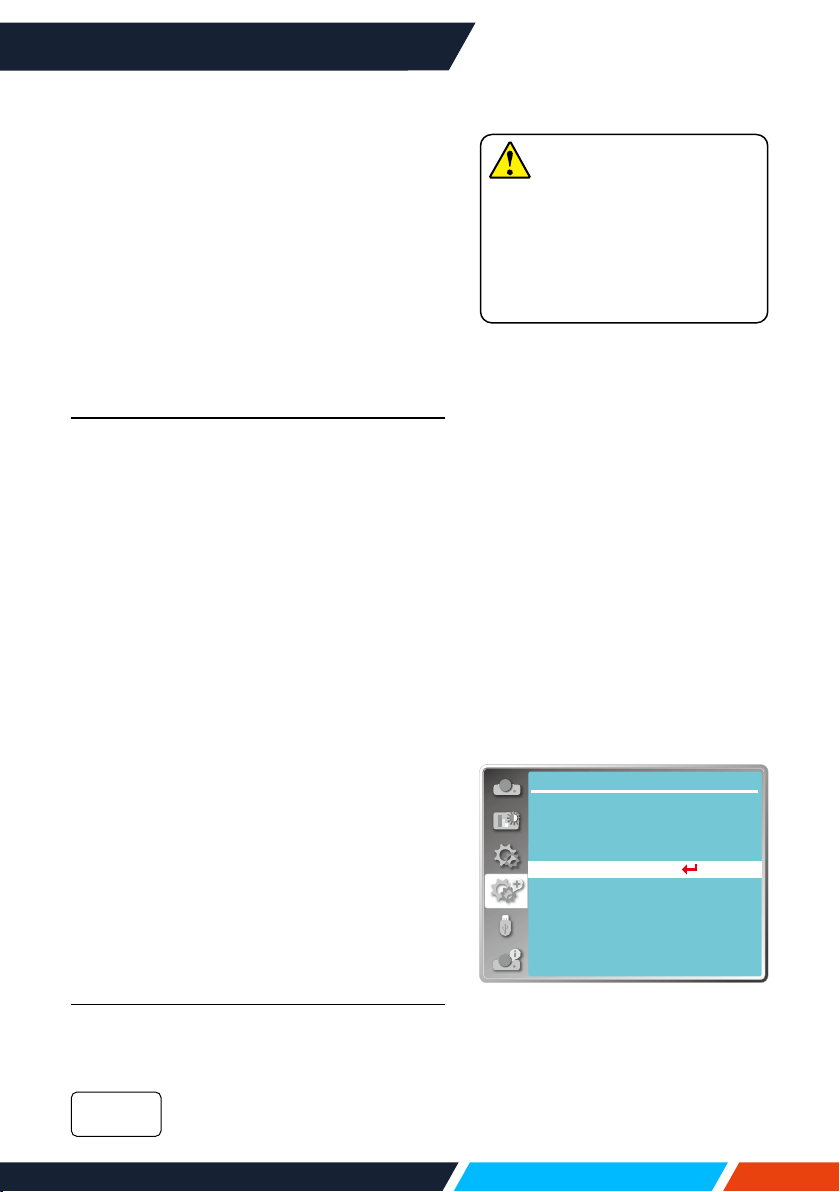
www.infocus.com
Expand
65
entered,press<MENU>buttontomovethe
cursortothenumberyouwanttochange,
press
buttontoselectthecorrectone.
• Repeatthissteptotypeina3-digitnumber.
Movethecursortosetafteryouhavetyped
the3-digitnumber.Press<OK>button.
• Ifthepasswordisinvalid,thepassword
displayedas“***”willbeinred.Pleasetry
againwithavalidone.
• AfteryouhaveenteredvalidlogoscreenPIN
code,youmaypress
buttontotoggle
switchOandOn.
Logo PIN Code change
YoumaychangetheLogoPINCodetoany
3-digitnumberyoulike.PressOKkeytoselect
LogoPINCodechange.TheLogoPINCode
changedialogueboxprompts,pressarrow
buttontogiveavalidnewcode.TheNew
LogoPINCodedialogueboxprompts.Set
upanewLogoPINCode,checkcontents
containedinthedialoguebox,selectYesand
thenewpasswordissetnow.
Pleaserememberyournewpasswordandkeep
itsafe.YoucannotchangetheLogoPINCode
againifyouforgotthepasswordyouhaveset.
Security
Setapasswordtolockthecontrolpanelor
remotecontrolkeypadtopreventunauthorized
personnelfromoperatingyourprojector.Once
theprojectorison,the[EnterPassword]
screenwillbedisplayed.
1. Press
buttontoselect[Security]
menu.
2. Press<OK>button.
3. Press
buttontoswitchrequireditem.
PIN Code lock
Thisfunctionpreventstheprojectorfrom
beingoperatedbyunauthorizedpersonsand
providesthefollowingsettingoptions:
Unlocked.
O
Network
...
Expand
Language
Auto setup
Keystone
Logo
Security
Power management
Filter counter
Test pattern
Factory default
Securitymenu
Note
• AfterchangingtheLogoPIN
Codetoanewnumber,please
rememberitandkeepitsafe
TheLogoPINCodecannot
bechangedagainifthenew
passwordislostorforgotten.
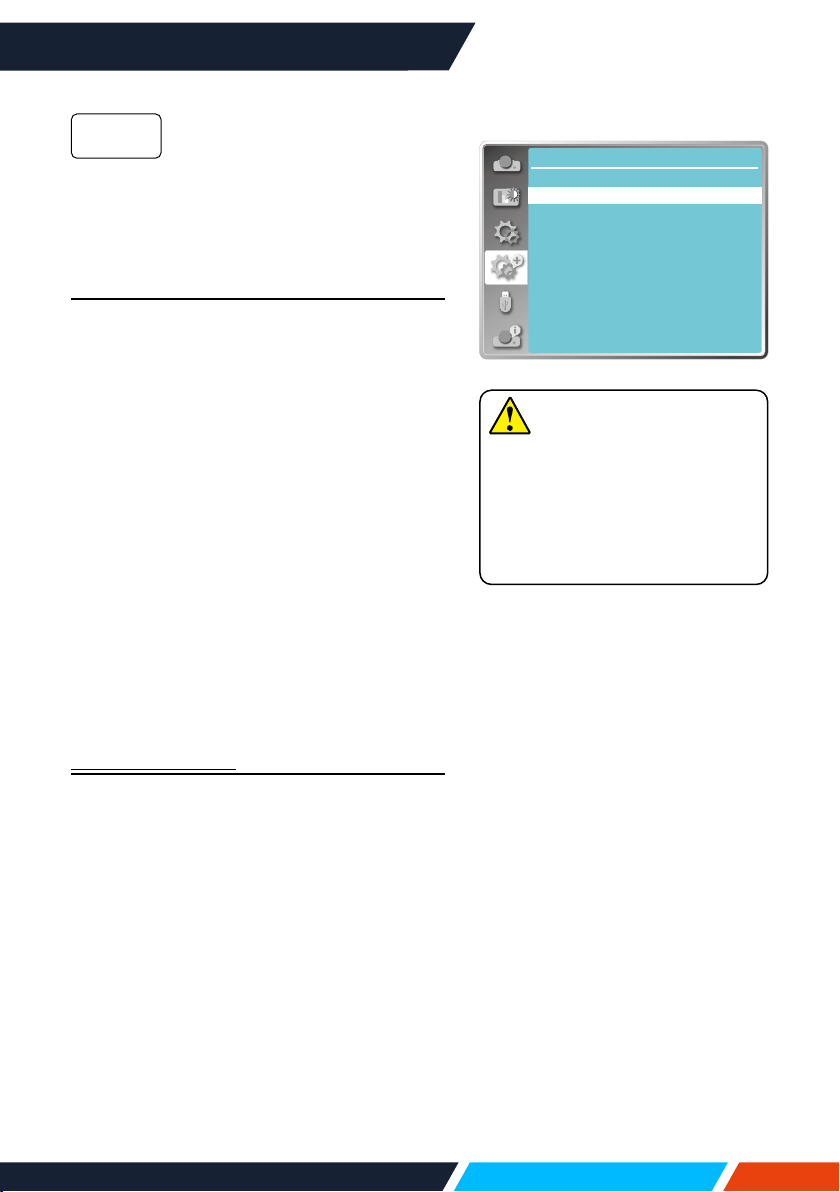
www.infocus.com
Expand
66
The[
Enter
Password]screen
willappearwhentheprojector
ison.Ifyouwanttochangethe
PINcodelockorpassword(for
threedigits),youmustenterthe
password.Thefactorydefault
passwordis"111".
Reset password
Tochangethepasswordprotection,press
<OK>button,andthePINCodechangepop-
updialogueboxprompts.
• Pressarrow
buttontoselectanumber,
thenpress<OK>buttontoenteritand
movethecursor.
• Thenumberyoutypedisdisplayedas“*”.
Toeditnumberyouhaveentered,press
menubuttontomovethecursortothe
numberyouwanttochange,press
buttontoselectthecorrectone.
• Repeatthissteptotypeina3-digitnumber.
• Enterathree-digitnumber,movethecursor
to"set".Pressthe<OK>button,youcan
starttooperatetheprojector.
• Ifthepasswordisinvalid,thepassword
displayedas“***”willbeinred.Pleasetry
againwithavalidone.
PIN Code Change
YoumaychangethePINCodetoany3-digit
numberyoulike.
• PressOKkeytoselectPINCodechange.
• ThePINCodechangedialoguebox
prompts,pressarrow
buttontogivea
validnewcode.
• TheNewPINCodedialogueboxprompts.
SetupanewPINCode,checkcontents
containedinthedialoguebox,selectset
andthenewpasswordissetnow.
• Pleaserememberyournewpasswordand
keepitsafe.YoucannotchangethePIN
Codeagainifyouforgotthepasswordyou
haveset.
On
Note
• AfterchangingthePINCode
toanewnumber,please
rememberitandkeepitsafe
ThePINCodecannotbe
changedagainifthenew
passwordislostorforgotten.
Expand
Security
OffPIN code lock
PIN code change
Securitysubmenu
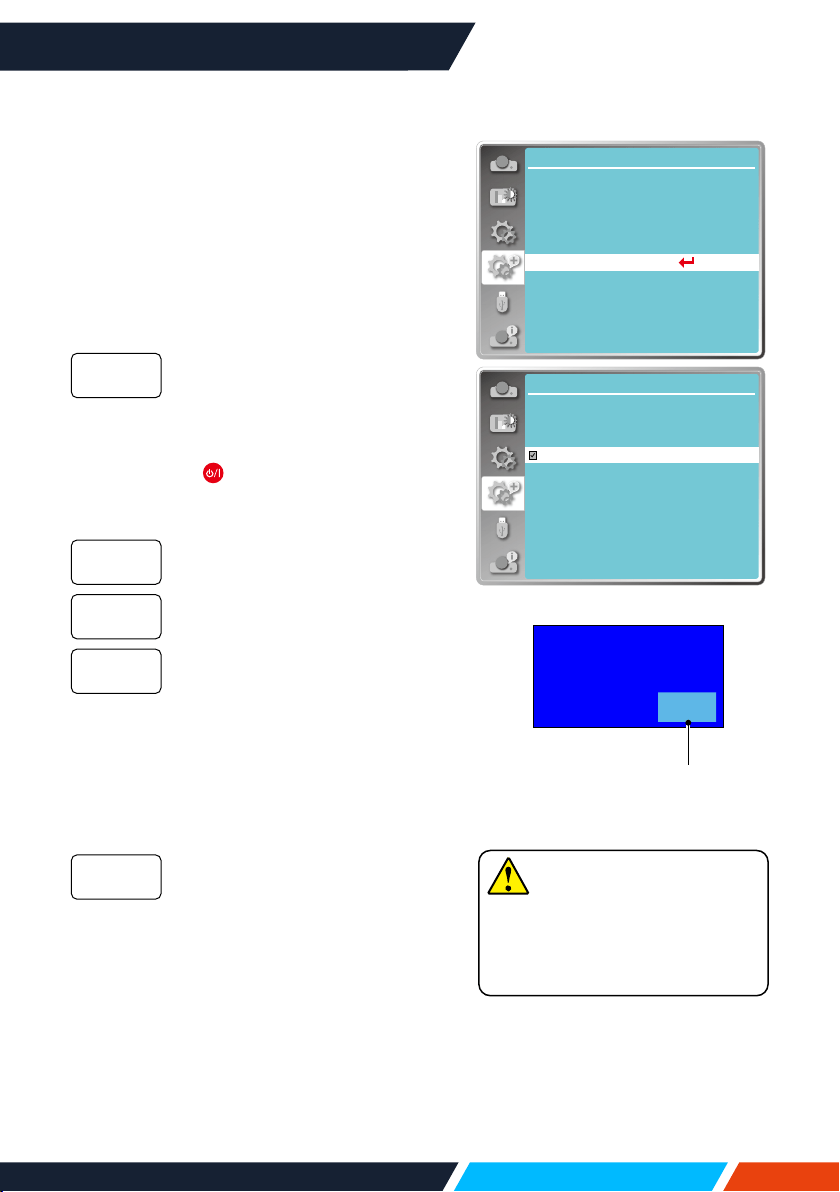
www.infocus.com
Expand
67
Remainingtimebefore
powerothelamp.
Nosignal
01:20
Power management
Toreducepowerconsumptionandmaintain
lifecycleoflamp,thepowermanagement
functionwillturnotheprojectionlampifyour
projectorhasnosignalsforaperiodoftime.
1. Press
buttontoselect[Power
management]menu.
2. Press<OK>button.
3. Press
buttontoswitchrequireditem.
ThePowerlightindicatorashes
greenwhenthelampisfully
cooleddown.Thelampturns
onagainifaninputsignalis
connectedoranykey(except
the
powerbutton)onthe
rearpanelandremotecontrolis
pressedduringthisperiodoftime.
Theprojectorshutdownafterthe
lampisfullycooleddown.
Disablethepowermanagement
function.
Oncetheinputsignalis
interruptedandnokeyshas
beenpressedfor30seconds
afterwards,the“Nosignal”
messagedisplaysinthetimer.
Thetimercountsdownuntilthe
lampturnso.Pressarrowkeyto
setupthetimerinrangeof1~30
minutes.
• Setuptheintervalfromready
modechangetostandby(0to30
minutes)automatically.Asetting
ofzerominuteskeepsyour
projectorfromautotransition.
• PressthePowerkeytochange
yourprojectorfromreadyto
standbymodeandanyotherkey
topoweriton.
Ready
Shutdown
O
Timer
Ready
countdown
Note
• Factorydefault:
Timer:5minutes;
Readycountdownmode:5
minutes.
Network
...
Expand
Language
Auto setup
Keystone
Logo
Security
Power management
Filter counter
Test pattern
Factory default
Powermanagementmenu
Expand
Power management
5 Min
5 Min
Ready
Off
Timer
Ready countdown
Shut down
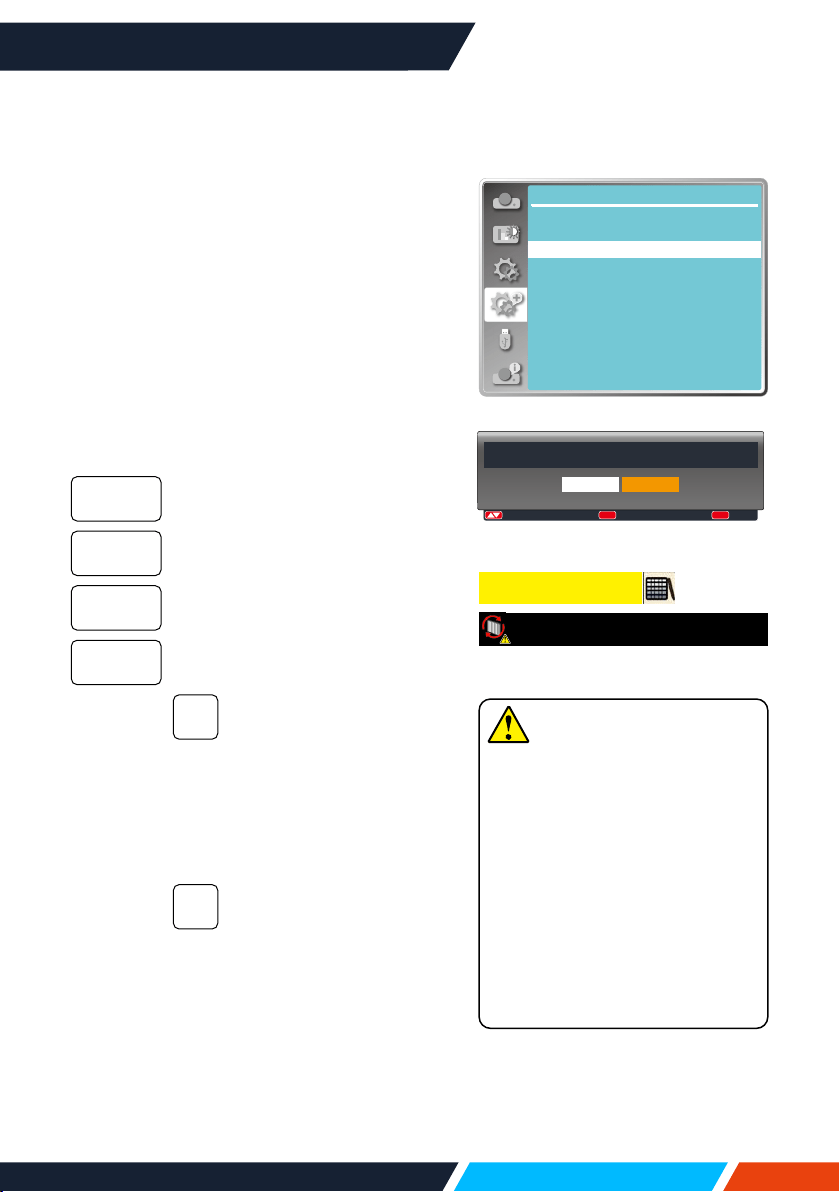
www.infocus.com
Expand
68
Filter counter
Setthisfunctiontoresetthelterusagetime
andsetupwarningdisplay.
1. Press
buttontoselect[Filtercounter]
menu.
2. Press<OK>button.
3. Press
buttontoswitchrequireditem.
Whentheprojectorreachestheuser-set
cleaningtime,lterwarningiconwillappear
onthescreentonotifytheuserneedstoclean
theprojectorlter.Pleasemakesuretoselect
theinitialstateandsetthetimeraftercleaning
it.Onceresettingltercounter,lterwarning
iconwillbeclosed.
Displaysthelterusagetime.
Setthetimetodisplayawarning
icon.
Resetltercounter.
Checkthetemperatureinsidethe
projectorandmakereactions.
Checklter.
• Oncetheprojectorhas
checkedanylterproblem
thescreenwilldisplay
awarningicon"Filter
warning!Pleasechange
thelter!".
DONOTchecklter.
Filtercounter
Timer
Filtercounter
reset
Filtercheck
On
O
Expand
Filter counter
27H
200H
Off
Filter counter
Filter counter reset
Filter check
Timer
Filtercountermenu
Filter counter reset?
Yes No
:Move :Select
OK
:Back
MENU
Note
• Thescreenwilldisplaytheicon
"Filterwarning!pleasechange
thelter!"whentheprojector
haschecksonewarning.And
thewarningiconwilldisappear
30slaterautomatically,while
onlythepowerbuttonis
eectiveduringthatperiod.
• Theprojectorwillgivewarning
againiftheprojectorhas
checkedlterblockandwill
recordtheinformation.
Filterwarning
Filterwarning!Pleasechangethefilter!
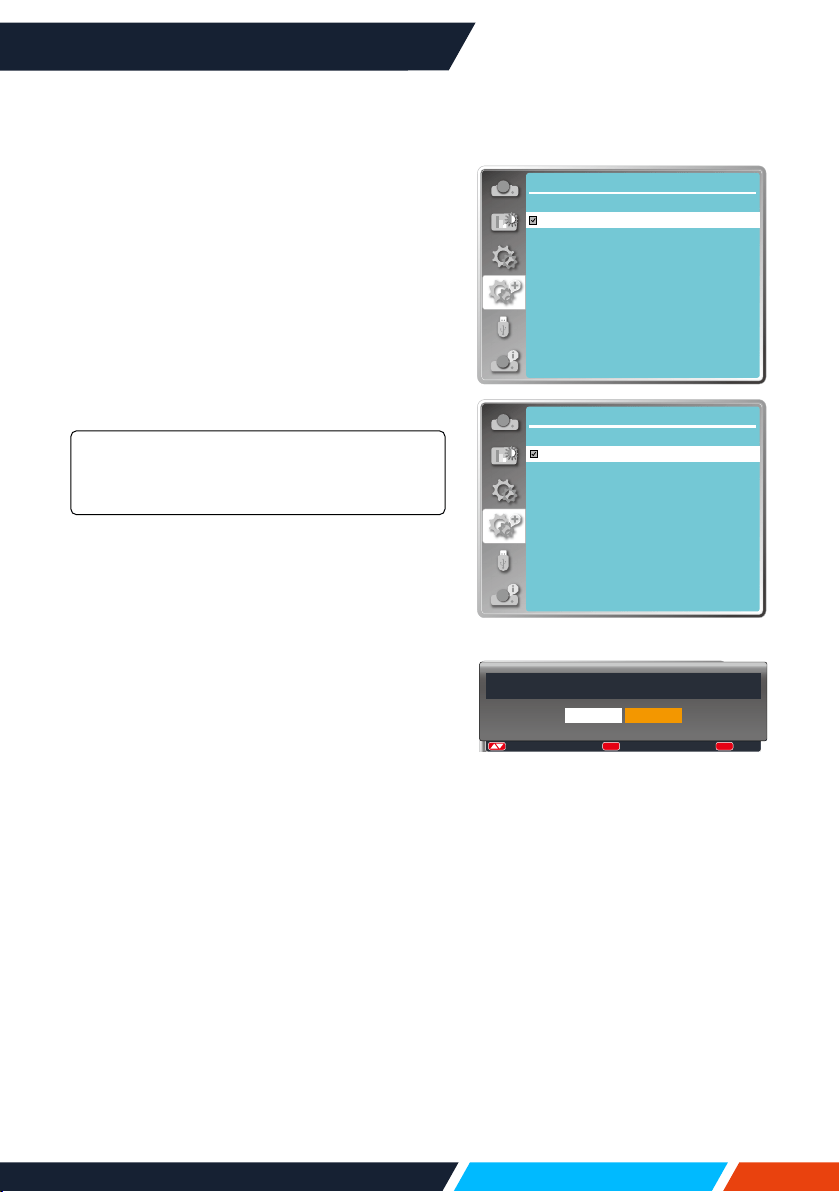
www.infocus.com
Expand
69
Test pattern
Selectthisfunctiontodisplaytheprojector's
built-intestpattern.
Location,size,andotherfactorscannotbe
reectedinthetestpattern.Pleasemakesure
todisplaytheinputsignalbeforeperforming
variousadjustments.
1. Press
buttontoselect[Testpattern]
menu.
2. Press<OK>button.
3. Press
buttontoswitchrequireditem.
4. Press<OK>button.
Grayscale1,Grayscale2,Grayscale3,
Grayscale4,Colourbar,Red,Green,Blue,
Crosshatch,White,Black,Rastergrey
UseTheOSDmenutodisplaythetestpattern.
Choosethetestmodecanhelpyoumakinga
seriesofadjustmentseasily.
Factory default
Thisfunctionresetsallyoursettingstofactory
default.
1. Press
buttontoselect
[Factory
default]
menu.
2. Press<OK>or
button.
3. Press
buttontoselectYes,thenpress
<OK>button.
Expand
Test pattern 1/2
Off
Gray scale1
Gray scale2
Gray scale3
Gray scale4
Color bar
Red
Green
Blue
Cross hatch
Testpatternmenu
Expand
Test pattern
2/2
White
Black
Raster gray
Return to factory default?
Yes No
:
Move
:
Select
OK
:
Back
MENU
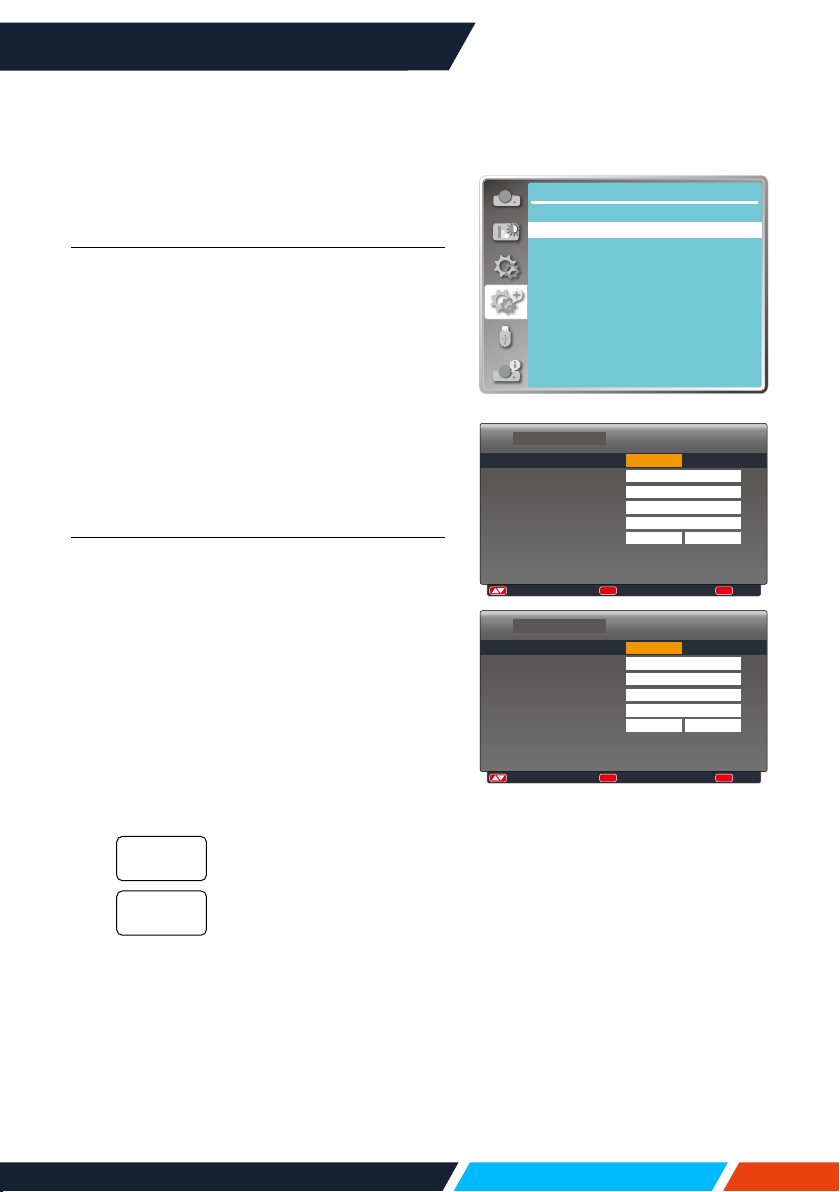
www.infocus.com
Expand
70
7C:6F:F8:4E:B9:2F
192.168.1.100
Expand
Network
Network setting
Network information
MAC address:
IP address
Networkmenu
Network
Thisfunctionisdesignedtoallowthe
computercontrolontheprojectorremotely
overyourlocalnetwork.
Preparation
1. Requiredequipment:Projector,computer,
networkcable
2. Connection:
Connectyourprojectortoarouterorswitch
intheLANwithnormalorjumpernetwork
cable.Incaseanormalnetworkcablefailed
toconnectsuccessfully,useajumpercable
instead.
3. Turnonthecomputer.TheLANporton
computerandprojectorareashingafter
powerontheprojector.
Operation steps
1. Poweronyourprojector.
2. AcquiretheIPaddress,withDHCPsetto
onandautoIPallocationsettoOn.(You
maysetDHCPtoOandsetupIPaddress
manuallyifyouaresomehowfamiliarwith
networking.)
3. Enterthenetworksetupmenu
1. Press<MENU>buttononremotecontrol
ortopofthecontrolpanel,press
buttontoselectnetworkicon.
2. Press
buttonselectnetwork
settingsandpress<OK>buttontoenter.
DisplaytheMACaddressof
wirednetwork.
DisplaytheIPaddressof
wirednetwork.
3. Press
buttontosetDHCPOnto
obtainanIPaddress,subnet,gateway
andDNSautomatically,andpress<OK>
buttontoconfirm.
Press
buttontosetDHCPOff,
thenpress<OK>buttontoenteranIP
address,thenpress
buttontoselect
subnet,gatewayandDNS,andpress
<OK>buttontoconfirm.
MAC
address
IPaddress
:Adjust :Next
OK
:Back
MENU
LAN
DHCP
IP address
Subnet
Gateway
DNS
Network setting
Set
On
Cancel
. . .
. . .
. . .
. . .
:
Adjust
:
Next
OK
:
Back
MENU
Off
192 . 168 . 1 . 100
255 . 255 . 255 . 0
192 . 168 . 1 . 1
192 . 168 . 1 . 1
LAN
DHCP
IP address
Subnet
Gateway
DNS
Network setting
Set Cancel
www.infocus.com
Memory Viewer
71
Memory Viewer
Select Memory Viewer function can project
images stored in USB memory, when you
insert the USB memory into the projector.
Press<MENU>buttonontheremotecontrol
todisplaytheOSDmenu.Press
button
toselectthememoryviewermenu,thenpress
<OK>or
button.
1. Press
buttontoselectrequireditem.
2. Press<OK>button.
3. Press
buttontosetoptions.
4. Press
<OK>button.
Set slide
Selectthisfunctiontoplayslides.
1. Press
buttontoselectale.
2. Press
buttontoselect[Setslide]
menu.
3. Press<OK>or
button.
• Fullscreendisplay.
• Press<OK>toreturnthethumbnail.
Slide transition eect
Selectthisfunctiontosettheslide'splayback,
whenswitchingslides.
1. Press
buttontoselect[Slidetransition
eect]menu.
2. Press<OK>or
button.
3. Press
buttontoswitchrequireditem.
Switchslidesfromtheupperto
thelower.
Switchslidesfromlefttothe
right.
Slidedown
Slideright
Memory Viewer
Set slide
Slide transition effect
Sort order
Rotate
Best fit
Repeat
Apply
Slide right
Name order
No rotate
Off
Off
Memoryviewermenu
Note
• Whenselecting[Memory
Viewer]asinputsignal,the
"MemoryViewer"menuis
available.
• Inadditionto"Setslide"menu,
evenchangethesettings,ifyou
donotimplementthe[Appliy],
thesettingvalueofthechange
isinvalid.
Note
USBplaybackrequiresthe
purchaseofanoptionalUSB
memorydrive,itisnotsupplied
withtheprojector.
www.infocus.com
Memory Viewer
72
Sort order
Selectthisfunctiontosettheslide's
order.
1. Press
buttontoselect[Sort
order]menu.
2. Press<OK>button.
3. Press
buttontoswitchrequired
item.
Sortbyexpandnamesof
leorfolder.
Sortbysizeofleorfolder.
Sortbythetimeofleor
folder.
Sortbynamesofleor
folder.
Rotate
Settherotationdirectionofimages.
1. Press
buttontoselect[Rotate]
menu.
2. Press<OK>button.
3. Press
buttontoswitchrequired
item.
Rotationisinvalid.
Rotatecounterclockwiseby
270degrees.
Rotateby180degrees.
Rotatecounterclockwiseby
90degrees.
Extendorder
Sizeorder
Timeorder
Nameorder
Norotate
270Degree
180Degree
90Degree
Best t
Settheimagetobecompatiblewith
projectionscreen.
1. Press
buttontoselect[Bestt]
menu.
2. Press<OK>button.
3. Press
buttontoswitchrequired
item.
Displayimagesbythe
aspectratioofthescreen.
Displayimagebythenormal
pixels.
Repeat
Selectthisfunctiontoplayslides
repeatedly.
1. Press
buttontoselect[Repeat]
menu.
2. Press<OK>or
button.
3. Press
buttontoswitchrequired
item.
Replaytherstdocument,
afterplayingthelastone.
Returntothethumbnail
displayscreen,afterplaying
thelastone.
Apply
Onlybeusedinplayingslides.
1. Press
buttontoselect[apply]
menu.
2. Press<OK>or
button.
On
O
On
O
Note
USBplaybackrequiresthepurchase
ofanoptionalUSBmemorydrive,itis
notsuppliedwiththeprojector.

www.infocus.com
Info.
73
Info.
Select Info. function to detect the projected
image signal and the projector operating
status.
Menu operation
Press<Info.>buttonontheremotecontrol
or<MENU>buttononthecontrolpanelto
displaytheOSDmenu.Press
buttonto
selecttheinfo.menu,thenpress<OK>or
button.
Info. display as follows:
Displayselectedinputsource.
DisplayH-sync.Freq.ofinput
signalinunitofKHz.
Show“---KHz”whennosignals
areinexistence.
DisplayV-sync.Freqofinput
signalinunitofKHz.
Show“---KHz”whennosignals
areinexistence.
Displaythelamp'susagetime.
Displayselectedpower
managementmode.
Displayselectedimagemode.
Displaytheprojector'smodel
name.
Displaytheprojector'sserial
number.
Displaytheprojector'srmware
version.
Input
H-sync.freq
V-sync.freq
Lightsource
counter
Power
management
Imagemode
ModelName
S/N
Firmware
Version
Info.
Input
V-sync freq.
H-sync freq.
Light source counter
Image mode
Model Name
S/N
VGA1
...
... KHZ
... HZ
Standard
Power management Off
5 H
xxxxx
xxxxx
Firmware Version 1.00.010
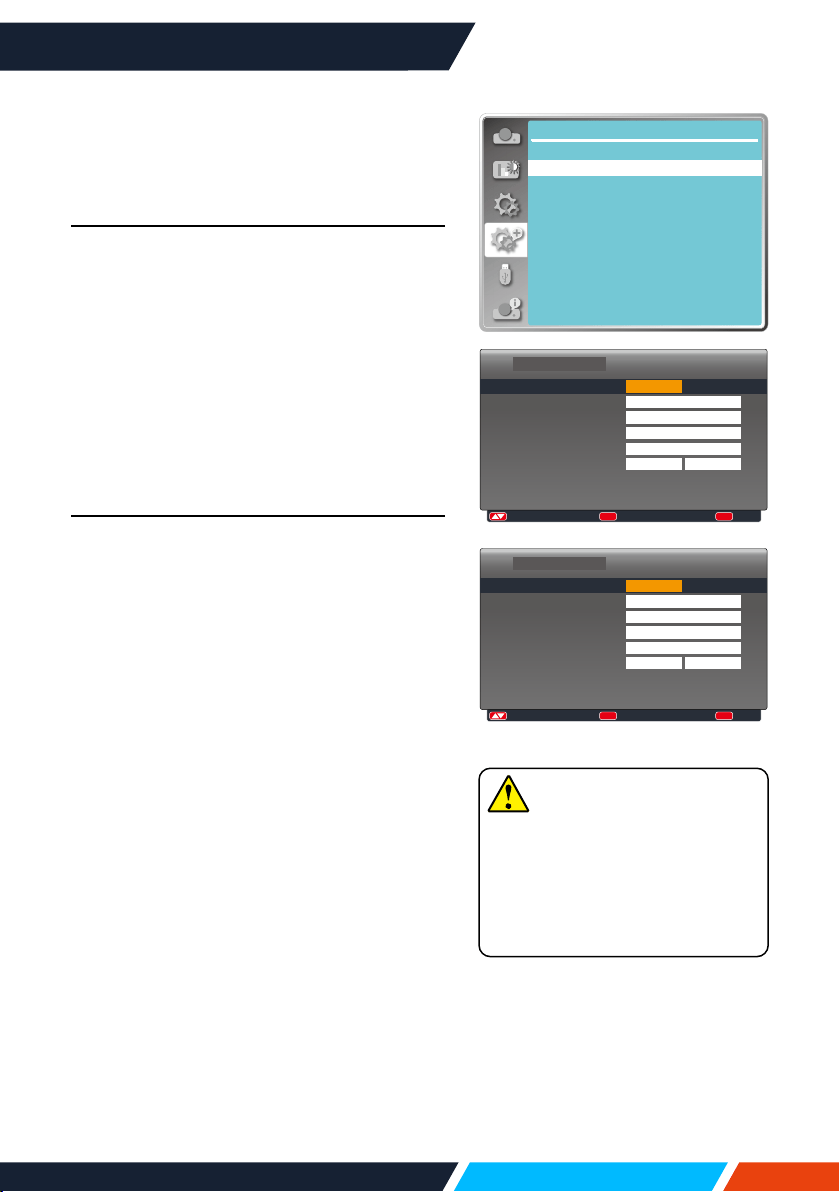
www.infocus.com
Network control
74
Network control
Network control operation
This function is designed to remote control
computer in the same LAN.
Preparation
1. Requiredequipment:
Projector,computer,networkcable.
2. Connection:
Connectyourprojectortoarouterorswitch
intheLANwithnormalorjumpernetwork
cable.Incaseanormalnetworkcablefailed
toconnectsuccessfully,useajumpercable
instead.
3. Turnonthecomputer.TheLANporton
computerandprojectorareashingafter
powerontheprojector.
Operation steps
1. Poweronyourprojector.
2. AcquiretheIPaddress,withDHCPsetto
onandautoIPallocationsettoOn.(You
maysetDHCPtoOandsetupIPaddress
manuallyifyouaresomehowfamiliarwith
networking.)
3. Enterthenetworksetupmenu
1. PressMENUbuttononremotecontrol
ortopofthecontrolpanel,press
buttontoselectnetworkicon.
2. Press<OK>buttonor
buttonandthe
networkmenudisplays.
3. Press
buttonselectnetwork
settingsandpress<OK>toconfirm.
4. Press
buttontosetDHCPOnand
press<OK>buttontoconfirm
5. Press
buttontoselectSet,press
<OK>buttontowaituntilthe“Please
wait..”messagedisappears.
Note
• Ifyouareusingthewireless
networkconnection,please
checktheSSID/ESSIDand
wirelessIPaddressinthe
NetworkSettingstatus,and
writedowntheinformation.
7C:6F:F8:4E:B9:2F
192.168.1.100
Expand
Network
Network setting
Network information
MAC address:
IP address
:Adjust :Next
OK
:Back
MENU
LAN
DHCP
IP address
Subnet
Gateway
DNS
Network setting
Set
On
Cancel
. . .
. . .
. . .
. . .
:
Adjust
:
Next
OK
:
Back
MENU
Off
192 . 168 . 1 . 100
255 . 255 . 255 . 0
192 . 168 . 1 . 1
192 . 168 . 1 . 1
LAN
DHCP
IP address
Subnet
Gateway
DNS
Network setting
Set Cancel
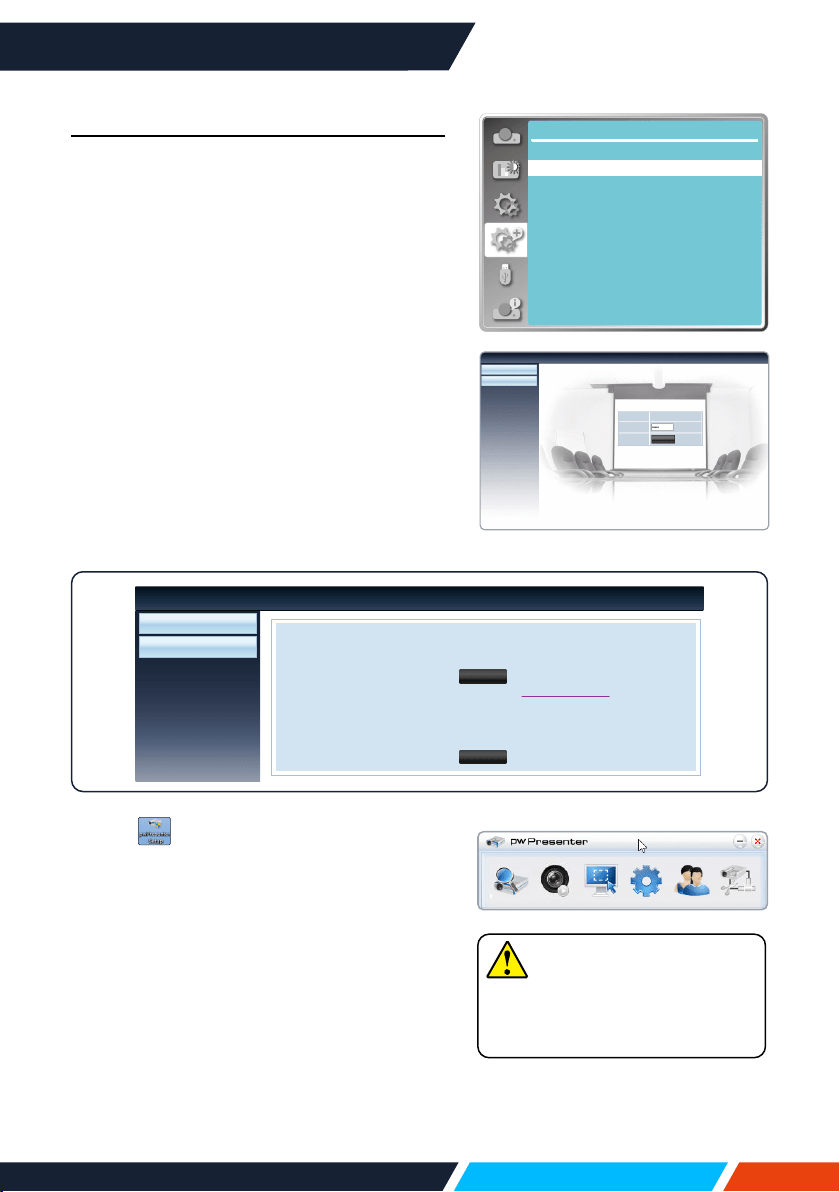
www.infocus.com
Network control
75
Installation procedure:
1. TypetheWirelessSSID/ESSIDaddress
(172.28.120.1)oftheprojectorinthe
addressbarofthewebbrowser.
(PleasendtheSSID/ESSIDaddressfrom
theNetworkinformationintheOSD.)
2. Clickdownloadbutton.
3. pwPresentersoftware:AfterenteringtheIP
addressoftheprojectorinthewebpageto
themaininterface,click"Download",and
downloadthecorrespondingPwPresenter
softwarewithyourprojector.
7C:6F:F8:4E:B9:2F
192.168.1.100
Expand
Network
Network setting
Network information
MAC address:
IP address
4. Click theicontoenterintopwPresenter
software.(DetailsaboutpwPresenter
operation,pleaseturntopage80-82).
Clicktoentertosearch,selecttheneeded
projectorandconnectit,setthesameIP
address(forexample:172.28.120.1)asthe
projectorinpwPresentersoftware,andset
usernameas"admin",andthepasswordis
"admin".
Note
• BeforeusingthepwPresenter
search,pleaseswitchtothe
inputsignalofnetwork.
Download
Login
Network Display System>Download
You can download pwPresenter Windows from here:
You can download USB LAN driver from here:
To achieve best performance, download and install mirror display driver (free download)
Download (Windows 7/8/8.1/Vista/XP/10)
Download (Windows 7/8/8.1/Vista/XP/10)
Network Display System>Download
Download
Login
User Name admin
Login
Password

www.infocus.com
Network control
76
Enter through a web browser
1. Startthecomputer'swebbrowser.
2. EntertheIPaddressontheprojector
setintheURLinputeldoftheWeb
browser.
3. Enterthepasswordinthe[Password].
• Thefactorydefaultsettingisthe
username:"admin
"(administrator
privileges),password:"admin".
4. Clickthe[Login]
1
Systemstatus
Clickthisoptiontodisplaythe[System
status]page.
2
GeneralSetup
Clickthisoptiontodisplaythe[General
Setup]page.
3
PictureSetup
Clickthisoptiontodisplaythe[Picture
Setup]page.
Note
Userscanclickonthetoprightcornerofthewebbrowserscreentoselectthe
displaylanguage.
Donotstartmultiplewebbrowsersettingsorcontrol.Donotusemorethanone
computertocontroltheprojector.
Pleasechangeyourpassword.
Ifthenetworkdoesnotappearonscreencontrols,pleaseconsultyournetwork
administrator.
Descriptionofeachoption
4
ImageSetup
Clickthisoptiontodisplaythe[Image
Setup]page.
5
NetworkSetup
Clickthisoptiontodisplay[Network
Setup]page.
System Status
General Setup
Picture Setup
Image Setup
Network Setup
Versions
Firmware Version
0.00.1003
Ruby
Model Name
LAN Status
IP Address
192.168.0.65
Subnet
255.255.255.0
Gateway
192.168.0.1
Wire MAC Address
00:1e:c0:f2:11:e6
Network Display System>System Status
Network Display System>Download
Download
Login
User Name admin
Login
Password
4
5
2
3
1
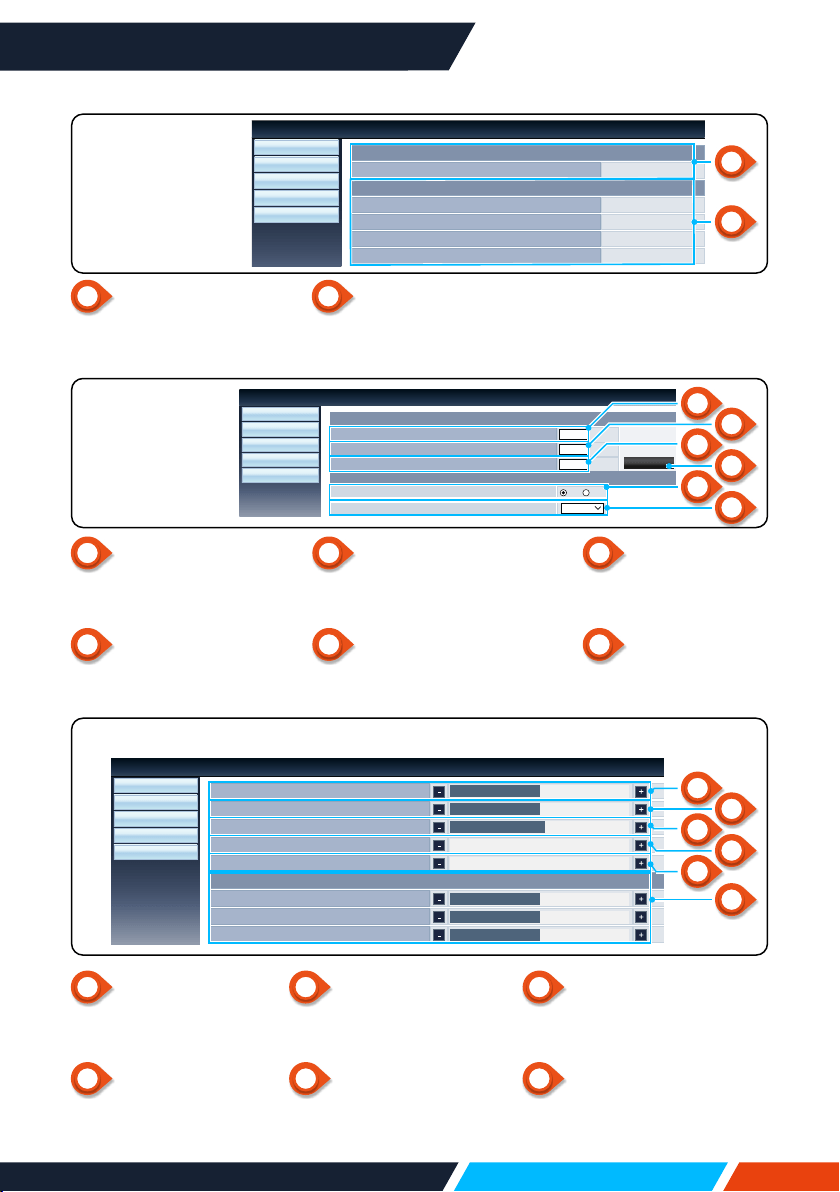
www.infocus.com
Network control
77
1
Versions
Displaysthermware
versionoftheprojector.
2
LANstatus
DisplaystheLAN
connectionstatus.
1
Enteroldpassword
Enterthepasswordforthe
conguration.
2
Enternewpassword
Enteranewpassword.
3
Conrmnewpassword
Re-enterthenewpasswordto
conrm.
4
Apply
Updatesettings.
5
Power
Switchonthepowerof
theprojectoron/o.
6
Sourceselect
Switchtheinput
sourceoftheprojector.
1
Brightness
Adjustthebrightness
oftheprojectedimage.
2
Contrast
Adjustthecontrastof
theprojectedimage.
3
Sharpness
Adjustthesharpnessof
theprojectedimage.
4
Color
Adjustscoloursaturation
oftheprojectedimage.
5
Tint
Adjuststhetintofthe
projectedimage.
6
Colourtemperature
Adjustthecolourtemperature
oftheprojectedimage.
System Status
General Setup
Picture Setup
Image Setup
Network Setup
Versions
Firmware Version
0.00.1003
LAN Status
IP Address
192.168.0.65
Subnet
255.255.255.0
Gateway
192.168.0.1
Wire MAC Address
00:1e:c0:f2:11:e6
Network Display System>System Status
[Systemstatus]
page
1
2
System Status
General Setup
Picture Setup
Image Setup
Network Setup
Brightness (0---63)
32
Contrast (0---63)
32
Sharpness (0---15)
8
Color (0---63)
0
Tint (0---63)
0
Color Temperature
Red (0---63)
32
Green (0---63)
32
Blue (0---63)
32
Network Display System>Picture Setup
[Picturesetup]page
1
3
5
2
4
6
Enter Old Password
System Status
General Setup
Picture Setup
Image Setup
Network Setup
Network Display System>General Setup
Change Password For Webpage
Enter New Password
Confirm New Password
Apply
Power & Source
Power
On Off
Source Select
HDMI 1
[GeneralSetup]
page
1
3
5
2
4
6
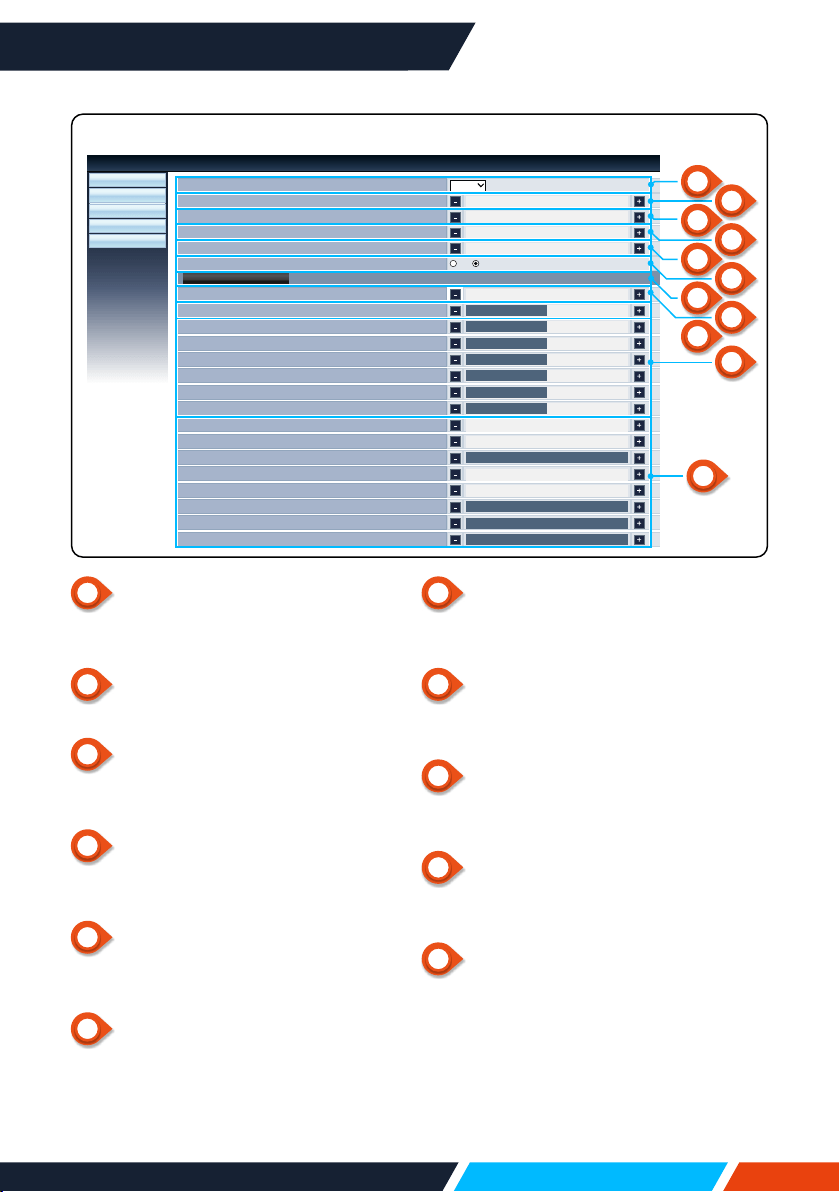
www.infocus.com
Network control
78
1
Aspectratio
Switchtheaspectratiooftheprojected
image.
2
Finesync
Adjustthephaseoftheprojectedimage.
3
Horizontalposition
Adjustthehorizontalpositionofthe
projectedimage.
4
Verticalposition
Adjusttheverticalpositionofthe
projectedimage.
5
Horizontaldimension
Adjustthehorizontaldimensionofthe
projectedimage.
6
Screenfreeze
Selectthefunctiontoswitchthescreen
freezeonando.
7
Automaticcomputeradjustment
Implementtheautomaticcomputer
adjustmentfunction.
8
VKeystone
Correcttrapezoidaldistortioninvertical
direction.
9
HKeystone
Correcthorizontaldistortioninhorizontal
direction.
10
CurvedCorrection
Correctpincushionandbarrelofthe
projectedimage.
11
Cornercorrection
Correctfouranglesoftheprojectedimage.
System Status
General Setup
Picture Setup
Image Setup
Network Setup
Normal
Aspect
Fine sync (0-31)
0
H Position
0
V Position
0
H Size
0
Freeze
On Off
Auto PC adj.
H Keystone (-30---30)
0
Curved correction X Gain (-40---40)
0
Curved correction Y Gain (-40---40)
0
Curved correction XOffset_x (-40---40)
640
V Keystone (-60---60)
0
Curved correction XOffset_y (-40---40)
400
Curved correction YOffset_x (-40---40)
640
Curved correction YOffset_y (-40---40)
400
Corner correction TopLeft_x (0---1279)
0
Corner correction TopLeft_y (0---799)
0
Corner correction TopRight_x (0---1279)
1279
Corner correction TopRight_y (0---799)
0
Corner correction BottomLeft_x (0---1279)
0
Corner correction BottomLeft_y (0---799)
799
Corner correction BottomRight_x (0---1279)
1279
Corner correction BottomRight_y (0---799)
799
Network Display System>Image Setup
11
[Imagesetup]page
1
3
5
7
9
2
4
6
8
10
11
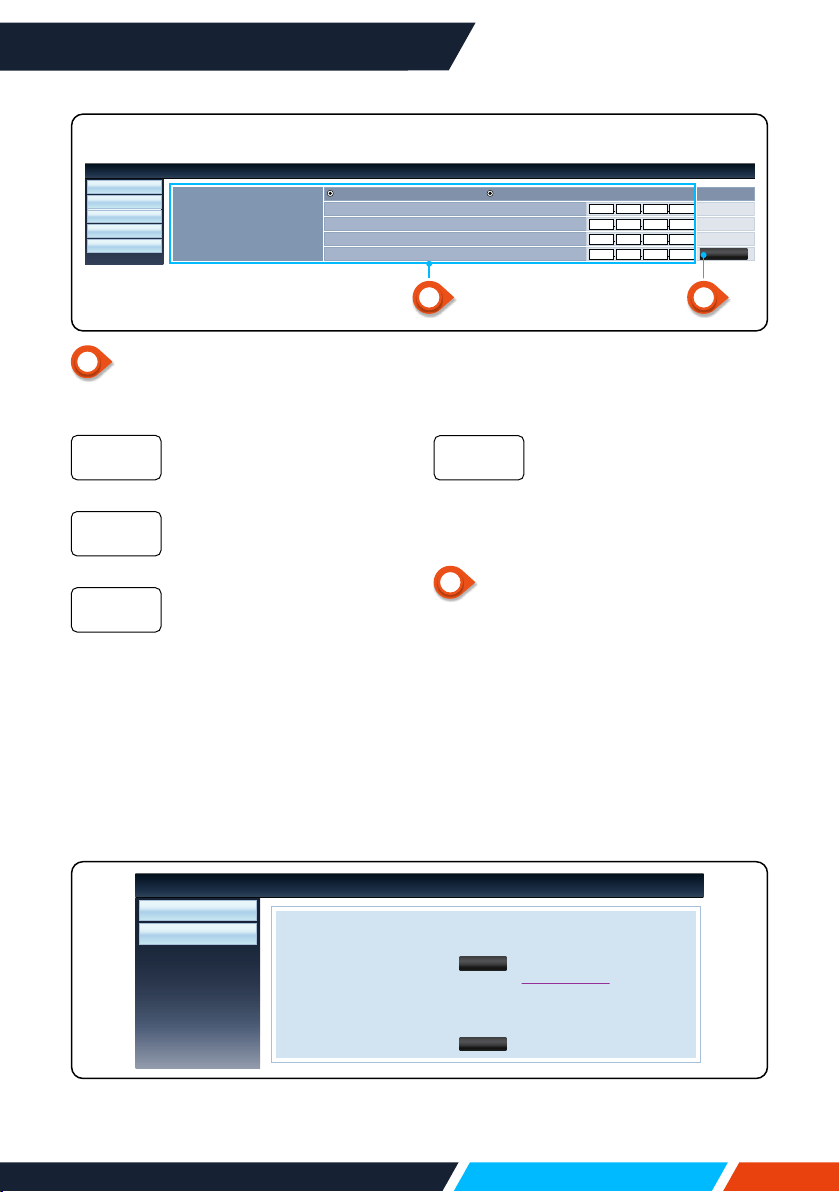
www.infocus.com
Network control
79
1
NetworkSetup
IfyouwanttoenabletheDHCPclient,
selecttheIPaddressautomatically.
PleaseentertheIPaddress
whenyoudonotusethe
DHCPserver.
Pleaseenterasubnetshield,
whenyoudonotusethe
DHCPserver.
Pleaseenterthegateway,
whenyoudonotusethe
DHCPserver.
IPaddress
Subnet
Gateway
[Networksetup]page
Network Setup
System Status
General Setup
Picture Setup
Image Setup
Network Display System>Network Setup
LAN Setup
255 255 255 0
Subnet
Obtain IP Address Automatically Use Following IP Address
192 168 0 65
IP Address
192 168 0 1
Gateway
202 96 134 33
DNS
Apply
1 2
PleaseentertheDNS
address,whenyoudonot
usetheDHCPserver.
• Availablecharacters:Digital(0-9),a
period(.)(forexample:192.168.0.253)
2
Apply
Updatesettings.
DNS
5. pwPresenterSoftware:
Whentheinputsignalsourceischosenasthenetwork,thenetworkwillbeusedto
projectcomputerimage.
AfterenteringtheIPaddressoftheprojectorinthewebpagetothemaininterface,
click"download",anddownloadthecorrespondingPwPresentersoftwarewithyour
projector.
Download
Login
Network Display System>Download
You can download pwPresenter Windows from here:
You can download USB LAN driver from here:
To achieve best performance, download and install mirror display driver (free download)
Download (Windows 7/8/8.1/Vista/XP/10)
Download (Windows 7/8/8.1/Vista/XP/10)
www.infocus.com
Network control
80
1
Searchnetworkprojector
Clicktoentertosearch,selecttheneeded
projectorandconnectit.SetthesameIP
address(forexample:192.168.1.100)asthe
projectorinpwPresentersoftware,andset
usernameas"admin",andthepasswordis
"admin".
Note
• BeforeusingthepwPresentersearch,
pleaseswitchtonetworksignalsource.
2
Screenshotstartorpause
Startorpausetheselectedpictures.
3
Selectscreenshotmode.
Selectscreenshotmodefromthe"fullrange",
"xedsize"or"variablesize".
6. Click theicontoenter
intopwPresentersoftware.
1 2 3 4 5 6
www.infocus.com
Network control
81
4
Parametersetting
Basic setting
language,captureregionsize,etc.
Advanced setting
JPEGimagesetting,networkport
setting,whitelist,andblacklist,etc.
Global setting
Remotecontrolsetting,Soundcapture
andScreencapture,etc.
Multicast setting
Volumesetting,Bandwidth,Sampling
frequency,etc.

www.infocus.com
Network control
82
5
Networkprojectormanagement
SetpwPresenternetworkusernameandpassword,etc.
6
Cutoprojectorconnection.
www.infocus.com
Useful function
83
Useful function
Memory Viewer function
WhentheUSBmemoryinsetintotheprojector,theviewermemoryfunctioncan
projectthevideoandpicturesstoredintheUSBmemory.
The projected content of memory viewer function
MemoryViewerfunctionsupportsthefollowingpictureles:
Video
Extensionname VideoCodec AudioCodec VideoFormat
avi MotionJPEG ADPCM
Maximum
1280x720,30fps
Picture
Extension
name
Format Description
jpg,jpeg
Baselineencoder24 Maxresolution:10000x10000
ProgressiveRGB24bit Maxresolution:PanelResolution
bmp
1,4,8-bitpalette-based
RGB24,32bit
Maxresolution:1280x800
png 24,48-bitTrueColour
24-Bitcolourpalettespace
Maxresolution:1024x768
gif 1,4,8-bitpalette-based Maxresolution:800x600
ti Maxresolution:800x600
Display memory viewer screen
WhentheUSBmemoryinsetintotheprojector,theviewermemoryfunctioncan
projectthevideoandpicturesstoredintheUSBmemory.
1. PressINPUTbuttononthecontrolpanelandonthetopcontrolpanelandselect
theinputsourceof[Memoryviewer].
2. InserttheUSBmemoryintothe<USB(browser)>terminaldirectly.
• PressRC<OK>todisplaystandbyscreeninstantly/whiletheUSBmemoryicon
displayintheleftcornerofthescreen.
• WhentheUSBmemoryisindependentofthepartition,itwilldisplaymorethan
oneUSBicon.
3. Press
buttontoswitchrequireditems.
• TherootdirectoryoftheUSBmemoryisdisplayedinathumbnail.

www.infocus.com
Useful function
84
Play image
Onlyoneimageshowonthescreenwhenyouplayit.
1. Press
buttontoselectale.
2. Press<OK>or
button.
• Fullscreendisplay
3. Press<OK>button.
• Press<OK>toreturnthethumbnail.
Play slide
Theslideshowmodeinthememoryviewermenuissettoaspecialsetting,allimages
inthesamefoldercanplayautomatically.
1. Press
buttontoselectale.
2. Press
buttontoselect[MemoryViewer]menu,thenselect[Fromscratch]
menu.
3. Press<OK>button.
• Fullscreendisplay
• Press<OK>buttontoreturnthethumbnail.
Play video
Playvideoles.
1. Press
buttontoselectale.
2. Press<OK>button.
• Fullscreendisplay
• Usetheremotecontroltooperatethecontrolthatappearsatthebottomofthe
screen.
Stopplayingthevideoandreturntothethumbnail.
Pause/playthevideo.
Videofastforward/backward.
Videofastforward/backwardatthetwicespeed.
Eachtimepresstheicon,theboxswitches.Whenthebox
appears,thevideocanplayback.
00:00:08/00:00:30
www.infocus.com
Useful function
85
The termination of Memory Viewer
1. Press
buttontoselect ,displayedintheleftcornerofthescreen.
2. Press<OK>button.
3. UnplugtheUSBmemorydirectly.
Note
• WhenyouinsertaUSBmemory,pleasemakesureinsertiondirectiontoavoid
damagingtheport.
• PleasenotethefollowingpointswheninsertingandremovingUSBmemory:
a. Theindicatorashes,whentheUSBmemoryinsertintotheprojectororthe
projectorisreadingdata,donotremovetheUSBmemoryWhenthelightis
ashing.
b.IfyouuseaUSBmemorydevicewithoutlights,theprojectorwillnotrecognize
whenreadingdata.Pleasecloseitsbrowsefunctiononandturnothe
projector,thenremovetheUSBmemory.
c. DonotinstallandremoveUSBmemoryfrequently.Thenremoveitafterthe
installationofatleast5seconds.Afterremovingatleastvesecondsand
thenreinstallit.Theprojectorisonswitchmodeduringtheoperationwhen
installingorremovingtheUSBmemory.
Precautions on processing and storage of USB memory
• PleasedonotplacetheUSBmemoryorthelidwherechildrencanreach.Swallow
USBmemoryorthelidmaycausechoking.
• Ifsmokeorproduceabnormalsmell,closetheexternaldeviceandcontactthe
dealer.
• Donotletthewater,chemicalsoroilintotheUSBmemory,oritmaycausea
shortcircuitorre.
• DoNOTputforeignmatterormetalitemsintheUSBport.Staticelectricitymay
causedatalossordatadamage.
• WhenUSBmemoryisreadorwritten,DonotremoveUSBmemoryfromthe
computerorprojector/otherwiseitmayresultindatalossorcorruptionofdata.
• PleasedonotputtheUSBmemoryinhightemperature,dampordustyplace,or
nexttomagneticmaterials.
Note
• InsertionorremovaloftheUSBmemorymaybeperformedwhentheprojectoris
inanypowerstatus.
www.infocus.com
Useful function
86
USB display function
Selectthisfunctiontocanprojecttheimageandaudiofromthecomputerthroughthe
USBconvertercable.
When using Windows:
Windowsoperatingenvironment
OperatingSystem
WindowsVista,7,8,10.32bitand64bit
CPU
IntelCore2Duo2.0GHZorfastercompatibleprocessors
MemoryCapacity
256MBorabove(512MBorabove)
DiskSpaceAvailable
20MBorabove
Monitor
Resolution640x480andabove
CANNOTguaranteethatthePCmeetingtheaboveconditionscanoperate
normally.
Project USB display
1. UsingUSB-BcabletoconnecttheprojectortotheUSBdisplayterminals.
• Itemsingreyarenotavailable.
2. Presstheinformationsourcemenuontheremotecontrolortheinputbuttononthe
controlpanel,thenselect[USBdisplay]intheinputsourcemenu.
3. Pressthedrivericoninthecomputer'staskbar
,theselectoneiteminthe
pop-upmenubar.
• Pop-upmenuonlyanglais
[Activeaudio]/[Disableaudio]
Setsuptheoutputfromthecomputer'saudio
[Playvideo]/[Pausevideo]
Switchonplayingandpausingimages
[Start/Stop]
Setsuptheoutputfromthecomputer'simage
[Exit]
ExitUSBDisplay
Note
• Resolutionofthecomputerscreenwillbeswitched.
• Ifthedriverisnotinstalledonthecomputer,thedriverwillberemoved
whentheUSBcableisdisconnected.
• Youneedwaitforamoment,ifyouwantprojectcomputerscreen.
• ConnecttheUSBcabledirectlytothecomputer'sUSBconnector.
WhenconnectingtheUSBhub,itmaybeabnormal.
The termination of USB display
1. RemovetheUSBcabledirectly,whenterminateUSBmonitor.
• Youneverneedfollow"RemoveHardwareSafel",whenUSBcableisnotconnected.

www.infocus.com
Useful function
87
When using Mac OS:
MacOSoperatingenvironment
OperatingSystem
MacOSx10.5andhigher
CPU
PowerPCG41GHzorfastercompatibleprocessors
MemoryCapacity
512MBorabove
DiskSpaceAvailable
20MBorabove
Monitor
Resolution640x480andabove
CANNOTguaranteethatthePCmeetingtheaboveconditionscanoperate
normally.
Project USB display
1. UsingUSB-BcabletoconnecttheprojectortotheUSBdisplayterminals.
2. Presstheinformationsourcemenuontheremotecontrolortheinputbuttononthe
controlpanel,thenselect[USBMonitor]intheinputsourcemenu.
3. Double-click"monitor.app"buttoninstalledonthevirtualdisk.
• Projectimageonthecomputerscreen.
4. Pressthedrivericon
inthedockofcomputerandselectoneiteminthepop-
upmenubar.
• Pop-upmenuonlydisplayinEnglish.
• Itemsingreyarenotavailable.
[Activeaudio]/[Disableaudio]
Setsuptheoutputfromthecomputer'saudio.
[Playvideo]/[Pausevideo]
Switchonplayingandpausingimages.
[Start/Stop]
Setsuptheoutputfromthecomputer'simage.
[Exit]
TerminateUSBMonitor
Note
• Resolutionofthecomputerscreenwillbeswitched.
• Youneedwaitforamoment,ifyouwantprojectcomputerscreen.
• ConnecttheUSBcabledirectlytothecomputer'sUSBconnector.
WhenconnectingtheUSBhub,itmaybeabnormal.
The termination of USB display
1. RemovetheUSBcabledirectly,whenterminateUSBmonitor.
• Youneverneedfollow"RemoveHardwareSafely,whenUSBcableisnotconnected.
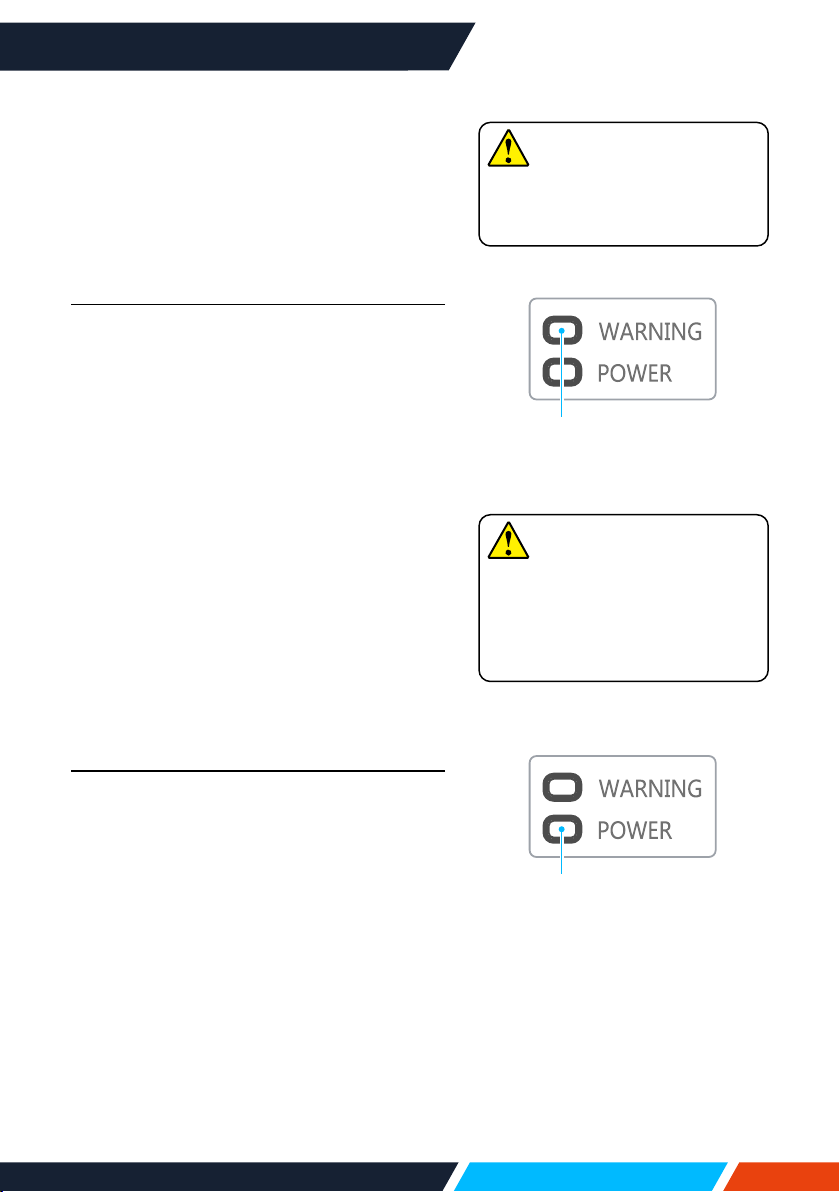
www.infocus.com
Maintenance and cleaning
88
Maintenance and cleaning
WARNING light indicator
TheWARNINGlightindicatorshowsstatus
ofprojectorprotectionfunction.Check
WARNINGandPOWERlightindicatorfor
goodmaintenanceoperation.
The projector turns o and the
WARNING indicator ashes red
Yourprojectorpowersoautomatically
toprotectcomponentswithinitwhenitis
overheated.ThePOWERindicatorashes
whenyourprojectoriscoolingdown.Press
thePOWERbuttontopoweryourprojector
onagainwhenitiscooleddowntonormal
operationtemperature.
Checkthefollowing:
–
Isadequateclearanceprovidedfor
yourprojector’sventilation?Checkthe
installationstatusandanyairoutletblock.
–
Isyourprojectorinstalledatlocationclose
tooutletofairconditioningequipment?
Keepyourprojectorawayfromairoutletof
airconditioningequipment.
–
Isthelterincleancondition?Pleaseclean
thelterregularly.
The power is abnormal and the power
indicator turns steady yellow
Thepowerindicatorturnssteadyyellow
andyourprojectorpowersotoprotectits
internalcomponentswheneveranabnormality
isdetected.UnplugtheACpowercordand
connectagain.Restartyourprojectorand
runcheck-uproutine.Iftheproblempersists,
unplugtheACpowercordandcallyour
servicecentreforcheck-upandmaintenance.
Note
ThePOWERindicatorstops
ashingwhenyourprojector’s
internaltemperaturehascooled
downtonormalanditispowered
onagain.
Note
UnplugtheACpowercordin
caseofanyabnormalityasitmay
leadtoreorelectricshock.
TheWARNING
indicatorashingred
ThePOWERindicator
turnssteadyyellow
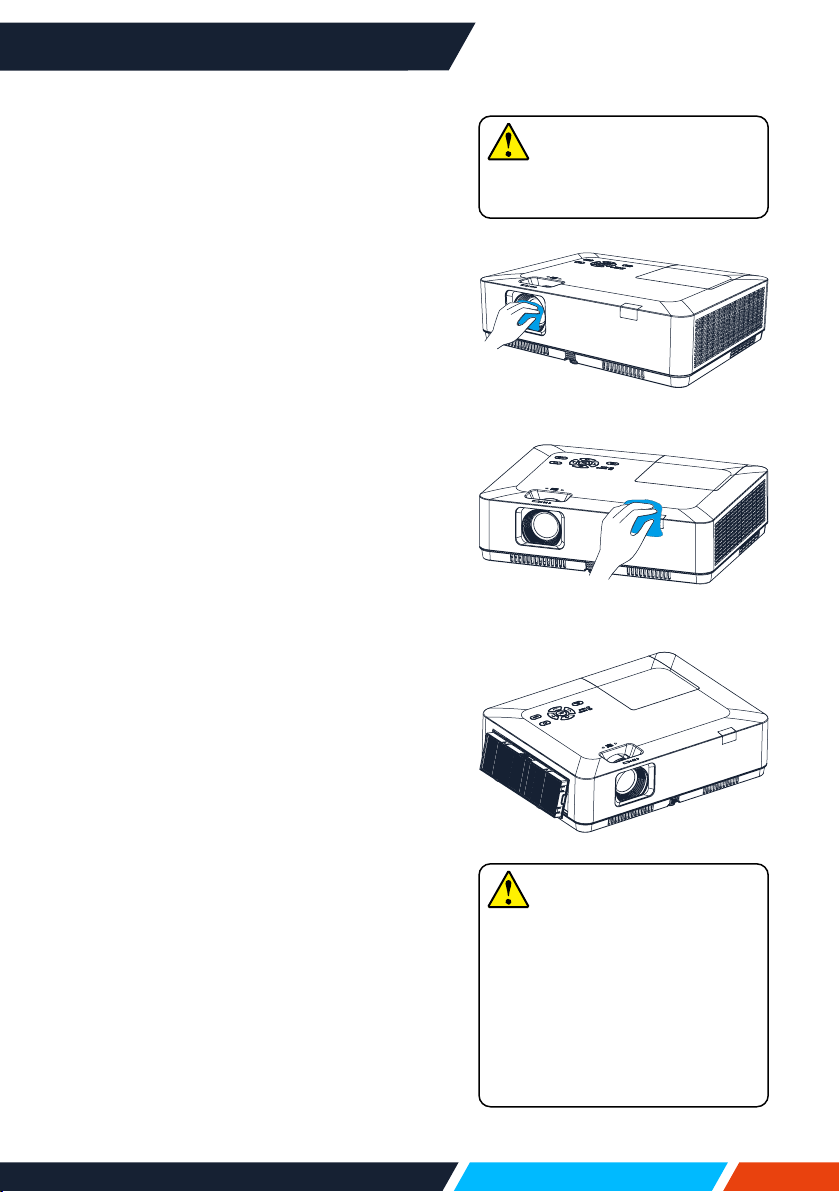
www.infocus.com
Maintenance and cleaning
89
Cleanyourprojectoronlyusingthebelow
guidelines.
Clean the lens
Wipethelenswithcleanclothdampenedwith
non-abrasivecameralenscleanerorcleanit
withlenscleaningpaperorcompressedair.
Donotoverapplycleanertothelens.Abrasive
cleaner,solution,orotherroughchemicalmay
scratchthelens.
Clean casing of your projector
Wipethecasingsurfacewithcleanandsoft
cloth.Gentlywipethecasingwithcleanand
softclothdampenedtoremoveheavydirt.
Donotoverapplycleaner,abrasivecleaner,
solution,orotherroughchemicalthatmay
scratchthecasingsurface.
Placeyourprojectorinpropercontainerafter
usetoprotectitfromdirtanddustandbeing
scratched.
Clear the lter
Thelterisdesignedtokeepdustfrom
enteringinyourprojector,whichmaylead
todustsaccumulatedonsurfaceofinternal
components.Cloggedltermayreduce
coolingfaneects,which,inturn,willoverheat
yourprojectorandshortenitslifecycle.Clean
thelterimmediatelywhenevertheFilter
Warningicondisplays.
Pleasefollowthesestepstocleanyourlter:
1. Poweroyourprojectorandunplugfrom
ACpowersource.
2. Removethelter.
3. Gentlycleanitwithabrush.
4. Replacethelter.Makesureithasbeen
fullyinserted.
Note
Donotoperateyourprojector
afteritslterisremoved.Dust
mayattachtothelensassembly
anddeteriorateimagequality.
Donotallowobjectstoenterthe
airoutlets.Allowingobjectsto
entertheprojectorwillcausethe
projectortofail.
Note
UnplugtheACpowercordbefore
anycleaningoperation.
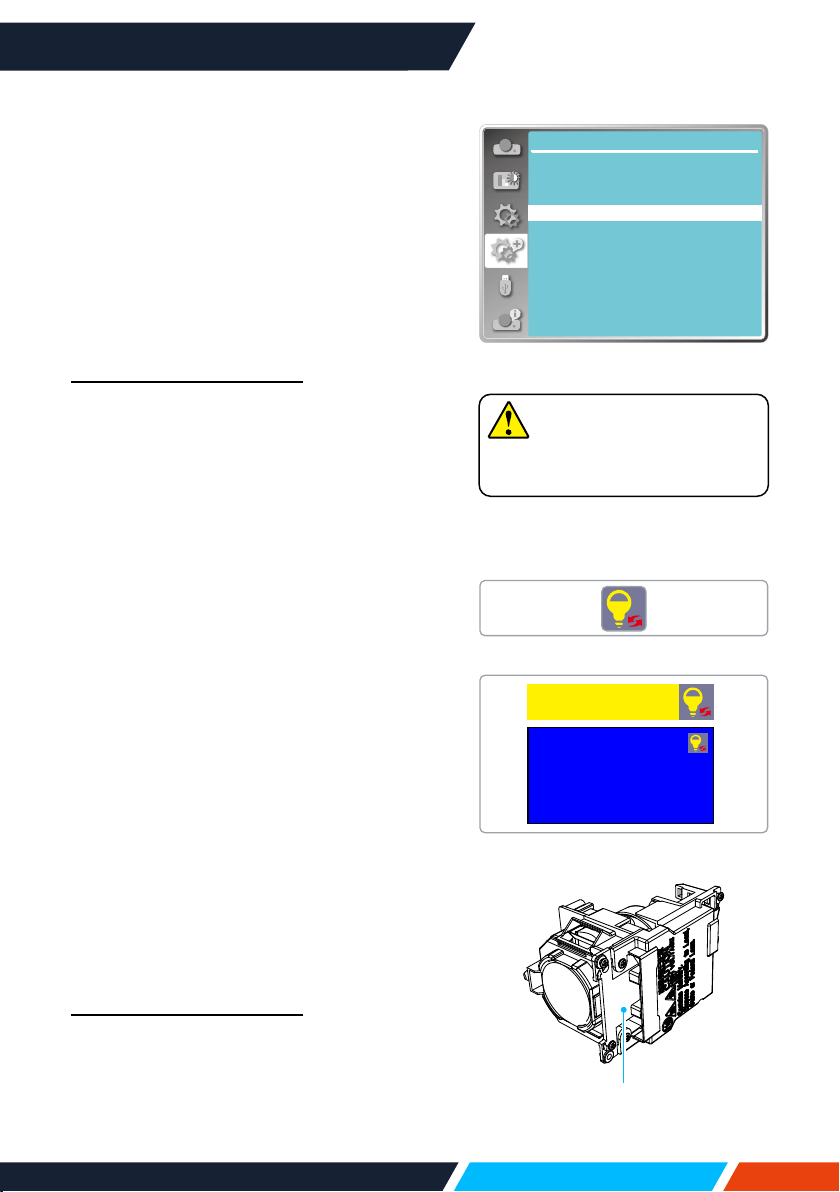
www.infocus.com
Maintenance and cleaning
90
Note
Resettheltercounterafterits
cleaningorreplacement.
Reset the lter counter
1. PressMENUbuttonandtheOSDdisplays.
Press
buttontoselectExpandmenu,
press
buttonorOK.
2. Press
buttontoselect"FilterCounter",
press
buttonorOK.Press
button
toselect“Filtercounterreset”andpress
OK.The“Resetltercounter?”message
displays.SelectYestoproceed.
3. Inanotherpop-updialoguebox,selectYes
toresettheltercounter.
Recommendations
Pleasedonotuseyourprojectoratplace
ofdustandsmoke.Thismayaectsimage
quality.Usingyourprojectorinplaceofdust
andsmokemayleadtopilingdustsonlens,
LCDpanel,andlenscomponentswithinit.In
caselikethis,callyourdealerorservicecentre
forcorrectcleaning.
Lamp replacement
Thelampwarningicondisplayswhenits
usagetimearemorethanthelifeofthe
projectorminus300Handlessthanthelifeof
theprojector.
Thelampreplacementicondisplayswhen
itsusagetimearemorethanthelifeofthe
projector.
Lamp model
Yourprojector’slampisaconsumable.You
canconrmyourusagetimeaccordingto
"Lightsourcecounter"ontheInfo.menuin
page73.
You'dbetteraskaprofessionaltechnicianto
replacethelamp.contactyourdealerforhelp.
Pleasecallyourdealertoreplacethelamp.
Recommendations
DONOTreplacethelampwhenitissohot.
Makesuretoreplaceitatlease1hourlater
afterusingit.
Theinternalcoveroflampmodelisgettinghot
inuse.Takecare,oryoumaygetburned.
Expand
Filter counter
0H
200H
On
Filter counter
Filter counter reset
Filter check
Timer
Thelampmodel
Thelampwarningicon
Thelampreplacementicon
Lampreplacement
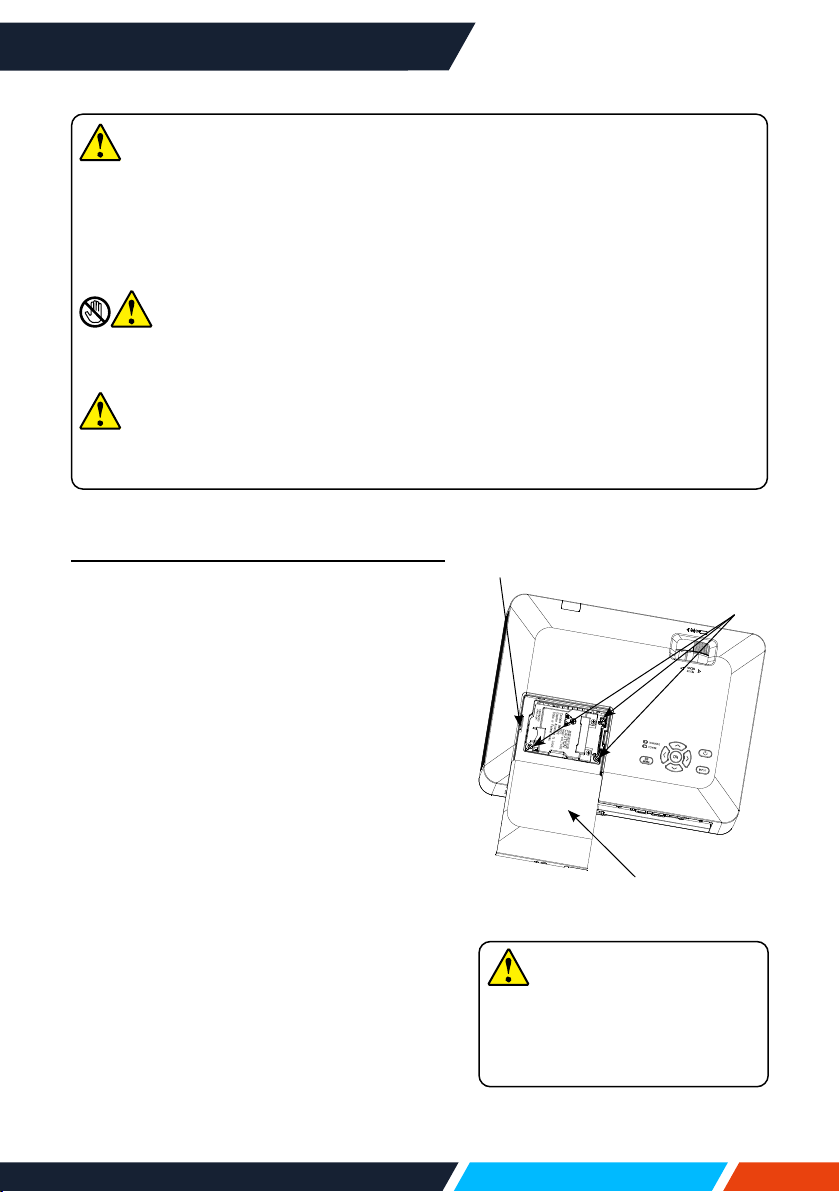
www.infocus.com
Maintenance and cleaning
91
Follow steps below to replace the lamp:
1. PoweroyourprojectorandunplugtheAC
powercord.Letitcooldownforatleast45
minutes.
2. Openthelampcoverafterremovingscrews
holdingthecover.
3. Looseall3screwsxingthelamp.Remove
thelampbyholdingitshandle.
4. Replacewithanewlampandtightenall
3screws.Makesurethelamphasbeen
installedcorrectly.Closethelampcover
andtightenthescrew.
5. ConnectyourprojectortoanACpower
sourceandpoweriton.
Note
Donotreplacethelampafteritwentdarkasitmaybebroken.Alwaysassumethe
lampofaceilingmountedyourprojectorisbrokenwhenreplacingit.Standbeside
thelampcoverinsteadofbelowit.Removethelampcovergently.Smallpiece
ofglassdebrismayfalloutwhenopeningthelampcover.Consultwithadoctor
immediatelyifthereisanyglassdebrisfellinyoureyesormouth.
Note
Letyourprojectorcoolforatleast45minutesbeforeopeningthelampcover,as
temperaturewithinyourprojectorishigh.
Note
Replacethelampwithanewoneofthesamemodeljustincase.Donotdropor
touchthelamp!Itmaybreakandleadtopersonalinjuries.
Note
Alwaysuseoriginalmanufactures
lampstoensureyourprojector
isnodamagedandoperates
accordingtodesign.
Lampcover
Handle
Screw

www.infocus.com
Maintenance and cleaning
92
Precautions on lamp operation
Yourprojectoremployshighvoltagelamp,whichrequirescarefulandcorrect
operation.
Failtodosomayleadtoaccidents,personalinjuries,orre.
• Lifecycleoflampvarieswithenvironmentitisinservice.Lifecycleoflampvaries.
Thatis,somelampsmaylastlongerthantheircounterparts.
• Ifyourprojectorpromptsyoutoreplacelamp(byshowingalampreplacingicon)
thenreplaceitwithanewoneafterpoweringitoanditisfullycooleddown.
(Pleasereplacelampbystrictlyfollowingstepsgiveninthismanual.)
Ifyoukeeponusingthelampafterbeingpromptedtoreplaceitthenyouare
exposedtogreaterrisksoflampexplosion.
• Lampmayexplodeduetoexternalimpactandshock.Risksofexplosionvary
withprojectoranduseenvironmentandstatusofthelamp.
Incaseoflampexplosion,takethefollowingsafetymeasures:
Disconnectyourprojectorfrompowersourceimmediatelyincaseoflamp
explosion.Callauthorizedservicecentretoinspectyourprojectorandreplace
lamp.Makeathoroughinspectiontoensureeverypieceofdebrisafterexplosion
hasbeenremoved.Removeeverypieceofdebrisafterexplosion.Nooneelse
mayinspecttheinternalofyourprojectorexceptthoseauthorizedandwelltrained
technicianwhoalsoarefamiliarwithitsmaintenance.Orweshallnotbeheldliable
fortheconsequences.

www.infocus.com
Appendix
93
Appendix
Troubleshooting
Check the following before calling your dealer or service centre:
Troubleshooting Solution
Poweronfailure
• PlugthepowercordofyourprojectorinanACsocket.
• MakesurethePOWERlightindicatorturnsred.
• RestartyourprojectoruntilthePOWERlightindicatorturns
red.Itindicatesyourprojectorisreadyforpoweronagain.
• Checkthelamp.
• DisabletheKeyLockfunctionofyourprojector.
Logoscreendisplay
failure
• MakesuretheOandCountdownOisselectedinthe
Displayfunction.
TheLogoscreen
diersfromthe
standardsettings
• MakesureyoudidnotselectUserorOintheLogo
Screen.
Inputsignalswitch
(ordonotswitch)
automatically
• MakesureyouhavecorrectlysetuptheInputSearch
function.
PressINPUTbutton
duringpoweronanda
non-inputmodeicon
displays
• Thisisalterorlampreplacementalerts.
Anon-inputorlamp
modeicondisplays
• Thisisalterreplacementalerts.
Imagelooksfuzzy
• Adjustfocusofyourprojector.
• Provideproperprojectiondistance.
• Theprojectionlensrequirescleaning.
• Movingyourprojectorfromacolderenvironmenttoa
hotteronemayresultincondensingonthelens.Ifthis
isthecase,waituntilthecondensingwaterevaporated
beforepoweringonyourprojector.
Imagemirrorreected • ChecktheCeiling/Rearsettings.
Imageturnsupside
down
• ChecktheCeilingsettings.

www.infocus.com
Appendix
94
Troubleshooting Solution
Imagelooksdim
• Checkforcontrastandbrightnesssettings.
• Checkforcorrectimagemodesettings
• Checkforlampbrightnesssettings.
• Checkforlampreplacementalert.Thelampreplacement
alertsuggeststhelampisreachingtheendofitslifecycle.
Pleasereplaceitwithanewoneofthesamemodel
immediately.
Noimagedisplays
• Checkfortheconnectionbetweenyourprojectorand
computerorimageequipment.
• Checkforcorrectinputsignalfromcomputer.Connection
withcertainnotebookcomputermaymandatechangesto
itsdisplayoutputsettings.Seetheusermanualincluded
withthecomputerfordetailsonsettings.
• Ittakesabout30secondsforyourprojectortoshowthe
rstimage.
• Checkformodeofsignal,coloursystem,imagesystem,or
computersystem.
• Makesuretheambienttemperatureiswithingivenrange
[0°C–40°C(35-ECO)].
• ImagedoesnotdisplayinBLANKmode.TheBLANK
buttonorotherbuttonsontheremotecontrol.
Abnormalcolour
• Checkformodeofsignal,coloursystem,imagesystem,or
computersystem.
• MakesureBlackboardmodeisnotselectedinImage
mode.
Someoperationsare
invisible
• Checkthedisplayfunction.
AutoPCAdjusting
functionfailure
• Checkinputsignal.AutoPCAdjustingfunctionin
unavailablein480p,576p,720p,480i,576ior1080imode.
Settingsdonotsave
afterpowero
• MakesureyouhaveselectedStoreaftersettings
adjustment.Certainsettingsdonotkeepwithoutselecting
Store.
Powermanagement
failure
• IncaseofFreezeorBlankoperation,thepower
managementfunctiondoesnotwork.
AutoSettingdoesnot
work
• Makesureitisnotsetto"O"ineachSettingmenu.
• Makesure"On"isnotsetinCeilingfunction.
Imagedistortedor
disappeared
• CheckandrevisethePCAdj.menuorDisplay.

www.infocus.com
Appendix
95
• Makesureyourprojectoriscorrectlyconnectedtoexternalequipment.
• MakesurealldevicesarepluggedinanACpowersourceandhavebeen
poweredon.
• Ifyourprojectorfailstoprojectimageoftheconnectedcomputer,restartthe
computer.
Note
Yourprojectoremployshighvoltagepowerforoperation.Donotopenitscasing.
Iftheproblempersists,callyourdealerorservicecentre.Alongwithmodelnumber
ofyourprojectorandadescriptiontoyourproblem.
Troubleshooting Solution
Apasswordprompt
displaysafterpoweron
• YouhavesetuptheLogoPINCodelockfunction.
Remotecontroldoes
notwork
• Checkthebattery.
• Makesurethereisnoobstaclesstandinbetweenyour
projectorandtheremotecontrol.
• Makesuretheremotecontrolisnottoofarawayfromyour
projector.Themaximumoperationrangeis8m.
• Makesuretheremotecontrolandyourprojectorarepaired
withthesameremotecontrolcodes.
• DisablethekeylockoftheremotecontrolintheSetting
menu.
Lightindicatorturns
onorashes
• Checkstatusofyourprojectoraccordingtothelight
indicatorstatus.
"X"markdisplays • Invalidoperation,pleaseoperateyourprojectorcorrectly.
Controlpaneldoes
notfunction
• DisablethekeylockoncontrolpanelfunctionintheKey
lockoptionoftheSettingmenu.
Cannotremove
theLogoSelect
password,KeyLock,
andPINCodelock
• Pleasecallyourdealerorservicecentre.

www.infocus.com
Appendix
96
Mainmenu Sub-menu Setting Remarks
Display
AutoPCadj.
Finesync 0-31
Hposition -5-+5
Vposition -5-+5
H.Size -15-+15
Therangeof
H.Sizediers
fromsignals.
Aspect
Normal
Wide
Advanced
Full
Projectway
Front
Rear
Ceiling/Front
Ceiling/Rear
AutoCeiling/Front
AutoCeiling/Rear
Menuposition
Upperleft,Upperright
Centre
Lowerleft,Lowerright
Background
display
Black
Blue
System
Auto
PAL
SECAM
NTSC
NTSC4.43
PAL-M
PAL-N
PAL-60
Videoinput
Colouradj.
Imagemode
Dynamic
Standard
Cinema
Blackboard(Green)
Colourboard
Userimage
Contrast 0-63
PCinput
Brightness 0-63
Colourtemp High,Mid,Low
Red 0-63
Green 0-63
Blue 0-63
Sharpness 0-15
Menu tree
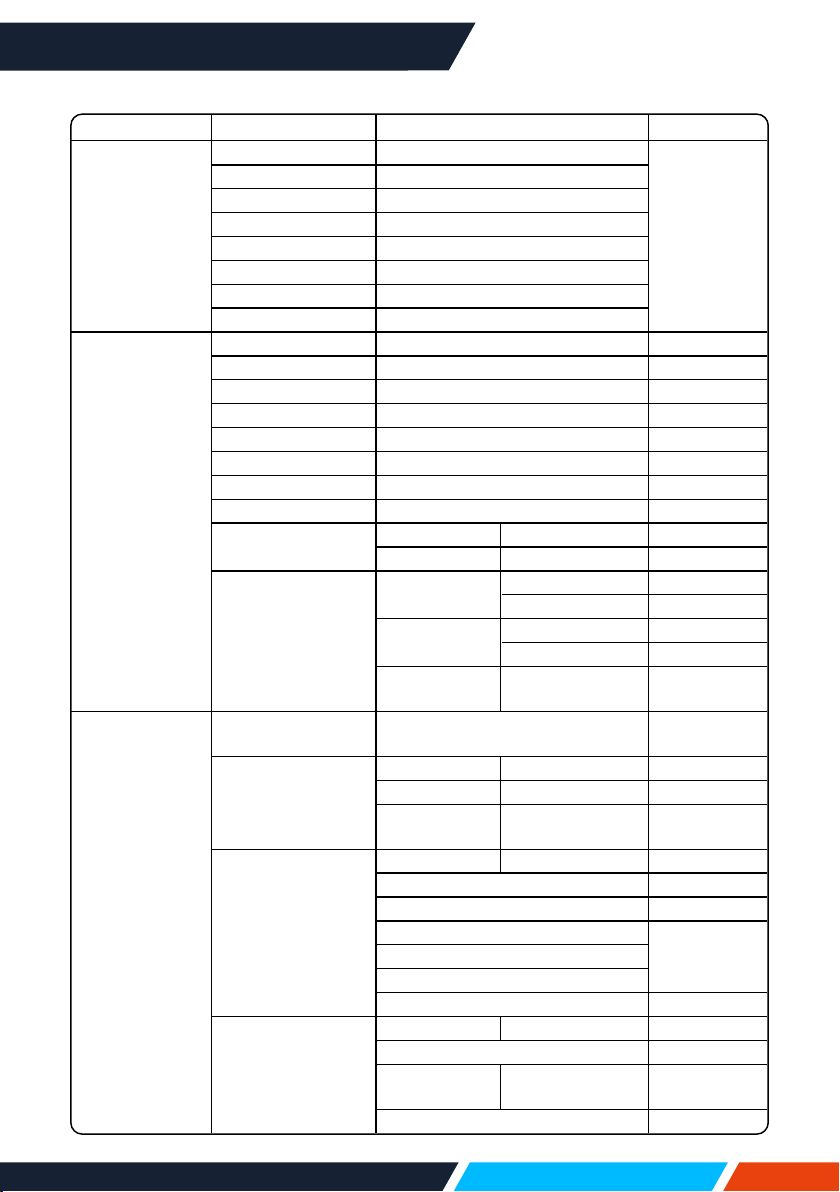
www.infocus.com
Appendix
97
Mainmenu Sub-menu Setting Remarks
Colouradj.
Contrast 0-63
Videoinput
Brightness 0-63
Colour 0-63
Tint 0-63
Red 0-63
Green 0-63
Blue 0-63
Sharpness 0-15
Setting
Directpoweron On,O
Standbymode Normal,ECO
Highland On,O
Lightsourcemode Normal,ECO
Coolingfast Normal,60Sec,0Sec
Closedcaption O,CC1,CC2,CC3,CC4
Keylock O,projector,remotecontrol
Iris On,O
Sound
Volume 0-25
Mute On,O
HDMISetup
Image
64-940
0-1023
Sound
HDMI
VGA
HDMIEQ
Setup
0-3
Expand
Language
Projectorprovidesmultiple
languagesupport
Autosetup
InputSearch On,O
AutoPCadj. On,O
Auto
keystone
O,Auto,
Manual
Keystone
Keystone Store,Reset
H/VKeystone
4-Cornercorrection
6-Connercorrection
ForWUXGA
series
Curvedcorrection
Gridimagetune
Resetvalue
Logo
Logoselect Default,User,O
Capture
LogoPIN
codelock
On,O
LogoPINCodeChange
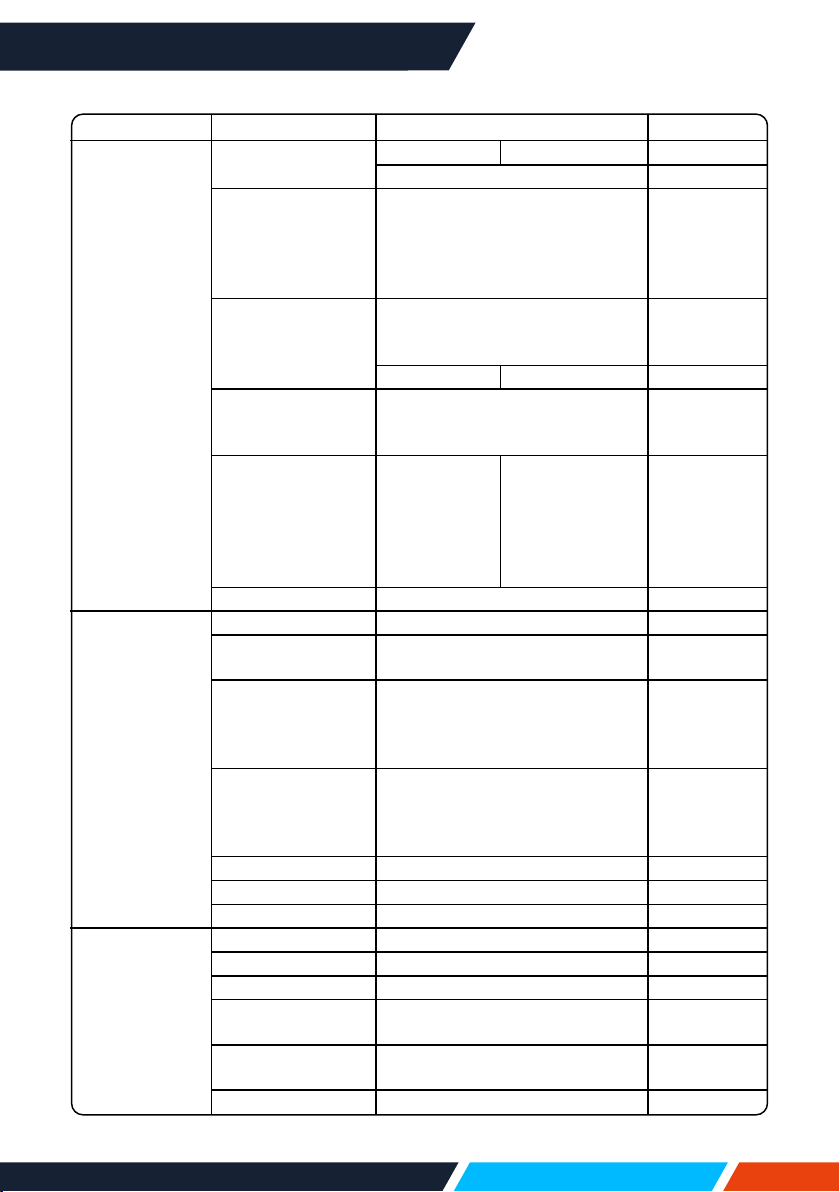
www.infocus.com
Appendix
98
Mainmenu Sub-menu Setting Remarks
Expand
Security
PINcodelock On,O
PINcodechange
Power
management
Ready
Shutdown
O
Timer
Readycountdown
Filtercounter
Filtercounter
Timer
Filtercounterreset
Filtercheck On,O
Testpattern
O,Grayscale(1-4),Colourbar,
Red,Green,Blue,Crosshatch,
White,Black,Rastergrey
Network
Network
setting
LAN
DHCP(On/O)
IPaddress
Subnet
Gateway
DNS
Factorydefault
MemoryViewer
Setslide
Slidetransition
eect
Slidedown
Slideright
Sortorder
Extendorder
Sizeorder
Timeorder
Nameorder
Rotate
Norotate
270°Degree
180°Degree
90°Degree
Bestt On,O
Repeat On,O
Apply
Info.
Input
H-sync.freq.
V-sync.freq.
Lightsource
counter
Power
management
Imagemode

www.infocus.com
Appendix
99
Mainmenu Sub-menu Setting Remarks
Info
ModelName
S/N
FirmwareVersion
Input
VGA
HDMI1
HDMI2
Video
Network
MemoryViewer
USBdisplay

www.infocus.com
Appendix
100
Light indicator status
Checklightindicatortolearnstatusofyourprojector.
Lightindicator
Stateofyourprojector
WARNING
(Red)
POWER
(Red/Green/
Yellow)
YourprojectorisinOstatus(withoutACpower
supply).
Yourprojectorisinstandbystatus.PressPower
buttontoturniton.
Yourprojectorisinnormalstatus.
Itisinreadystatusorthelightsourceiscooling.
YourprojectorisinReadymode.
Yourprojectordetectsthevoltageabnormalityand
switchesintostandbymode.
YourprojectordetectstheFANabnormalityand
switchesintocoolingmode.
Yourprojectordetectsthetemperatureabnormality
andswitchesintocoolingmode.
Yourprojectordetectsthetemperatureabnormality
andswitchesintostandbymode.
Yourprojectordetectsthelightsourceabnormality
andswitchesintocoolingmode.
Yourprojectordetectsthelightsourceabnormality
andswitchesintostandbymode.
Yourprojectordetectsitsusagetime≥thelifeofthe
projectorand<1.1timesofthelifeoftheprojector.
Yourprojectordetectsitsusagetime≥1.1timesof
thelifeoftheprojector.
...Green ...Red ...Yellow
...Turnso
...Flashinggreen ...Flashingred ...Flashingyellow
www.infocus.com
Appendix
101
Compatible computer screen
YourprojectorisdesignedtoaccepteverycomputersignalbelowDotClock160MHz.
Seetablebelowfordetailsonresolutionandrelevantfrequency.
No OSDDisplay
Source Specication
RGB
HDMI Video
Resolution
Pixelclock
(MHz)
H-freq
(KHz)
V-freq
(Hz)
1
NTSC — —
NTSC
— 15.734 59.940
NTSC-443 — —
NTSC4.43
PAL-60 — —
PAL60
PAL-M — —
PAL-M
2
PAL — —
PAL
— 15.625 50.000PAL-N — —
PAL-N
SECAM — —
SECAM
3 720x480i,60Hz
— — 720x480i 13.500 15.734 59.940
4 720x480i,60Hz —
— 720(1440)x480i 27.000 15.734 59.940
5 720x576i,50Hz
— — 720x576i 13.500 15.625 50.000
6 720x576i,50Hz —
— 720(1440)x576i 27.000 15.625 50.000
7 720x483,60Hz
— 720x483(480P) 27.000 31.469 59.940
8 720x576,50Hz
— 720x576(576P) 27.000 31.250 50.000
9 1280x720p,60Hz
—
1280x720p
74.250 45.000 60.000
— 74.176 44.955 59.940
10 1280x720p,50Hz
— 74.250 44.955 50.000
11 1920x1080i,60Hz
—
1920x1080i
74.250 33.750 60.000
— 74.176 33.716 59.940
12 1920x1080i,50Hz
— 74.250 28.125 50.000
13 1920x1080p24Hz
—
—
1920x1080p
74.250 27.000 24.000
— 74.176 26.970 23.980
14 1920x1080p60Hz
— 148.500 67.500 60.000
— 148.352 67.433 59.940
15 1920x1080p50Hz
— 148.500 56.250 50.000
16 640x480,60Hz
—
640x480
25.175 31.469 59.940
17 640x480,67Hz
— 30.240 35.000 66.667
18 640x480,72Hz
— 31.500 37.861 72.809
19 640x480,75Hz
— 31.500 37.500 75.000
20 640x480,85Hz
—
36.000 43.269 85.008
www.infocus.com
Appendix
102
No OSDDisplay
Source Specication
RGB
HDMI Video
Resolution
Pixelclock
(MHz)
H-freq
(KHz)
V-freq
(Hz)
21 800x600,56Hz
—
800x600
36.000 35.156 56.250
22 800x600,60Hz
— 40.000 37.879 60.317
23 800x600,72Hz
— 50.000 48.077 72.188
24 800x600,75Hz
— 49.500 46.875 75.000
25 800x600,85Hz
— 56.250 53.674 85.061
26 832x624,75Hz
— 832x624 57.283 49.725 74.550
27 1024x768,60Hz
—
1024x768
65.000 48.363 60.004
28 1024x768,70Hz
— 75.000 56.476 70.069
29 1024x768,75Hz
— 78.750 60.023 75.029
30 1024x768,85Hz
— 94.500 68.678 84.997
31 1152x864,70Hz
—
1152x864
94.200 63.995 70.020
32 1152x864,75Hz
— 108.000 67.500 75.000
33 1280x720,60Hz
— 1280x720 74.500 44.772 59.855
34 1280x768,60Hz
—
1280x768
79.500 47.776 59.870
35 1280x768,75Hz
— 102.250 60.289 74.893
36 1280x768,85Hz
— 117.500 68.630 84.840
37 1280x800,60Hz
—
1280x800
83.500 49.702 59.810
38 1280x800,75Hz
— 106.500 62.795 74.934
39 1280x800,85Hz
— 122.500 71.554 84.880
40 1280x960,60Hz
—
1280x960
108.000 60.000 60.000
41 1280*960,75Hz
— 126.000 75.000 75.080
42 1280x1024,60Hz
— 1280x1024 108.000 63.981 60.020
43 1280*1024,65Hz
— 118.500 65.180
44 1280x1024,72Hz
— 135.060 78.16 71.97
45 1280x1024,75Hz
— 135.000 79.976 75.025
46 1280x1024,85Hz
— 157.500 91.146 85.024
47 1360*768,60Hz
— 1360x768 85.500 47.710 60.020
48 1366x768,60Hz
— 1366x768 84.750 47.720 59.799
49 1400x1050,60Hz
— 1400x1050 121.750 65.317 59.978
50 1400x1050,75Hz
— 156.000 82.278 74.867
51 1440x900,60Hz
— 1440x900 106.500 55.935 59.887
52 1600x900,60Hz
—
1600x900 118.998 55.920 60.000
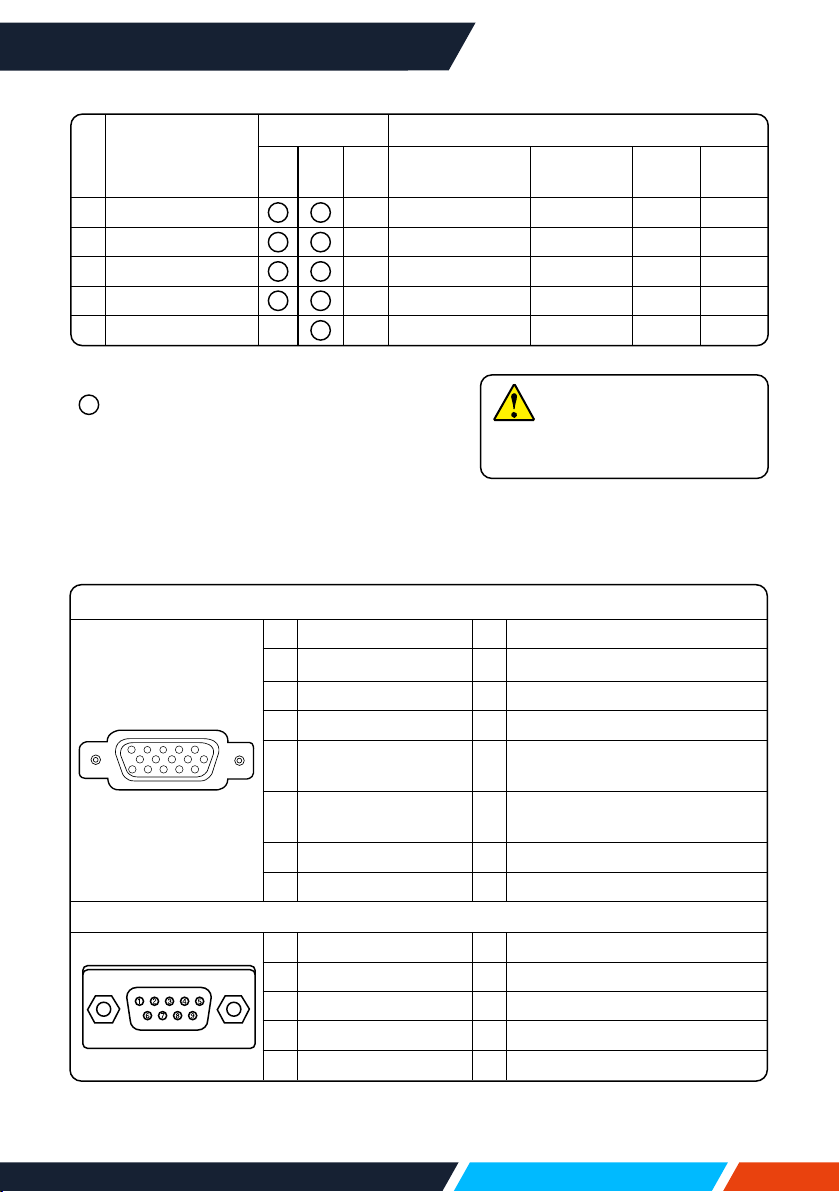
www.infocus.com
Appendix
103
“ ”showsinputsignalsourcesupportthis
format.
“—”showsinputsignalsourcedonotsupport.
No OSDDisplay
Source Specication
RGB
HDMI Video
Resolution
Pixelclock
(MHz)
H-freq
(KHz)
V-freq
(Hz)
53 1600x1200,60Hz
—
1600x1200 162.000 75.000 60.000
54 1680x1050,60Hz
— 1680x1050 146.250 65.290 59.954
55 1920x1080,60Hz
— 1920x1080 138.500 66.587 59.934
56 1920x1200,60Hz
— 1920x1200 154.000 74.038 59.950
57 3840x2160,30Hz
—
—
3840x2160 297.000 67.500 30.000
Note
Changestothismanualmaybe
madewithoutnotice.
Terminal conguration
VGAIN/MONITOROUTTerminal(D-sub15)
5
1
2
34
10
9 678
15
14
13
1112
1 Red(Input,output) 9 -----
2 Green(Input,output) 10 Grounding(eldsynchronizing)
3 Blue(Input,output) 11 Grounding
4 ----- 12 DDCdata
5
Grounding
(linesynchronizing)
13
Horizontalsynchronizing
(compoundsync.)input/output
6 Grounding(red) 14
Verticalsynchronizing
input/output
7 Grounding(green) 15 DDCClock
8 Grounding(blue)
SERIALTerminal(D-SUB9)
1 ----- 6 -----
2 RXD 7 -----
3 TXD 8 -----
4 ----- 9 -----
5 GND
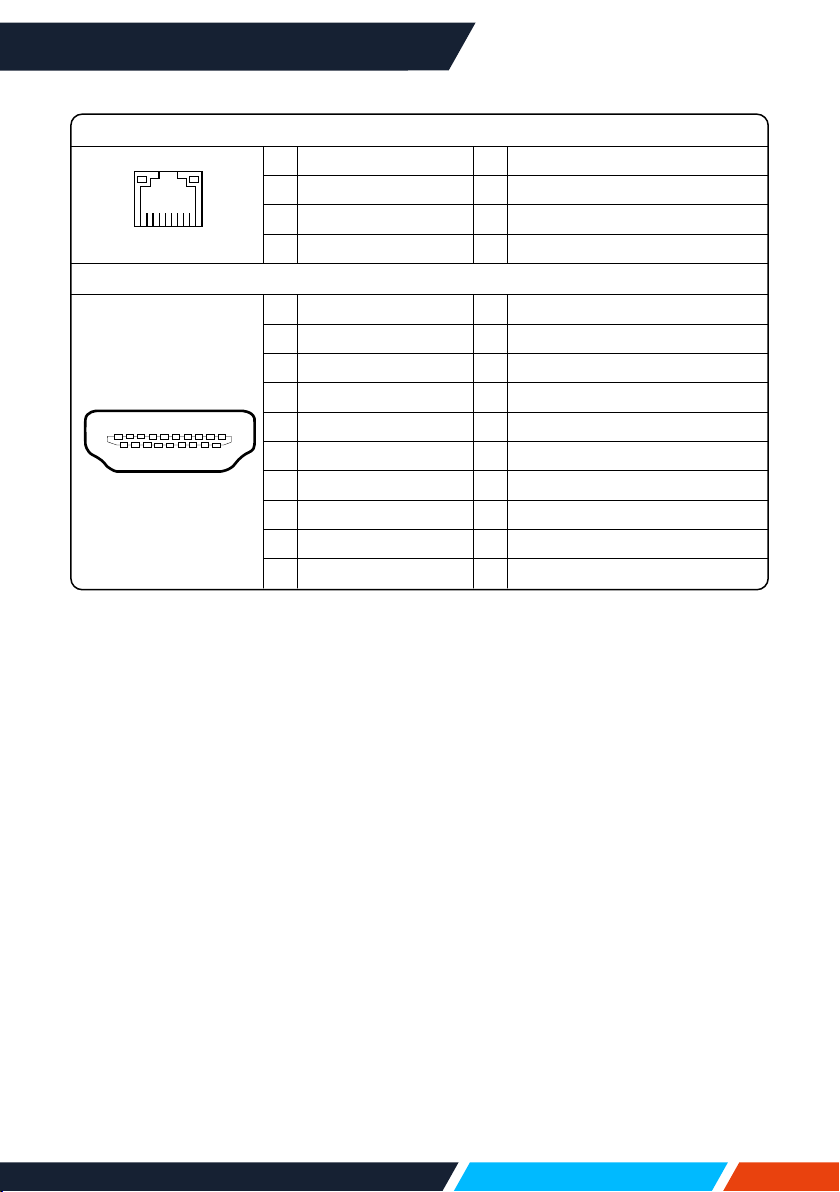
www.infocus.com
Appendix
104
LANTerminal
8 7 6 5 43 2 1
1 TX+ 5 -----
2 TX- 6 RX-
3 RX+ 7 -----
4 ----- 8 -----
HDMITerminal(HDMITypeA19)
1
246
8
9 7 5 3
10
12
14
1618
19
17 15 13 11
1 TMDSData2+ 11 TMDSClockShield
2 TMDSData2Shield 12 TMDSClock-
3 TMDSData2- 13 CEC
4 TMDSData1+ 14 Reserved(N.C.ondevice)
5 TMDSData1Shield 15 SCL
6 TMDSData1- 16 SDA
7 TMDSData0+ 17 DDC/CECGround
8 TMDSData0Shield 18 +5VPower
9 TMDSData0- 19 HotPlugDetect
10 TMDSClock+
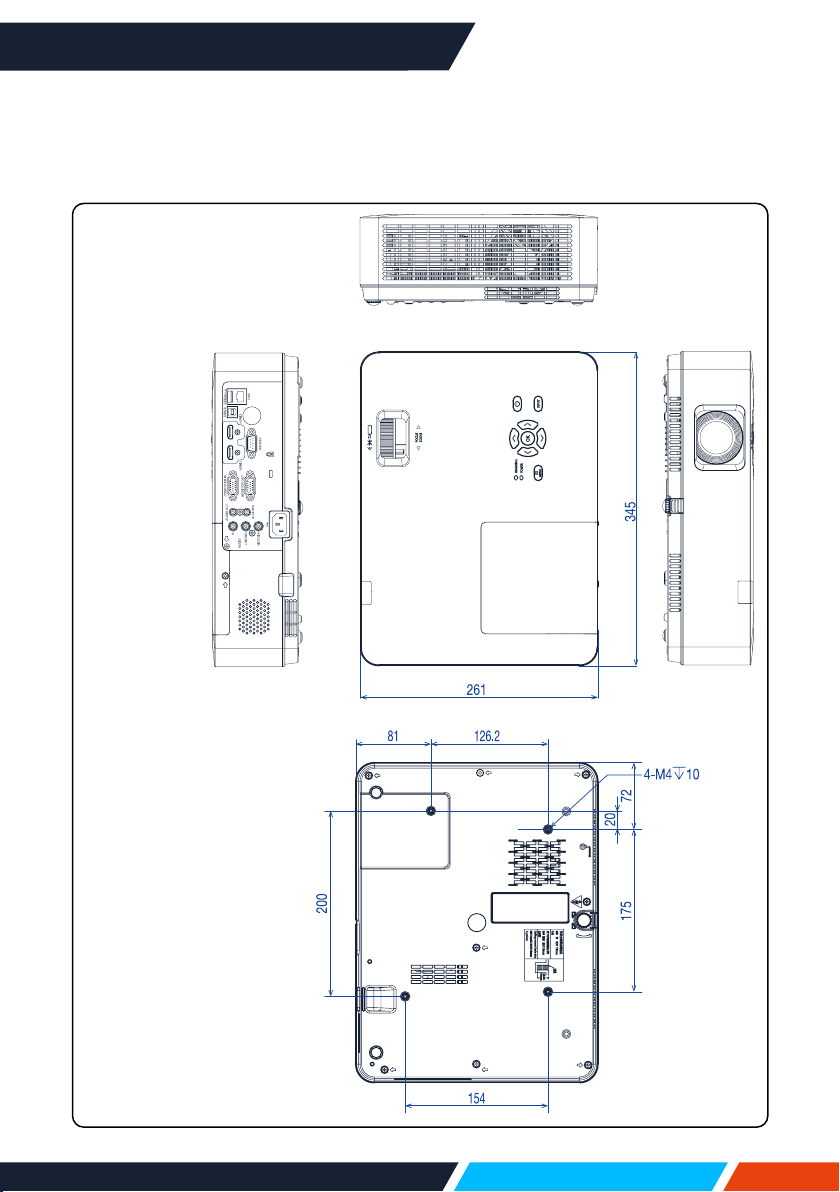
www.infocus.com
Appendix
105
Dimensions
(ForIN1029,IN1039,IN1049,IN1059,IN1024,IN1034,IN1044,IN1026,IN1036,
IN1046)
SupportframeforCeiling
Mount
Screw: M4
Depth: 10.0
Unit: mm
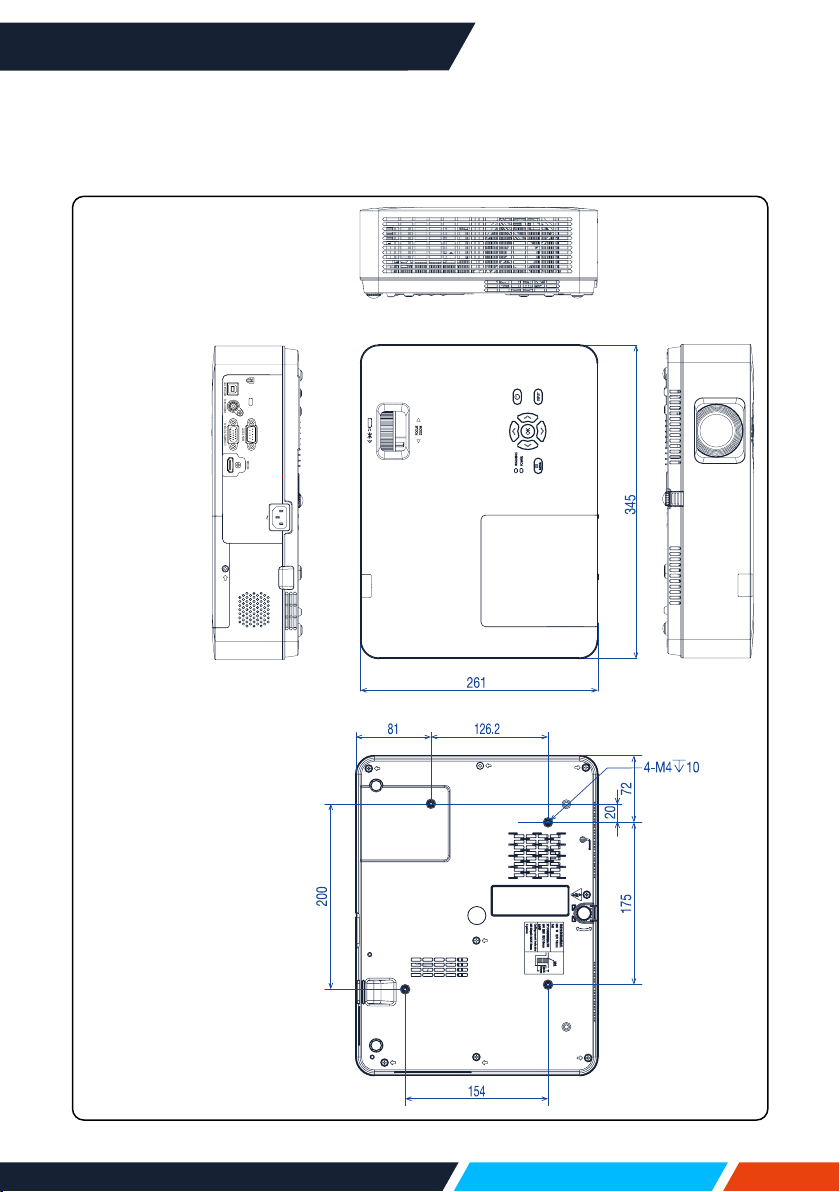
www.infocus.com
Appendix
106
Dimensions
(ForIN1004,IN1014)
SupportframeforCeiling
Mount
Screw: M4
Depth: 10.0
Unit: mm

www.infocus.com
Appendix
107
Technical Specications
LightPro
Advanced LCD
IN1004
IN1014
IN1024
IN1034
IN1044
IN1026
IN1036
IN1046
IN1029
IN1039
IN1049
IN1059
IMAGE
Projection
Technology
LCDwithMicro-LensArray
PanelSize
3xSonyTM0.63" 3xSonyTM0.59" 3xSonyTM0.64"
NativeResolution
XGA WXGA WUXGA
Pixels
1024x756 1280x800 1920x1200
AspectRatio
4:3 16:10 16:10
ContrastRatio
2000:1 50000:1withIris
Brightness(Lumens)
3100 3400 4000 4800 4800 4200 4600 4600 4200 4200 4600 4600
LightSource
UHPLamp
LightSourceLife
MaximumHours
20000
Maximum
Supported
Resolution
3840x2160(4K)@30Hz
HorizontalSync.
Range(KHz)
15~100
VerticalSync.Range
(Hz)
48~85
Uniformity
85%
OPTICAL
Lens(Zoom)
1.2x 1.66x 1.2x 1.66x 1.2x 1.66x 1.2x 1.66x
LensZoom
Adjustment
Manual
OptionalLenses
-
ImageOset
(Percentage)
14 7 10
FocalLength(mm)
19.11
~
22.94
19.16
~
23.02
17.50
~
29.01
19.16
~
23.02
17.50
~
29.01
19.16
~
23.02
17.50
~
29.01
19.16
~
23.02
17.50
~
29.01
F-Stop
2.1~2.25 1.6~1.76
1.7~
2.1
1.6~1.76
1.7~
2.1
1.6~
1.76
1.7~
2.1
1.6~
1.76
1.7~
2.1
VerticalLensshift(%)
-
HorizontalLensshift
-
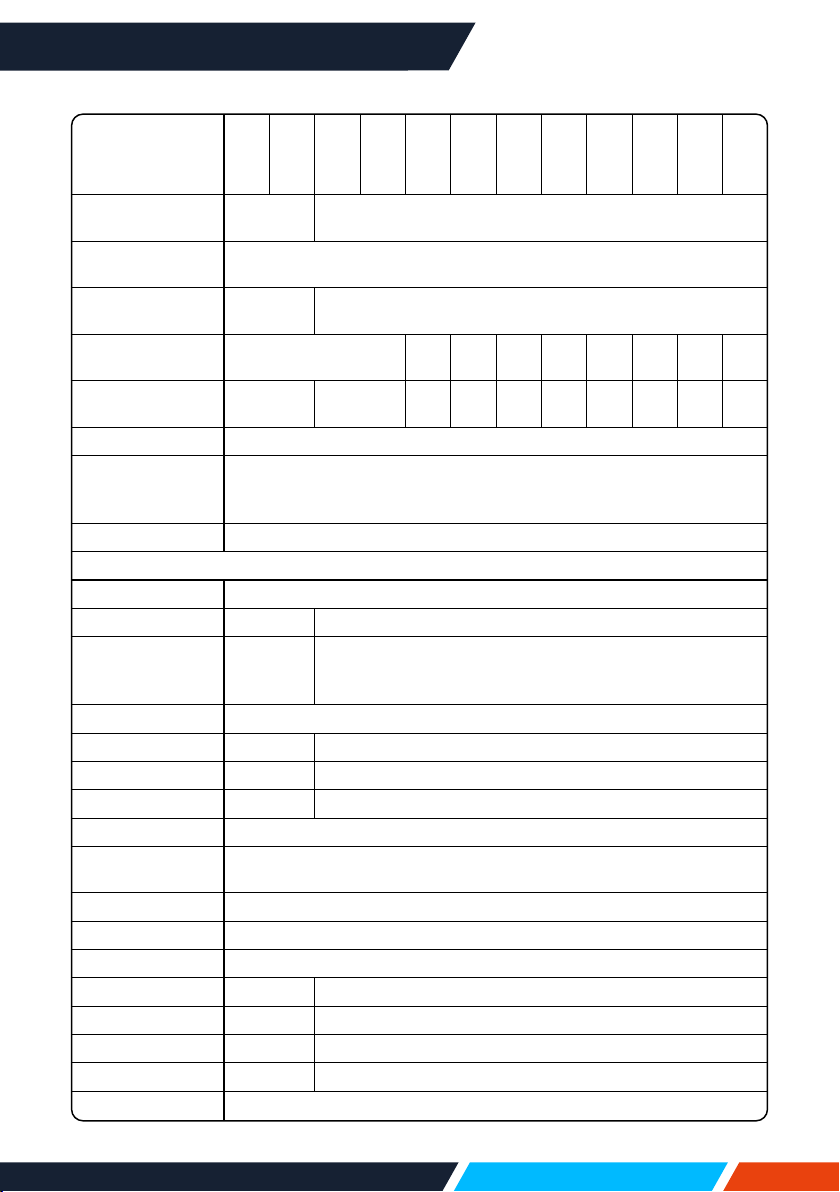
www.infocus.com
Appendix
108
LightPro
Advanced LCD
IN1004
IN1014
IN1024
IN1034
IN1044
IN1026
IN1036
IN1046
IN1029
IN1039
IN1049
IN1059
Keystone
Adjustment
Manual Automatic/Manual
VerticalKeystone
correction
±30°
HorizontalKeystone
correction
- ±30°
ProjectionFactor
1.48~1.78:1
1.34~
2.22:1
1.48~
1.78:1
1.37~
1.65:1
1.26~
2.09:1
1.37~
1.65:1
1.26~
2.09:1
1.37~
1.65:1
1.26~
2.09:1
ProjectionDistance
[m]
0.88~10.90 0.89~10.94
0.81~
13.86
0.94~
11.60
0.87~
10.74
0.81~
13.86
0.87~
10.74
0.81~
13.86
0.87~
10.74
0.81~
13.86
OpticalZoom
Manual
DigitalZoom
Demagnication/
Magnication
0.0x~4.0x
FocusAdjustment
Manual
CONNECTIVITY
AnalogInput
VGA
AnalogOutput
- VGA
DigitalInput
HDMI™1.4
(HDCP1.4),
RJ45
2xHDMI™1.4(HDCP1.4),USB-B2.0,RJ45
DigitalOutput
-
AudioInput
- 3.5mm2xRCA
AudioOutput
- 3.5mm
Control
RS232,RJ45 RS232,RJ45,USB-B2.0
Service
USB-B2.0
PoweredUSBfor
WirelessDongle
USB-A2.05V/1.5A/7.5W
3DSync
-
Full3DSupport
-
3DFormats
-
DocumentReader
- USB-A2.0(PDF)
VideoPlayer
- USB-A2.0(AVI)
PhotoViewer
- USB-A2.0(JPG,BMP,PNG,GIF,TIFF)
MusicPlayer
- USB-A2.0(AVI)
PCLessCompatibility
-
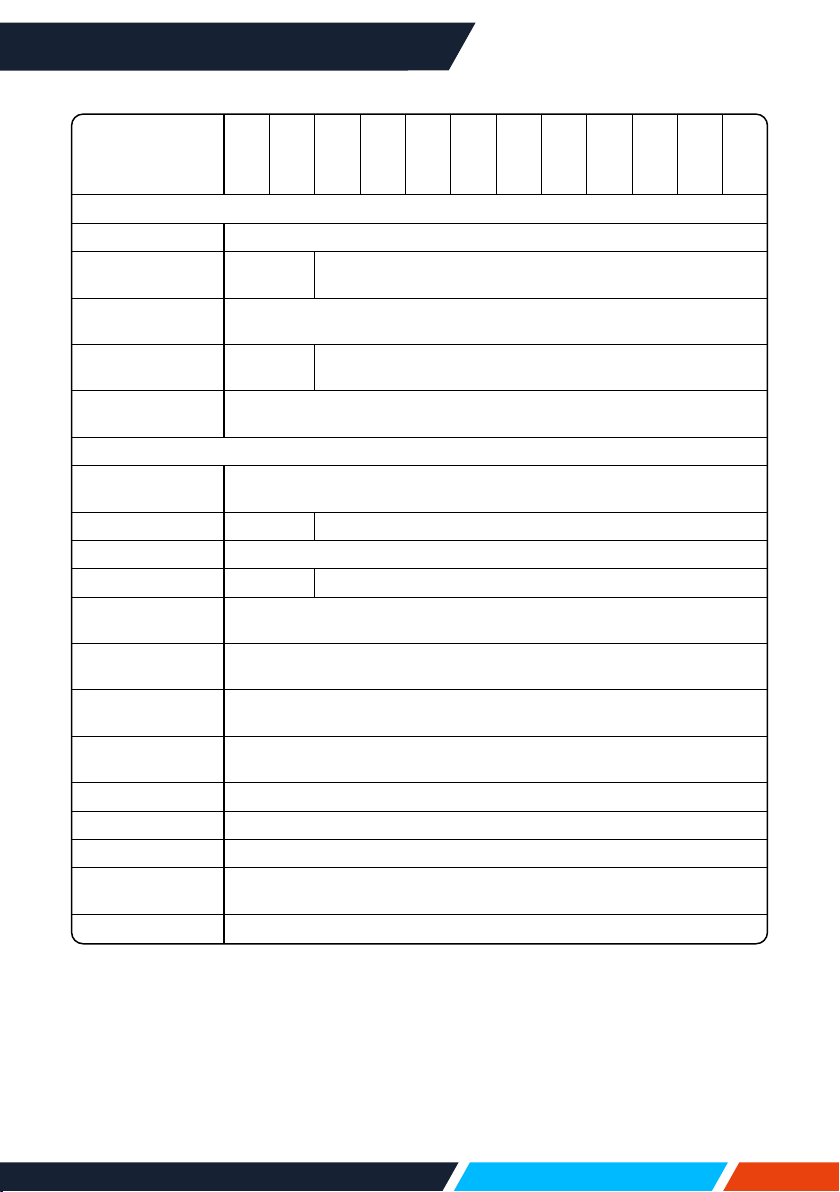
www.infocus.com
Appendix
109
• Theaforesaidspecicationissubjecttochangewithoutpriornotice.
• Liquidcrystalpanelismadeonthebasisofhighstandard,where99.99%ofthe
pixelsareeective.
Duetothenatureoftheliquidcrystalpanel,afractionofthepixels(0.01%orless)
maybeineective.
LightPro
Advanced LCD
IN1004
IN1014
IN1024
IN1034
IN1044
IN1026
IN1036
IN1046
IN1029
IN1039
IN1049
IN1059
POWER
PowerSupply
100~240VAC;50-60Hz
PowerConsumption
Max[W]
300 340
PowerConsumption
Min.[W]
150
PowerConsumption
NetworkStandby(W)
- <2
PowerConsumption
Standby(W)
<0.5
GENERAL
Dimensions
(WxHxD)[mm]
345x261x99
Weight[kg]
3,1 3,3
FanNoise[dB(A)]
26~32
Audio(W)
- 1x16
Operating
Temperature[°C]
5~40
OperatingHumidity
[%]
20~80
OperatingAltitude
(meters)
0~3000
StorageTemperature
[°C]
-10~50
StorageHumidity[%]
20~80
Security
KensingtonLockPort,SecurityBar,KeypadLock,PIN&TimerFunctions
IntheBox
Projector,IRRemoteControl,PowerCord,VGACable,SetupGuide
Safetyand
Regulatory
CB,CE,EAC,cTUVus,CCC,FCC,UKCA,NOM*,PSB,BIS
Environmental
WEEE,EURoHS,ChinaRoHS,CEL,CECP
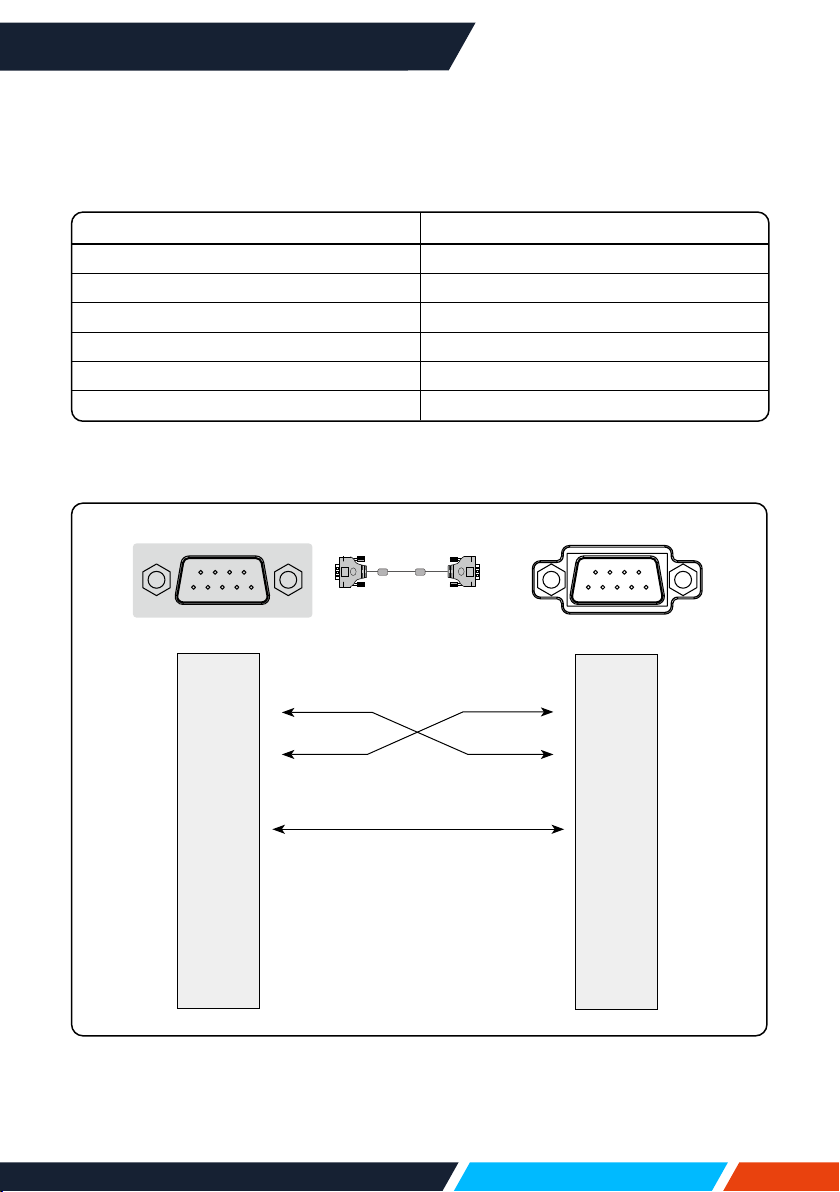
www.infocus.com
Appendix
110
RS232 control mode
1.Serialconnection
1.1Portsetting
Project Setpoint
Communicationmethod Asynchronouscommunication
Communicationrate 19200
Length 8-bit
Paritycheck NO
Stopposition 1
Flowcontrol NO
1.2Connectionmode
CanonlyuseRS232serialcrossconnectPCandprojector.
CD1
RXD2
TXD3
DTR4
SG5
DSR6
RTS7
CTS8
RING9
1N.C.
2RXD
3TXD
4N.C.
5SG
6N.C.
7RTS
8CTS
9N.C.
Computerterminal
Projectorterminal
www.infocus.com
Appendix
111
2.Basiccommands
Distinguishthelettercase,andenterEachcommandendswith[CR](enter).
Command Option Command Option
C00 POWERON C07 Video
C01 POWEROFF(immediately) C15 NETWORK
C02 POWEROFF C16 MEMORYVIEWER
C36 HDMI1 C17 USBDISPLAY
C37 HDMI2 C05 VGA
2.1POWERONcommand
Command
“C00”[CR]
Details
PowerONaction.
Donothing,whenyouareinPowerONstate.
Sendthiscommandcanforcetheendofthecountdowninthe
countdownstate.
Returnvalue
Receivesuccessfully [ACK][CR]
Receiveunsuccessfully “?”[CR]
2.2POWEROFFcommand(NamelyPowerOimmediately)
Command
“C01”[CR]
Details
Poweroaction.
Sendthiscommandcanforceyourprojectortopoweroduringin
poweronstate.
Returnvalue
Receivesuccessfully [ACK][CR]
Receiveunsuccessfully “?”[CR]
2.3POWEROFFcommand
Command
“C02”[CR]
Details
PowerOFFaction.
A"POWEROFF"dialogueboxpopsupwhensendingthePOWER
OFFcommand,anddoonceagaincanforceyourprojectorto
powero.
Sendthiscommandcanforcetheendofthecountdowninthe
countdownstate.
Returnvalue
Receivesuccessfully [ACK][CR]
Receiveunsuccessfully “?”[CR]

www.infocus.com
Appendix
112
2.4HDMI1command
Command
“C36”[CR]
Details
SelectHDMIinput.
Returnvalue
Receivesuccessfully [ACK][CR]
Receiveunsuccessfully “?”[CR]
2.5VGAcommand
Command
“C06”[CR]
Details
SelectVGAINinput
Returnvalue
Receivesuccessfully [ACK][CR]
Receiveunsuccessfully “?”[CR]
2.6NETWORKcommand
Command
“C15”[CR]
Details
SelectNETWORKinput
Returnvalue
Receivesuccessfully [ACK][CR]
Receiveunsuccessfully “?”[CR]
2.7MEMORYVIEWERcommand
Command
“C16”[CR]
Details
SelectMEMORYVIEWERinput
Returnvalue
Receivesuccessfully [ACK][CR]
Receiveunsuccessfully “?”[CR]
2.8USBDisplaycommand
Command
“C17”[CR]
Details
SelectRGBHVinput
Returnvalue
Receivesuccessfully [ACK][CR]
Receiveunsuccessfully “?”[CR]
www.infocus.com
Appendix
113
2.9Videocommand
Command
“C07”[CR]
Details
SelectVideoinput
Returnvalue
Receivesuccessfully [ACK][CR]
Receiveunsuccessfully “?”[CR]
2.10HDMI2command
Command
“C37”[CR]
Details
SelectHDMI2input
Returnvalue
Receivesuccessfully [ACK][CR]
Receiveunsuccessfully “?”[CR]

www.infocus.com
Getting help
114
Getting help
Contacting InFocus
InFocustechnicalsupportcanbecontactedatthebelowphonenumberswithinthe
statedoperatinghours,byusingtheenquiryformlinksprovidedorbyvisiting
infocus.comandclickingonthechatsupporticonfoundoneverypage.
US&Canada
Mon-Fri|6:00am-5:00pmPST
UnitedStates
877-388-8360
Canada
877-388-8360
Technical support enquiry
Europe,Middle-East&Africa
Mon-Fri|08:00-17:00CET
Austria
08004636287
Germany
08001813649
France
0800905993
Italy
0800877238
Spain
0900993163
Sweden
020791251
Switzerland
080004636287
EuropeanUnion
+80004636287
UK&NorthernIreland
08000286470
Technical support enquiry


www.infocus.com
Restriction of use
116
Whenthisproductisusedforapplicationsrequiringhighreliability/safety,suchas
transportationdevicesrelatedtoaviation,rail,marine,automotive,disasterprevention
devices;varioussafetydevices,orfunctional/precisionde-vices,youshouldusethis
productonlyaftergivingconsiderationtoincludingfail-safesandredundanciesinto
yourdesigntomaintainsafetyandtotalsystemreliability.Becausethisproductwas
notintendedforuseinapplicationsrequiringextremelyhighreliability/safety,such
asaerospaceequipment,maincommunicationequipment,nuclearpowercontrol
equipment,ormedicalequipmentrelatedtodirectmedicalcare,etc.,pleasemake
yourownjudgmentonthisproduct’ssuitabilityafterafullevaluation.
Restriction of use

www.infocus.com
Network Service
117
Important Statement on Network Service
AllcontentsandservicesobtainedfromtheProductareownedbythirdpartiesand
protectedbycopyright,patent,trademarkand/orotherintellectualpropertylaws.
Thesecontentsandservicesareonlyforyourpersona!non-commercialpurposes,
whichshallnotbeusedinawaynotauthorisedbythecontentownerorservice
provider.
UndernocircumstanceshallInFocusbeliableforanydirect,indirectorunexpected
lossesordamagesarisingfromyouroranythirdparty'saccesstoanycontentsor
servicesoranyinformationorthird-partysoftwarethroughthisProduct.
Third-partyservicesmaybesubjecttochange,removalordiscontinuationwithout
priornotice.InFocusdoesnotrepresentorwarrantthatsomeservicesorcontentswill
remainaccessibleatanytime.
InFocuswillnotberesponsibleforanyservicerelatedtothesecontentsandservices
orassumeanyliabilityforcustomerservice.Foranyquestionorservicerequestabout
thesecontentsandservices,pleasedirectlycontactthecorrespondingcontentor
serviceprovider.
Network Service

www.infocus.com
Regional & country specic notices
118
Disposing of your used product In the European Union
EU-widelegislationasimplementedineachMemberStaterequiresthatusedelectrical
andelectronicproductscarryingthemark(below)mustbedisposedofseparatelyfrom
normalhouseholdwaste.Thisincludesprojectorsandtheirelectricalaccessories.
Whenyoudisposeofsuchproducts,pleasefollowtheguidanceofyourlocalauthority
and/orasktheshopwhereyoupurchasedtheproduct.
Aftercollectingtheusedproducts,theyarereusedandrecycledinaproperway.This
eortwillhelpusreducethewasteaswellasthenegativeimpacttothehumanhealth
andtheenvironmentattheminimumlevel.
ThemarkontheelectricalandelectronicproductsonlyappliestothecurrentEuropean
UnionMemberStates.
Thecrossed-outwheeledbinimpliesthatusedbatteriesshouldnotbeputtothe
generalhouseholdwaste!
Thereisaseparatecollectionsystemforusedbatteries,toallowpropertreatmentand
recyclinginaccordancewithlegislation.
AccordingtotheEUdirective2006/66/EC,thebatteriescan’tbedisposedimproperly.
Thebatteryshallbeseparatedtocollectbylocalservice.
DisposingofyourusedproductoutsidetheEuropeanUnion
IfyouwishtodisposeofusedelectricalandelectronicproductsoutsidetheEuropean
union,pleasecontactyourlocalauthorityandaskforthecorrectmethodofdisposal.
Californian residence
WARNINGTOCALIFORNIARESIDENTS:
Handlingthecablessuppliedwiththisproductwillexposeyoutolead,achemical
knowntotheStateofCaliforniatocausebirthdefectsorotherreproductiveharm.
WASHHANDSAFTERHANDLING.
RF interference (for USA only)
Warning
TheFederalCommunicationsCommissiondoesnotallowanymodicationsor
changestotheunitEXCEPTthosespeciedbyInFocusinthismanual.Failure
tocomplywiththisgovernmentregulationcouldvoidyourrighttooperatethis
equipment.Thisequipmenthasbeentestedandfoundtocomplywiththelimits
foraClassBdigitaldevice,pursuanttoPart15oftheFCCRules.Theselimitsare
designedtoprovidereasonableprotectionagainstharmfulinterferenceinaresidential
installation.Thisequipmentgenerates,uses,andcanradiateradiofrequencyenergy
and,ifnotinstalledandusedinaccordancewiththeinstructions,maycauseharmful
interferencetoradiocommunications.However,thereisnoguaranteethatinterference
willnotoccurinaparticularinstallation.
Regional & country specic notices

www.infocus.com
Regional & country specic notices
119
Ifthisequipmentdoescauseharmfulinterferencetoradioortelevisionreception,
whichcanbedeterminedbyturningtheequipmentoandon,theuserisencouraged
totrytocorrecttheinterferencebyoneormoreofthefollowingmeasures:
• Reorientorrelocatethereceivingantenna.
• Increasetheseparationbetweentheequipmentandreceiver.
• Connecttheequipmentintoanoutletonacircuitdierentfromthattowhichthe
receiverisconnected.
• Consultthedealeroranexperiencedradio/TVtechnicianforhelp.
Turkish RoHS information relevant for Turkish market
EEEYonetmeligineUygundur.
Thisdeviceisnotintendedforuseinthedirecteldofviewatvisualdisplay
workplaces.Toavoidincommodingreectionsatvisualdisplayworkplacesthisdevice
mustnotbeplacedinthedirecteldofview.
Lamps
US Residents
Thelampinthisproductcontainsmercury.PleasedisposeaccordingtoLocal,Stateor
FederalLaws.
Canadian Environmental Protection Act, 1999
Thelamp(s)inthisproductcontainsmercury.Pleasedisposeaccordingtoyourlocal
authoritylaw.
1. deséchalo

www.infocus.com
Regional & country specic notices
120
Manufacturer, EU importer and EU Authorised Representative in
accordance with EU directives
Manufacturer
Maxnerva Technology Services Limited
Room1001,10/F,HoustonCentre,63ModyRoad,TsimShaTsuiEast,Kowloon,Hong
Kong.
EU Importer
Grand Field Technology Limited
Room1001,10/F,HoustonCentre,63ModyRoad,TsimShaTsuiEast,Kowloon,Hong
Kong.
EU Authorised Representative
24Hour-AR
Storgatan51,90326Umeå,Sweden
T +46(0)10-4240020
E info@24hour-ar.com
W www.24hour-ar.com
UK Authorised Representative in accordance with UK regulations
Independent Quality Solutions Ltd
EnterpriseHouse,WrestPark,Silsoe,Bedfordshire,MK454HR
T +44(0)1462713322
W www.i-q-s.co.uk
Russian Authorised Representative
InFocushasappointedAUVIXLLC,129085,c.Moscow,ZvezdnyBoulevard,21,bldg.1.
astheauthorisedrepresentativeinRussiaandthisproductiscompliantwithTRTC
004/2011,TRTC020/2011andTRCU020/2011localconformitytestingandapprovals.
«InFocusназначилООО«АУВИКС»,129085,г.Москва,Звездныйбульвар,д.
21,стр.1.,вкачествеофициальногопредставителявРоссии,иэтотпродукт
соответствуеттребованиямTRTC004/2011,TRTC020/2011иTRCU020/2011г.
местныеиспытаниянасоответствиеисогласования»
ООО « АУВИКС »
129085,г.Москва,Звездныйбульвар,д.21,стр.1
T +7(495)797-57-75
E-mail: [email protected]
US Importer and Local Representative in accordance with FCC regulations
Maxnerva Technology Services USA LLC
13190SW68thParkway,Suite120
Portland,Oregon,97223,USA

www.infocus.com
EU Declaration of Conformity
121
EU Declaration of Conformity
EU Declaration of Conformity
We, MAXNERVA TECHNOLOGY SERVICES LIMITED
(3. company name & manufacturer)
Room 1001, 10/F Houston Centre 63 Mody Road, Tsim Sha Tsui East, Kowloon, Hong Kong
(4. address)
declare under our sole responsibility that the product(s):
P160
( 5. the regulatory model )
IN1004, IN1014
(6. marketing references)
LCD Projector
(7. product type)
INFOCUS
(8. brand)
The designated product(s) is (are) in conformity with the essential requirements of the following European Directives and Regulations, by compliance with
the European and International standards or other specifications as listed:
Directive 2014/30/EU of the Electromagnetic Compatibility (EMC) Directive (9. directive)
EN 55032:2015+A11:2020, CISPR 32:2015+A1:2019: Class B Electromagnetic compatibility of multimedia equipment. Emission Requirements
EN IEC 61000-3-2:2019 and IEC 61000-3-2:2018 Limits for harmonic current emissions (equipment input current ≤16 A per phase)
EN 61000-3-3:2013/A1:2019 Limitation of voltage changes, voltage fluctuations and flicker in public low-voltage supply systems, for equipment
with rated current <= 16 A per phase and not subject to conditional connection
EN 55035:2017+A11:2020, CISPR 35:2016 modified Electromagnetic compatibility of multimedia equipment. Immunity requirements
EN 61000-4-2:2009 EN 61000-4-3:2006+A1:2008 +A2:2010, EN 61000-4-4:2012 , EN 61000-4-5:2014+A1:2017, EN 61000-4-6:2014+AC:2015,
EN 61000-4-8:2010, EN 61000-4-11:2004+A1:2017 Testing and measurement techniques (11. standards)
Directive 2011/65/EC Restriction of the use of certain Hazardous Substances in electrical and electronic equipment (RoHS) (9. directive)
EN 50581:2012 & EN IEC 63000:2018 Technical documentation for the assessment of electrical and electronic products with respect to the restriction
of hazardous substances (11. standards)
2014/35/EU Low voltage (LVD) Directive (9. directive)
EN 62368-1:2014+A11: 2017 Audio/video, information and communication technology equipment - Part 1: Safety requirements
EC 60664-1: 1.48 Insulation Coordination For Equipment Within Low-Voltage Supply Systems - Part 1: Principles, Requirements And Tests
IEC 60990 Methods Of Measurement Of Touch Current And Protective Conductor Current
IEC 62471-5: 2015 Photobiological Safety Of Lamps And Lamp Systems. Image Projectors (11. standards)
Directive 2012/19/EU of the European Parliament and of the Council of 4 July 2012 on waste electrical and electronic equipment (WEEE)
(9. directive)
Directive 2005/20/EC of the European Parliament and of the Council of 9 March 2005 amending Directive 94/62/EC on packaging and packaging
waste 9. directive)
Directive 2006/66/EC of the European Parliament and of the Council of 6 September 2006 on batteries and accumulators and waste batteries and
accumulators (9. directive)
Directive 2009/125/EC of the European Parliament and of the Council of 21 October 2009 establishing a framework for the setting of ecodesign
requirements for energy-related products (ErP) (9. directive)
Regulation (EC) No 1907/2006 of the European Parliament and of the Council of 18 December 2006 concerning the Registration, Evaluation,
Authorisation and Restriction of Chemicals (REACH) (10. regulation)
Signed for and on behalf of: MAXNERVA TECHNOLOGY SERVICES LIMITED, Hong Kong, August 02, 2021.
Signature:
Name: CHENG Yee Pun
Designation: CFO & Authorised Signatory
20210802-000 2021/08
(1. document number) (2. Year, Month in which the CE mark is axed)
Cheng Yee Pun (Aug 2, 2021 11:34 GMT+8)
Cheng Yee Pun

www.infocus.com
EU Declaration of Conformity
122
EU Declaration of Conformity
We, MAXNERVA TECHNOLOGY SERVICES LIMITED
(3. company name & manufacturer)
Room 1001, 10/F Houston Centre 63 Mody Road, Tsim Sha Tsui East, Kowloon, Hong Kong
(4. address)
declare under our sole responsibility that the product(s):
P161
( 5. the regulatory model )
IN1024, IN1034, IN1044
(6. marketing references)
LCD Projector
(7. product type)
INFOCUS
(8. brand)
The designated product(s) is (are) in conformity with the essential requirements of the following European Directives and Regulations, by compliance with
the European and International standards or other specifications as listed:
Directive 2014/30/EU of the Electromagnetic Compatibility (EMC) Directive (9. directive)
EN 55032:2015+A11:2020, CISPR 32:2015+A1:2019: Class B Electromagnetic compatibility of multimedia equipment. Emission Requirements
EN IEC 61000-3-2:2019 and IEC 61000-3-2:2018 Limits for harmonic current emissions (equipment input current ≤16 A per phase)
EN 61000-3-3:2013/A1:2019 Limitation of voltage changes, voltage fluctuations and flicker in public low-voltage supply systems, for equipment
with rated current <= 16 A per phase and not subject to conditional connection
EN 55035:2017+A11:2020, CISPR 35:2016 modified Electromagnetic compatibility of multimedia equipment. Immunity requirements
EN 61000-4-2:2009 EN 61000-4-3:2006+A1:2008 +A2:2010, EN 61000-4-4:2012 , EN 61000-4-5:2014+A1:2017, EN 61000-4-6:2014+AC:2015,
EN 61000-4-8:2010, EN 61000-4-11:2004+A1:2017 Testing and measurement techniques (11. standards)
Directive 2011/65/EC Restriction of the use of certain Hazardous Substances in electrical and electronic equipment (RoHS) (9. directive)
EN 50581:2012 & EN IEC 63000:2018 Technical documentation for the assessment of electrical and electronic products with respect to the restriction
of hazardous substances (11. standards)
2014/35/EU Low voltage (LVD) Directive (9. directive)
EN 62368-1:2014+A11: 2017 Audio/video, information and communication technology equipment - Part 1: Safety requirements
EC 60664-1: 1.48 Insulation Coordination For Equipment Within Low-Voltage Supply Systems - Part 1: Principles, Requirements And Tests
IEC 60990 Methods Of Measurement Of Touch Current And Protective Conductor Current
IEC 62471-5: 2015 Photobiological Safety Of Lamps And Lamp Systems. Image Projectors (11. standards)
Directive 2012/19/EU of the European Parliament and of the Council of 4 July 2012 on waste electrical and electronic equipment (WEEE)
(9. directive)
Directive 2005/20/EC of the European Parliament and of the Council of 9 March 2005 amending Directive 94/62/EC on packaging and packaging
waste 9. directive)
Directive 2006/66/EC of the European Parliament and of the Council of 6 September 2006 on batteries and accumulators and waste batteries and
accumulators (9. directive)
Directive 2009/125/EC of the European Parliament and of the Council of 21 October 2009 establishing a framework for the setting of ecodesign
requirements for energy-related products (ErP) (9. directive)
Regulation (EC) No 1907/2006 of the European Parliament and of the Council of 18 December 2006 concerning the Registration, Evaluation,
Authorisation and Restriction of Chemicals (REACH) (10. regulation)
Signed for and on behalf of: MAXNERVA TECHNOLOGY SERVICES LIMITED, Hong Kong, August 02, 2021.
Signature:
Name: CHENG Yee Pun
Designation: CFO & Authorised Signatory
20210802-001 2021/08
(1. document number) (2. Year, Month in which the CE mark is axed)
Cheng Yee Pun (Aug 2, 2021 11:28 GMT+8)
Cheng Yee Pun

www.infocus.com
EU Declaration of Conformity
123
EU Declaration of Conformity
We, MAXNERVA TECHNOLOGY SERVICES LIMITED
(3. company name & manufacturer)
Room 1001, 10/F Houston Centre 63 Mody Road, Tsim Sha Tsui East, Kowloon, Hong Kong
(4. address)
declare under our sole responsibility that the product(s):
P162
( 5. the regulatory model )
IN1026, IN1036, IN1046
(6. marketing references)
LCD Projector
(7. product type)
INFOCUS
(8. brand)
The designated product(s) is (are) in conformity with the essential requirements of the following European Directives and Regulations, by compliance with
the European and International standards or other specifications as listed:
Directive 2014/30/EU of the Electromagnetic Compatibility (EMC) Directive (9. directive)
EN 55032:2015+A11:2020, CISPR 32:2015+A1:2019: Class B Electromagnetic compatibility of multimedia equipment. Emission Requirements
EN IEC 61000-3-2:2019 and IEC 61000-3-2:2018 Limits for harmonic current emissions (equipment input current ≤16 A per phase)
EN 61000-3-3:2013/A1:2019 Limitation of voltage changes, voltage fluctuations and flicker in public low-voltage supply systems, for equipment
with rated current <= 16 A per phase and not subject to conditional connection
EN 55035:2017+A11:2020, CISPR 35:2016 modified Electromagnetic compatibility of multimedia equipment. Immunity requirements
EN 61000-4-2:2009 EN 61000-4-3:2006+A1:2008 +A2:2010, EN 61000-4-4:2012 , EN 61000-4-5:2014+A1:2017, EN 61000-4-6:2014+AC:2015,
EN 61000-4-8:2010, EN 61000-4-11:2004+A1:2017 Testing and measurement techniques (11. standards)
Directive 2011/65/EC Restriction of the use of certain Hazardous Substances in electrical and electronic equipment (RoHS) (9. directive)
EN 50581:2012 & EN IEC 63000:2018 Technical documentation for the assessment of electrical and electronic products with respect to the restriction
of hazardous substances (11. standards)
2014/35/EU Low voltage (LVD) Directive (9. directive)
EN 62368-1:2014+A11: 2017 Audio/video, information and communication technology equipment - Part 1: Safety requirements
EC 60664-1: 1.48 Insulation Coordination For Equipment Within Low-Voltage Supply Systems - Part 1: Principles, Requirements And Tests
IEC 60990 Methods Of Measurement Of Touch Current And Protective Conductor Current
IEC 62471-5: 2015 Photobiological Safety Of Lamps And Lamp Systems. Image Projectors (11. standards)
Directive 2012/19/EU of the European Parliament and of the Council of 4 July 2012 on waste electrical and electronic equipment (WEEE)
(9. directive)
Directive 2005/20/EC of the European Parliament and of the Council of 9 March 2005 amending Directive 94/62/EC on packaging and packaging
waste 9. directive)
Directive 2006/66/EC of the European Parliament and of the Council of 6 September 2006 on batteries and accumulators and waste batteries and
accumulators (9. directive)
Directive 2009/125/EC of the European Parliament and of the Council of 21 October 2009 establishing a framework for the setting of ecodesign
requirements for energy-related products (ErP) (9. directive)
Regulation (EC) No 1907/2006 of the European Parliament and of the Council of 18 December 2006 concerning the Registration, Evaluation,
Authorisation and Restriction of Chemicals (REACH) (10. regulation)
Signed for and on behalf of: MAXNERVA TECHNOLOGY SERVICES LIMITED, Hong Kong, August 02, 2021.
Signature:
Name: CHENG Yee Pun
Designation: CFO & Authorised Signatory
20210802-002 2021/08
(1. document number) (2. Year, Month in which the CE mark is axed)
Cheng Yee Pun (Aug 2, 2021 11:29 GMT+8)
Cheng Yee Pun

www.infocus.com
EU Declaration of Conformity
124
EU Declaration of Conformity
We, MAXNERVA TECHNOLOGY SERVICES LIMITED
(3. company name & manufacturer)
Room 1001, 10/F Houston Centre 63 Mody Road, Tsim Sha Tsui East, Kowloon, Hong Kong
(4. address)
declare under our sole responsibility that the product(s):
P163
( 5. the regulatory model )
IN1029, IN1039, IN1049, IN1059
(6. marketing references)
LCD Projector
(7. product type)
INFOCUS
(8. brand)
The designated product(s) is (are) in conformity with the essential requirements of the following European Directives and Regulations, by compliance with
the European and International standards or other specifications as listed:
Directive 2014/30/EU of the Electromagnetic Compatibility (EMC) Directive (9. directive)
EN 55032:2015+A11:2020, CISPR 32:2015+A1:2019: Class B Electromagnetic compatibility of multimedia equipment. Emission Requirements
EN IEC 61000-3-2:2019 and IEC 61000-3-2:2018 Limits for harmonic current emissions (equipment input current ≤16 A per phase)
EN 61000-3-3:2013/A1:2019 Limitation of voltage changes, voltage fluctuations and flicker in public low-voltage supply systems, for equipment
with rated current <= 16 A per phase and not subject to conditional connection
EN 55035:2017+A11:2020, CISPR 35:2016 modified Electromagnetic compatibility of multimedia equipment. Immunity requirements
EN 61000-4-2:2009 EN 61000-4-3:2006+A1:2008 +A2:2010, EN 61000-4-4:2012 , EN 61000-4-5:2014+A1:2017, EN 61000-4-6:2014+AC:2015,
EN 61000-4-8:2010, EN 61000-4-11:2004+A1:2017 Testing and measurement techniques (11. standards)
Directive 2011/65/EC Restriction of the use of certain Hazardous Substances in electrical and electronic equipment (RoHS) (9. directive)
EN 50581:2012 & EN IEC 63000:2018 Technical documentation for the assessment of electrical and electronic products with respect to the restriction
of hazardous substances (11. standards)
2014/35/EU Low voltage (LVD) Directive (9. directive)
EN 62368-1:2014+A11: 2017 Audio/video, information and communication technology equipment - Part 1: Safety requirements
EC 60664-1: 1.48 Insulation Coordination For Equipment Within Low-Voltage Supply Systems - Part 1: Principles, Requirements And Tests
IEC 60990 Methods Of Measurement Of Touch Current And Protective Conductor Current
IEC 62471-5: 2015 Photobiological Safety Of Lamps And Lamp Systems. Image Projectors (11. standards)
Directive 2012/19/EU of the European Parliament and of the Council of 4 July 2012 on waste electrical and electronic equipment (WEEE)
(9. directive)
Directive 2005/20/EC of the European Parliament and of the Council of 9 March 2005 amending Directive 94/62/EC on packaging and packaging
waste 9. directive)
Directive 2006/66/EC of the European Parliament and of the Council of 6 September 2006 on batteries and accumulators and waste batteries and
accumulators (9. directive)
Directive 2009/125/EC of the European Parliament and of the Council of 21 October 2009 establishing a framework for the setting of ecodesign
requirements for energy-related products (ErP) (9. directive)
Regulation (EC) No 1907/2006 of the European Parliament and of the Council of 18 December 2006 concerning the Registration, Evaluation,
Authorisation and Restriction of Chemicals (REACH) (10. regulation)
Signed for and on behalf of: MAXNERVA TECHNOLOGY SERVICES LIMITED, Hong Kong, August 02, 2021.
Signature:
Name: CHENG Yee Pun
Designation: CFO & Authorised Signatory
20210802-003 2021/08
(1. document number) (2. Year, Month in which the CE mark is axed)
Cheng Yee Pun (Aug 2, 2021 11:33 GMT+8)
Cheng Yee Pun

www.infocus.com
UK Declaration of Conformity
125
UK Declaration of Conformity
UK Declaration of Conformity
We, MAXNERVA TECHNOLOGY SERVICES LIMITED
(3. company name & manufacturer)
Room 1001, 10/F Houston Centre 63 Mody Road, Tsim Sha Tsui East, Kowloon, Hong Kong
(4. address)
declare under our sole responsibility that the product(s):
P160
( 5. the regulatory model )
IN1004, IN1014
(6. marketing references)
DLP Projector
(7. product type)
INFOCUS
(8. brand)
The designated product(s) is (are) in conformity with the essential requirements of the following UK Directives and Regulations, by compliance with the
European and International standards or other specifications as listed:
The Electromagnetic Compatibility Regulations 2016 (9. regulations)
EN 55032:2015+A11:2020, CISPR 32:2015+A1:2019: Class B Electromagnetic compatibility of multimedia equipment. Emission Requirements
EN IEC 61000-3-2:2019 and IEC 61000-3-2:2018 Limits for harmonic current emissions (equipment input current ≤16 A per phase)
EN 61000-3-3:2013/A1:2019 Limitation of voltage changes, voltage fluctuations and flicker in public low-voltage supply systems, for equipment
with rated current <= 16 A per phase and not subject to conditional connection
EN 55035:2017+A11:2020, CISPR 35:2016 modified Electromagnetic compatibility of multimedia equipment. Immunity requirements
EN 61000-4-2:2009 EN 61000-4-3:2006+A1:2008 +A2:2010, EN 61000-4-4:2012 , EN 61000-4-5:2014+A1:2017, EN 61000-4-6:2014+AC:2015,
EN 61000-4-8:2010, EN 61000-4-11:2004+A1:2017 Testing and measurement techniques (11. standards)
Restriction of the Use of Certain Hazardous Substances in Electrical and Electronic Equipment Regulations 2012 (9. regulations)
EN 50581:2012 & EN IEC 63000:2018 Technical documentation for the assessment of electrical and electronic products with respect to the restriction
of hazardous substances (11. standards)
Electrical Equipment (Safety) Regulations 2016 (9. regulations)
EN 62368-1:2014+A11: 2017 Audio/video, information and communication technology equipment - Part 1: Safety requirements
EC 60664-1: 1.48 Insulation Coordination For Equipment Within Low-Voltage Supply Systems - Part 1: Principles, Requirements And Tests
IEC 60990 Methods Of Measurement Of Touch Current And Protective Conductor Current
IEC 62471-5: 2015 Photobiological Safety Of Lamps And Lamp Systems. Image Projectors (11. standards)
The Waste Electric and Electronic Equipment (WEEE) Regulations 2013 (9. regulations)
Producer Responsibilities Obligations (Packaging Waste) Regulations 2007 (9 regulations).
Batteries and Accumulators (Placing on the Market) Regulations 2008 (9. regulations)
Ecodesign for Energy-Related Products Regulations 2010 (9. regulations)
UK Registration, Evaluation, Authorisation and Restriction of Chemicals (REACH) Regulations 2021 (9 regulations)
Signed for and on behalf of: MAXNERVA TECHNOLOGY SERVICES LIMITED, Hong Kong, July 7, 2021.
Signature:
Name: CHENG Yee Pun
Designation: CFO & Authorised Signatory
20210907-009 2021/09
(1. document number) (2. Year, Month in which the UKCA mark is axed)
Cheng Yee Pun (Sep 7, 2021 10:25 GMT+8)
Cheng Yee Pun

www.infocus.com
UK Declaration of Conformity
126
UK Declaration of Conformity
We, MAXNERVA TECHNOLOGY SERVICES LIMITED
(3. company name & manufacturer)
Room 1001, 10/F Houston Centre 63 Mody Road, Tsim Sha Tsui East, Kowloon, Hong Kong
(4. address)
declare under our sole responsibility that the product(s):
P161
( 5. the regulatory model )
IN1024, IN1034, IN1044
(6. marketing references)
DLP Projector
(7. product type)
INFOCUS
(8. brand)
The designated product(s) is (are) in conformity with the essential requirements of the following UK Directives and Regulations, by compliance with the
European and International standards or other specifications as listed:
The Electromagnetic Compatibility Regulations 2016 (9. regulations)
EN 55032:2015+A11:2020, CISPR 32:2015+A1:2019: Class B Electromagnetic compatibility of multimedia equipment. Emission Requirements
EN IEC 61000-3-2:2019 and IEC 61000-3-2:2018 Limits for harmonic current emissions (equipment input current ≤16 A per phase)
EN 61000-3-3:2013/A1:2019 Limitation of voltage changes, voltage fluctuations and flicker in public low-voltage supply systems, for equipment
with rated current <= 16 A per phase and not subject to conditional connection
EN 55035:2017+A11:2020, CISPR 35:2016 modified Electromagnetic compatibility of multimedia equipment. Immunity requirements
EN 61000-4-2:2009 EN 61000-4-3:2006+A1:2008 +A2:2010, EN 61000-4-4:2012 , EN 61000-4-5:2014+A1:2017, EN 61000-4-6:2014+AC:2015,
EN 61000-4-8:2010, EN 61000-4-11:2004+A1:2017 Testing and measurement techniques (11. standards)
Restriction of the Use of Certain Hazardous Substances in Electrical and Electronic Equipment Regulations 2012 (9. regulations)
EN 50581:2012 & EN IEC 63000:2018 Technical documentation for the assessment of electrical and electronic products with respect to the restriction
of hazardous substances (11. standards)
Electrical Equipment (Safety) Regulations 2016 (9. regulations)
EN 62368-1:2014+A11: 2017 Audio/video, information and communication technology equipment - Part 1: Safety requirements
EC 60664-1: 1.48 Insulation Coordination For Equipment Within Low-Voltage Supply Systems - Part 1: Principles, Requirements And Tests
IEC 60990 Methods Of Measurement Of Touch Current And Protective Conductor Current
IEC 62471-5: 2015 Photobiological Safety Of Lamps And Lamp Systems. Image Projectors (11. standards)
The Waste Electric and Electronic Equipment (WEEE) Regulations 2013 (9. regulations)
Producer Responsibilities Obligations (Packaging Waste) Regulations 2007 (9 regulations).
Batteries and Accumulators (Placing on the Market) Regulations 2008 (9. regulations)
Ecodesign for Energy-Related Products Regulations 2010 (9. regulations)
UK Registration, Evaluation, Authorisation and Restriction of Chemicals (REACH) Regulations 2021 (9 regulations)
Signed for and on behalf of: MAXNERVA TECHNOLOGY SERVICES LIMITED, Hong Kong, July 7, 2021.
Signature:
Name: CHENG Yee Pun
Designation: CFO & Authorised Signatory
20210907-010 2021/09
(1. document number) (2. Year, Month in which the UKCA mark is axed)
Cheng Yee Pun (Sep 7, 2021 10:30 GMT+8)
Cheng Yee Pun

www.infocus.com
UK Declaration of Conformity
127
UK Declaration of Conformity
We, MAXNERVA TECHNOLOGY SERVICES LIMITED
(3. company name & manufacturer)
Room 1001, 10/F Houston Centre 63 Mody Road, Tsim Sha Tsui East, Kowloon, Hong Kong
(4. address)
declare under our sole responsibility that the product(s):
P162
( 5. the regulatory model )
IN1026, IN1036, IN1046
(6. marketing references)
DLP Projector
(7. product type)
INFOCUS
(8. brand)
The designated product(s) is (are) in conformity with the essential requirements of the following UK Directives and Regulations, by compliance with the
European and International standards or other specifications as listed:
The Electromagnetic Compatibility Regulations 2016 (9. regulations)
EN 55032:2015+A11:2020, CISPR 32:2015+A1:2019: Class B Electromagnetic compatibility of multimedia equipment. Emission Requirements
EN IEC 61000-3-2:2019 and IEC 61000-3-2:2018 Limits for harmonic current emissions (equipment input current ≤16 A per phase)
EN 61000-3-3:2013/A1:2019 Limitation of voltage changes, voltage fluctuations and flicker in public low-voltage supply systems, for equipment
with rated current <= 16 A per phase and not subject to conditional connection
EN 55035:2017+A11:2020, CISPR 35:2016 modified Electromagnetic compatibility of multimedia equipment. Immunity requirements
EN 61000-4-2:2009 EN 61000-4-3:2006+A1:2008 +A2:2010, EN 61000-4-4:2012 , EN 61000-4-5:2014+A1:2017, EN 61000-4-6:2014+AC:2015,
EN 61000-4-8:2010, EN 61000-4-11:2004+A1:2017 Testing and measurement techniques (11. standards)
Restriction of the Use of Certain Hazardous Substances in Electrical and Electronic Equipment Regulations 2012 (9. regulations)
EN 50581:2012 & EN IEC 63000:2018 Technical documentation for the assessment of electrical and electronic products with respect to the restriction
of hazardous substances (11. standards)
Electrical Equipment (Safety) Regulations 2016 (9. regulations)
EN 62368-1:2014+A11: 2017 Audio/video, information and communication technology equipment - Part 1: Safety requirements
EC 60664-1: 1.48 Insulation Coordination For Equipment Within Low-Voltage Supply Systems - Part 1: Principles, Requirements And Tests
IEC 60990 Methods Of Measurement Of Touch Current And Protective Conductor Current
IEC 62471-5: 2015 Photobiological Safety Of Lamps And Lamp Systems. Image Projectors (11. standards)
The Waste Electric and Electronic Equipment (WEEE) Regulations 2013 (9. regulations)
Producer Responsibilities Obligations (Packaging Waste) Regulations 2007 (9 regulations).
Batteries and Accumulators (Placing on the Market) Regulations 2008 (9. regulations)
Ecodesign for Energy-Related Products Regulations 2010 (9. regulations)
UK Registration, Evaluation, Authorisation and Restriction of Chemicals (REACH) Regulations 2021 (9 regulations)
Signed for and on behalf of: MAXNERVA TECHNOLOGY SERVICES LIMITED, Hong Kong, July 7, 2021.
Signature:
Name: CHENG Yee Pun
Designation: CFO & Authorised Signatory
20210907-011 2021/09
(1. document number) (2. Year, Month in which the UKCA mark is axed)
Cheng Yee Pun (Sep 7, 2021 10:33 GMT+8)
Cheng Yee Pun

www.infocus.com
UK Declaration of Conformity
128
UK Declaration of Conformity
We, MAXNERVA TECHNOLOGY SERVICES LIMITED
(3. company name & manufacturer)
Room 1001, 10/F Houston Centre 63 Mody Road, Tsim Sha Tsui East, Kowloon, Hong Kong
(4. address)
declare under our sole responsibility that the product(s):
P163
( 5. the regulatory model )
IN1029, IN1039, IN1049, IN1059
(6. marketing references)
DLP Projector
(7. product type)
INFOCUS
(8. brand)
The designated product(s) is (are) in conformity with the essential requirements of the following UK Directives and Regulations, by compliance with the
European and International standards or other specifications as listed:
The Electromagnetic Compatibility Regulations 2016 (9. regulations)
EN 55032:2015+A11:2020, CISPR 32:2015+A1:2019: Class B Electromagnetic compatibility of multimedia equipment. Emission Requirements
EN IEC 61000-3-2:2019 and IEC 61000-3-2:2018 Limits for harmonic current emissions (equipment input current ≤16 A per phase)
EN 61000-3-3:2013/A1:2019 Limitation of voltage changes, voltage fluctuations and flicker in public low-voltage supply systems, for equipment
with rated current <= 16 A per phase and not subject to conditional connection
EN 55035:2017+A11:2020, CISPR 35:2016 modified Electromagnetic compatibility of multimedia equipment. Immunity requirements
EN 61000-4-2:2009 EN 61000-4-3:2006+A1:2008 +A2:2010, EN 61000-4-4:2012 , EN 61000-4-5:2014+A1:2017, EN 61000-4-6:2014+AC:2015,
EN 61000-4-8:2010, EN 61000-4-11:2004+A1:2017 Testing and measurement techniques (11. standards)
Restriction of the Use of Certain Hazardous Substances in Electrical and Electronic Equipment Regulations 2012 (9. regulations)
EN 50581:2012 & EN IEC 63000:2018 Technical documentation for the assessment of electrical and electronic products with respect to the restriction
of hazardous substances (11. standards)
Electrical Equipment (Safety) Regulations 2016 (9. regulations)
EN 62368-1:2014+A11: 2017 Audio/video, information and communication technology equipment - Part 1: Safety requirements
EC 60664-1: 1.48 Insulation Coordination For Equipment Within Low-Voltage Supply Systems - Part 1: Principles, Requirements And Tests
IEC 60990 Methods Of Measurement Of Touch Current And Protective Conductor Current
IEC 62471-5: 2015 Photobiological Safety Of Lamps And Lamp Systems. Image Projectors (11. standards)
The Waste Electric and Electronic Equipment (WEEE) Regulations 2013 (9. regulations)
Producer Responsibilities Obligations (Packaging Waste) Regulations 2007 (9 regulations).
Batteries and Accumulators (Placing on the Market) Regulations 2008 (9. regulations)
Ecodesign for Energy-Related Products Regulations 2010 (9. regulations)
UK Registration, Evaluation, Authorisation and Restriction of Chemicals (REACH) Regulations 2021 (9 regulations)
Signed for and on behalf of: MAXNERVA TECHNOLOGY SERVICES LIMITED, Hong Kong, July 7, 2021.
Signature:
Name: CHENG Yee Pun
Designation: CFO & Authorised Signatory
20210907-012 2021/09
(1. document number) (2. Year, Month in which the UKCA mark is axed)
Cheng Yee Pun (Sep 8, 2021 09:13 GMT+8)
Cheng Yee Pun
www.infocus.com
WARRANTY
129
WARRANTY
INFOCUS LIMITED WARRANTY
Forproductpurchaseseective1stJanuary2021
WARRANTY STATEMENT
InFocuswarrantsitsproductstobefreefromdefectsinmaterialandworkmanship
duringthewarrantyperiod.Ifaproductprovestobedefectiveinmaterialor
workmanshipduringthewarrantyperiod,InFocuswill,atitssoleoption,repairor
replacetheproductwithasimilarproduct.ReplacementProductsorpartsmayinclude
remanufacturedorrefurbishedpartsorcomponents.Thereplacementunitwillbe
coveredbythebalanceoftimeremainingonthecustomer'soriginallimitedwarranty.
InFocusprovidesnowarrantyforanythird-partysoftwarewhetherincludedwiththe
productorinstalledbythecustomer,installationofanyunauthorizedorthirdparty
hardwarepartsorcomponents(e.g.ProjectorLamps}.
DEAD ON ARRIVAL (DOA)
AllbrandnewInFocusproductscarryathirty(30}dayDeadonArrival(DOA}
warrantypolicyfortherstconsumerpurchaser.Anewreplacementunitwillbe
providediftheProductisfoundtobenon-operationalwithinthirty(30}daysof
purchaseandfreightshallbecoveredbothwaysbylnFocus.
WHO THE WARRANTY PROTECTS
Thiswarrantyisvalidonlyfortherstconsumerpurchaser,itisnontransferable.
WARRANTY PERIOD
Product Period
LaserIlluminatedProjectors
5yearsor20,000hourswhichever
comesrst
Lamp&LEDIlluminatedProjectors 2years
InteractiveTouchDisplays 3years
OPSandSlotablePC's 1year
OriginalLampContainedWithinProjector
1yearor1,000hourswhichever
comesrst
ReplacementlampsandOtherAccessories 3months

www.infocus.com
WARRANTY
130
WHAT THE WARRANTY DOES NOT COVER
1. Anyproductonwhichtheserialnumberhasbeendefaced,modiedorremoved.
2. Damage,deteriorationormalfunctionresultingfrom:
a. Accident,misuse,neglect,fire,water,lightning,orotheractsofnature,
unauthorizedproductmodification,orfailuretofollowinstructionssuppliedwith
theproduct.
b. RepairorattemptedrepairbyanyonenotauthorizedbyInFocus.
c. Damagetoorlossofanyprograms,dataorremovablestoragemedia.
d. Softwareordatalossoccurringduringrepairorreplacement.
e. Anydamageoftheproductduetoshipment.
f. Removalorinstallationoftheproduct.
g. Causesexternaltotheproduct,suchaselectricpoweructuationsorfailure.
h. UseofsuppliesorpartsnotmeetinglnFocusspecications.
i. Normalwearandtear.
j. FailureofownertoperformperiodicproductmaintenanceasstatedinUser
Guide.
k. Anyothercausewhichdoesnotrelatetoaproductdefect.
l. Damagecausedbystatic(non-moving}imagesdisplayedforlengthyperiodsof
time(imageburn-in}.
m. Anythird-partysoftwareincludedwiththeproductorinstalledbythecustomer.
n. Installationofanyunauthorizedhardware,accessories,consumablepartsor
components.
o. Damageto,orabuseof,thecoatingonthesurfaceofthedisplaythrough
inappropriatecleaningasdescribedinproductUserGuide.
OBTAINING WARRANTY SERVICE
Submityourrequesttousonline:https://infocus.com/support/technical-support/or
callyourlocalInFocussupporthotlinewhichcanbefoundat:https://infocus.com/
support/contact-us/BesuretoreadourRMAinstructioncloselytoensureasmooth
andtimelyprocessofyourreport,thesewillbesenttoyouwiththeRMAconrmation.
NOTICE
ProductspresentedfordeliveryatInFocusrepairorlogisticscenterwithoutan
assignedRMAwillberefusedandreturnedtosender.ProductsdeliveredtoInFocus
repairorlogisticscenterdamagedwillbeheldandcustomerwillbenotied.Itisthe
responsibilityofsendertoleclaimsdirectlywiththeirfreightcarriercompany.

www.infocus.com
WARRANTY
131
LIMITATION OF IMPLIED WARRANTIES
TOTHEEXTENTALLOWEDBYLOCALLAW,THISPRODUCTISPROVIDEDTOYOU
"ASIS"WITHOUTWARRANTIESORCONDITIONSOFANYKIND,WHETHERORAL
ORWRITTEN,EXPRESSORIMPLIED.INFOCUSSPECIFICALLYDISCLAIMSANY
IMPLIEDWARRANTIESORCONDITIONSOFMERCHANTABILITY,SATISFACTORY
QUALITY,NONINFRINGEMENTANDFITNESSFORAPARTICULARPURPOSE.
EXCLUSION OF DAMAGES
INFOCUS'SLIABILITYISLIMITEDTOTHECOSTOFREPAIRORREPLACEMENTOF
THEPRODUCT.INFOCUSSHALLNOTBELIABLEFOR:
1. DAMAGETOOTHERPROPERTYCAUSEDBYANYDEFECTSINTHEPRODUCT.
2. DAMAGESBASEDUPONINCONVENIENCE,LOSTPROFIT,LOSTDATAOR
DOWNTIMECOSTS,LOSSOFUSEOFTHEPRODUCT,LOSSOFTIME,LOSS
OFPROFITS,LOSSOFBUSINESSOPPORTUNITY,LOSSOFGOODWILL,
INTERFERENCEWITHBUSINESSRELATIONSHIPS,OROTHERCOMMERCIAL
LOSS,EVENIFADVISEDOFTHEPOSSIBILITYOFSUCHDAMAGES.
3. ANYOTHERDAMAGES,WHETHERDIRECT,SPECIAL,INCIDENTAL,
CONSEQUENTIALOROTHERWISE.
4. ANYCLAIMAGAINSTTHECUSTOMERBYANYOTHERPARTY.
LOCAL LAW
Thiswarrantygivesyouspeciclegalrights,andyoumayalsohaveotherrights
whichvaryfromlocalitytolocality.Somelocalitiesdonotallowlimitationsonimplied
warrantiesand/ordonotallowtheexclusionofincidentalorconsequentialdamages,
sotheabovelimitationsandexclusionsmaynotapplytoyou.