Loading ...
Loading ...
Loading ...

9
11.0 Operation
Before using the machine:
Check that safety devices, such as blade
guards, are in position and work perfectly
and that personal safety requirements are
complied with.
Check the sharpness of the blade and verify
coolant flow.
11.1 General Operating Procedure
1. Make sure the work piece is securely
clamped in the vise.
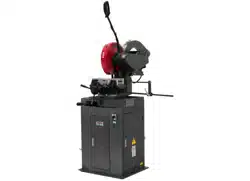
2. Turn the power on (A, Fig. 8).
3. Select the cutting speed (B, Fig. 8).
Figure 8
4. Grip the trigger handle (Figure 5) on the
control lever.
5. Start the blade by pressing the micro-switch
on the handgrip.
The down stroke speed of the head is controlled
manually by the operator. The mist coolant is
activated during the time that the head is below
the upper limit position.
When the cut is complete:
6. Raise the head.
7. Remove the work piece from the vise using
the vise hand wheels.
11.2 Miter Adjustment
To adjust the miter position follow the steps
below while referring to Figure 10:
1. Move the miter position lock (A) to the right
to release.
2. Adjust the head to the desired angle ranging
from –45º to +45º by pushing on the back of
the motor to the right or left. The miter
position is shown on the scale (B).
3. A detent mechanism locks the head in the -45º,
90º and +45º positions to prevent the head from
rotating. For a miter position other than -45º,
90º and +45º, press the lever (C) to release
while rotating the head.
4. When the desired cutting angle is set, move
miter position lock (A) to the left to secure.
Figure 10
11.3 Depth Stop
The depth cut stop adjustment limits the lower
travel of the saw blade during a cutting
operation.
Remove power when
making this adjustment.
Failure to comply may result in serious
injury!
To adjust the depth of cut (refer to Figure 12):
1. Using two 13mm wrenches, loosen the lock
nut (A).
2. With the saw in the fully lowered position,
turn the screw (B) until the saw blade
bottoms out at the desired level.
3. Tighten the lock nut.
Figure 12
Loading ...
Loading ...
Loading ...