Loading ...
Loading ...
Loading ...

8
Introduction
This manual includes operating and maintenance
instructions for the JET 14-Inch Vertical Band
Saws, Models J-8201, J-8203, J-8201VS, and J-
8203VS. This manual also includes parts listings
and illustrations of replaceable parts.
Band Saw Features
Refer to Figures 1 through 3 for key features of the
band saw. Refer to the Specifications section for
additional information on the features and
capabilities of the saw.
Figure 1: Band Saw Features - Rear View (Models
J-8201/J-8203)
Figure 2: Band Saw Features – Rear View (Models
J-8201VS/J-8203VS)
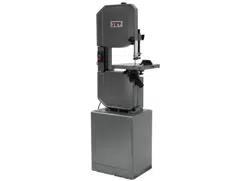
Figure 3: Band Saw Features – Front View (All
Models
Setup and Operation
Set-up
1. The saw should be bolted securely to the shop
floor to make sure the saw is stable when
sawing long, heavy or unwieldy work pieces.
Always use extra support for long or heavy
stock. There are lugs in the bottom of the saw
base for use in bolting down of the saw. After
positioning the saw, open the door in the base
and mark the positions of the four lug holes.
Move the saw to expose the marks. Prepare
for attachment as required by the attachment
method being used. Install the applicable
fasteners. Install shims as required to level the
saw. Tighten the fasteners to secure the saw
to the floor.
2. Check belt tension (refer to Changing Drive
Belt Position).
3. Check gearbox fluid level in sight gauge. If
required, add lubricant to bring level halfway
up the sight gauge. (Two containers of Shell
Spirax 90 HD gear oil are packed with the saw.
The containers have sufficient amount of
lubricant to fill the gearbox.)
4. Check blade tension and support mechanism
adjustment (refer to Changing Saw Blades).
5. Connect power to the saw. For 3-phase
motors, follow the instructions in the Electrical
section to complete the electrical hookup.
Loading ...
Loading ...
Loading ...