
Loading ...
Loading ...
Loading ...
20 − English
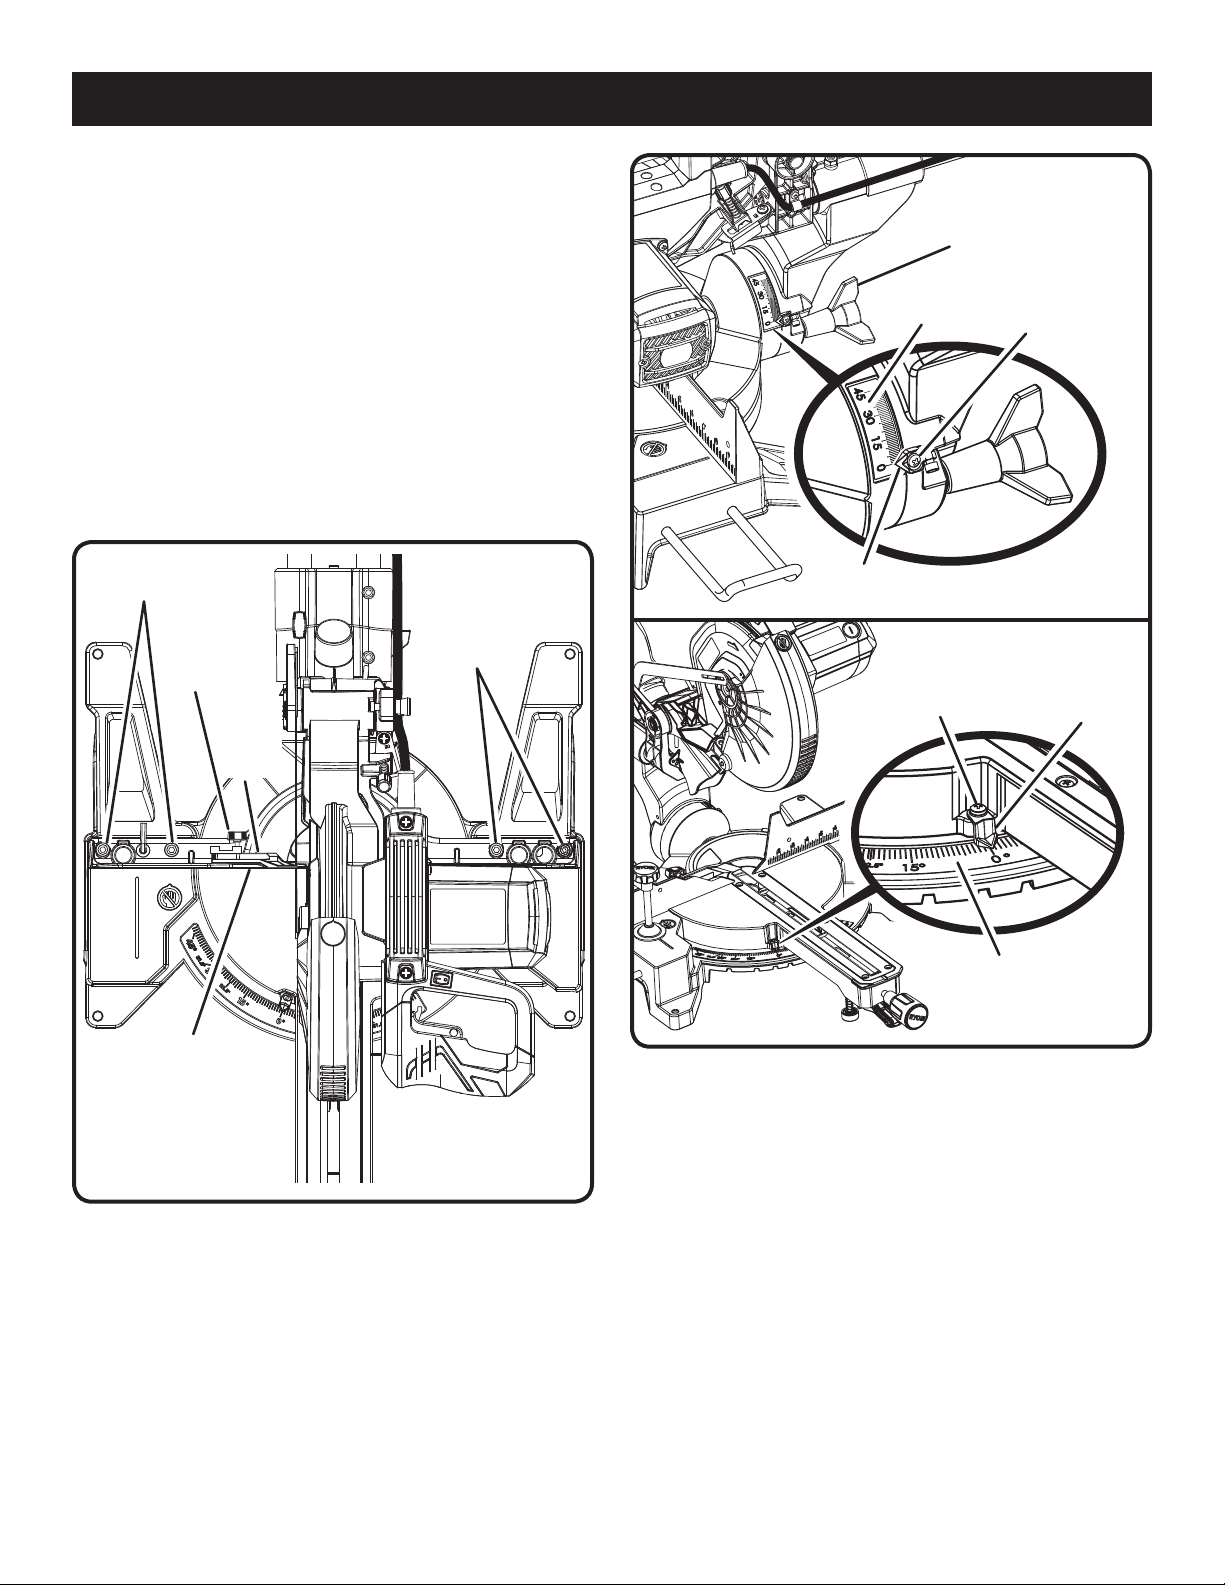
SCALE
INDICATOR
INDICATOR
SCREW
BEVEL
SCALE
BEVEL
LOCK KNOB
Fig. 22
Fig. 23
SCALE
INDICATOR
INDICATOR
SCREW
MITER
SCALE
Loosen the fence screw and slide the partial sliding miter
fence toward the blade to access the socket head screws
securing the left miter fence to the table.
Using the blade wrench provided, loosen the socket head
screws that secure the miter fence to the miter table.
Rotate the miter fence left or right until the saw blade is
parallel with the square.
Retighten the screws securely and recheck the blade-to-
fence alignment.
Return the partial sliding miter fence to the home position
and retighten the fence screw to secure.
Your saw has several scale indicators. After squaring adjust-
ments have been made, it may be necessary to loosen the
indicator screws and reset them to zero. See Figures 22 - 23.
ASSEMBLY
SOCKET HEAD
SCREW(S)
MITER
FENCE
SOCKET HEAD
SCREW(S)
Fig. 21
FENCE
SCREW
PARTIAL
SLIDING
MITER
FENCE
Loading ...
Loading ...
Loading ...