Loading ...
Loading ...
Loading ...
• Turn the blade guide knob, located below the upper
door latch, to lower the Upper blade guide completely.
• Carefully unsnap and remove the blade guard panel.
• Release the table insert from the cast iron table.
• Unscrew and remove table locking insert assembly at
the end of table slot.
• Carefully release the used blade and remove it through
the slot on the cast iron table.
• Replace with a new blade only. Inspect the new blade
rst. The teeth of blade should point down when
installed. If not, turn the blade inside out.
• Place the new blade through the cast iron table slot.
• Slide the blade onto the upper and lower blade wheels.
• Position the blade between the upper blade guide.
• Turn the blade tension lever clockwise until it stops.
• Close both upper and lower doors. The doors need to
have appropriate seal for the dust collection system to
function. Check to see the doors are in good alignment
with the doorframes. Secure the door latches.
• Replace the table insert onto the cast iron table.
• Replace the table locking insert assembly.
• Snap the blade guard panel into position.
• Adjust blade tracking mechanism.
• Check blade tension. Adjust it if necessary.
ADJUST BLADE TRACKING MECHANISM
Refer to Figure 7
Watch for sharp blade edges when turning the wheels.
Turn the switch to the OFF position and disconnect the
machine from power source before adjusting blade
tracking mechanism.
• Unlock door latches and open the doors.
• Manually rotate the drive wheel clockwise. The saw
blade should travel downward at the table insert.
Observe the blade movement from the viewing window
on the side of upper door.
• If the saw blade stays centered on both wheels, No
further adjustment is necessary.
• If the saw blade keeps tilting toward one side and is not
in the center of idler wheel, the saw blade needs to be
adjusted.
• Loosen the lock nut of the tracking control knob on the
right upper side panel to release the tracking control
knob.
• Carefully and slowly turn the idler wheel clockwise with
the left hand and adjust the tracking control knob with
the right hand until the blade is centered.
• Turn tracking knob counterclockwise when blade rides
away from the upper door. Turn tracking knob clockwise
when blade rides toward the upper door.
• Tighten the lock nut of tracking control knob when the
blade is centered.
• Close the upper door.
• During the machine operation, the blade tracking can be
observed from the viewing window.
ADJUST BLADE TENSION
Refer to Figure 7
• The blade tension is adjusted automatically by a
spring-loaded blade tensioning mechanism and should
require no frequent adjustment. However, there is blade
tension knob on top of machine for ne tuning of the
blade tension.
• Over tensioned blade is prone to excessive wear and
breakage. Under tensioned blade is prone to uttering
and movement during operation.
• To adjust the blade tension, the blade cannot have any
contact with the upper and lower blade guides. Raise
the upper blade guide to the top. Move the blade guides
away from the blade.
• Turn the machine on.
• Release the blade tension knob very slowly, ¼ turn at a
time, until the blade starts to utter.
• Now tighten the blade tension knob very slowly until the
blade stop uttering.
• Further tighten the blade tension knob for another ¼
turn.
• Turn the machine off.
• Properly adjust upper and lower blade guides before
use.
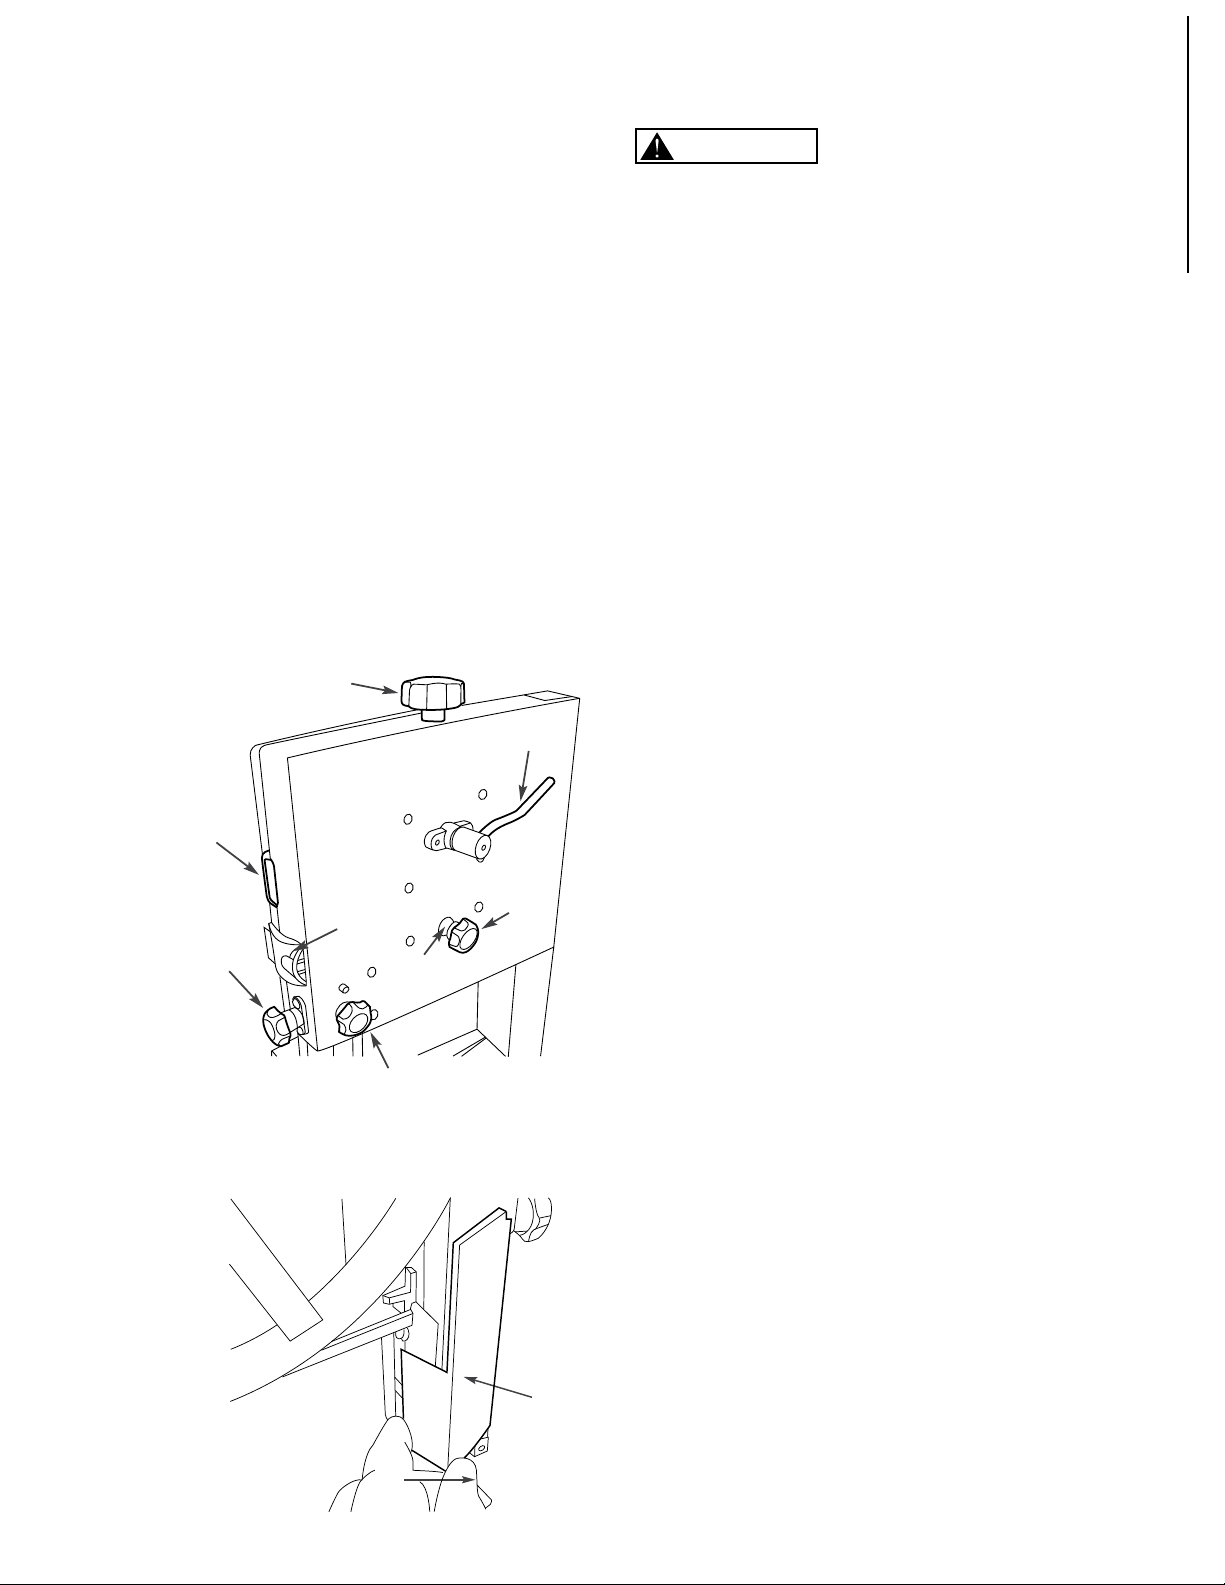
Figure 7
Figure 8
5
OPERATION
Blade Tension
Lever
Blade Guide
Lock Knob
Upper
Guide
Adjusting
Door Latch
Knob
Tension Knob
Tracking
Knob
Tracking
Window
Tracking
lock nut
WARNING
Blade Guard
Panel
IA
0
0
0
/ltl)/
0
Loading ...
Loading ...
Loading ...