Loading ...
Loading ...
Loading ...
14
INSTALLING THE WATER LINE
INSTALLING THE WATER LINE TO YOUR ICE MAKER
WARNING: Connect to potable water supply only.
The water supply system must be installed and connected by a professional technician.
NOTE: In order for the ice maker to operate properly a water line is required.
The maximum inlet water pressure is 690kPa.
The minimum inlet water pressure is 140kPa
WARNING
The water connection must be made by a qualifi ed plumber. Operation
outside the water pressure range may cause malfunction, sever and
damaging water leaks. Under normal conditions a 200cc (5.75 oz) cup
can be fi lled in about 10 seconds. If the refrigerator is installed in an
area with low water pressure (below 30ps1), you can install a booster
pump to compensate for the low pressure.
NOTE: Water line installation di ers based on copper versus PVC, ABS,
PEX, piping in your home.
NOTE: Ice maker connection kits are available at your local hardware
store based on copper or PVC piping in your
home.
TOOLS REQUIRED
(Example of copper piping water line)
1. Power drill and 1/4” drill bit
2. 1/2” or adjustable wrench
3. Flatblade and Philips head screwdrivers
NOTE: You will need to purchase several items
to complete the connection. You may fi nd
these items sold as a kit at local hardware
stores.
CONNECTING TO THE WATER SUPPLY LINE
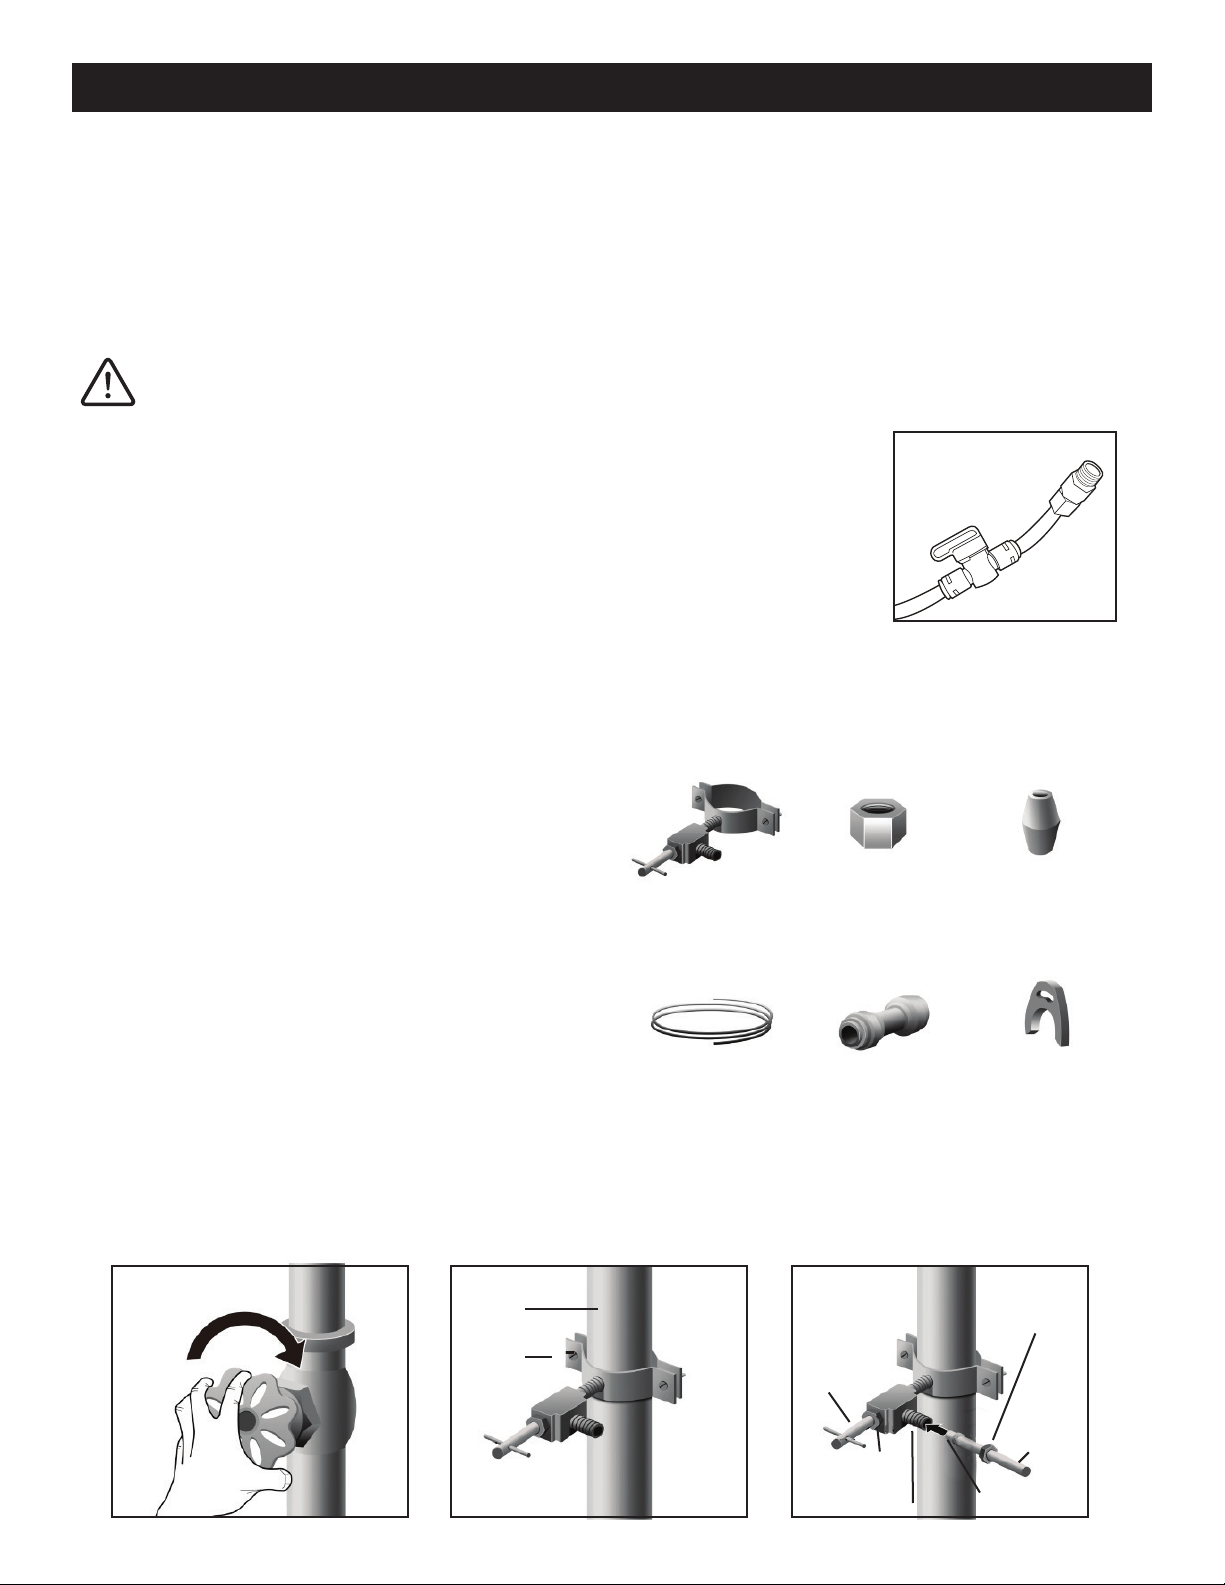
1. First shut o the main water supply - Fig 1.
2. Using a power drill and 1/4” drill bit drill into the cold water line and connect the saddle-type
shuto valve.
3. Connect 1/4” extension tubing to shuto valve outlet.
one 1/4”
compression
1 ferrule
(sleeve)
saddle-type
shut o valve
(1/4” outlet)
1 coupler 2 clips1/4” outlet
extension tubing
Fig 1. Fig 2. Fig 3.
cold water
line
pipe
clamp
shut o
valve
saddle
-type shut
o valve
outlet valve
packing nut
compres-
sion nut
ferrule
(sleeve)
1/4” ex-
tension
tubing
1/4” threaded ice maker
line with water shut-o
located at the back of
the fridge
Loading ...
Loading ...
Loading ...