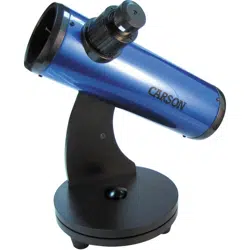
SKELESCOPE
REFLECTOR TELESCOPE WITH TABLE TOP TRIPOD
TM
SK-100 INSTRUCTION MANUAL

TABLE OF CONTENTS
Introduction
2
Box Contents / Visual Key Diagram
3
Telescope Assembly
4-5
• Setting up Your Telescope
• Attaching Tripod Legs to Mount
• Attaching Telescope to Mount
• Attaching Eyepieces
Using the Telescope
5-7
Calculating Power
7
Care and Maintenance of Your Telescope
8
Specications
8
Warnings
9
Customer Service
9
Warranty Information
9-10
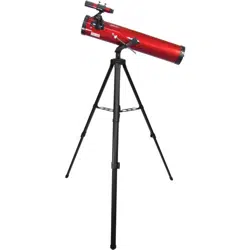
Congratulations on your purchase of a Carson SK-100 SkeleScope
TM
telescope. This telescope features an easy-to-use design that is perfect
for beginning astronomers looking to explore the wonders of outer
space and the world around them. Please read this manual carefully
to ensure that you assemble and use your telescope correctly. When
used properly, your Skelescope
TM
telescope should provide years of
exciting observations of space and terrestrial objects alike.
IMPORTANT: DO NOT USE YOUR SKELESCOPE
TM
TELESCOPE TO
LOOK AT OR NEAR THE SUN! DOING SO WILL CAUSE INSTANT
AND PERMANENT EYE DAMAGE.
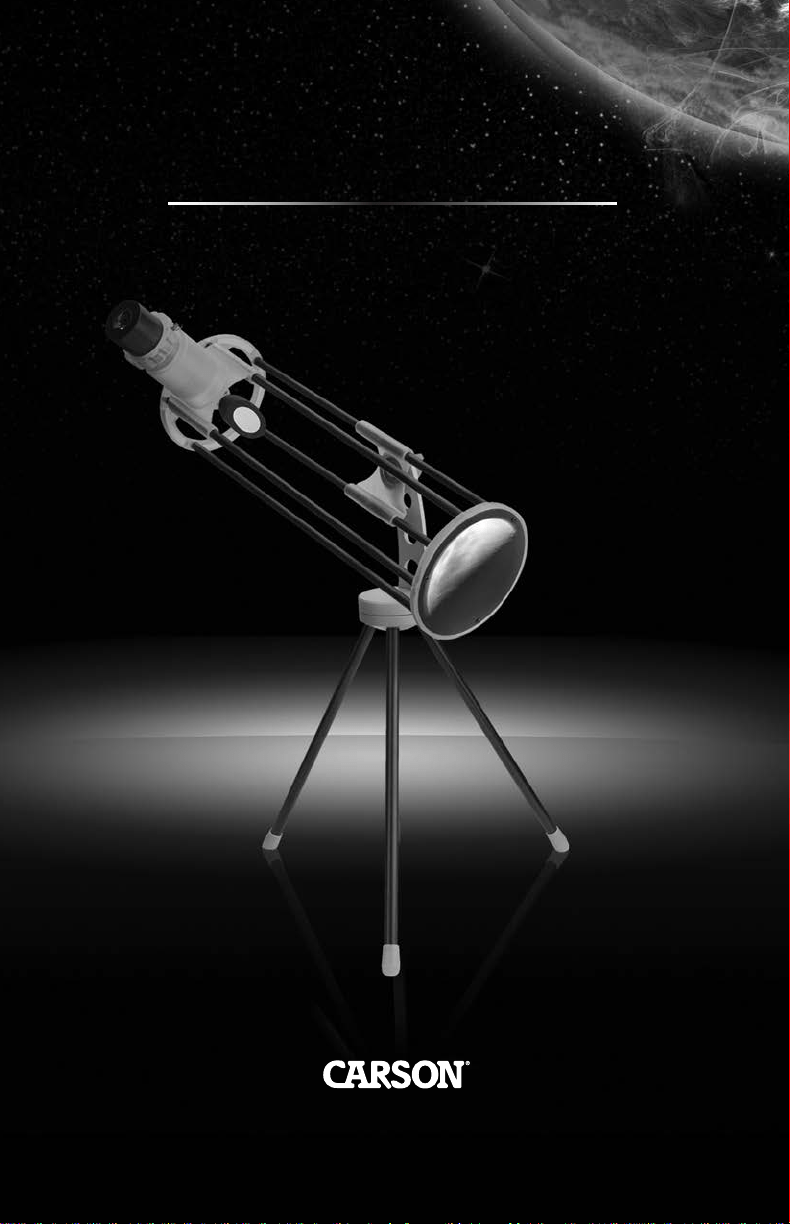
2
TUBELESS
OPTICAL
ASSEMBLY
ROTATE
AZIMUTH
POSITION
BOX CONTENTS
• Tubeless optical assembly
• Tabletop tripod with mount
• 10mm Kellner eyepiece (1.25” O.D.)
• 25mm Kellner eyepiece (1.25” O.D.)
Please unpack your telescope carefully and make sure that all
accessories are included in the box.
VISUAL KEY DIAGRAM
3
TELESCOPE ASSEMBLY
Setting Up Your Telescope:
• Carefully remove the components from the box.
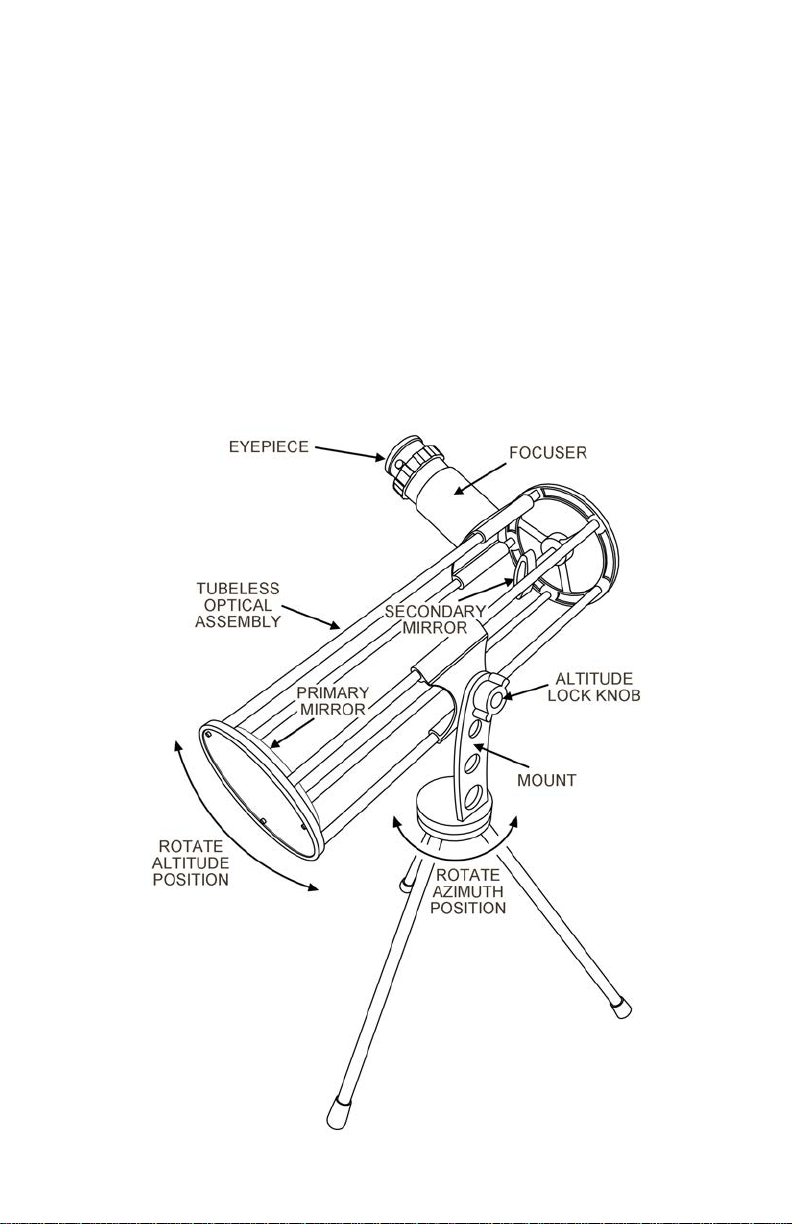
Attaching Tripod Legs To Mount:
• Twist each tripod leg into corresponding holes in mount.
Do not overtighten.
• Rotate rubber feet so that the at portion is ush to the table.
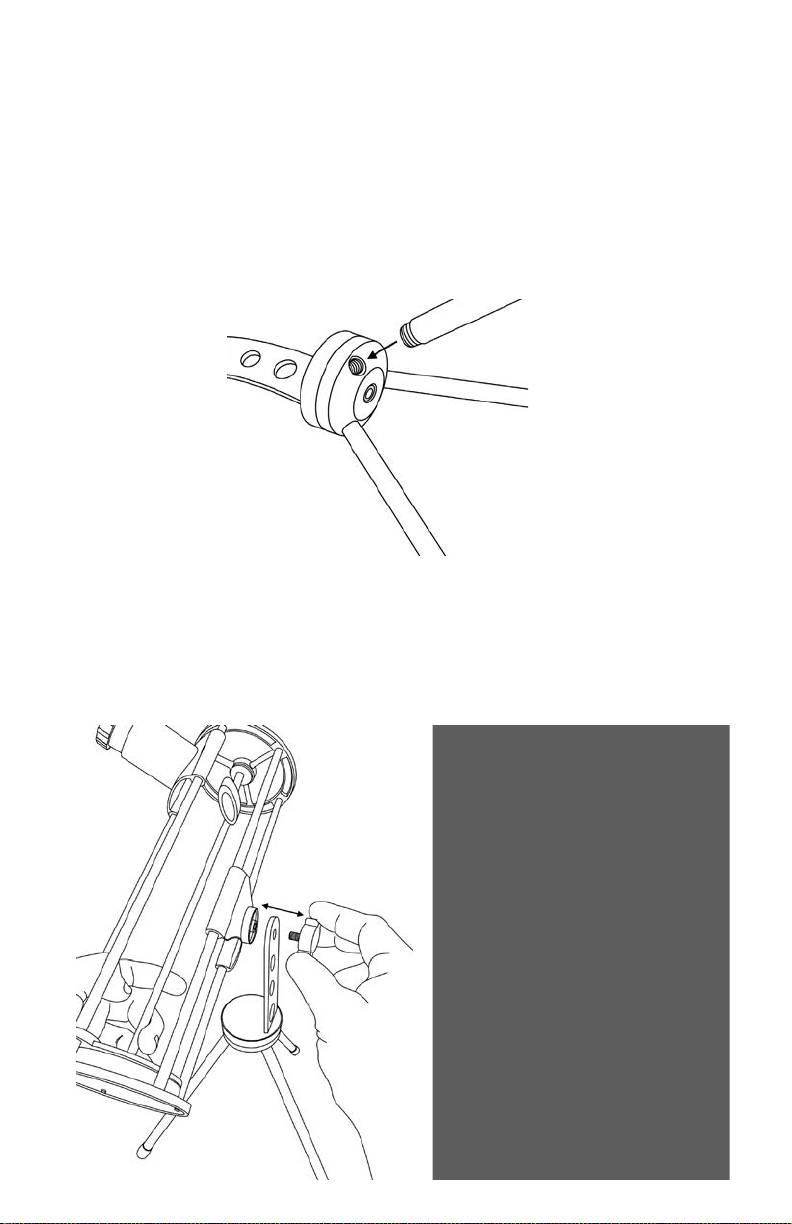
Attaching Telescope To Mount:
• Remove altitude lock knob.
• Align top hole in mount with screw hole in mounting bracket. Make
sure eyepiece is pointing upward.
• Insert altitude lock knob through top hole in mount and screw into
hole in mounting bracket until secure. Do not overtighten.
4
TELESCOPE ASSEMBLY CONT.
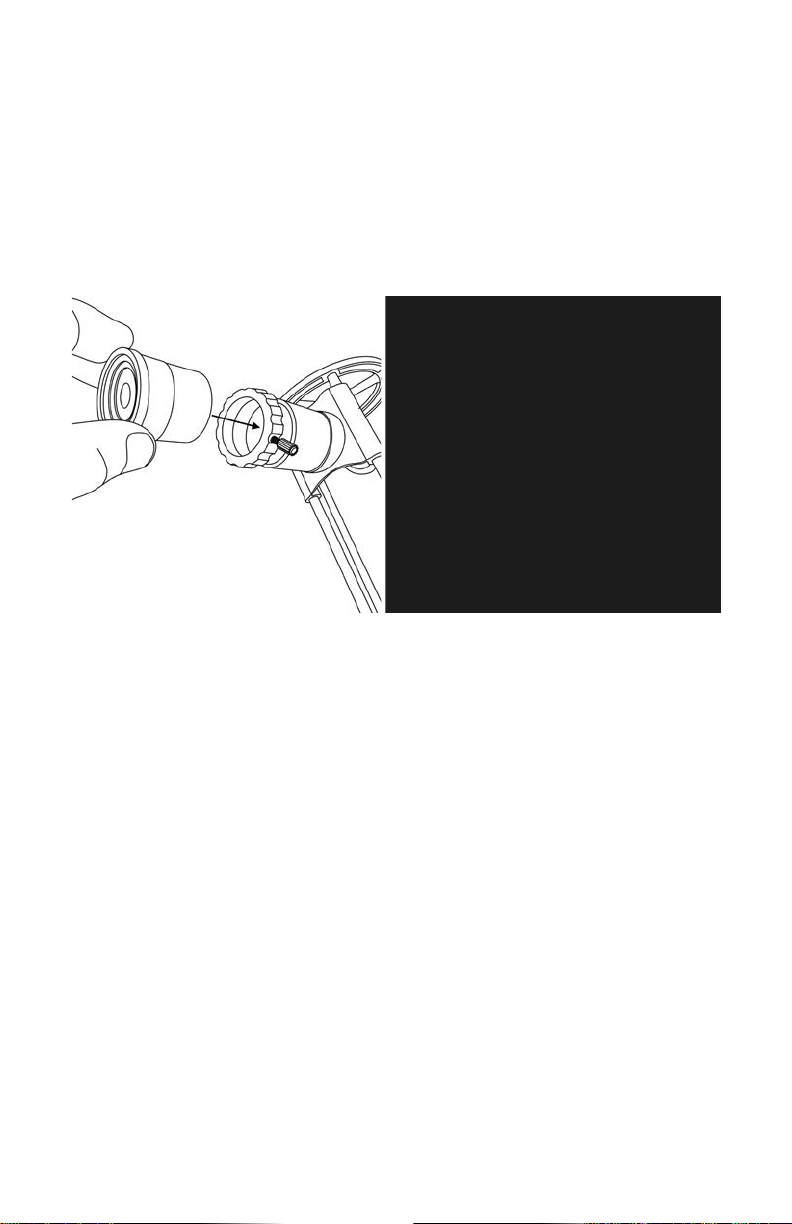
Attaching Eyepieces:
• Loosen thumbscrew in focuser.
• Select an eyepiece and insert into focuser.
• Tighten thumbscrew to secure eyepiece in place. Do not overtighten
as it may damage eyepiece.
• Make sure to loosen thumbscrew before removing eyepieces from
focuser.
USING THE TELESCOPE
Once you have properly assembled your telescope you are ready to
start using it. Please refer to the visual key diagram while reading
these instructions.
First, place your telescope on a stable surface. Make sure all rubber
feet on tripod are rotated so the at section is ush to the surface.
• Remove the rubber dust cover from the primary mirror and set aside.
• Insert the desired eyepiece. It is best to use the lowest power eye-
piece (the Kellner 25mm eyepiece) at rst. This allows for a wider eld
of view making it easier to locate objects. Once the viewing object is
visible, focused and centered in the eld of view you can switch the
eyepiece to the higher magnication.
• T o locate an object using the telescope, rst loosen the altitude lock
knob allowing the telescope to rotate freely along both axes.
5

USING THE TELESCOPE CONT.
• Aim the tubeless optical assembly at your desired target by rotating
the azimuth position left or right. Look through the eyepiece at the
desired target, and make altitude adjustments by moving the tube-
less optical assembly vertically by hand. When the altitude direction
is aligned, you may retighten the altitude lock knob.
• Once the object is centered in the eld of view, turn the focuser until
the image is clear and sharp.
• For best results, position your eye as close as possible to the eyepiece
lens. This is especially important when using the higher power 10mm
eyepiece.
• Replace dust cover on primary mirror when not in use.
There are many conditions that may aect your ability to focus or
observe celestial objects clearly.
• Brightly lit areas (light pollution) will make it dicult to see faint
objects in the sky. It will also make it dicult for your eyes to adjust
to the dark. You should try and nd a dark area and allow your eyes
to adjust to the dark before making observations. Using a red ltered
ashlight to view charts and your telescope components is recom-
mended to preserve your night sight. The best viewing conditions
are when the sky is inky black.
• Hazy skies, pollution, clouds and moisture can all aect the clarity of
your viewing image.
• Due to the tubeless construction of this telescope, the primary and
secondary mirrors are exposed to possible dust, debris and nger-
prints. Be careful to avoid touching these mirrors and exposing them
to excessive debris. Refer to the Care and Maintenance section of
this manual for instructions on how to clean your telescope. Always
replace the dust cover over primary mirror when not in use.
• Avoid touching the eyepiece or optical assembly while looking
through the telescope. The vibrations caused by this contact will
cause the object you are looking at to move. You should also make
sure that the surface you place your telescope on does not vibrate or
move as this will also cause your viewing object to move.
• You should avoid setting up your telescope inside a room looking
through an open window. The dierence in air temperatures may
result in a blurry image.
6

USING THE TELESCOPE CONT.
• Viewing through a closed window might also result in a distorted
image due to the varying densities of window glass.
• Avoid viewing objects that are low on the horizon. Objects that are
higher up in the sky will appear much sharper.s to the new tempera-
ture before using it.
• Sudden changes in temperature may cause condensation to appear
on the optical components of the telescope. It is best to set up your
telescope ahead of time and then wait while the telescope adjusts to
the new temperature before using it.
CALCULATING POWER
The magnication of a telescope depends on both the focal length
of your telescope as well as the eyepiece you use. There is a simple
formula you can use to determine the magnication you are using at
any given time. Simply divide the focal length of the telescope by the
focal length of the eyepiece. There are two possible magnication
settings for your SK-100 telescope:
Power = 360mm / 25mm = 14.4x
Power = 360mm / 10mm = 36x
7

CARE AND MAINTENANCE
• The primary mirror and secondary mirror must remain precisely
aligned in order for this telescope to work properly. Avoid dropping
or jarring the telescope, or moving the mirrors by hand.
• Always replace dust covers and lens caps and store in box when not
in use. This will minimize the amount of dust and debris that gets
into your telescope.
• Cleaning should be performed only if absolutely necessary. Be
careful to avoid touching the internal mirrors and exposing them to
excessive debris. In the event that these mirrors become dirty, rst
use compressed air to remove dust and debris. If any debris or n-
gerprints remain, use a soft lens cloth or cotton balls with very light
pressure and warm water to remove them. A mixture of water and
dish soap may be used to remove any stubborn debris. Be careful not
to scrub the surface of the mirror or use any abrasive material, harsh
chemicals or solvent as this may damage the surface of the mirror.
• If dew collects on the optics of your telescope or moisture condenses
on the optics, remove all accessories and place the telescope in a
dry, dust free environment and point the telescope downward. This
should help eliminate the moisture.
• Do not attempt to take apart your telescope to clean it.
SPECIFICATIONS
Optical Design: Reector
Aperture: 76mm
Focal Length: 360mm
Eyepiece 1: Kellner 25mm
Magnication 1: 14.4x
Eyepiece 2: Kellner 10mm
Magnication 2: 36x
Weight: 1.3 lbs.
8

WARNINGS
• Never use this telescope to look directly at or near the sun.
Viewing the sun can cause instant and irreversible eye damage.
• Always supervise children when using this telescope.
• Do not leave telescope unattended at any time. Untrained adults or
children may not be familiar with the correct operating procedure.
• Do not point the telescope at the sun even when you are not looking
through it. This will cause internal damage to the telescope.
• Handle this telescope with care. Rough handling might knock the
internal optical components out of alignment.
CUSTOMER SERVICE
We will be happy to help you with any problems you may
experience while using your telescope.
Please call our toll-free customer service line at 1-800-967-8427.
WARRANTY INFORMATION
• This Carson product is warranted to be free from defects in material
and workmanship for a period of one year from date of purchase.
During this period Carson will, at its option and without charge, either
repair any part or assembly of parts found to be defective in mate-
rial or workmanship, or replace this Carson product with a Carson
product of comparable value and condition, subject to the limitations
and exclusions noted herein. This warranty extends to the original
purchaser only and is not assignable or transferable. It shall not apply
to any product that has been subject to misuse, abuse, negligence or
accident, or to any defects or damage directly or indirectly caused by
the use of unauthorized replacement parts and/or service performed
by unauthorized personnel. This warranty gives you specic legal
rights, and you may also have other rights which could vary from
state to state. Some states do not allow limitations on the life of an
implied warranty and/or do not allow excluding or limiting incidental
or consequential damages. If so, the above limitations or exclusions
may not apply to you.
9

WARRANTY INFORMATION CONT.
• Provide proof of purchase. A receipt or other dated proof of purchase
must be included with merchandise being returned for a warranty
claim to be processed. Call or write for authorization. Before return-
ing any product for a warranty claim, a Return Authorization (RA)
number must be obtained. No merchandise will be accepted without
an RA, and failure to obtain an RA will prevent or delay processing
of the warranty claim. To obtain an RA call 631-963-5000, or write to
Carson Warranty Service, 2070 5th Avenue, Ronkonkoma NY, 11779
with a description of the problem. Include your name, address and
telephone number. Package the return carefully. Shippers will not
reimburse for damages due to insucient packaging, even if the
merchandise is insured. Print the RA number prominently on the
top of the package. Prepay shipping. Insure the package. Send it to
Carson Warranty Service, 2070 5th Avenue, Ronkonkoma NY, 11779.
Merchandise must be shipped prepaid. Carson will not accept mer-
chandise C.O.D.
10

11

CARSON®
Carson | 2070 5th Avenue | Ronkonkoma, New York 11779
Phone: 631-963-5000 | Fax: 631-427-6749
For information, call toll-free: 1-800-967-8427
[email protected] | [email protected] | www.carson.com
12