Loading ...
Loading ...
Loading ...
13
www.bromicheating.com
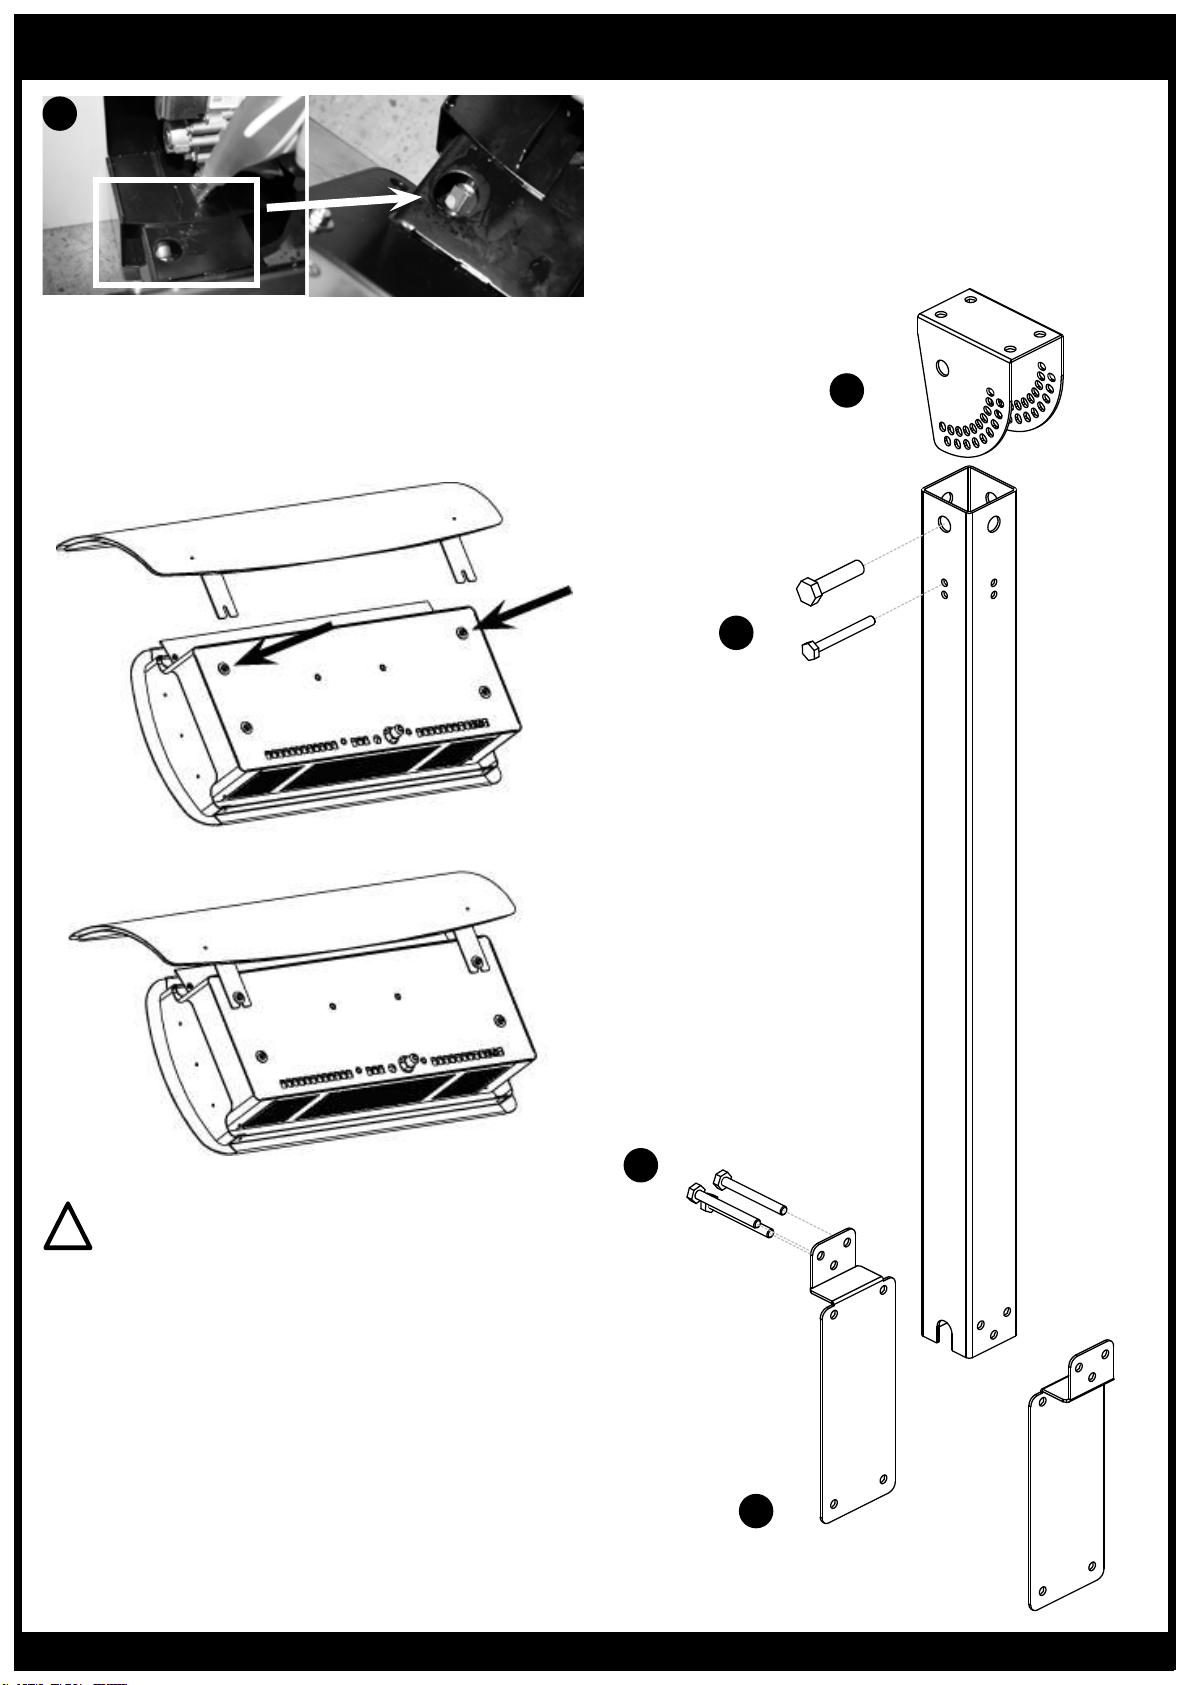
HEAT-DEFLECTOR INSTALLATION
CEILING POLE INSTALLATION
NOTE: Tungsten Smart-Heat Heating recommends
running power and gas lines, to the heater, inside the
pole to reduce visibility and likelihood of damage.
INSTALLATION INSTRUCTIONS CONTINUED...
1
2
3
4
3
!
WARNING
When mounting
ceiling pole, ensure the anchoring to the
structure is of sufficient strength, quality and workmanship
to support the weight of the heater and any other load that
could be applied to the fixture. Note: Ceiling pole must be
perpendicular (90deg) to the ground when mounted
(irrespective of pitched or flat ceiling).
1.Mount Top Bracket to ceiling or support beam using
suitable fixings no less than 60mm length.
2.Assemble pole to the mounting bracket using the
M8x100mm and M19x100mm bolts, and fix using nuts
and washers (as supplied).
3.Assemble both lower paddles to the pole (back to back)
and insert 3 M10x100mm bolts and fix using nuts and
washers (as supplied).
4.Fix Heater to Lower paddles using suitable fixtures.
1.Assemble Heat Deflector following instructions supplied
in the Heat Deflector carton.
2.Mount Heat Deflector to back of heater by loosening the
two screws and secure brackets underneath washers.
Re-tighten screws to original position using screw driver.
Loading ...
Loading ...
Loading ...