Loading ...
Loading ...
3
1-3
1-2
1-1
A
B
C
C
A
A
B
B
Installation
Step
1
: Determine Installation
Conguration:ThePDUsupportsfour
primaryinstallationcongurations:1U
Rack,0URack,WallandUnder-Counter.
Choose a configuration and follow the
installation instructions in the appropriate
sectionofStep
1
beforeproceedingtoStep
2
.
Note: Regardless of installation configuration, the user
must determine the fitness of hardware and procedures
before mounting. The PDU and included hardware are
designed for common rack and rack enclosure types
and may not be appropriate for all applications. Exact
mounting configurations may vary.
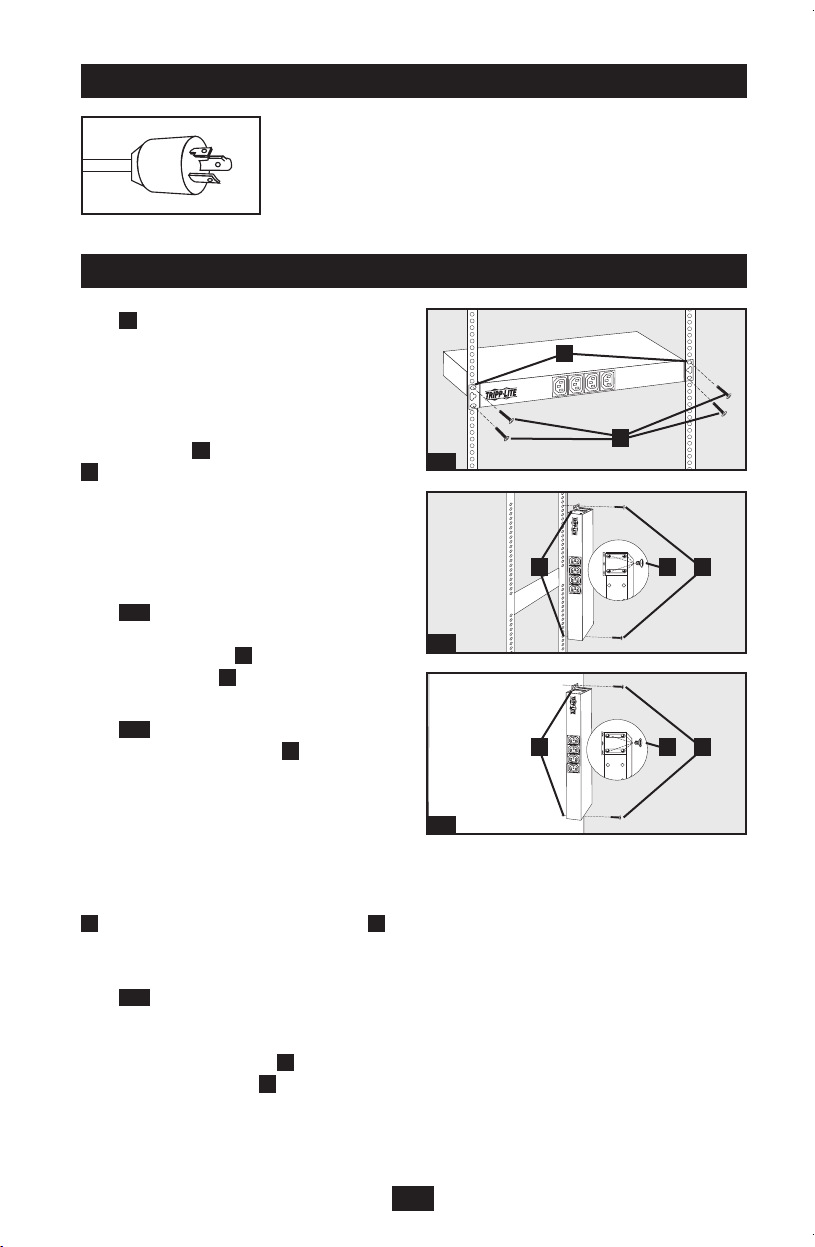
Step
1-1
: 1U Rack Installation: Attach
thePDUtotherackbyinsertingfour
user-suppliedscrews
A
throughthePDU
mounting brackets
B
and into the mounting
holes of the rack rail as shown.
Step
1-2
: 0U Rack Installation:
Part 1: Remove the screws
C
attaching
themountingbracketstothePDU,change
the orientation of the brackets as shown
andreattachthebrackets.Useonlythe
screws supplied by the manufacturer or
theirexactequivalent(#6-32,1/4”at
head). Part 2:AttachthePDUverticallyby
insertingtwoormoreuser-suppliedscrews
A
throughthePDUmountingbrackets
B
and into mounting points in the rack or rack
enclosure.
Step
1-3
: Wall Installation: After
repeatingPart1above,attachthePDUtoa
stable mounting surface by inserting two or
moreuser-suppliedscrews
A
through the
PDUmountingbrackets
B
and into secure
mounting points on the mounting surface.
Features (continued)
NEMA L6-20P Adapter (PDUH20DV Only): Connects to a
NEMAL6-20Routlet.
14-02-329-933047.indb 3 4/23/2014 3:39:25 PM
Loading ...
Loading ...
Loading ...