
Loading ...
Loading ...
Loading ...
ENGLISH
8
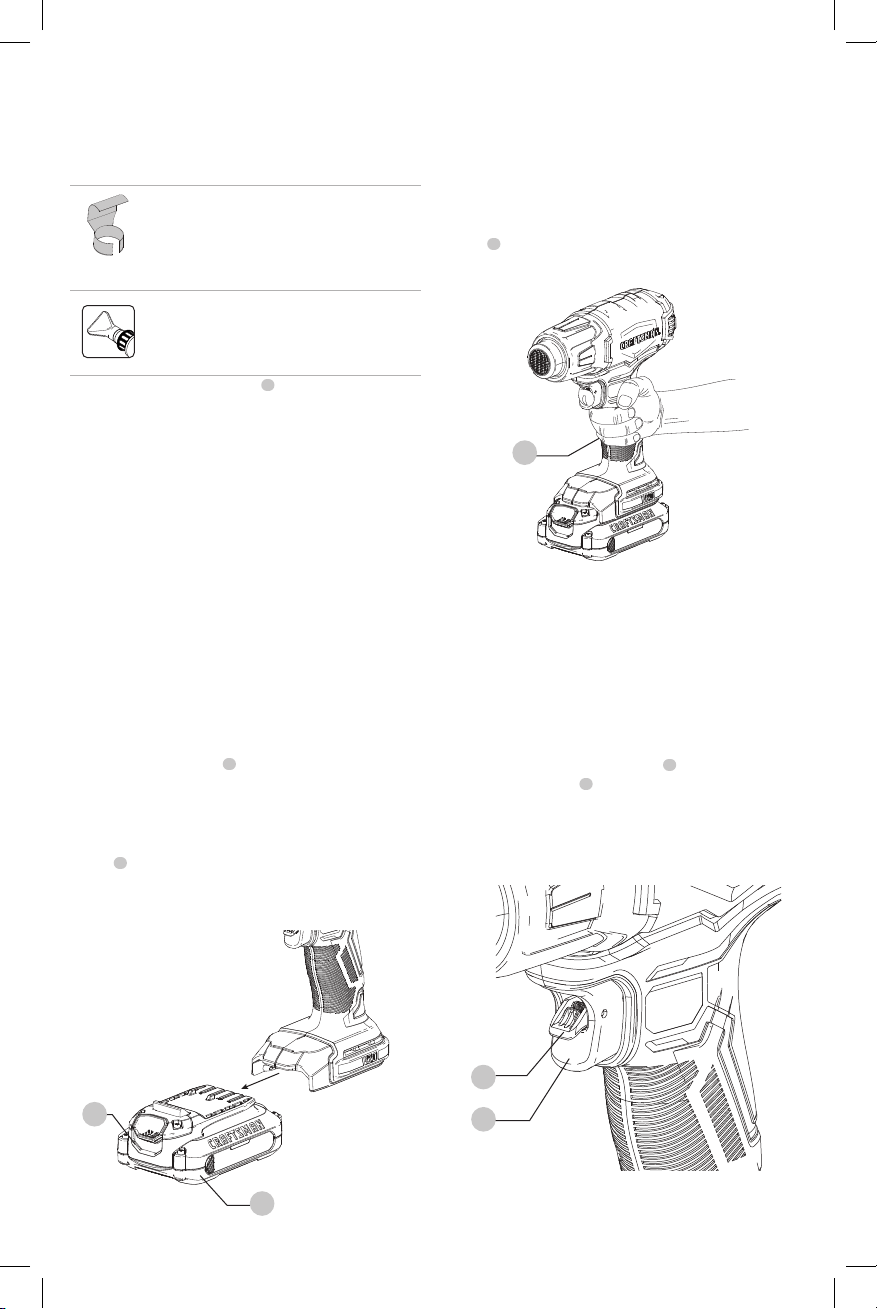
Fig.C
8
Proper Hand Position (Fig. C)
WARNING: To reduce the risk of serious personal
injury, ALWAYS use proper hand position as shown.
WARNING: To reduce the risk of serious personal
injury, ALWAYS hold securely in anticipation of a
suddenreaction.
Proper hand position requires one hand on the main
handle
8
.
Switching On and Off (Fig. D)
1. To power on the tool, flip lock-off
7
upwards and
depress the trigger
1
.
2. To turn the unit off release the trigger.
NOTE: Disconnect the tool from the power source and let
the tool cool down before moving or storingit.
Fig.D
7
1
Fig.B
6
5
Prior to Operation (Fig. A)
WARNING: Make sure the nozzle always points away
from you and anybystanders.
WARNING: DO NOT drop anything into thenozzle.
WARNING: DO NOT exceed 60 minutes "ON" in a
2hourperiod.
Installing and Removing the Battery Pack
(Fig. B)
WARNING: Use only CRAFTSMAN 20V batteries
with this product. Use of any other batteries may
create the risk of fire.
NOTE: For best results, make sure your battery pack is
fullycharged.
To install the battery pack
6
into the tool handle, align the
battery pack with the rails inside the tool’s handle and slide
it into the handle until the battery pack is firmly seated in
the tool and ensure that it does notdisengage.
To remove the battery pack from the tool, press the release
button
5
and firmly pull the battery pack out of the tool
handle. Insert it into the charger as described in the charger
section of thismanual
OPERATION
WARNING: To reduce the risk of serious personal
injury, turn unit off and remove the battery pack
before making any adjustments or removing/
installing attachments or accessories. An
accidental start-up can causeinjury..
To Attach the Correct Accessory
This tool is supplied with a set of accessories for
differentapplications.
Icon Description Purpose
Reflector nozzle or
hook nozzle
Heat shrink wrap, reflecting
heat around item, avoiding
excess heat burning or
hurting surface behind item
being heated.
3" (75 mm) Fish tail
surface nozzle
Drying, removing paint,
removing vinyl or linoleum,
thawing (heat spread over
wide area)
1. Make sure the trigger switch
1
is in the off position and
the tool is disconnected from the power source. Ensure
the nozzle has cooleddown.
2. Place the desired accessory onto thenozzle.
Loading ...
Loading ...
Loading ...