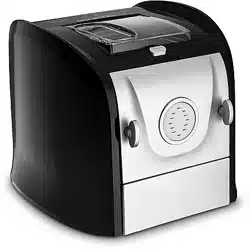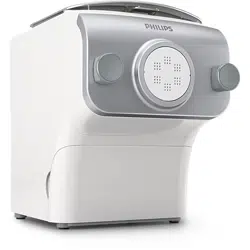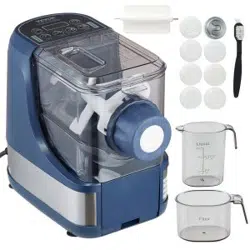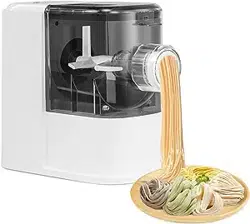
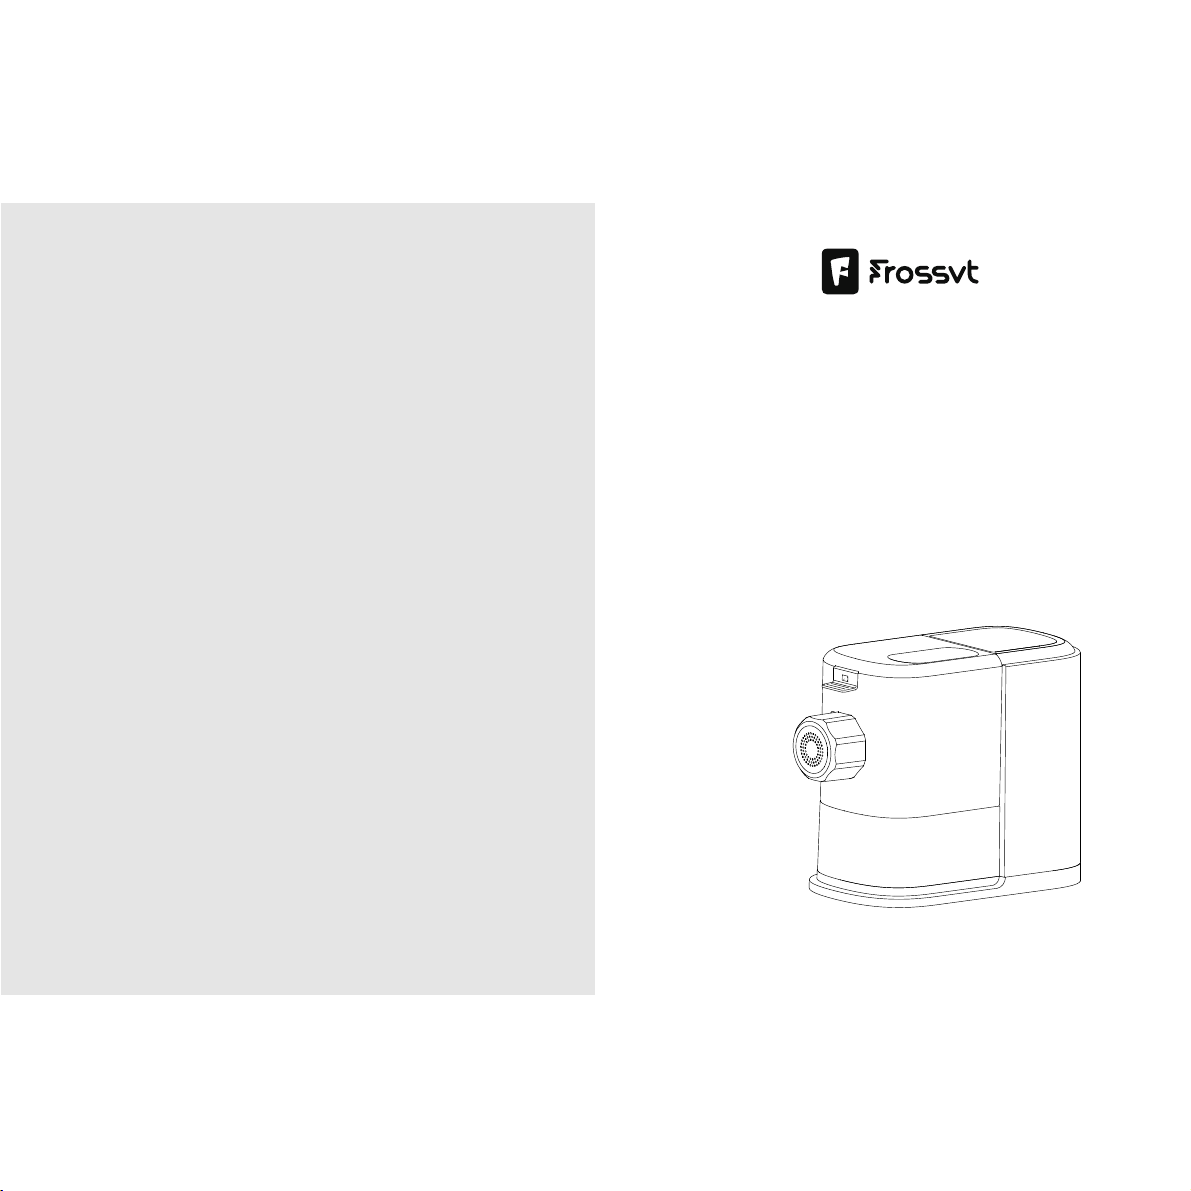
PASTA MAKER
INSTRUCTION
MANUAL
Before operating this appliance, please read these instructions completely.
Important safeguards
Catalog
Dear users, thank you for using our company's fully automatic
pasta maker. In order to facilitate your correct operation of this
product please read this manual carefully before use and store
it in a fixed place so that you can refer to it in the future. This
product is for indoor use only! The company reserves the right
of final interpretation.
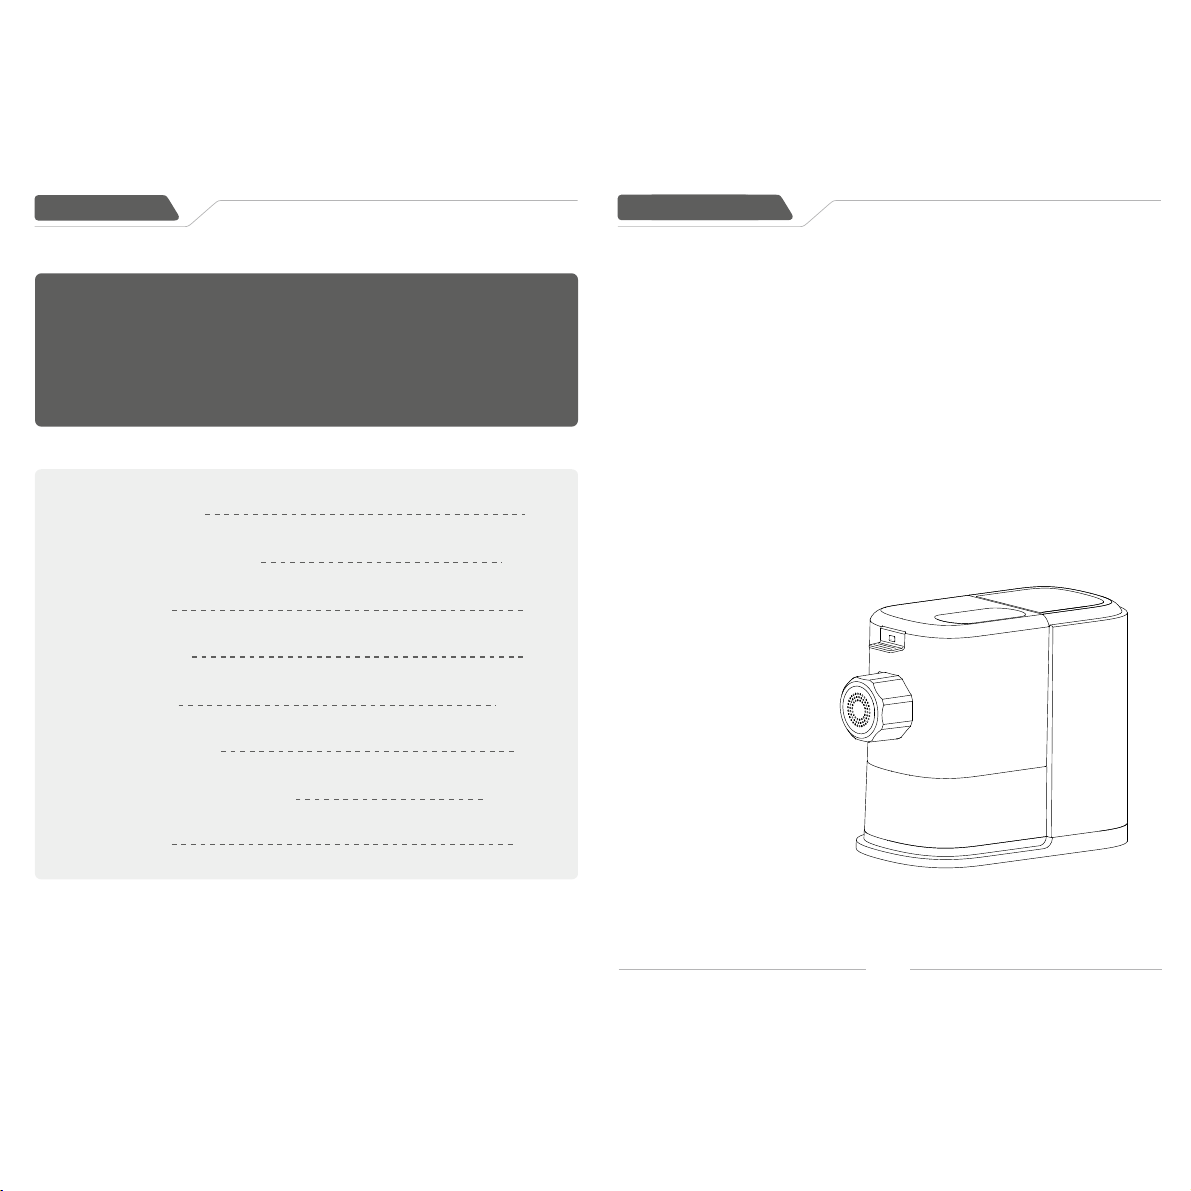
Product feature
1
Parts name
4
2~3
Parts Function
Use method
Cleaning method
Common usage problems
Packing list
5
6-12
13
14-16
17
Product feature
1、A variety of discs combinations can make Fettucine, speghetti, etc.
2、You can add egg liquid, vegetable juice (soft vegetable leaves can be put directly, hard
vegetables must be juiced), etc, to make noodles with different flavors, which are healthy
and delicious.
3、The operation is simple, from flour to pasta, the whole process is easy to achieve.
4、Food grade material, hygienic, healthy, environmentally friendly and practical.
5、lmitate the hand kneading, pour the right amount of flour and water into the mixing bowl,
the machine will knead them and extrude pasta automatically.
6、Excess dough can be cleaned up easily by hand, simple and convenient.
7、Multiple safety protection devices, long-serve life.
02

Important safeguards
6、Make sure the appliance is not plugged in when assembling or disassembling
the appliance.
7、If the product needs to be repaired during use. please contact the company's
customer service department, or go directly to the repair point designated by
the company for repairs. Do not disassemble it yourself to avoid danger.
8、Before use, please check whether the mixing bowl, extruding pipe, discs nut
and other detachable parts are damaged. If found damaged, please stop
using the product. Please contact our Customer Service Department in time.
Please do not disassemble and repair it by yourself, so as to avoid danger.
9、Please check the mixing bowl, extruding pipe, discs nut and mixing axle
before use.
10、During the working process of the product, it will intelligently identify the
softness and hardness of the dough, and it will reverse during the process,
Please check if the dough is too dry or there are foreign objectives in the
mixing bowl. If there is no foreign objectives, then add appropriate amount
of water into it, and waiting for 2 minutes of kneading, and then select
"extrude" mode, If it is still blocked, it is recommended to disconnect the
power supply and clean the flour in the discs, Then continue to operate it.
11、When the product is working, it is strictly prohibited to add any non-liquid
foreign objectives in the mixing bowl (The eggs need to be mixed well with
water).
12、After the product is connected to the power supply or during operation, if
there is a flashing light alarm, please disconnect the power supply, check
whether there is stuck of flour or other things. after cleaning it, reconnect
the power supply to continue to using, if the display flashes and alarm,
please go to the designated maintenance points of our company for repair.
13、When the product is working, it is strictly prohibited to open the top cover or
unscrew the discs nut to take out the discs, and do not touch the extruding
axle to avoid accidents.
14、All parts of this product are not allowed to be sterilized in a microwave oven
to avoid thermal deformation and damage.
15、Do not immerse the main housing in water or other liquids.
16、Do not use steel wool, abrasive cleaners or corrosive liquids (such as
gasoline or acetone)to clean the product.
17、This appliance is not intended for used by persons (including children) with
reduced physical, sensory, or mental capabilities, or lack of experience and
knowledge on using the appliance. Unless they are closely supervised and
instructed concerning use of the appliance by a person responsible for their
safety. Close supervision is necessary when any appliance is used by or
near children. Children should be supervised to ensure that they do not play
with the appliance.
18、Avoid exposure to the sun to avoid discoloration of the appearance.
19、It is strictly prohibited to disassemble or modify this product by yourself.
20、Do not put the main housing in the dishwasher for cleaning.
21、Do not heat the parts of this product.
22、This product is a Class I electrical appliance. The grounding wire of the
socket must be well grounded.
23、When making egg noodles, please weigh the eggs and water. It is strictly
forbidden to add egg directly.
24、If the power cord is damaged, it must be replaced with a special soft cord
or special components purchased from other manufacturers or maintenance
departments.
02
03
1、For household use only.
2、The maximum of this appliance is about 320 of dry flour (2 flat cup of flour, the
amount of water should be about 100ml. Amount of the water can be 5ml±
according to the humidity of the flour). The minimum capacity is about 160g
(1 flat cup of flour) , it needs about 60ml (Amount of the water can be 5ml ±
according to the humidity of the flour).
3、Please add flour and water in strict accordance with the amount of ingredients
recommended in the reference table for the ratio of noodles to water. Otherwise
the noodles will be too dry or too wet, and the accessories may be damaged in
severe cases.
4、When using“extrude” function, make sure that the flour and water are evenly
mixed before extruding. so as not to stuck the hole of the discs with dry flour
and cause damage to the accessories.
5、The product is equipped with an intelligent protective control program, which
will automatically shut off after one noodle making cycle.
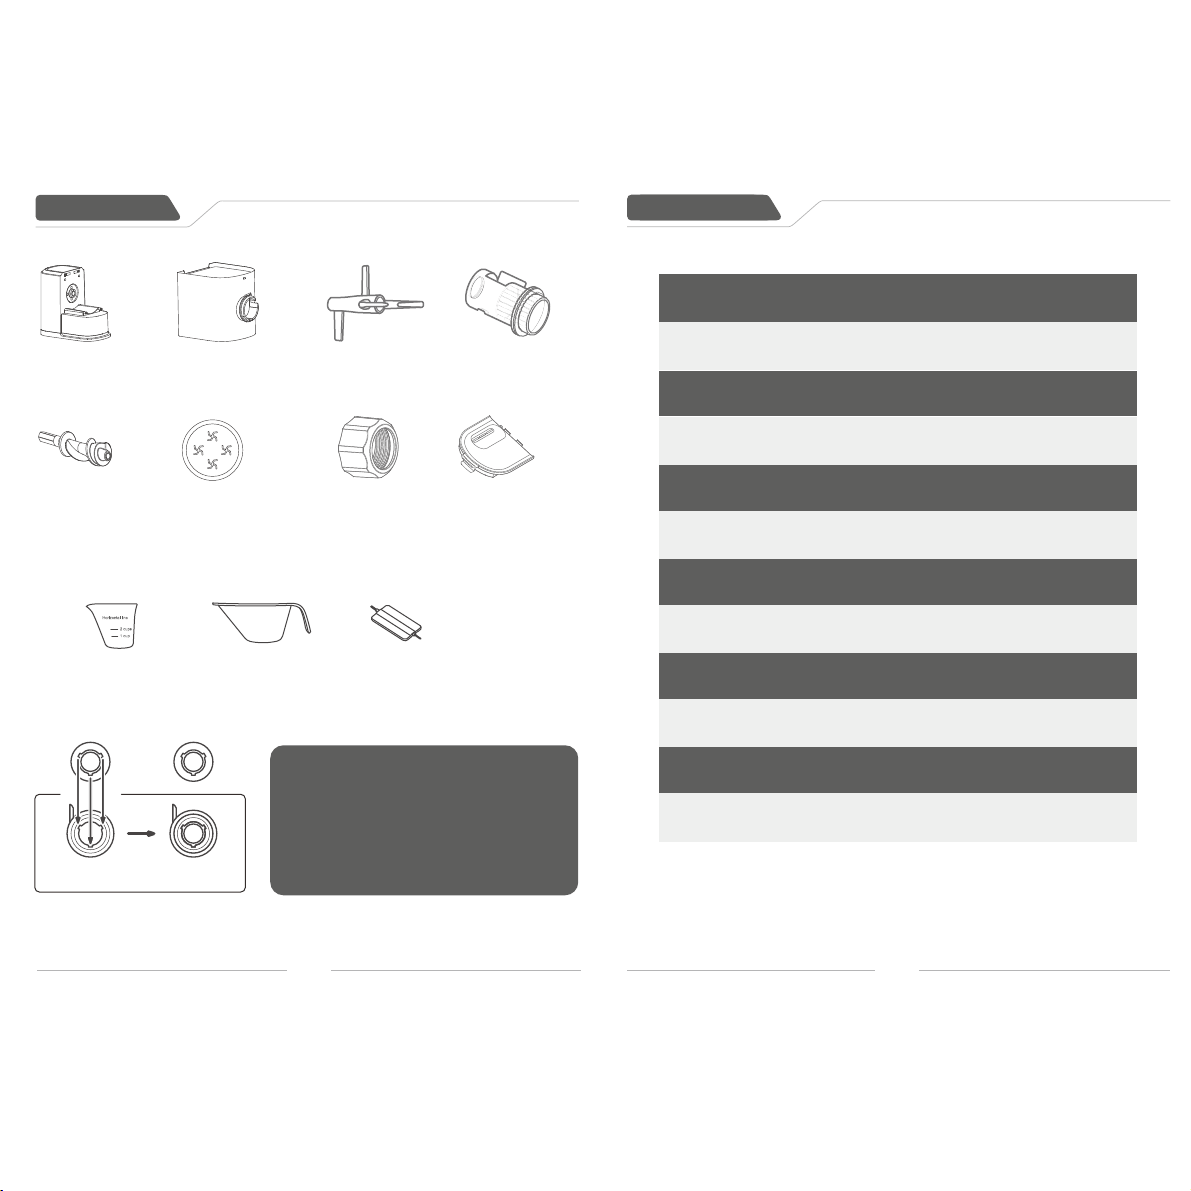
1.Housing
2.Mixing Bowl
3.Mixing Axe
4.Extruding pipe
5.Extruding Axle
6.Discs
7.Discs nut
8.Top cover lid
9.Water measuring cup
10.Flour cup
11.Cleaning scraper
Accessory:
Parts name
Parts function
Washer
Fix the washer
on right place
Fixed well
Note:
1. There is a Washer on the extruding pipe, please
press the washer onto the extruding pipe after
finished cleaning.
2. Replace washer after cleaning, otherwise the
product cannot operate properly.
Number
Parts name Parts name
1
Housing
The power source of the product
Mixing Bowl The container for mixing ingrediants
2
3
Mixing Axle
For mixing flour and water,
pressing noodles
4
Extruding pipe
Cooperate with the extruding axle to
form the dough
5
Extruding Axle Used in extrude the pasta
6
Discs
Accessories for shaping various
kinds of pasta
7
Discs nut
Used for lock the discs.
8
Top cover lid
It is used for connect with the
fuselage micro switch and playing
the role of safety protection
9
Water measuring
cup
Weigh the mixture of water.
vegetable juice and egg water
10 Flour cup
Used to weigh flour
11
Cleaning scraper
Measure the flour and scrape the
flour
04 05
1. Plug in the power supply, the buzzer sounds once, the digital tube and
indicator light are all on for 0.5 seconds and then go out, and the pasta
maker enters the shutdown state.
2. In the shutdown state, press the "ON/OFF" button, the pasta maker
will enter the standby state, and then selecting the corresponding function
and the pasta maker will work.
3. Knead Dough
In the standby state, select the "Knead Dough” button, and the buzzer will sound
once, the pasta maker will enter the work reversal for 4 minutes, and the
noodle mixing process will end.
4. Extrude Pasta
In the standby state, select the "Extrude Pasta” button, the buzzer will sound
once, the pasta maker will start to work for 4 minutes and 25 seconds,
stop for 5 seconds, reverse for 30 seconds, and the appearance process
is over.
5. Quick Noodles
In the standby state, select the "Quick Noodles” button, the buzzer will sound
once, the pasta maker will start to work, reverse for 3 minutes, stop for 5
seconds, and turn forward.
6. Pause
In the working state, select the "Pause” button, the buzzer will sound
once, and the pasta maker will stop working. If you press the "Pause”
button again, the pasta maker will resume the current working process.
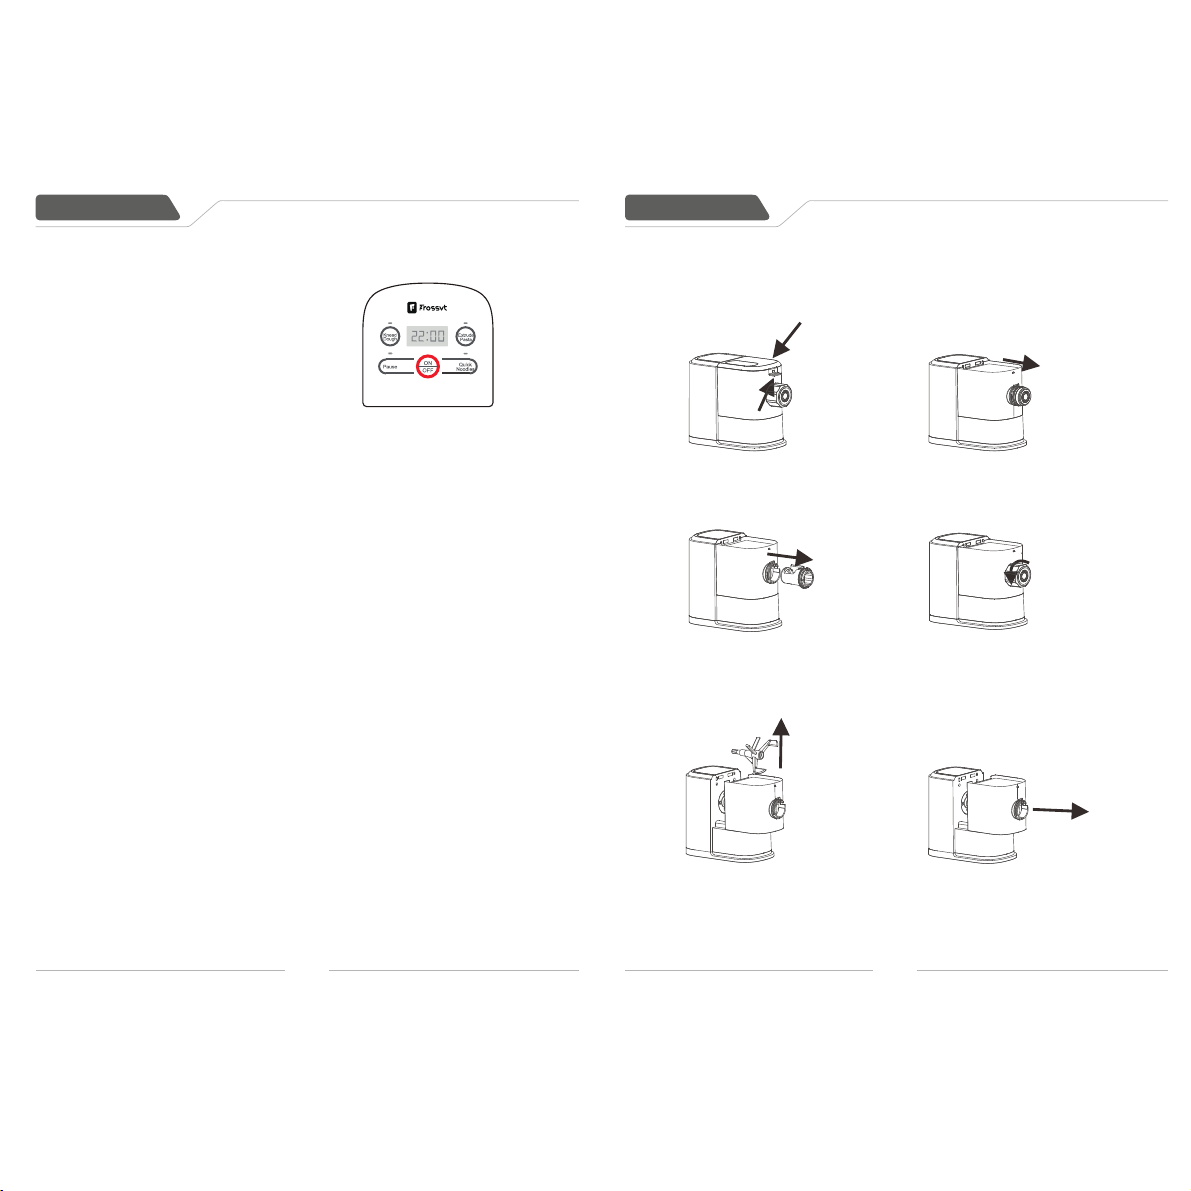
Pull the lid to unlock it
and then remove the lid
from the mixing bowl.
2).Turn the discs nut
counterclockwise to remove it
from the mixing bowl outlet.
Detach the discs, and
then puĄll the extruding
axle out of the
extruding pipe outlet.
4).Remove extruding pipe
from the mixing bowl
outlet.
Slide the mixing chamber
and mixing axle on the
main unit, and then remove
the mixing axle out of the
mixing bowl.
Use method
Before the first use of the product, please thoroughly
clean the parts in contact with the ingredients.
1.Operation instructions
Use method
2.Product disassembly instructions
1.Disassembly steps (before disassembly, be sure to turn off
the switch and disconnect the power)
1).
3).
5).
06
07
6).Remove the mixing bowl.
Put the mixing axle in
the mixing bowl as
shown in the illustration.
Slide the mixing bowl
onto the main unit. Insert
the mixing axle all the
way into the main unit.
Insert the extruding pipe
into the mixing bowl.
Insert the extruding axle
into the mixing bowl.
Attach the disc on the
mixing bowl outlet. Make
sure the shaping disc fits
into the fixing point on the
extruding pope and
extruding axle.
Assemble the discs
nut on the mixing
bowl outlet. Turn the
discs nut clockwise
to firmly lock it in
place.
Use method
Use method
2. Product installation steps (before installation, be sure to turn off
the switch and disconnect the power)
1).
The outer hexagon hole of the extruding axle
is fitted into the inner hexagon hole of the
motor shaft.
lf it gets stuck in the assembly. rotate the
extruding axle slightly to install it.
smoothly.
2).
3).
6). First, aim the top cover lid
clamping position at the front
notch of the fusel age barrel,
press down, hear a"click".
and install well.
4).
5).
08 09
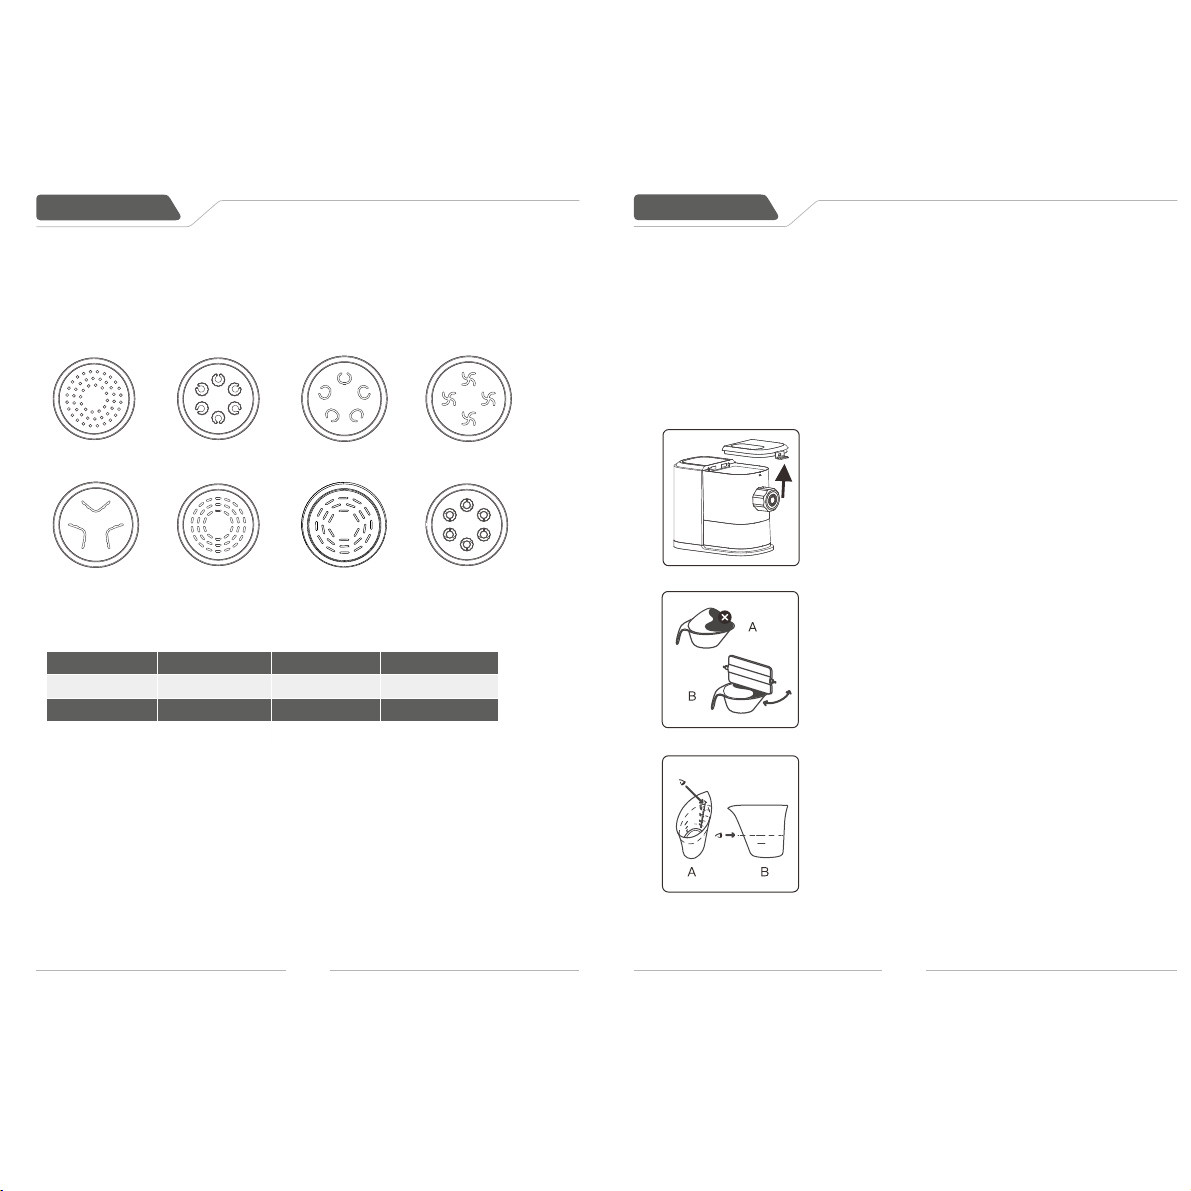
Cavernicoli
Trafori
Turbine
Carapaci
Small
Taglioline
Large
Taglioline
Maccherroncini
Spaghettini
Note:
The egg mixture and vegetable juice must be whisked
evenly with the water before pouring into the mixing bowl.
These ratio is only for all-purpose flour and water / egg /
vegetable. If you experiment with or use other flour, the
flour and water / eggs / vegetable’s ratios will need to be
adjusted. The pasta maker will not operate successfully
if you do not adjust the new recipe accordingly.
(2) Measuring the flour
Scoop one full cup of flour by the flour
cup. Scrape the excessive flour from off
the cup edge with the cleaning scraper
(refer to the illustration B). 1 full cup of
flour weighs around 160 g, and 2 full
cups of flour weigh around 320g.
(3) Measuring the liquid
Method 2(illustration B):
Measure the liquid volume at eye level on
a flat surface.
Note:
Do not pour liquid into the mixing bowl before the pasta
maker starts running. The cups must be placed on a
stable or an even surface.
Use method
Use method
3.Product Usage
1 ) Choose die disc
The distribution die of this product is as follows:
1 ) Choose die disc
2 ) The water ratio
Amount of flour
Water
Vegetable juice
1egg+water
1cup(160g)
2cup(320g)
60ml 70ml 70ml
120ml
130ml
130ml
Warm prompt:
(1) Egg mixture must be mixed well with water
(2) The maximum surface volume is 320g(about two cups), and the minimum
surface volume is 160g(about 1 flat cup). lt is strictly prohibited to exceed
the capacity.
(3) Use strictly in accordance with the recommended proportion of surface
water. Abnormal failure caused by not following the instructions is not
covered by the warranty
3)Noodle production process
(1) First, remove the top cover lid
Pull the lid to unlock it and then remove
the lid from the mixing bowl. Do not put
less than 160g (about 1 flat cup) or more
than 320g (about 2 flat cup) of flour in the
mixing bowl.
Method 1(illustration A):
Look over the water cup and see where
the water meets the scale.
10
11

(2) Take the lid to align with the two
notches in the top of the main housing,
and then press it down until you hear a
"click". Lock the cover lid onto the
mixing bowl.
(3) Put the plug in the power socket, and
press the "On/OFF" button, and then
press the "Quick Noodles” button. After the
kneading starts, slowly pour in the
measured liquid along the entire length
of the slot in the lid.
Note: Pour in the liquid after the
appliance starts mixing.
(4) After about 10 minutes(When the
extrusion process is complete, the
appliance will beep for once.
Step 1: Disassemble the appliance
and Then use dry cloth to clean flour
residue on the main unit, and use
the cleaning scraper and wet cloth
clean the dough residues.
Step 2:
Let the the dough residues air-dry
for some time, and then use the
cleaning scraper and wet cloth to
clean other detachable parts.
Step 3:
Let the discs air-dry 2 to 4 hours.
Then use the corresponding
cleaning tool to poke out the dough
in the holes.
(1) Pour the measured flour into the
mixing bowl
Use methodUse method
Cleaning method
Reminder:
After using the noodle maker, do not clean it immediately.
Remove the parts that are in contact with the flour, freeze
or leave it to dry before cleaning. lt is forbidden to immerse
the housing in water or other liquids to avoid leakage of
electricity.
13
12

2、During the pasta extruding process, there is no pasta coming out.
1、The indicators do not light up.
5、Is not inconvenient to clean the pasta maker discs?
Check whether the power plug is plugged correctly and the outlet is working
properly.
1. The ratio of the flour and water is incorrect or The flour becomes damp after
longtime storage. Disconnect the plug from the power source, remove the damp
dough out of the mixing bowl and tears it into small pieces(about 2-3cm),put into
the mixing bowl again, and then mix and extrude it again.
2.The flour becomes too dry because of the incorrect ratio. Add a small amount
of water to mix and extrude it again.
It is recommended to use all-purpose flour.
Common usage problems
3、Which noodles can be made by the automatic mode?
The pasta maker is with 8 discs, which can make noodles of various
shapes, and can also add egg liquid, vegetable juice (soft vegetables
leaves can be put into mixing with flour directly, hard vegetables must
be juiced), etc. to make noodles with different flavors.
4、What should I do if too much leftover dough inside the mixing bowl?
(1)The dough is too wet or the flour is damp. Please make sure that the flour
is tored in a dry container. You can fine-tune the moisture according to
the water ratio and refer to the table to make the flour again.
(2) The mixing bowl, extruding pipe, discs nut, extruding axle are not cleaned
before work. Please make sure that the relevant parts are dry.
(3) The order of adding water is wrong or the type of flour is wrong.
5 How to use flour measuring cup correctly?、
Take out the flour measuring cup, and fill it with flour and scrape the
excess flour along the edge of the cup with the attached cleaning spatula,
that is, a full cup.(Serving for 1~2 people, about 160g).
After the noodles in the disc are completely dry, tap on the hard board and
the noodles will fall off automatically.
Common usage problems
7、There are more burrs or cracks?
(1) Due to mixing reasons, the noodles will have large burrs or cracks at the
beginning and the end of the noodles. If smooth, you can add eggs or a
proper amount of cooking oil to significantly improve the burrs and cracks
of the noodles.
(2) lf you have enough time, you can also tear the finished noodles into
peanut-sized dough. Please Weigh and put a little flour into the mixing bowl,
press the Knead key to knead them for a while, and then choose the extrude
mode to extrude the noodles out again. The more times you repeat the
smoother and chewy the noodles are.
8、How can we make noodles successfully?
(1) Use the flour measuring cup and measuring cup provided to the pasta maker
to measure the flour and water, and the ratio of flour and liquid must be strictly
in accordance with ratio instructions.
(2) Please add flour first, cover the top cover lid , after the standby machine is
running, pour water (liquid ) into mixing bowl through slot hole on the top cover
lid slowly and evenly.
9、Does the pasta maker has flour requirements?
10、There is a small amount of flour remaining after making, how to deal with it?
You can turn off the machine first. pour out the remaining noodles and put them
together, then put them in the mixing bowl , and press the "Extrude” button to
continue pressing.
11、The noodles that come out are hot, and they will stick together when they reach
a certain length. ls there a solution?
(1) After the noodles come out, sprinkle some dry flour to make the noodles
much more chewy and not sticky.
(2) Please cut the noodles in time not to be too long!
12、Will the amount of noodles come out is crack? How to solve it?
The face will be interrupted, most of which are because of the lack of water.
Please strictly follow the proportion of the instructions.
14
15

Common usage problems
The noodles that came out were hot.
lt will stick together at a certain length.
ls there a solution?
After the noodles come out, sprinkle
some dry flour to make the noodles more
gluten and not sticky. Please cut it in time,
do not let it be too long.
What is the situation of the face meeting
when I come out and how to solve it?
The surface will be cracked is mostly
because there is less water added, please
strictly follow the proportion of the instructions.
The surface water ratio
is appropriate. and the
flour is loose and large
flocculent.
Treatment method of dry or wet noodles.
Too wet or dry noodles may cause the
noodles to stick or break easily, or even
stop the machine. At this time, you can
refer to the following solutions:
If the flour is too dry, add
proper amount of water.
and then press the
automatic button
The noodles are too dry:
Add proper amount of water and press the
automatic button again. If you re-make the
noodles, add 10-20mL of water appropriately.
The dough is too wet:
Add dry flour in an appropriate amount
and press the automatic button again.
If vou re-make the noodles, you need to
reduce 10-20mL of water appropriately.
The dough is too wet,
after adding a proper
amount of dry flour, press
the automatic button again
to mix and extrude it again.
Packing List
Product specifications
Product name Pasta maker
Product model H9
Rated voltage 220-240V~
Rated frequency 50/60Hz
Rated power 180W
Packing list
Pasta
maker
1 pc
Discs
1 set
(8 pcs)
Manual book
1 pcs
Flour cup
1 pc
1 pc
Cleaning
scraper
1 pc
water cup
17
16

Ma n u fa c t ur e : F RO S S VT B r a nd s I n c
Th e s e a p p l i a n c e s a r e b u i l t t o t h e v e r y
hi g h e s t o f s t a n d a r d s .
Th e r e a r e n o u s e r s e r v i c e a b l e p a r t s .
Customer Service: frossvt@dg-sunrise.com
any product questions.
Fo l l o w t h e s e s t e p s i f t h e u n i t f a i l s t o o pe ra te :
1. C hec k t h e i n s t r u ct i o n s h a v e b e en fo l l o w e d c o r rec t l y .
2. C hec k t h a t t h e m a i ns s u p p l y i s f u n cti o n a l .
3. If the appliance will still not operate, please contact us
4.FROSSVT provide 24 months warranty service and help solve
Cu s t om e r S er v i ce : f r os s v t@ d g -s u n ri s e .c o m
19
18