Loading ...
Loading ...
Loading ...
Blaze Outdoor Products Instructional Book
Page | 18
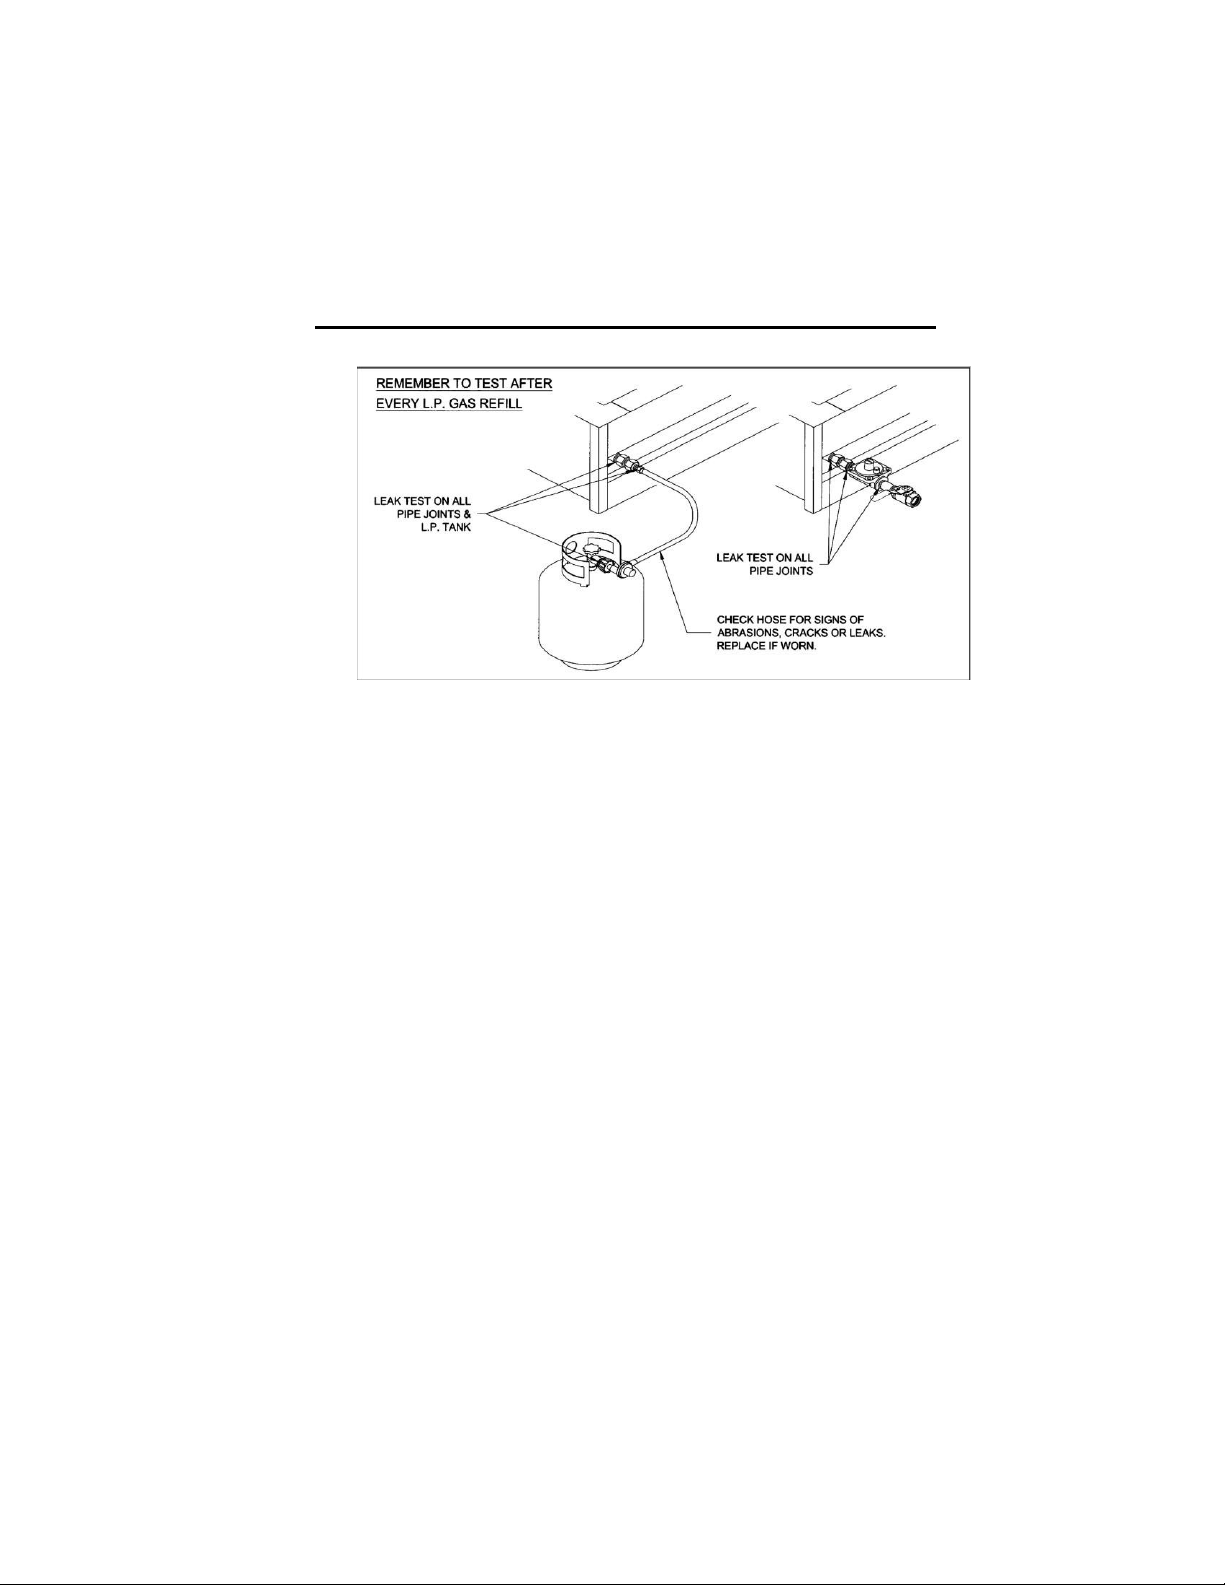
Open the valve (shut-off or ‘ON’ LP tank). Test for leaks by applying liquid soap solution to all joints. Bubbles forming
indicate gas leak.
•
The following diagram is for informational purposes only. These locations are not the only points to
check nor the only potential areas for a gas leak to be present. Ensure the leak test includes all
valves, pipe connections, joints, lines and every point from the gas source to the burners.
NEVER USE AN OPEN FLAME TO CHECK FOR LEAKS.
UNPACKING UNIT:
Product Inspection: A final inspection of your product occurs at the factory to ensure a quality product is
packaged. Please re-check for possible shipping damage immediately after unpacking your grill. If the appliance is
found to have some damage, contact your dealer immediately as often the shipping carrier will have a timeframe to
report damage. Please also save the packaging material the product came with as that is at times inspected by the
shipping carrier.
Caution: Do not leave the unit under the sun with the protective film on for a long period of time as it will make
the film difficult to remove and/or leave markings on the materials which are not covered by the warranty.
Your Blaze Series Appliance comes pre-assembled and requires very little setup. We do however; recommend
the use of professional help during the assembly and gas connection of your unit as improper installation may
affect your warranty. Remove the unit from the box along with all accessories and check that no damage has
occurred to the unit or any parts. Remove all packaging materials, labels and protective plastic film before you
start cooking.
Burners: Check the burner tubes and remove any obstructions that may be in the ports or holes. Using cold water
and a brush will be sufficient. Make sure all foreign particles are removed from the burner before use. Make sure
the air shutter on the burners is slightly opened (to about 1/4" for LP). When finished ensure that the burners are
aligned with the valve orifice and seated in the bracket slot. This is accomplished by first placing the burner tube
shutter hole securely over the valve orifice and ensuring the male posts on the burner rests in the corresponding
slot in the grill body. Failure to do so could result in a fire and injury.
Loading ...
Loading ...
Loading ...