Loading ...
Loading ...
Loading ...
11 ENGLISH
For XNU01
Theangleoftheheadcanbeadjustedin6steps.To
change the angle of the head, follow the steps below.
1. Hold the head and the slide sleeve as shown in
thegure.
1
2
►1. Head 2. Slide sleeve
2. Move the head while holding down the slide
sleeve, and then release the slide sleeve.
3. Movetheheadslightlyuntilitislockedwithaclick.
NOTE:Makesurethattheheadissecurelylocked
before operating the tool.
Hex wrench storage
For XNU02
When not in use, store the hex wrench as illustrated to
keep it from being lost.
1
2
►1. Handle 2. Hex wrench
Electric brake
This tool is equipped with an electric brake. If the tool
consistentlyfailstoquicklystopaftertheswitchtrigger
is released, have the tool serviced at a Makita service
center.
ASSEMBLY
CAUTION: Always be sure that the tool is
switched o and the battery cartridge is removed
before carrying out any work on the tool.
CAUTION: When replacing the shear blades,
always wear gloves so that your hands do not
directly contact the blades.
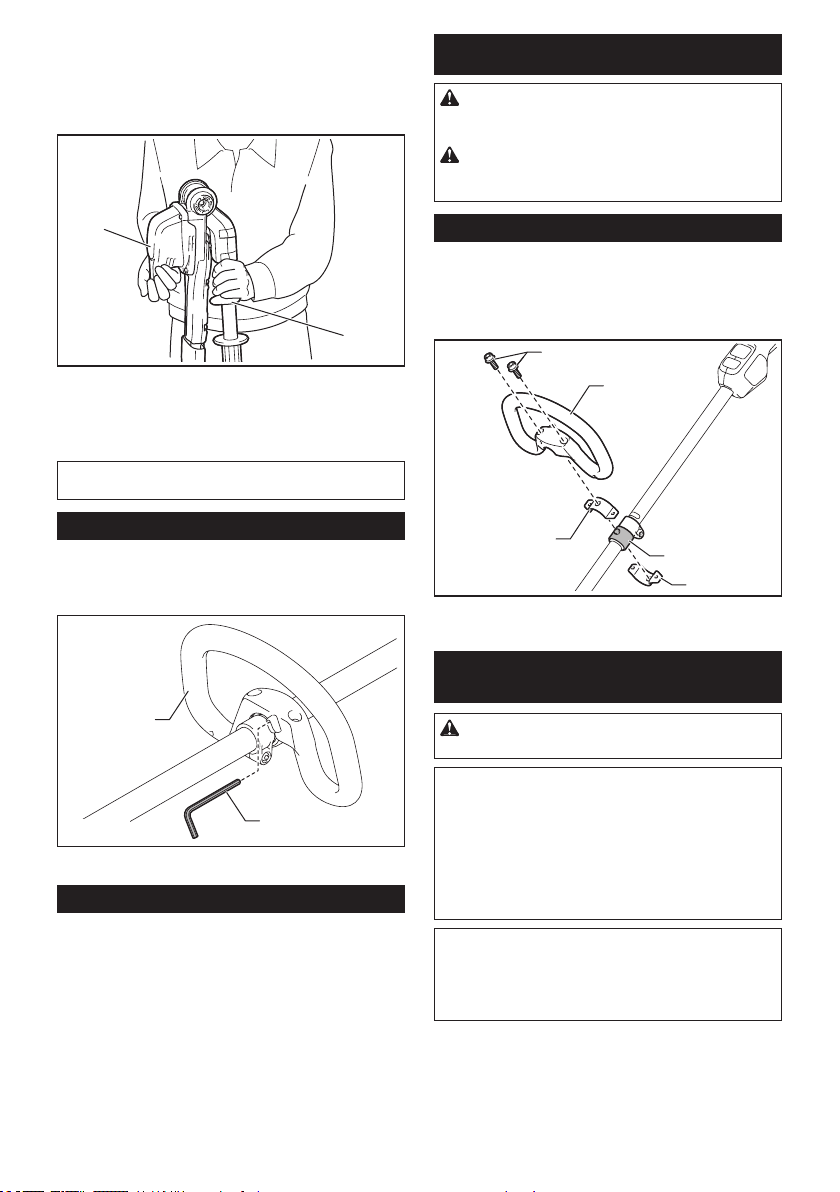
Installing the handle
For XNU02
1. Attach the upper and lower clamps on the damper.
2. Putthehandleontheupperclampandxitwith
bolts as illustrated.
1
2
3
4
5
►1. Bolt 2. Handle 3. Upper clamp 4. Damper
5. Lower clamp
Installing or removing the shear
blades
CAUTION: Attach the blade cover before
removing or installing the shear blades.
NOTICE: When replacing the shear blades, do
not wipe o grease from the gear and crank.
NOTICE:
For XNU01
Do not install 600 mm (23-5/8") shear blades to
your tool. If 600 mm (23-5/8") shear blades are
installedtothetool,youcannotfoldtheheadofthe
tool.
NOTE:
For XNU01
Before installing or removing the shear blades, unfold
the head of the tool so that the head is straight to the
toolbody.
Loading ...
Loading ...
Loading ...