DIGITAL PIANO
CN201
Owner's Manual
Important Information Preparation AppendixAdjustments & SettingsBasic Operation

3
Important Safety Instructions
Important Information
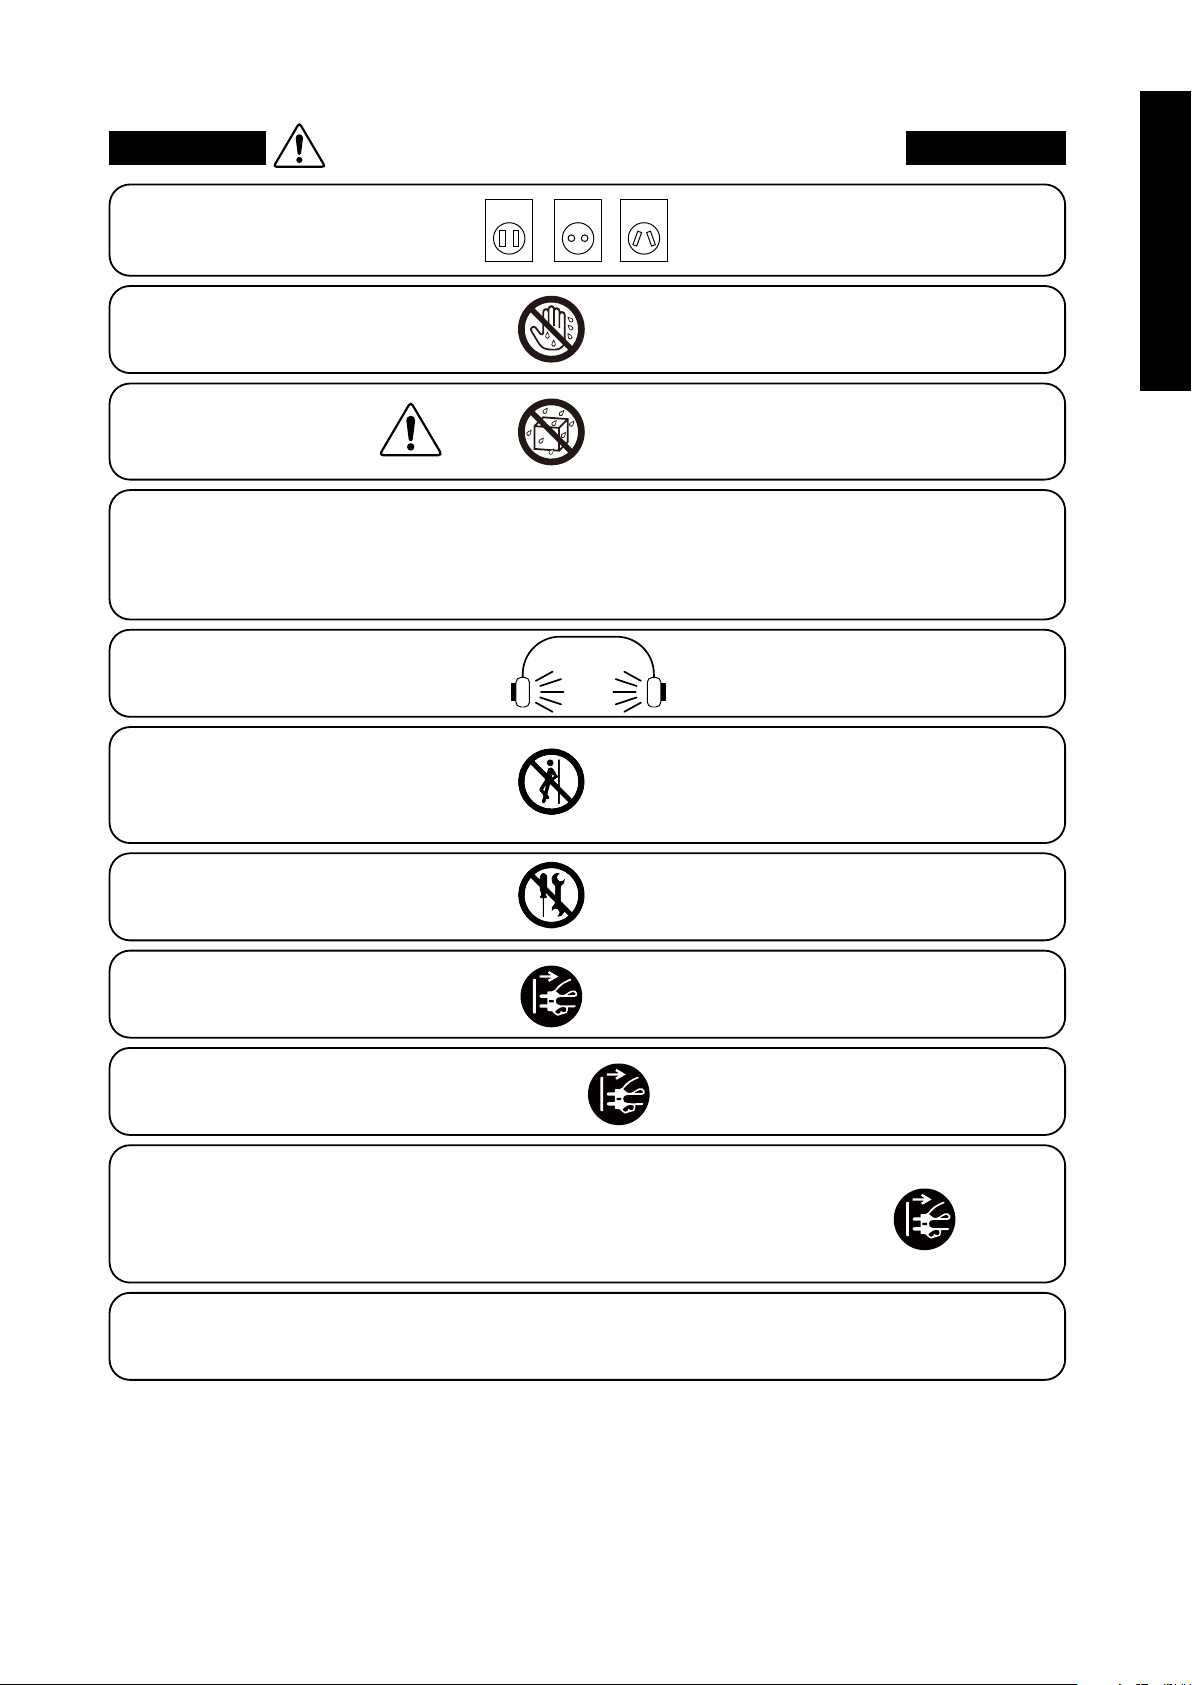
Indique que des précautions doivent être prises.
L’exemple indique à l’utilisateur qu’il doit faire attention à ne pas se faire coincer les doigts.
Indique une manipulation interdite.
L’exemple indique que le démontage de l’appareil est interdit.
Indique qu’une manipulation doit être effectuée.
L’exemple indique à l’utilisateur qu’il doit débrancher le câble d’alimentation de la prise secteur.
Exemples de symboles graphiques
Le symbole de l’éclair avec une pointe de èche à
l’intérieur d’un triangle équilatéral met en garde
l’utilisateur contre la présence de tension
dangereuse, non isolée, à l’intérieur de l’appareil,
dont l’amplitude peut être susante pour induire un
risque d’électrocution d’une personne.
Le point d’exclamation à l’intérieur d’un triangle
équilatéral alerte l’utilisateur de la présence de règles
d’utilisation et d’entretien importantes dans la notice
qui accompagne l’appareil.
CAUTION
RISK OF ELECTRIC SHOCK
DO NOT OPEN
AVIS : RISQUE DE CHOC ELECTRIQUE
- NE PAS OUVRIR.
POUR REDUIRE LES RISQUES D’INCENDIE OU D’ELECTROCUTION, NE DEMONTEZ PAS LE COUVERCLE
(OU L’ARRIERE). A L’INTERIEUR, AUCUNE PARTIE N’EST REPARABLE PAR L’UTILISATEUR.
POUR LA MAINTENANCE, ADRESSEZ-VOUS A DU PERSONNEL QUALIFIE.
AVERTISSEMENT
POUR REDUIRE LES RISQUES
D’INCENDIE OU D’ELECTROCUTION,
PROTEGEZ CET APPAREIL DE LA
PLUIE OU DE L’HUMIDITE.
CONSERVEZ CES INSTRUCTIONS
Règles de sécurité
(Supplémentairespour le Canada)
AVERTISSEMENT
Indique un risque potentiel qui peut entraîner
la mort, ou de graves lésions, si l’appareil
n’est pas manipulé correctement.
L’introduction d’eau, d’aiguilles ou d’épingles à
cheveux, peut provoquer une panne ou un
court-circuit. Ce produit doit être mis à l’abri des
écoulements ou projections d’eau. Ne jamais
placer sur le produit des objets contenant des
liquides, tels que des vases ou autres récipients.
Faite attention de ne pas introduire un
produit étranger à l’intérieur
de l’appareil.
Il est recommandé de placer l’instrument à proximité de la prise de courant et de positionner le câble d’alimentation
secteur de sorte qu’il puisse être débranché rapidement en cas d’urgence, le courant électrique étant toujours
présent tant que la prise est branchée même si le bouton de mise en marche est en position Arrêt.
INSTRUCTIONS DE MISE À LA TERRE
Si vous ne le faisiez pas la foudre pourrait
provoquer un incendie.
Si vous ne le faisiez pas, la surchaue de
l’appareil pourrait provoquer un incendie.
Ce produit n’est pas totalement déconnecté du circuit électrique
lorsqu’il est mis hors tension par le bouton d’arrêt. Si l’appareil
ne doit pas être utilisé pendant une longue période, débranchez
le câble d’alimentation de la prise secteur.
Ce produit doit être mis à la terre. En cas de défaillance matérielle ou de panne, la mise à la terre fournit un chemin de moindre
résistance au courant électrique an de réduire le risque d’électrocution. Ce produit est équipé d’un câble avec un conducteur de
protection et une che de mise à la terre. La che doit être branchée dans une prise appropriée correctement installée et mise à la
terre conformément à tous les codes et règlements locaux.
DANGER - La connexion incorrecte du conducteur de protection peut présenter un risque d’électrocution.
Consultez un électricien ou un réparateur qualié si vous avez des doutes en ce qui concerne la mise à la terre du produit. Ne
modiez pas la che fournie avec le produit – si elle n’est pas adaptée à la prise, faites installer une prise correcte par un électricien
qualié.
[Seuls les produits avec 3P che]
PRECAUTION
Indique un risque potentiel qui peut entraîner la détérioration,
ou des dommages, pour l’appareil ou ses propriétés, si celui-ci
n’est pas manipulé correctement.
Votre piano doit être placé à un endroit tel que sa position n’altère pas sa propre ventilation. Gardez une
distance minimum de 5 cm autour de l’instrument pour une aération susante.
Description de la l'emplacement de la reference (Le cas échéant):
Anglais phrase: The nameplate label is located on the underside of the instruments, as indicated below.
Français phrase: La reference commerciale est inscrite sur une etiquette en dessous de votre instrument, conformement
a l’indication ci-dessous.
4
Important Safety Instructions
Important Information
Important Safety Instructions
denotes that care should be taken.
The example instructs the user to take care not to allow ngers to be trapped.
denotes a prohibited operation.
The example instructs that disassembly of the product is prohibited.
denotes an operation that should be carried out.
The example instructs the user to remove the power cord plug from the AC outlet.
Examples of Picture Symbols
Read all the instructions before using the product.
CAUTION
RISK OF ELECTRIC SHOCK
DO NOT OPEN
AVIS : RISQUE DE CHOC ELECTRIQUE - NE PAS OUVRIR.
TO REDUCE THE RISK OF ELECTRIC SHOCK, DO NOT OPEN THE AC ADAPTOR.
NO USER-SERVICEABLE PARTS INSIDE. REFER SERVICING TO QUALIFIED SERVICE PERSONNEL.
The lighting ash with arrowhead symbol, within
an equilateral triangle, is intended to alert the user
to the presence of uninsulated "dangerous
voltage" within the product's enclosure that may
be of sucient magnitude to constitute a risk of
electric shock to persons.
The exclamation point within an equilateral
triangle is intended to alert the user to the
presence of important operating and maintenance
(servicing) instructions in the leterature
accompanying the product.
WARNING
TO REDUCE THE RISK OF FIRE
OR ELECTRIC SHOCK, DO NOT
EXPOSE THIS PRODUCT TO
RAIN OR MOISTURE.
INSTRUCTIONS PERTAINING TO A RISK OF FIRE, ELECTRIC SHOCK, OR INJURY TO PERSONS
SAVE THESE INSTRUCTIONS
1) Read these instructions.
2) Keep these instructions.
3) Heed all warnings.
4) Follow all instructions.
5) Do not use this apparatus near water.
6) Clean only with dry cloth.
7) Do not block any ventilation openings. Install in
accordance with the manufacturer's instructions.
8) Do not install near any heat sources such as radiators,
heat registers, stoves, or other apparatus (including
ampliers) that produce heat.
9) Do not defeat the safety purpose of the polarized or
grounding-type plug. A polarized plug has two
blades with one wider than the other. A grounding
type plug has two blades and a third grounding
prong. The wide blade or the third prongs are
provided for your safety. If the provided plug does
not t into your outlet, consult an electrician for
replacement of the obsolete outlet.
10) Protect the power cord from being walked on or
pinched particularly at plugs, convenience
receptacles, and the point where they exit from the
apparatus.
11) Only use attachments/accessories specied by the
manufacturer.
12) Use only with the cart, stand, tripod, bracket, or table
specied by the manufacturer, or
sold with the apparatus. When a cart is used,
use caution when moving the cart/apparatus
combination to avoid injury from tip-over.
13) Unplug this apparatus during lightning storms or
when unused for long periods of time.
14) Refer all servicing to qualied service personnel.
Servicing is required when the apparatus has been
damaged in any way, such as power-supply cord or
plug is damaged, liquid has been spilled or object
have fallen into the apparatus, the apparatus has
been exposed to rain or moisture, does not operate
normally, or has been dropped.
5
Important Safety Instructions
Important Information
WARNING
The product should be connected to
an AC outlet of the specied voltage.
・ If you are going to use an AC power cord,
make sure that its has the correct plug shape
and conforms to the specied power voltage.
・ Failure to do so may result in re.
120V 240V230V
Indicates a potential hazard that could result in death or
serious injury if the product is handled incorrectly.
Do not insert or disconnect the power
cord plug with wet hands.
Doing so may cause electric shock.
WARNING - When using electric products, basic precautions should always be followed, including the following.
The product is not completely disconnected from the
power supply even when the power switch is turned
o. If the product will not be used for a long time,
unplug the AC power cord from the AC outlet.
・ Failure to do so may cause re in case of
lightning.
・ Failure to do so may over-heat the product,
resulting in re.
Do not disassemble, repair or modify
the product.
Doing so may result in product breakdown, electric
shock or short-circuit.
This product may be equipped with a polarized line plug (one blade wider
than the other). This is a safety feature.
If you are unable to insert the plug into the outlet, contact an electrician to
replace your obsolete outlet.
Do not defeat the safety purpose of the plug.
When disconnecting the AC power cord's
plug, always hold the plug
and pull it to remove it.
・ Pulling the AC power cord itself may damage
the cord, causing a re, electric shock or
short-circuit.
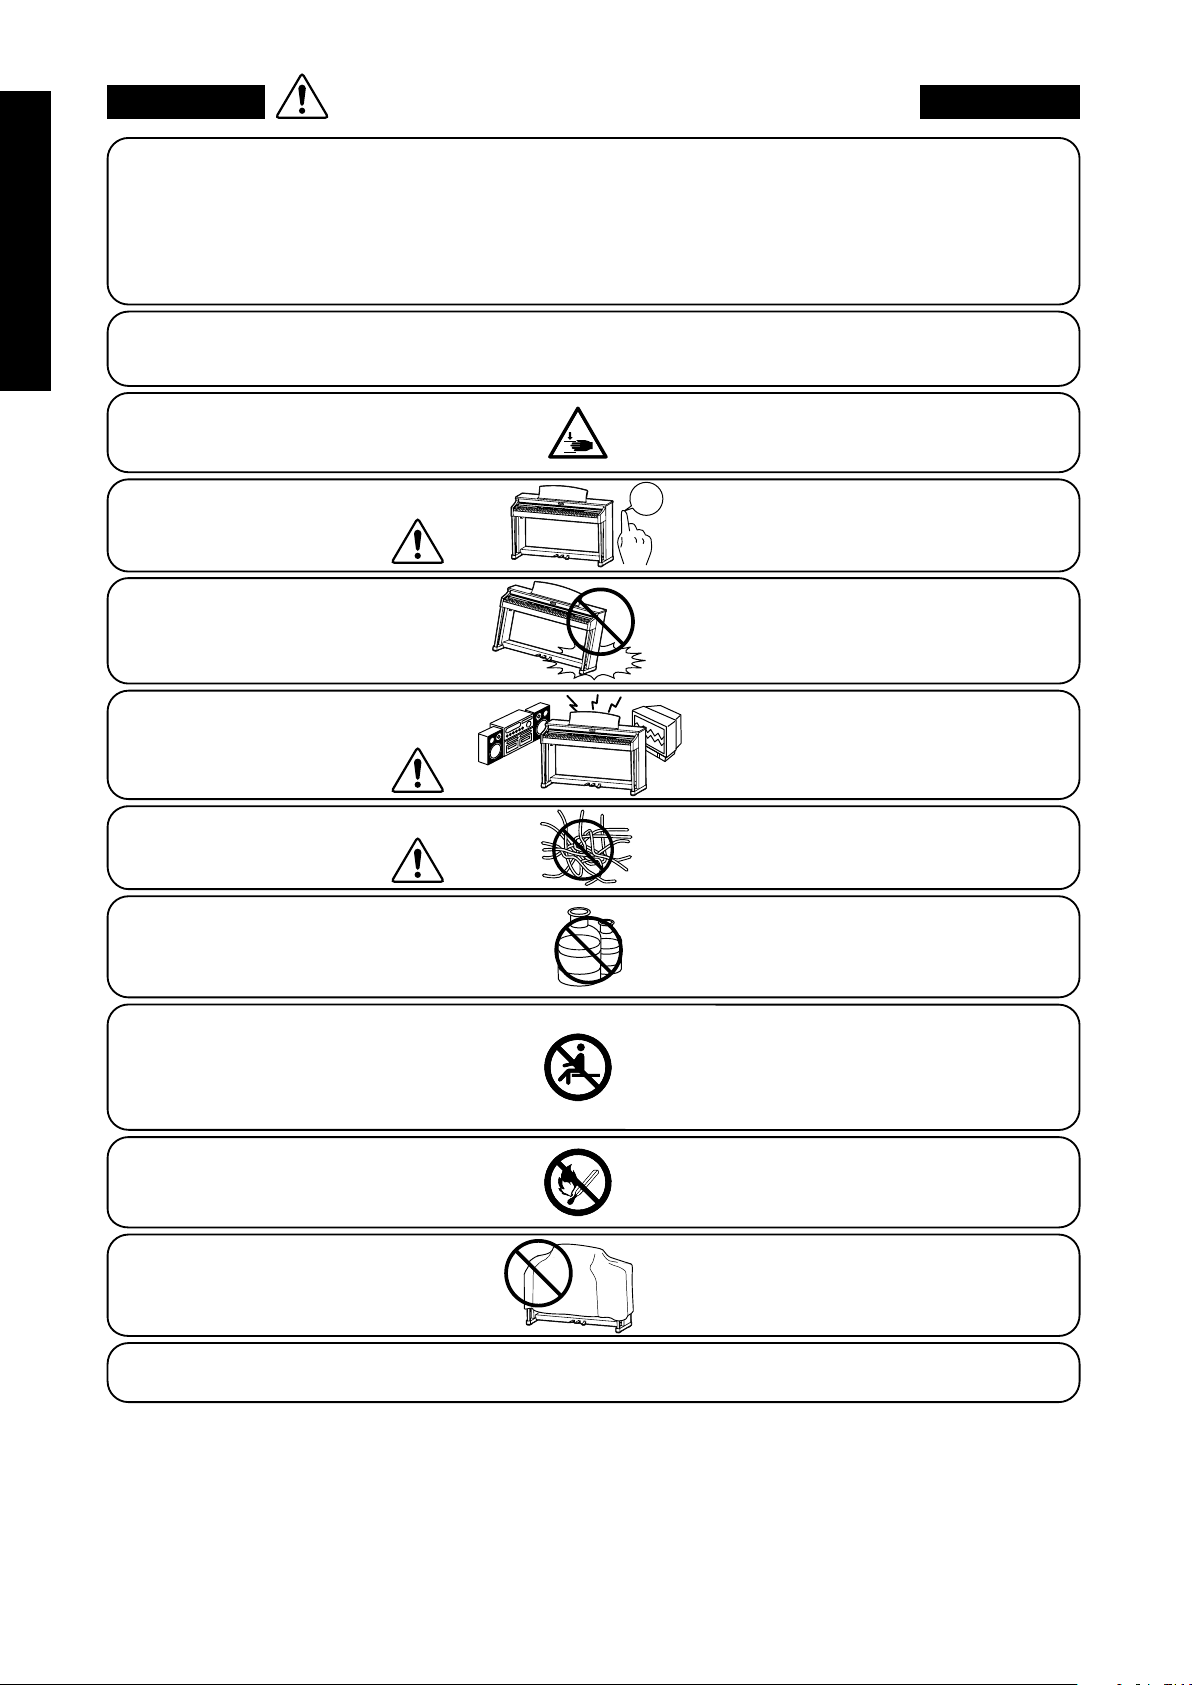
Doing so may cause the product to fall over,
resulting in injury.
Do not lean against the keyboard.
When using the headphones, do not
listen for long periods of
time at high volume levels.
Doing so may result in hearing problems.
It is a good practice to have the instrument near the AC outlet and the power cord plug in a position
so that it can readily be disconnected in an emergency because electricity is always charging
while the plug is in the AC outlet even in a power switch o condition.
The chair must be used properly (it must be
used only when playing the product).
・ Do not play with it or stand on it.
・ Only one person is allowed to sit on it.
・ Do not sit on it when opening the lid.
・ Re-tighten the bolts occasionally.
Doing so may cause the chair to fall over or your
ngers to be trapped, resulting in injury.
Entry of water, needles or hair pins may result
in breakdown or short-circuit.
The product shall not be exposed to dripping or
splashing. No objects lled with liquids, such as
vases, shall be placed on the product.
Take care not to allow any foreign
matter to enter the product.
6
Important Safety Instructions
Important Information
・ Doing so may cause the product to become
deformed or fall over, resulting in breakdown
or injury.
Do not stand on the product or exert
excessive force.
・ Doing so may result in discoloration or deformation
of the product.
・ When cleaning the product, put a soft cloth in
lukewarm water, squeeze it well, then wipe the
product.
Do not wipe the product with benzene
or thinner.
Failure to do so may damage them, resulting in
re, electric shock or short-circuit.
When connecting the AC power cord
and other cords, take care
not to get them tangled.
・ Doing so may cause the product to generate
noise.
・ If the product generates noise, move the
product suciently away from the electrical
appliance or connect it to another AC outlet.
Do not place the product near electrical
appliances such as TVs and radios.
Please lift up the product when moving it.
Please note that the product is heavy and must
be carried by more than two persons.
Dropping the product may result in breakdown.
Do not drag the product on the oor.
Take care not to drop the product.
Doing so may cause the illumination to fall over,
resulting in re.
Do not place naked ame, such as lighted
candles on the product.
CAUTION
Indicates a potential hazard that could result in injury or
damage to the product or other property if the product
is handled incorrectly.
Using the product in such areas may result in
product breakdown.
Use the product only in moderate climates (not
in tropical climates).
Do not use the product in the following areas.
・ Areas, such as those near windows, where the product is
exposed to direct sunlight
・ Extremely hot areas, such as near a heater
・ Extremely cold areas, such as outside
・ Extremely humid areas
・ Areas where a large amount of sand or dust is present
・ Areas where the product is exposed to excessive
vibrations
Closing it roughly may trap your ngers,
resulting in injury.
When you close the keyboard cover,
close it gently.
Failure to do so may cause breakdown of this
product and other devices.
Before connecting cords, make sure
that the power to this product
and other devices is turned
OFF.
OFF
The product should be located so that its location or position does not interfere with its proper ventilation. Ensure a
minimum distance of 5cm around the product for sucient ventilation.
Failure to do so may over-heat the product,
resulting in re.
Ensure that the ventilation is not
impeded by covering the ventilation
openings with items, such as newspaper,
table-cloths, curtains, etc.
Use only the AC adaptor included with this instrument to power the instrument.
・ Do not use other AC adaptors to power this instrument.
・ Do not use the included AC adaptor or AC power cord to power other equipment.
7
Important Safety Instructions
Important Information
The product should be serviced by qualied service personnel when:
・ The power supply cord or the plug has been damaged.
・ Objects have fallen, or liquid has been spilled into the product.
・ The product has been exposed to rain.
・ The product does not appear to operate normally or exhibits a marked change in performance.
・ The product has been dropped, or the enclosure damaged.
Notes on Repair
Should an abnormality occur in the product, immediately turn the power OFF, disconnect the power cord plug, and then contact the shop from which
the product was purchased.
CAUTION:
To prevent electric shock, match wide blade of plug to wide slot, fully insert.
ATTENTION:
Pour éviter les chocs électriques, introduire la lame la plus large de la che dans la borne correspondante de la prise et pousser jusqu'au fond.
An information on Disposal for users
If your product is marked with this recycling symbol it means that, at the end of its life, you must dispose of it separately by taking it to an
appropriate collection point.
You should not mix it with general household waste. Disposing of this product correctly will prevent potential negative eects on the environment
and human health which could otherwise arise due to inappropriate waste handling.
For further details, please contact your local authority.
(European Union only)
Instruction for AC power cord (U.K.)
IMPORTANT
THE WIRES IN THIS MAINS LEAD ARE COLOURED IN ACCORDANCE WITH THE FOLLOWING CODE.
BLUE : NEUTRAL
BROWN : LIVE
As the colours of the wires in the mains lead of this apparatus may not correspond with the coloured markings identifying the terminals in your plug,
proceed as follows:
The wire which is coloured BLUE must be connected to the terminal which is marked with the letter N or coloured BLACK.
The wire which is coloured BROWN must be connected to the terminal which is marked with the letter L or coloured RED.
Do not plug either terminal of the power cord to the the ground od AC outlet on the wall.
Canadian Radio Interference Regulations
This instrument complies with the limits for a class B digital apparatus, pursuant to the Radio Interference Regulations, C.R.C., c. 1374.
FCC Information (U.S.A)
CAUTION : Changes or modications not expressly approved by the party responsible for compliance could void the user’s authority to operate the
equipment.
NOTE : This equipment has been tested and found to comply with the limits for a Class B digital device, pursuant to Part 15 of the FCC Rules. These limits are
designed to provide reasonable protection against harmful interference in a residential installation. This equipment generates, uses and can radiate radio
frequency energy and, if not installed and used in accordance with the instructions, may cause harmful interference to radio communications. However, there
is no guarantee that interference will not occur in a particular installation. If this equipment does cause harmful interference to radio or television reception,
which can be determined by turning the equipment o and on, the user is encouraged to try to correct the interference by one or more of the following
measures:
• Reorient or relocate the receiving antenna.
• Increase the separation between the equipment and receiver.
• Connect the equipment into an outlet on a circuit dierent from that to which the receiver is connected.
• Consult the dealer or an experienced radio/TV technician for help.
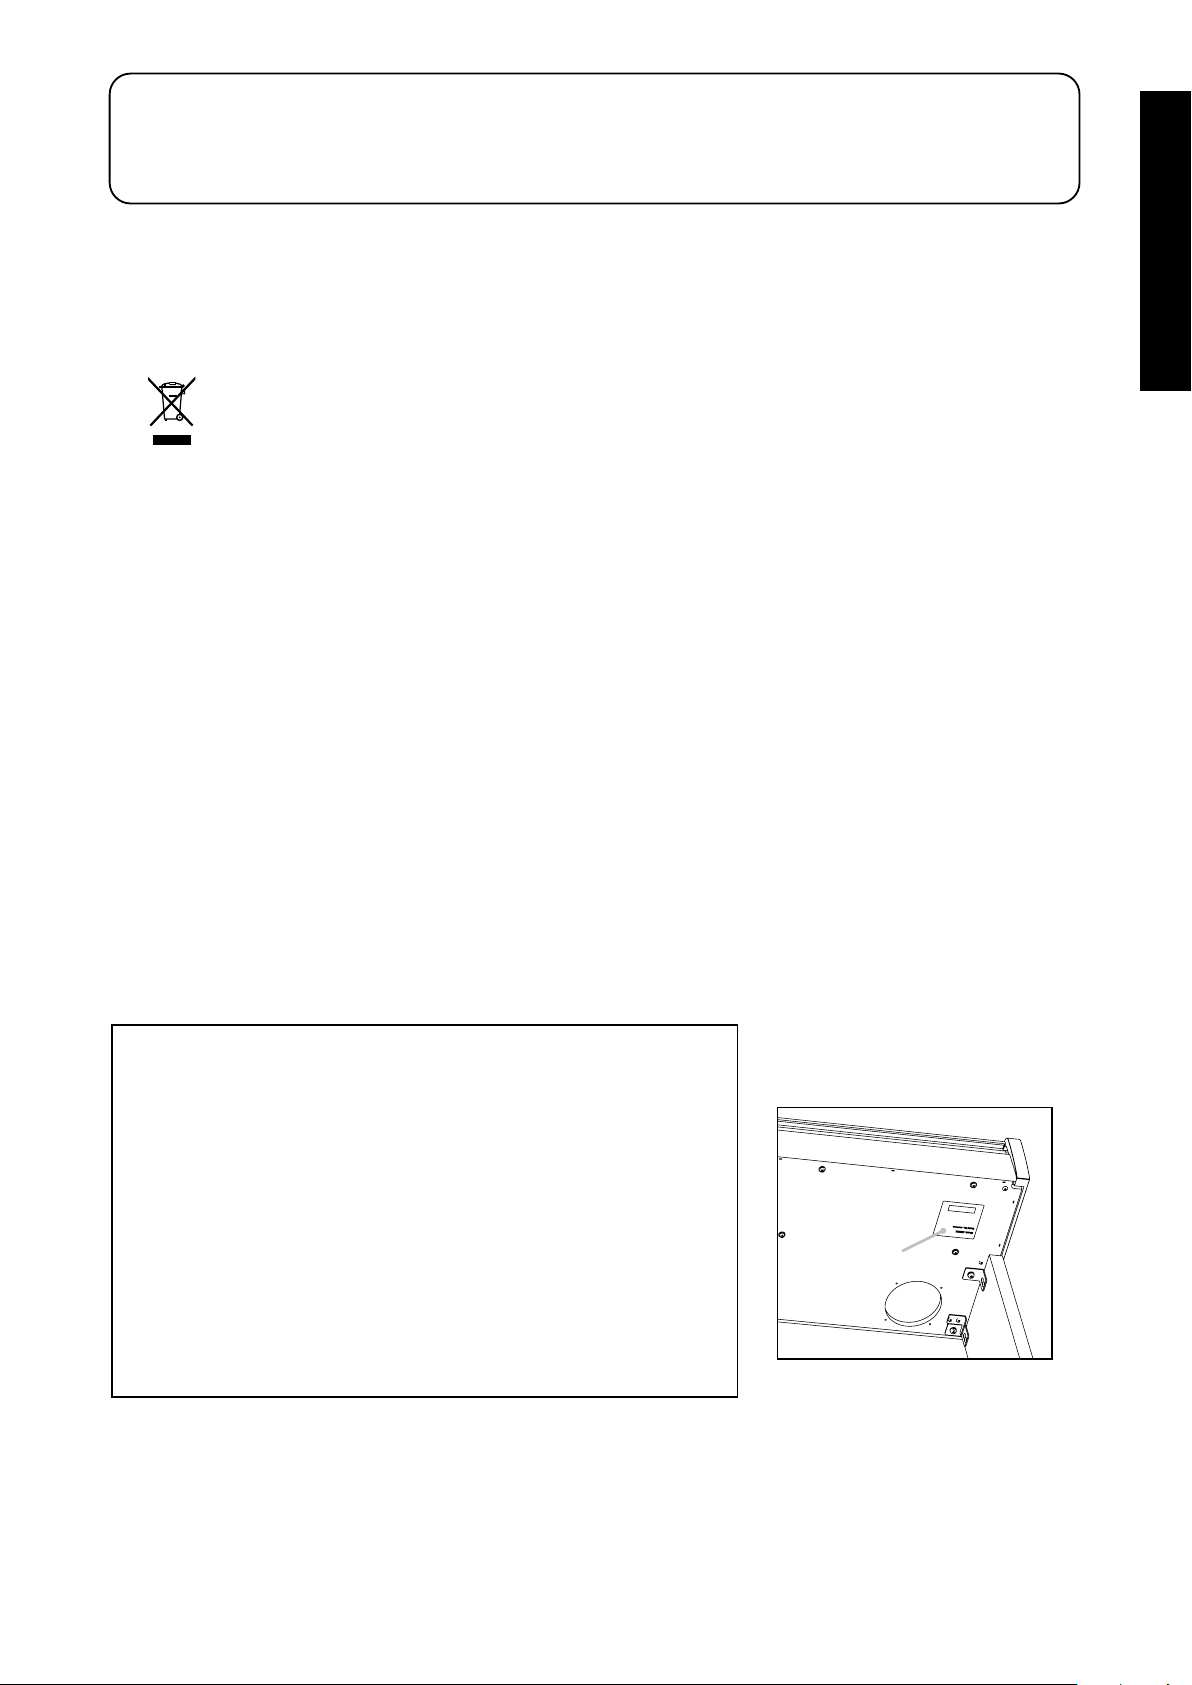
The nameplate label is located on
the
underside of the instrument, as
indicated below.
Declaration of Conformity
Products : Electronic Piano
Model Number : CN201
Responsible Party Name : Kawai America Corporation
Address : 2055 East University Drive Rancho
Dominguez, CA 90220
Telephone 310-631-1771
This device complies with Part 15 of the FCC Rules.
Operation is subject to the following two conditions:
(1) this device may not cause harmful interference, and
(2) this device must accept any interference received,
including interference that may cause undesired operation.
This applies only to products distributed by Kawai America Corporation.
Nameplate
8
Important Information
Introduction
Introduction
Thank you for purchasing this Kawai digital piano.
Please read this owner’s manual carefully and keep the manual in a safe place to make full use of this product and maximise its prod-
uct life.
▋ About this owner’s manual
This owner’s manual contains quick references for basic play-
back features and operation details for various functions.
▋ Nameplate
The information, including model name and serial number, is
specified on the nameplate located on the underside of the in-
strument.
▋ Intellectual property rights
• The Bluetooth® word mark and logos are registered trade-
marks owned by the Bluetooth SIG, Inc. and any use of such
marks by Kawai Musical Instruments Mfg. Co., Ltd. is under li-
cense.
• “Windows” is a registered trademark of Microsoft Corporation.
• “Mac” is a registered trademark of Apple Inc.
• Some samples © PREMIER Engineering Inc.
▋ Cleaning
• Use a dry soft cloth to wipe the main body.
• Avoid using alcohol, benzene, thinner, or chlorine bleach. Do-
ing so may result in discoloration or deformation of the keys,
exterior, or panels.
• Depending on the material of the cloth used, wiping the prod-
uct repeatedly may result in discoloration or deformation.
• If the surface of the pedals become dirty, clean the pedals us-
ing a dry dish-washing sponge. Wiping the gold-plated pedals
with a cloth may cause the surface to appear dull.
• If the pedals become dirty, do not attempt to clean them with
rust-removing solvents, abrasives, or files.
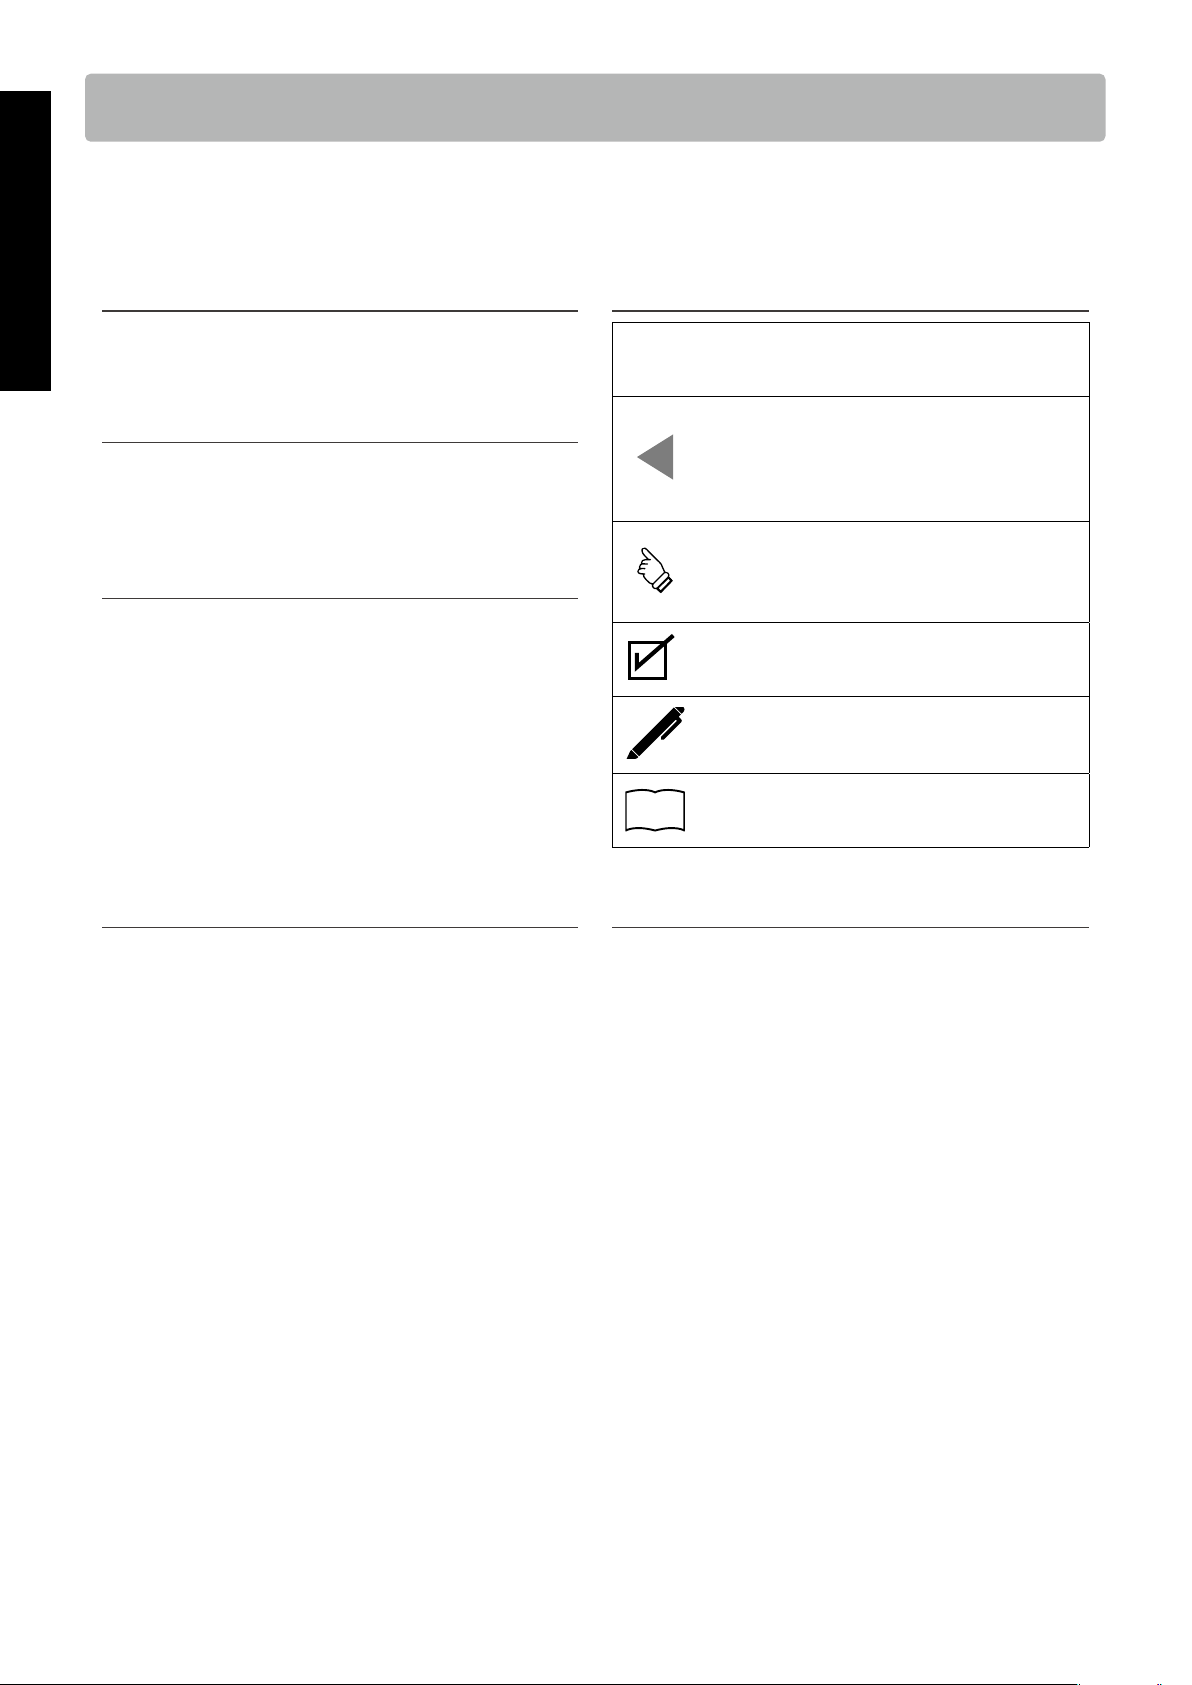
▋ Symbols
[ ]
The characters enclosed in brackets [ ] indicate
the names of sliders, buttons, ports or jacks.
This symbol shows the location of the button to
be operated, and the number in this symbol indi-
cates the order of operation.
The value in this symbol corresponds to the num-
ber describing the operating instructions.
The pointer finger symbol indicates key opera-
tion, and the value in this symbol corresponds to
the number assigned to the corresponding oper-
ation.
This symbol indicates operating precautions.
This symbol describes terminology and provides
additional information if the screen display is dif-
ferent from the name.
P
This symbol indicates the page to be referenced.
▋ About tuning
This piano is a digital instrument and does not require tuning.
If any aspect of this instrument does not function or perform as
expected, please contact the store from where the instrument
was purchased to seek assistance.

9
Important Information
Table of Contents
Table of Contents
For more information on MIDI and its operation details, please download the supplementary PDF manual from the Kawai Global
website:
https://www.kawai-global.com/support/manual/
Important Information
Important Safety Instructions
Introduction ��������������8
Table of Contents ������������9
Preparation
Part Names and Functions ������� 10
Opening/Closing the Key Cover ����� 11
Music Rest �������������� 11
Pedal support bolt ����������� 11
Power ���������������� 12
Home screen ������������� 12
Volume and headphones �������� 13
Basic Operation
Sounds���������������� 14
Pedals ���������������� 14
Metronome �������������� 15
Recorder ��������������� 16
Music Menu �������������� 17
Demo Songs ������������� 17
Lesson ��������������� 18
Concert Magic ������������ 19
Adjustments & Settings
Settings Menu ������������ 21
Reverb ��������������� 22
Transpose �������������� 22
Tone Control ������������� 22
Low Volume Balance ���������� 23
Dual ���������������� 23
4 Hands ��������������� 24
Tuning ��������������� 24
Touch Curve ������������� 24
Virtual Technician Smart Mode ������ 25
Damper Noise ������������ 25
Key Volume ������������� 26
Startup Settings ����������� 26
Spatial Headphone Sound ������� 27
Phones Type ������������� 27
Bluetooth® �������������� 28
Bluetooth® Audio Volume �������� 28
Auto Display Off ����������� 29
Auto Power Off ������������ 29
Factory Reset ������������� 29
Appendix
Troubleshooting ������������ 30
Internal Songs List ����������� 31
Connecting to Other Devices ������ 33
Assembly Instructions ��������� 35
Information about Adaptor Specifications � 39
EU Declaration of Conformity ������ 40
Specifications ������������� 41
10
Preparation
Part Names and Functions
Part Names and Functions
③
④
⑥
⑩
⑦
⑧
⑪
⑨
⑤
⑮
⑫ ⑬ ⑭
①
②
In market locations where Bluetooth
functionality is not available, the
Bluetooth mark will not be printed.
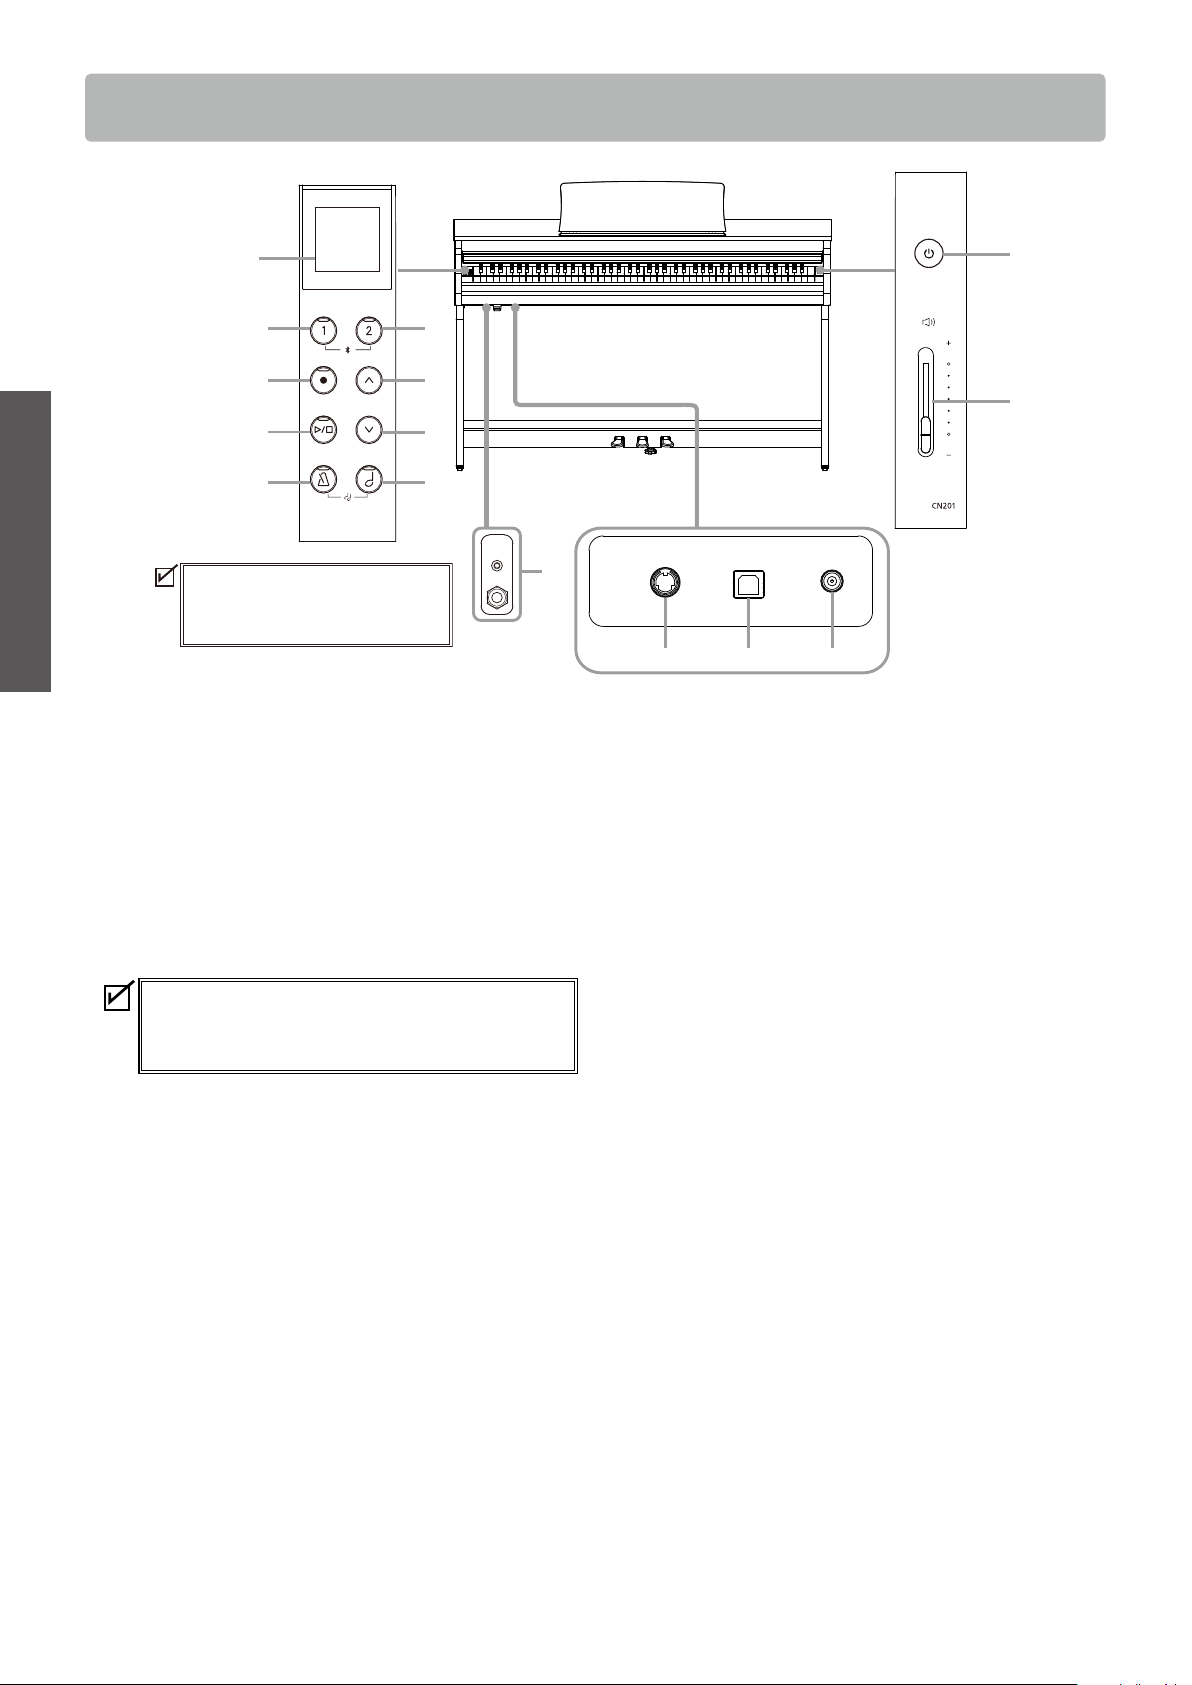
① [POWER] button
This button is used to turn the power on/o. Be sure to turn
o the instrument after playing.
② [MASTER VOLUME] slider
This slider controls the volume output from the head-
phones or built-in speakers.
③ Display
It shows the function names and setting values.
A protective plastic film is attached to the display
during production. Please remove this film before
attempting to play the instrument.
④ [1] button
This button is used to select functions shown on [1].
⑤ [2] button
This button is used to select functions shown on [2].
⑥ [REC] button
This button is used to record performances.
⑦ [PLAY/STOP] button
This button is used to play/stop recorded performances
and Internal Songs such as those stored in Lesson.
⑧ [UP] button
This button is used to move the menu up or increase the
setting values.
⑨ [DOWN] button
This button is used to move the menu down or decrease
the setting values.
⑩ [METRONOME] button
This button is used to turn the metronome function on/o
and adjust its tempo, time signature, and volume settings.
⑪ [SOUND SELECT] button
This button is used to select sounds.
⑫ [PEDAL] connector
This connector is used to plug the pedal cable attached to
the pedal unit.
⑬ [USB to HOST] port
This port is used to connect the instrument to a computer
using a USB ‘B to A’ type cable in order to send and receive
MIDI data.
⑭ [DC IN] jack
This jack is used to connect the AC adaptor.
⑮ [PHONES] jacks
These jacks are used to connect stereo headphones to the
instrument, allowing headphones with a stereo mini phone
plug and headphones with a stereo standard plug to be
connected at the same time.
11
Preparation
Opening/Closing the Key Cover
Opening/Closing the Key Cover
▋ Opening the key cover
Gently lift the key cover with both hands, then slowly push it
back into the instrument’s body.
• Do not leave any object on the key cover when
opening the key cover. Doing so could cause the
objects to fall inside the instrument, leading to
electric shock, short-circuit, ignition, or failure.
• Be careful not to have hands and fingers caught
between the key cover and the main body.
▋ Closing the key cover
Slowly pull the key cover with both hands, then gently lower it
downward.
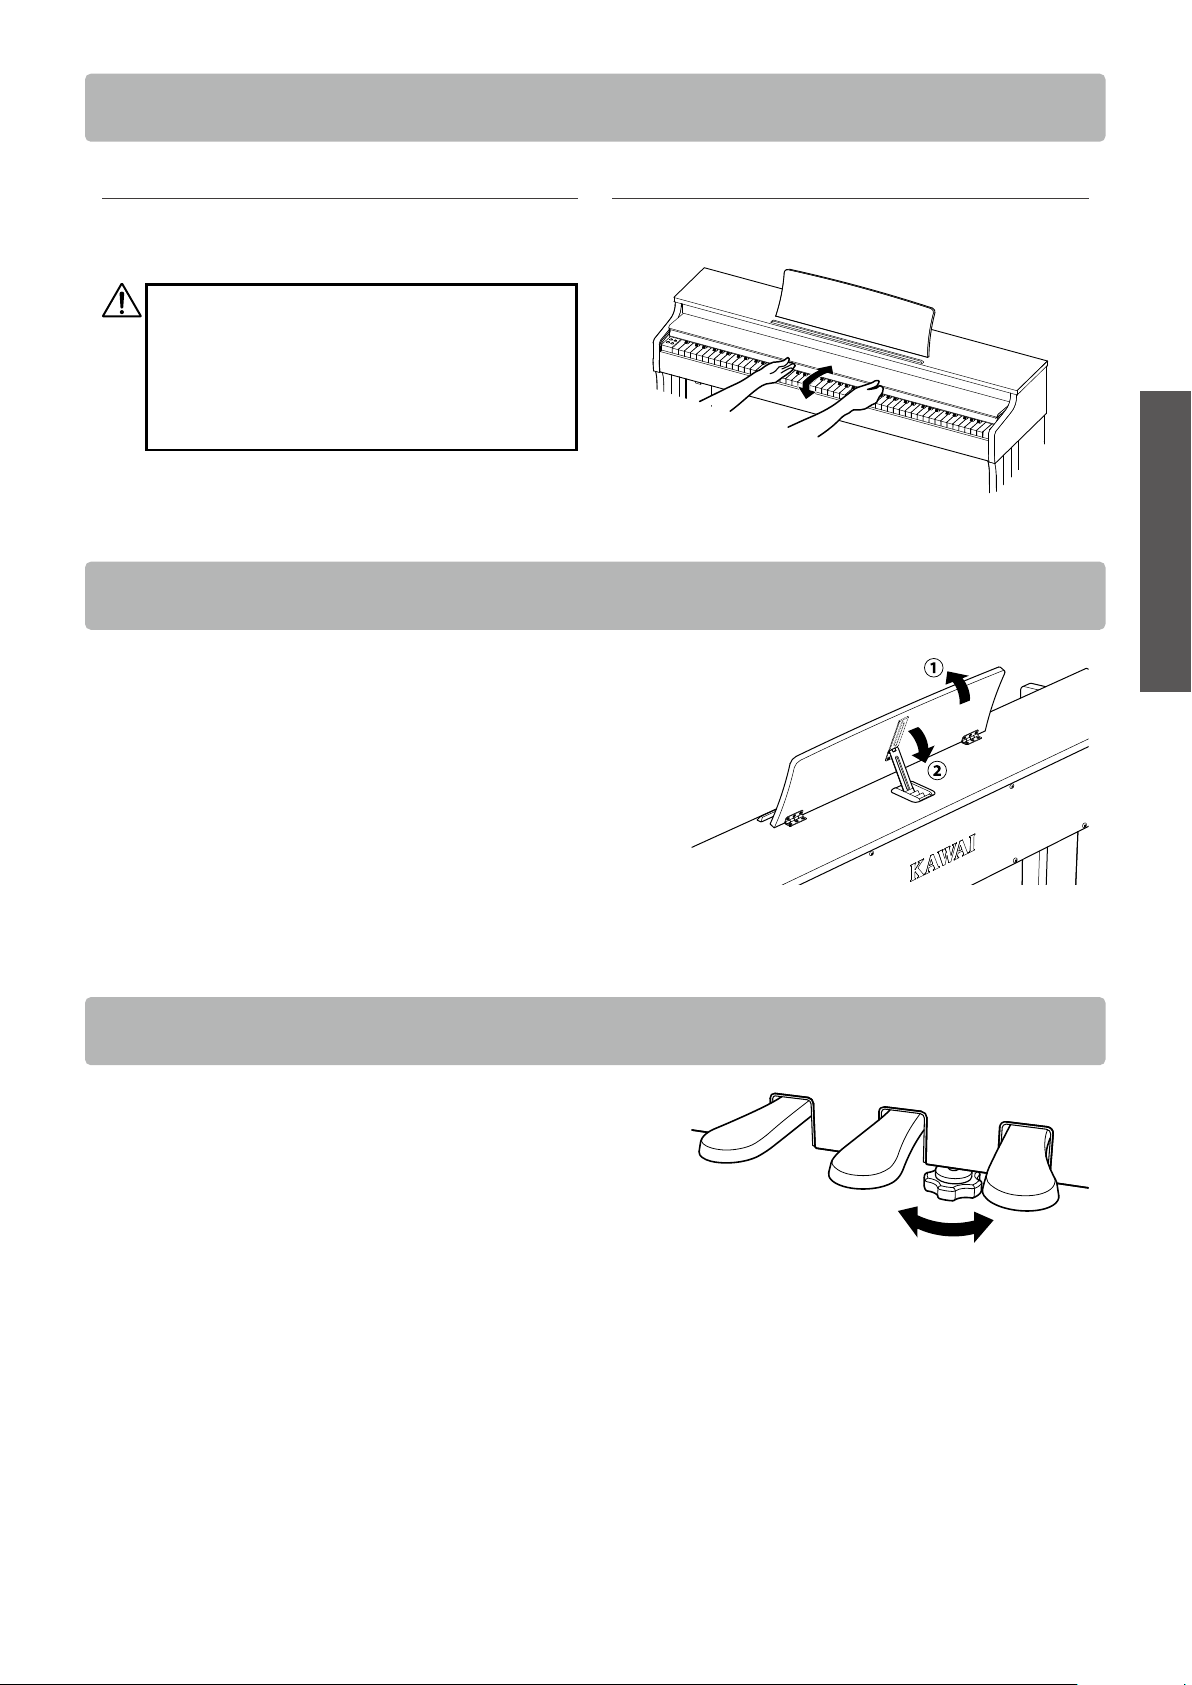
Music Rest
1. Lift the music rest.
2. Set the metal prop on the rear side of the music rest to a de-
sired position in the recessed holder on the top surface of the
main body.
(The angle is adjustable in three stages.)
Pedal support bolt
A pedal support bolt is attached at the base of the pedal board
to aid stability when the pedals are pushed.
Turn the bolt anti-clockwise until it makes contact with the floor
and supports the pedals firmly. If the pedal support bolt does
not make contact with the floor, the pedal board may become
damaged.
12
Preparation
Power
Power
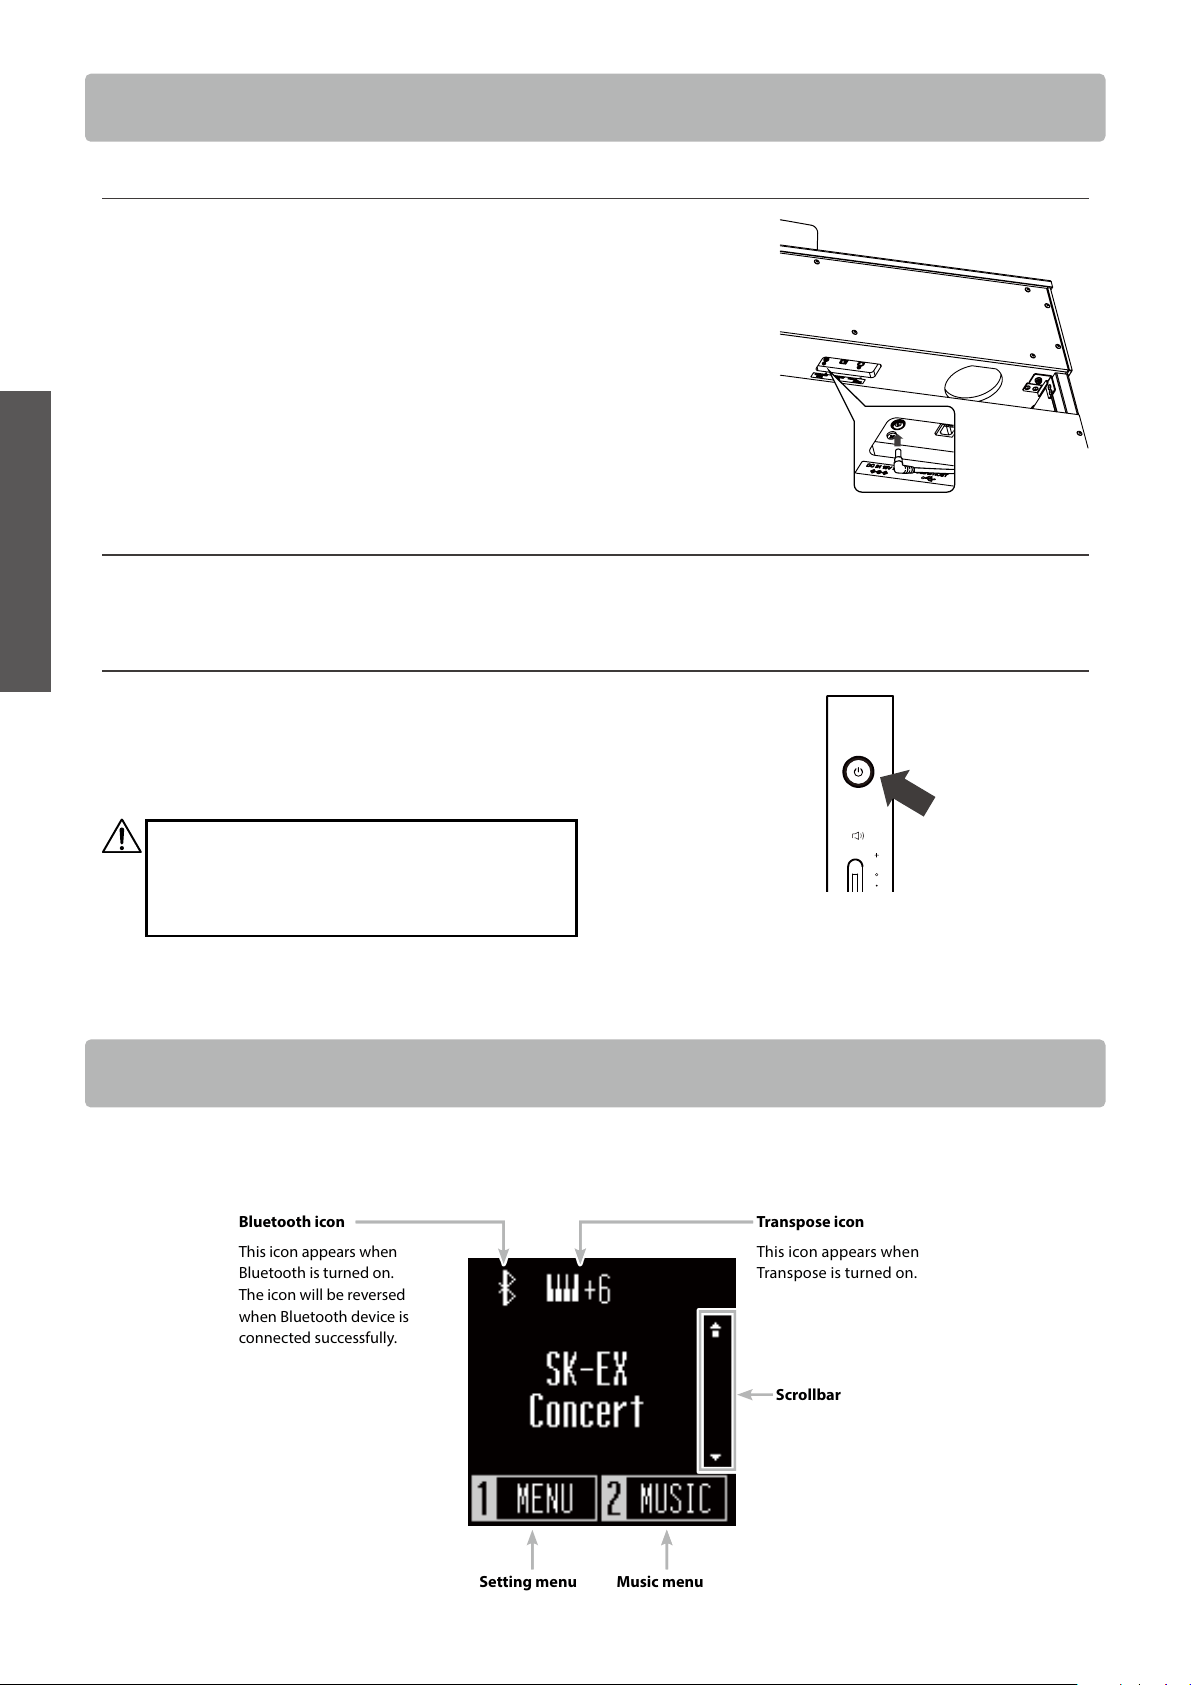
1. Connecting the AC adaptor to the main body
Plug the supplied AC adaptor into the power cord and insert it
into the [DC IN] jack located on the underside of the main body.
2. Connecting the plug into an outlet
Connect the AC power adaptor to an AC outlet.
3. Turning the power on/o
Press the [POWER] button to turn the power on.
When the instrument has started up, the LED indicator of the
[POWER] button will turn on.
To turn the power o, press the [POWER] button again.
Do not turn o the power until the startup process is
completed.
Do not unplug the power cord until the display has
turned o.
Transpose icon
This icon appears when
Bluetooth is turned on.
The icon will be reversed
when Bluetooth device is
connected successfully.
Scrollbar
Setting menu Music menu
Bluetooth icon
This icon appears when
Transpose is turned on.
The first screen that appears when the instrument has started up after power-on is called the Home screen.
The Home screen is the initial menu of the operation.
Home screen
13
Preparation
Volume and headphones
Volume and headphones
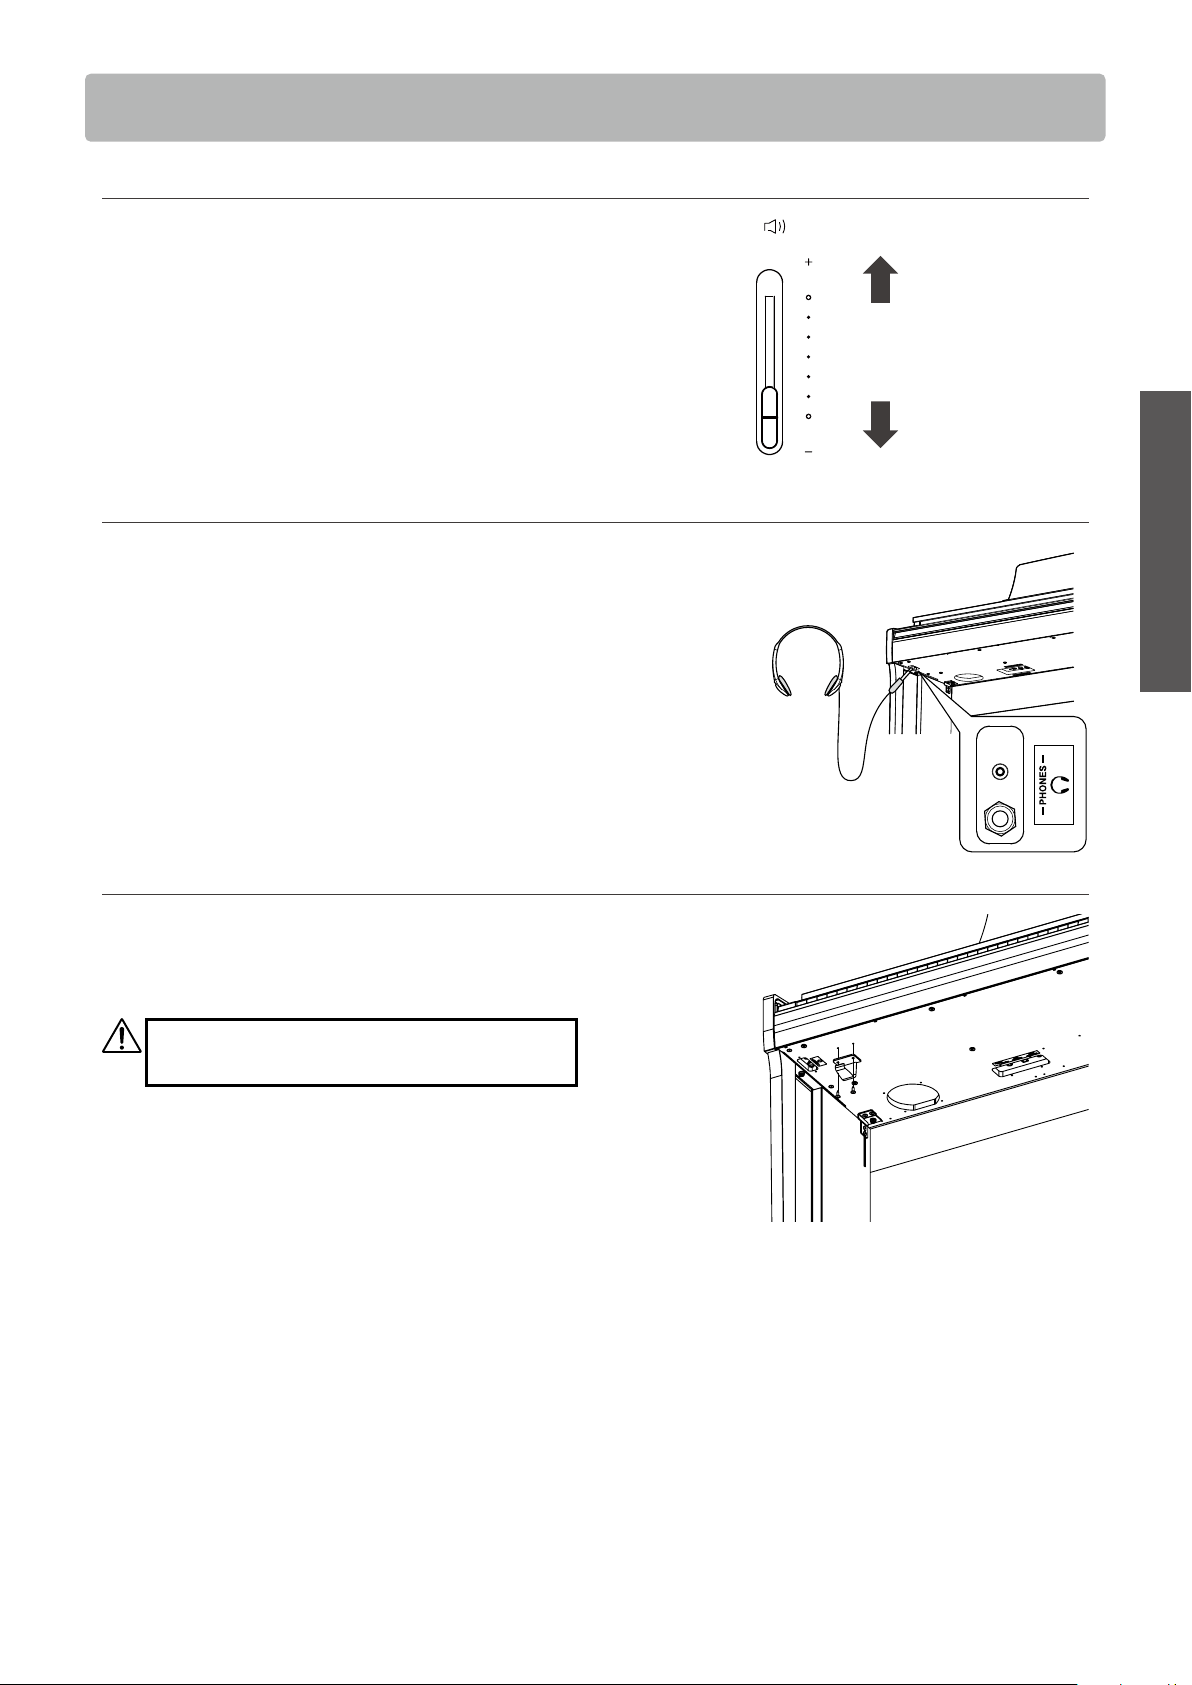
▋ Adjusting the volume
Use the [MASTER VOLUME] slider located on the right side of the
main body to adjust the volume.
Move the slider up to increase the volume and down to decrease
the volume.
Adjust the volume while listening to the sound by striking the
keys.
▋ Using headphones
Plug the headphones into the [PHONES] jack located on the un-
derside of the main body.
When the headphones are connected, the speakers on the main
body no longer produce sound.
▋ Using the headphone hook
When the headphones are not in use, the headphones can be
placed on the headphone hook.
To use the headphone hook, attach it as shown in the illustra-
tion.
Do not hang any other items except headphones on
the headphone hook. Doing so could result in damage.
Increase
Decrease
14
Basic Operation
Sounds
Sounds
This instrument includes 19 dierent sounds. The sounds can be selected in one of the following two
ways. “SK-EX Concert Grand Piano | Concert” is selected as the default setting. The sounds are displayed
on the Home screen.
Method 1
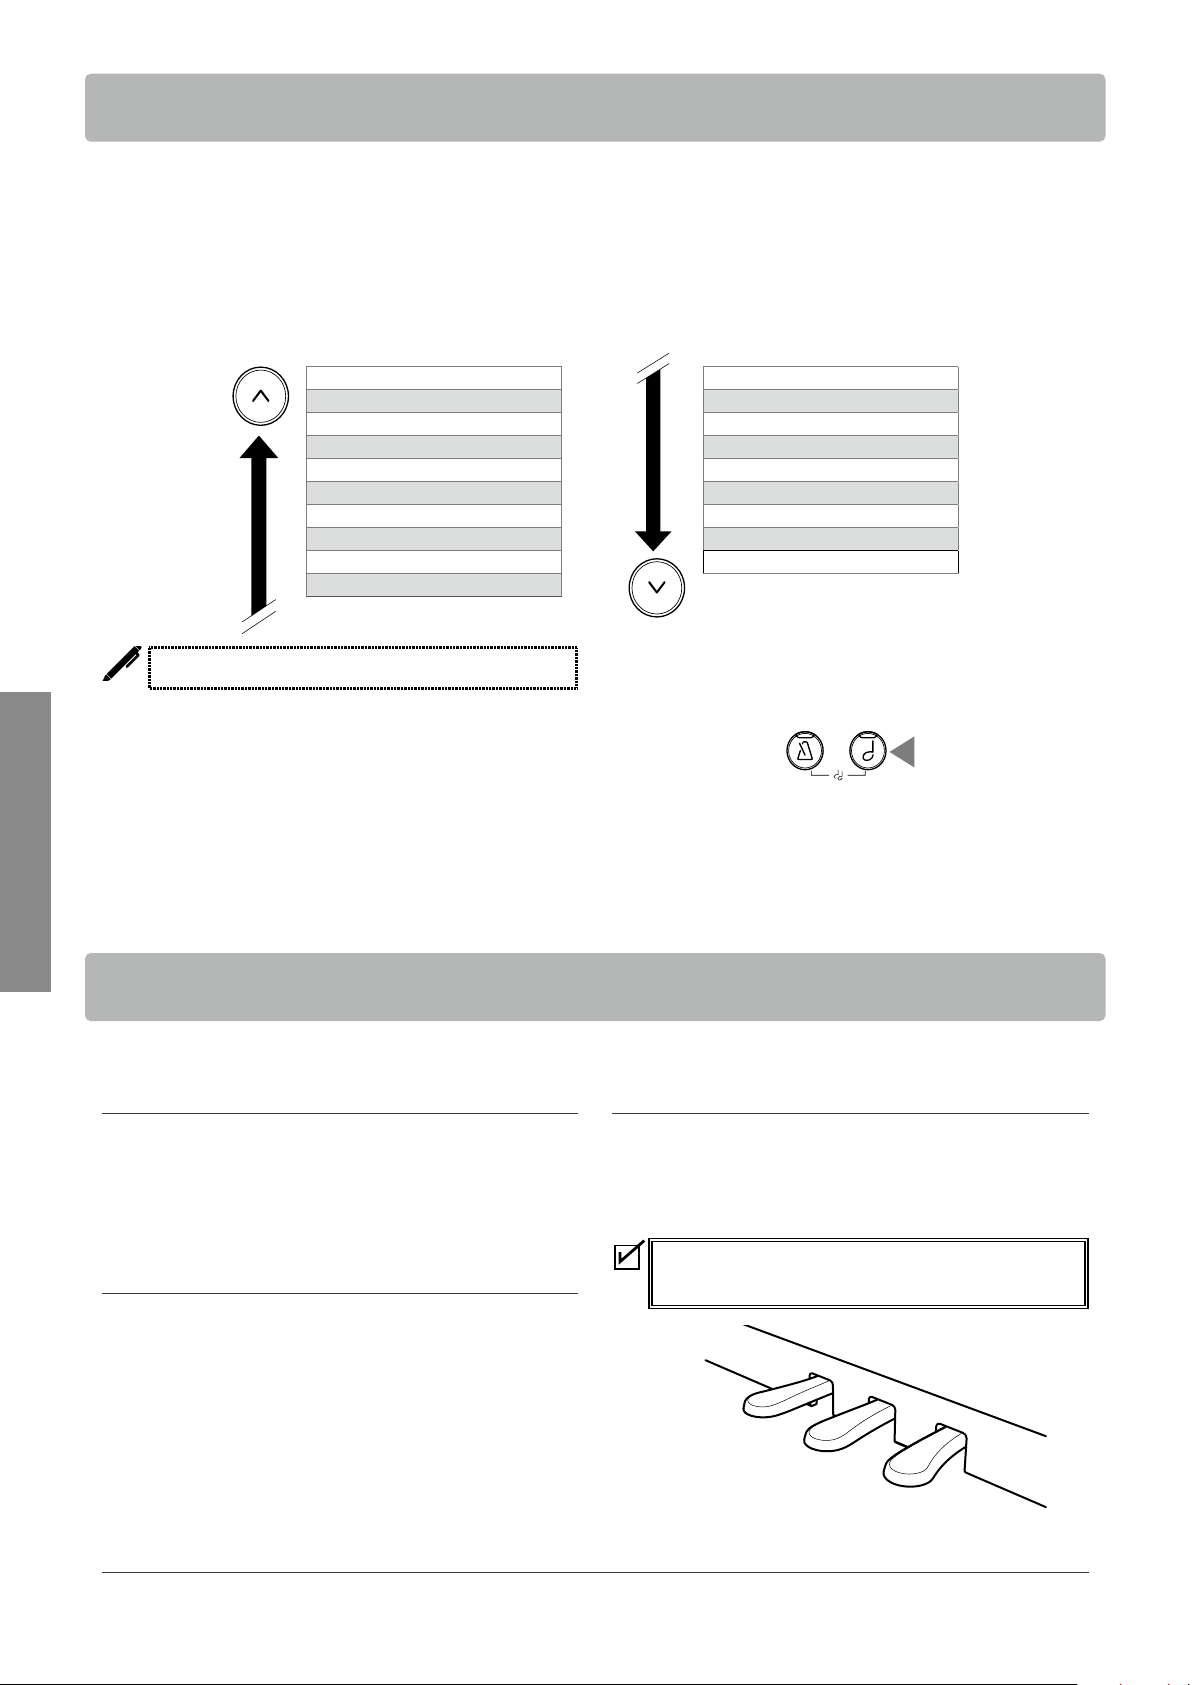
Press the [UP]/[DOWN] button on the Home screen to select sounds.
Press the [UP]/[DOWN] button simultaneously to restore the default setting “SK-EX Concert Grand Piano | Concert”.
SK-EX Concert Jazz Organ
EX Concert Church Organ
Upright Piano Harpsichord
SK-EX Jazz Vibraphone
EX Pop String Ensemble
SK-EX Mellow Slow Strings
EX Mellow Choir
EX Modern New Age Pad
Tine E. Piano Atmosphere
Modern E. Piano
The display shows shortened sound names.
Method 2
Press the [SOUND SELECT] button on the Home screen to cycle
through the sounds in the order as illustrated above and select a
sound.
Pressing the [SOUND SELECT] button at “Atmosphere” will
moves the cursor back to “SK-EX Concert Grand Piano | Concert”.
This instrument is equipped with three pedals.
▋ Damper pedal (right pedal)
Depressing this pedal while playing the piano will sustain the
sound even after one’s hands have been lifted from the keyboard.
The length of reverberation can be controlled by the level of ped-
al depression. (Half-pedal supported)
▋ Sostenuto pedal (centre pedal)
Depressing this pedal after pressing any key and before releas-
ing the key(s) will sustain the sound of only those notes that
have been played. Any keys that are subsequently pressed after
stepping on the sustenuto pedal will not be sustained.
▋ Soft pedal (left pedal)
Depressing this pedal softens the sound, reducing its volume
slightly. When the Jazz Organ sound is selected, the soft pedal
is also used to alternate the speed of rotary simulation between
Slow and Fast eect modes.
The eect of pressing each pedal may not be noticeable
depending on the sound.
Soft pedal
Sostenuto pedal
Damper pedal
▋ Grand Feel Pedal System
This instrument features the Grand Feel Pedal System, which replicates the sustain, soft, and sostenuto pedal weighting of a Shigeru
Kawai SK-EX Concert Grand piano.
Pedals
15
Basic Operation
Metronome
Metronome
The Metronome function provides a steady beat to aid practicing the piano.
▋ Turning the Metronome on/o
• Press the [METRONOME] button.
The LED for the [METRONOME] button turns on and the met-
ronome sound begins.
• Pressing the [METRONOME] button again will stop the met-
ronome and turn o the LED indicator for the [METRONOME]
button.
▋ Metronome settings
Item Description
Tempo
The value can be specified in the range from ♩ = 10 to 300.
The Tempo Term corresponding to the value is also displayed.
The default setting is ♩ = 120.
Beat The beat setting is available from the following: 1/4, 2/4, 3/4, 4/4, 5/4, 3/8, 6/8.
When the setting 1/4 is selected, it produces only the click
sounds without an accent beat.
The default setting is 1/4.
Volume The metronome volume can be specified in the range from 1 to 10.
The default setting is 5.
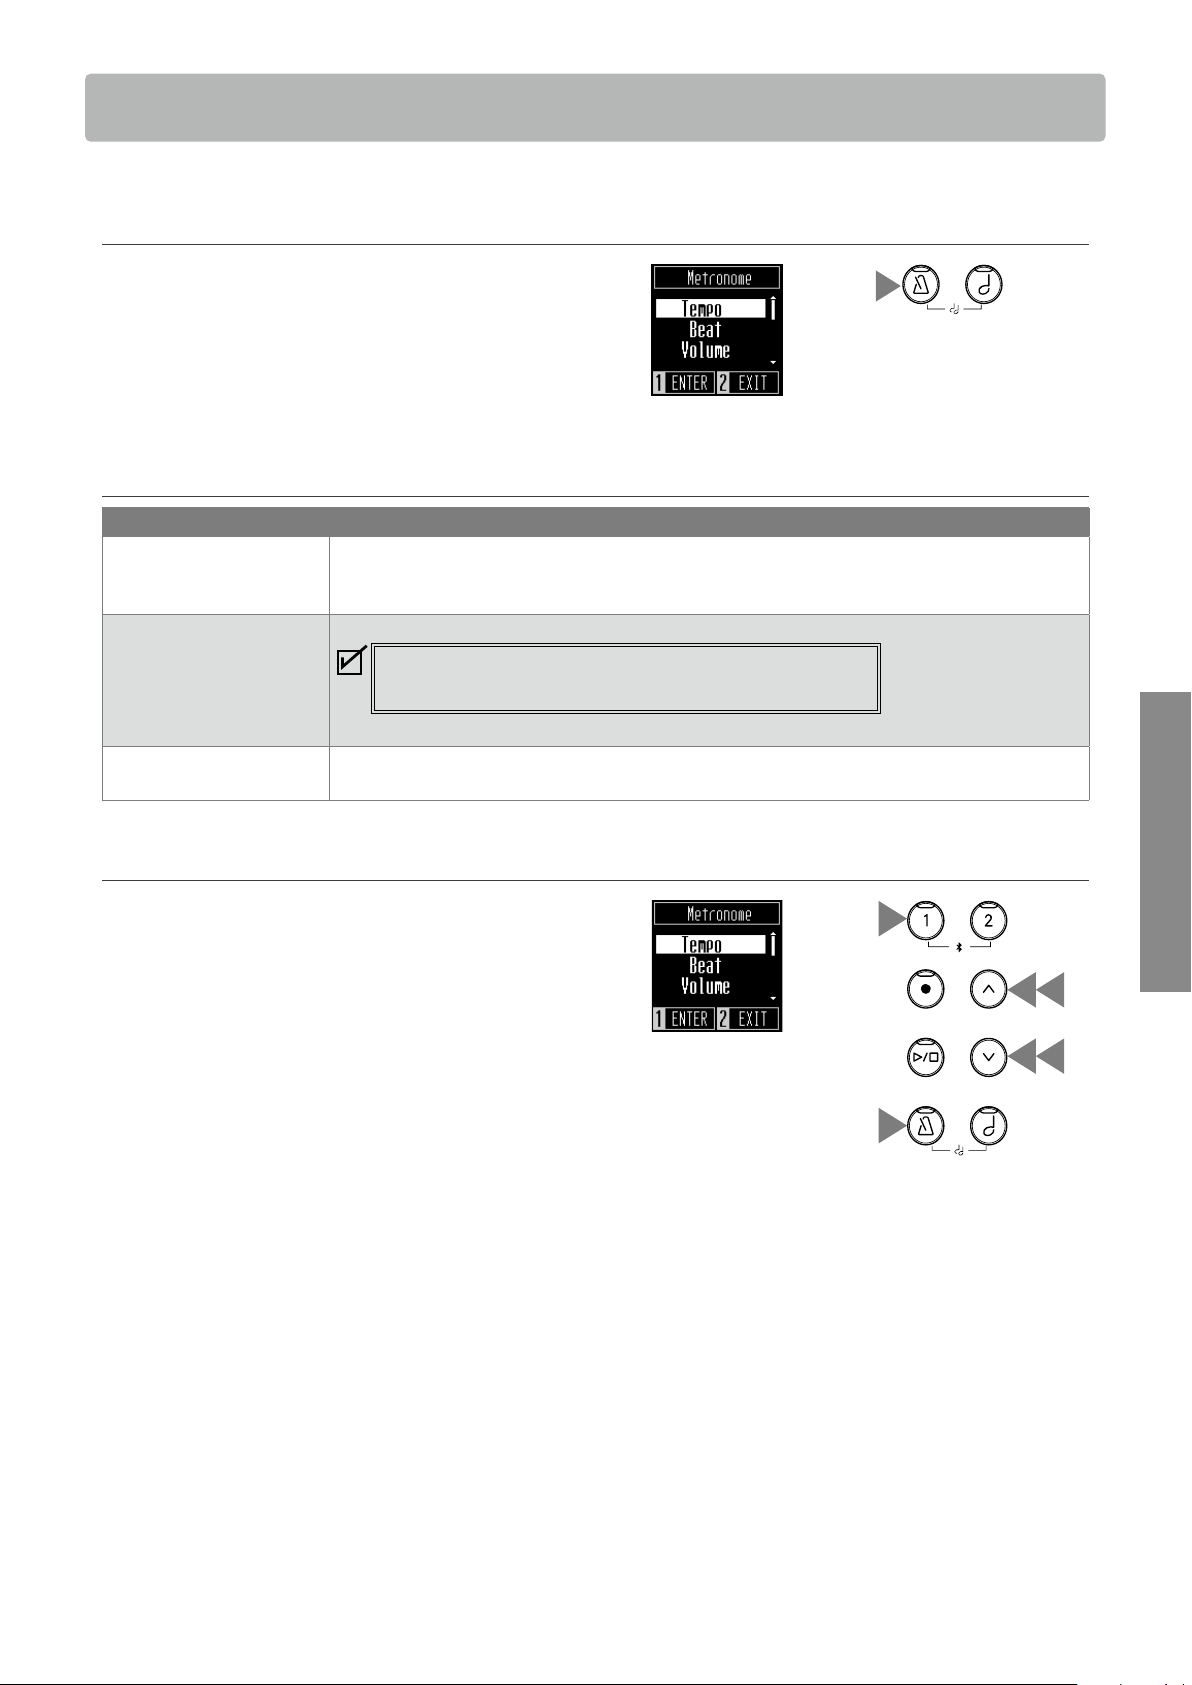
▋ Setting the Metronome
1. Press the [METRONOME] button.
2. Press the [UP]/[DOWN] button to select the setting menu.
3. Press the [1] button to enter the setting menu.
4. Press the [UP]/[DOWN] button to set the value.
• Pressing the [UP]/[DOWN] button simultaneously will restore
the default setting.
• Pressing the [2] button will open the Metronome screen again.
• Pressing the [2] button again will restore the Home screen.
2
2
4
4
1
3
16
Basic Operation
Recorder
This instrument allows up to three performances to be recorded in the internal memory.
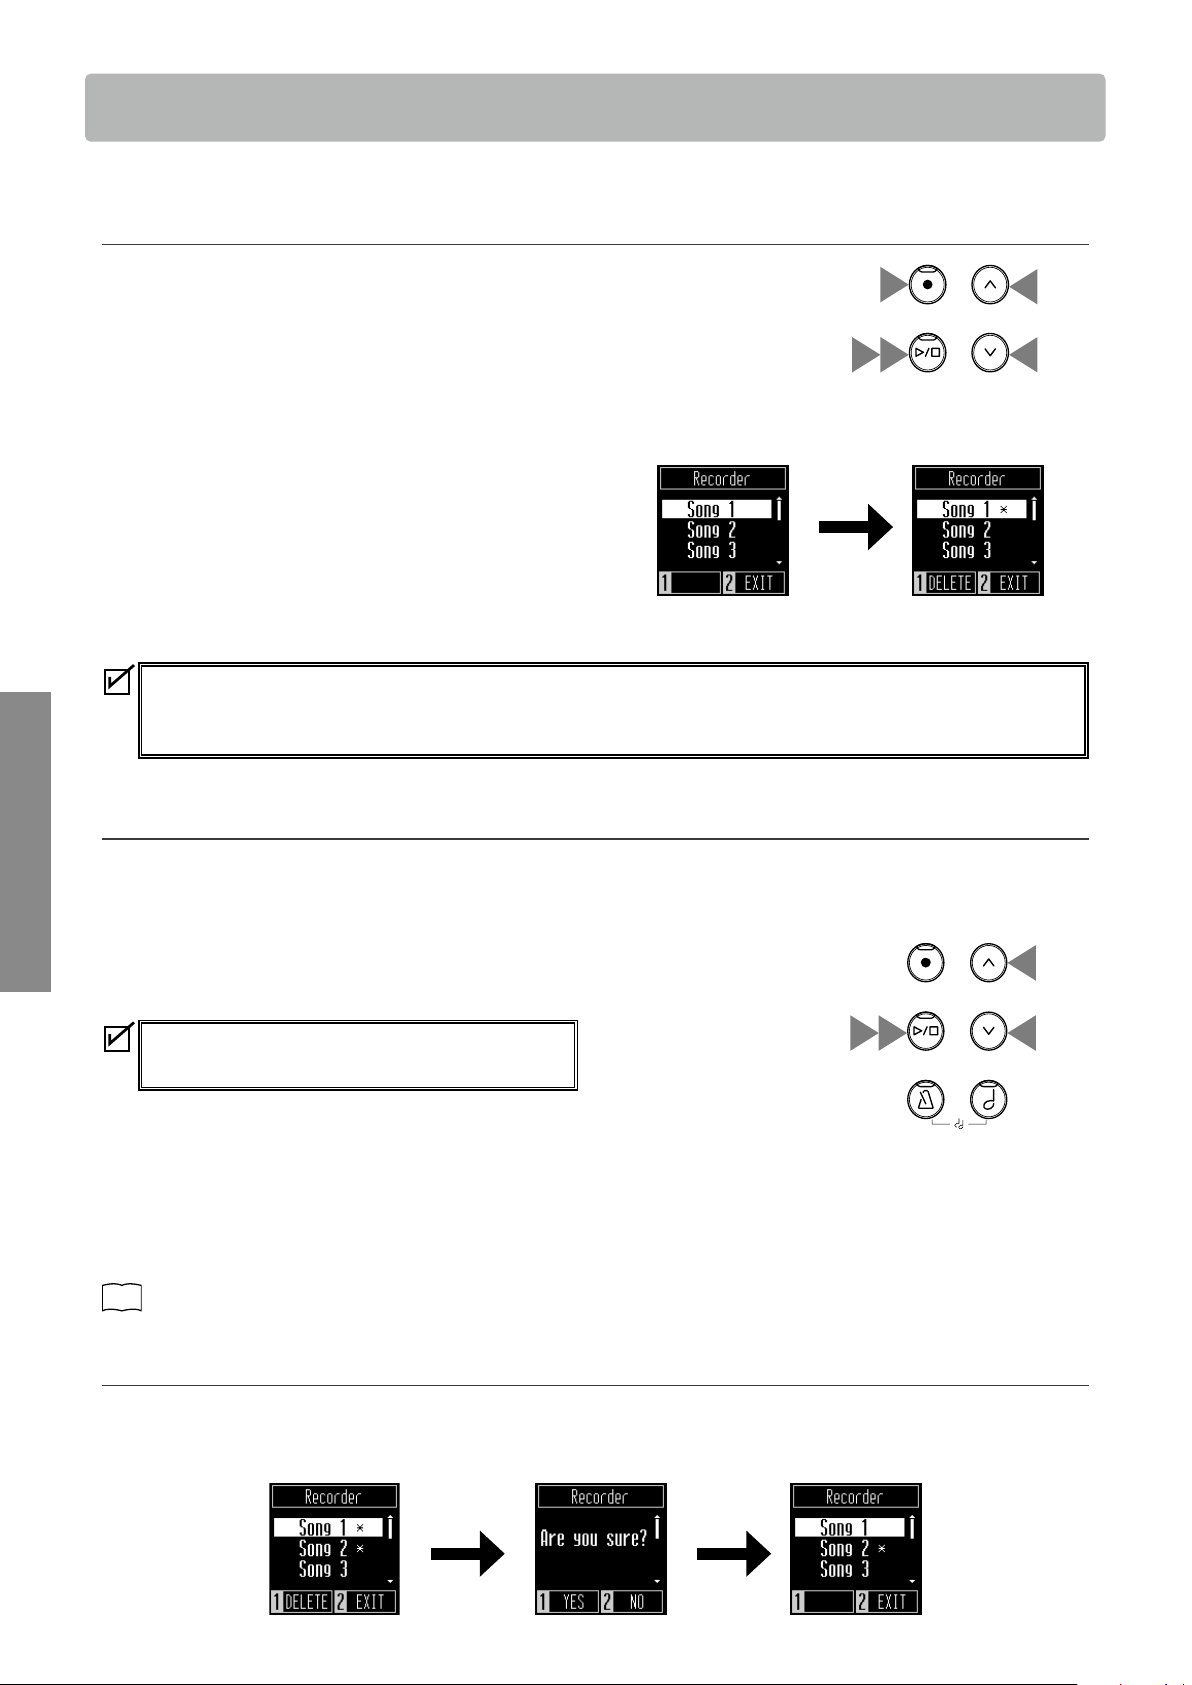
▋ Recording a song
1. Press the [REC] button to enter the Recorder screen.
The LED indicator for the [REC] button will start to flash once
the Recorder screen opens.
2. Press the [UP]/[DOWN] button to select a song.
3. Press the [PLAY/STOP] button to start recording.
Or recording starts automatically when the piano play starts.
When the recording starts, the LED indicators for the [REC]
button and the [PLAY/STOP] button will turn on.
4. Press the [PLAY/STOP] button to finish recording.
When the recording ends, the LED indicators for the [PLAY/
STOP] button and the [REC] button will turn o.
A
symbol will appear beside the recored song.
• The performances can be recorded with the Metronome func-
tion turned on by pressing the [METRONOME] button.
• When a song is recorded to the song memory containing performance data, the existing performance data will be
overwritten by the new performance data.
• The tempo set by the metronome will not be recorded in the recorder data.
▋ Playing back a recorded song
Method 1
On the Home screen, press the [PLAY/STOP] button to start the playback if the selected song has been recorded.
Method 2
1. On the Recorder screen, press the [UP]/[DOWN] button to se-
lect a song to be played back from the list of recorded songs.
When the LED indicator for the [REC] button is flashing,
press the [REC] button.
2. Press the [PLAY/STOP] button to start the playback.
3. Press the [PLAY/STOP] button again to stop the playback.
• The tempo can be changed by pressing the [METRONOME]
button.
The playback speed changes according to the metronome
tempo.
P15
Metronome settings
▋ Deleting a recorded song
1. On the Recorder screen, press the [UP]/[DOWN] button to select the recorded song to be deleted.
2. Press the [1] button while the LED indicator for the [REC] button is turned o.
3. To delete, press [1]. To cancel, press [2]. After the song has been deleted, the
symbol will disappear.
After
deletion
Press [1]
1
2
2
4 3
After
recording
1
1
23
Recorder
17
Basic Operation
Music Menu
Music Menu
Music menu contains three functions consisting of Demo Songs, Lesson, and Concert Magic.
▋ Music menu list
Function Description
Demo Songs This instrument includes demo songs for each sound.
P31
Sound/Demo Songs List
Lesson This instrument has a collection of lesson songs stored in memory.
Concert Magic This instrument includes 40 Concert Magic songs stored in memory. The Concert Magic function
allows players to experience a real piano performance by simply tapping any key with a finger. Con-
cert Magic songs can also be played back as demo songs.
P32
Concert Magic Songs List
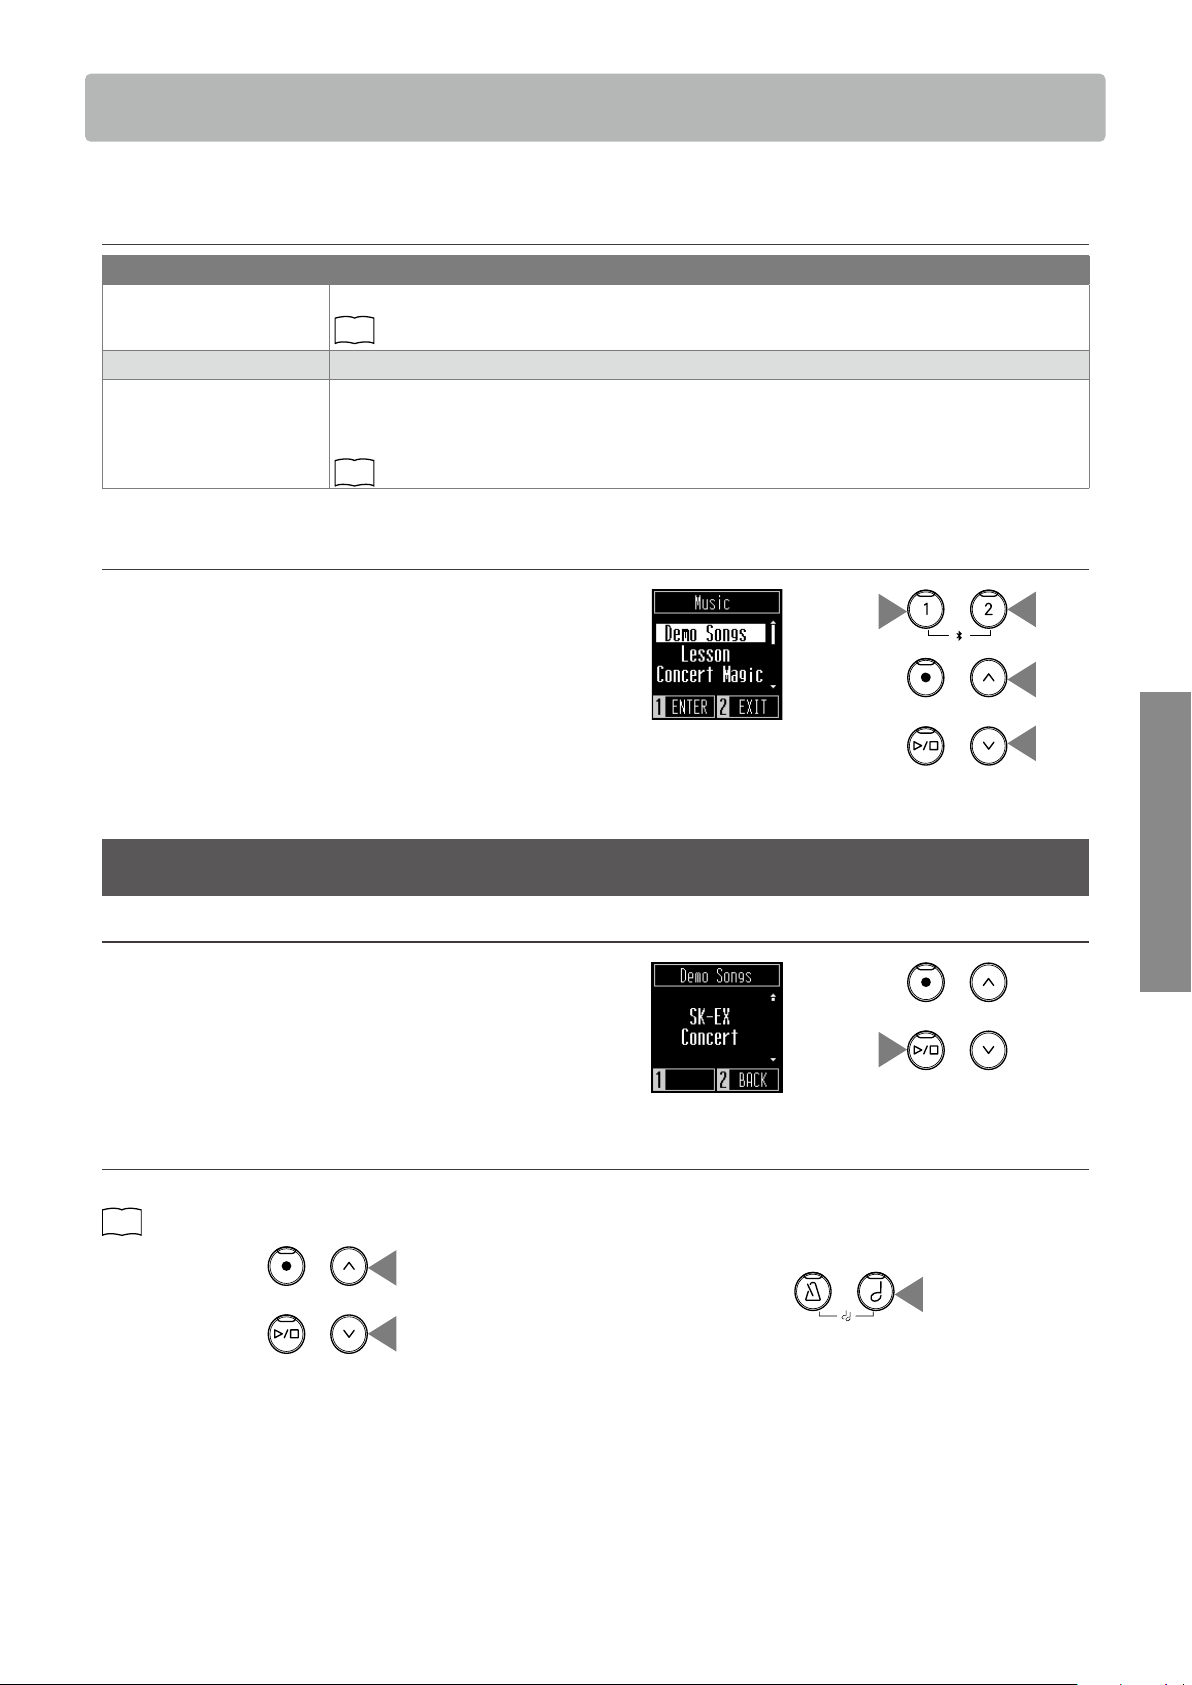
▋ Entering the Music menu mode
1. On the Home screen, press the [2] button to enter the Music
menu.
2. Press the [UP]/[DOWN] button to select a function to use.
3. Press the [1] button.
Demo Songs
▋ Playing/Stopping demo songs
• On the Demo Songs screen, press the [PLAY/STOP] button to
play a demo song.
• Press the [PLAY/STOP] button again to stop the song.
▋ Changing demo songs
Changing sounds by pressing the [UP]/[DOWN] or [SOUND SELECT] buttons will also change the demo song at the same time.
P14
Sounds
or
1
2
2
3
18
Music Menu
Basic Operation
Lesson
▋ Lesson song books
US, Canada, Australasia Rest of the World
Alfred’s Basic Piano Library Lesson Book Level 1A Beyer 106 (Vorschule im Klavierspiel, Opus 101)
Alfred’s Basic Piano Library Lesson Book Level 1B Burgmüller 25 (25 Etudes Faciles, Opus 100)
Beyer 106 (Vorschule im Klavierspiel, Opus 101) Czerny 30 (Etudes de Mécanisme, Opus 849)
Burgmüller 25 (25 Etudes Faciles, Opus 100) Chopin Walzer (Chopin waltzes series 1-19)
Czerny 30 (Etudes de Mécanisme, Opus 849) Alfred’s Basic Piano Library Lesson Book Level 1A
Chopin Walzer (Chopin waltzes series 1-19) Alfred’s Basic Piano Library Lesson Book Level 1B
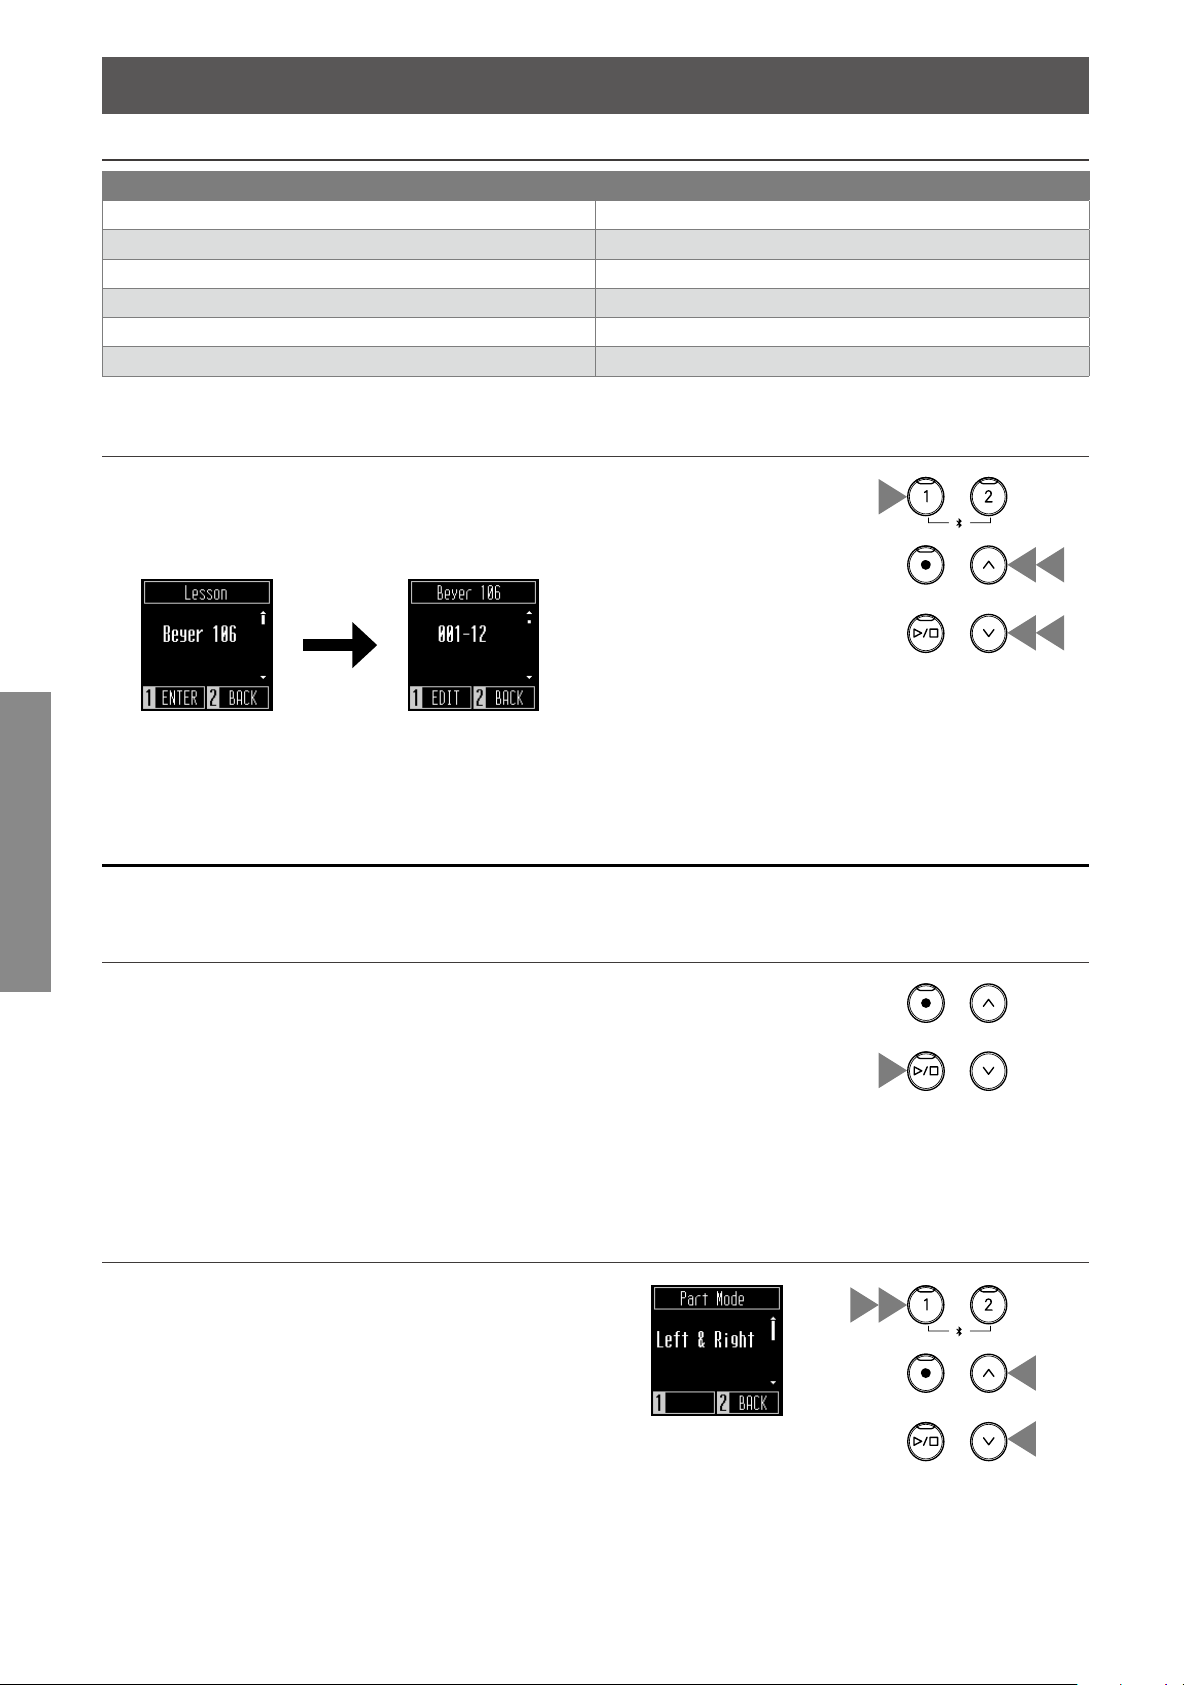
▋ Selecting a lesson song
1. On the Lesson screen, press the [UP]/[DOWN] button to select
a song book.
2. Press the [1] button to enter the song book selection mode.
3. Press the [UP]/[DOWN] button to select a song book.
Select a song book Select a song
Practicing
The Lesson function allows players to practice the piano in the three methods listed below.
▋ Playing a lesson song and learning the songs
• With a playback song selected, pressing the [PLAY/STOP] but-
ton will turn on the LED indicator for the [PLAY/STOP] button.
The lesson song playback starts after a one-bar count-in of the
metronome.
The sound is set to “SK-EX Concert Grand Piano | Concert”.
• Press the [PLAY/STOP] button again to stop the playback of the
lesson song. The LED indicator for the [PLAY/STOP] button will
turn o.
▋ Practicing the right-hand (left-hand) parts while playing back the left-hand
(right-hand) parts of a lesson song
1. On the Lesson screen, press the [1] button to select a song.
2. Press the [1] button to enter the Part Mode screen.
3. Press the [UP]/[DOWN] button to select the parts to be played
back from “Left & Right,” “Left,” or “Right”.
1
1
2
3
3
12
3
3
Music Menu
19
Basic Operation
▋ Practicing by changing the tempo
1. While a song is playing, press the [METRONOME] button.
The instrument produces beats corresponding to the song.
2. Press the [UP]/[DOWN] button to set the tempo.
• Pressing the [UP]/[DOWN] button simultaneously will restore
the default tempo.
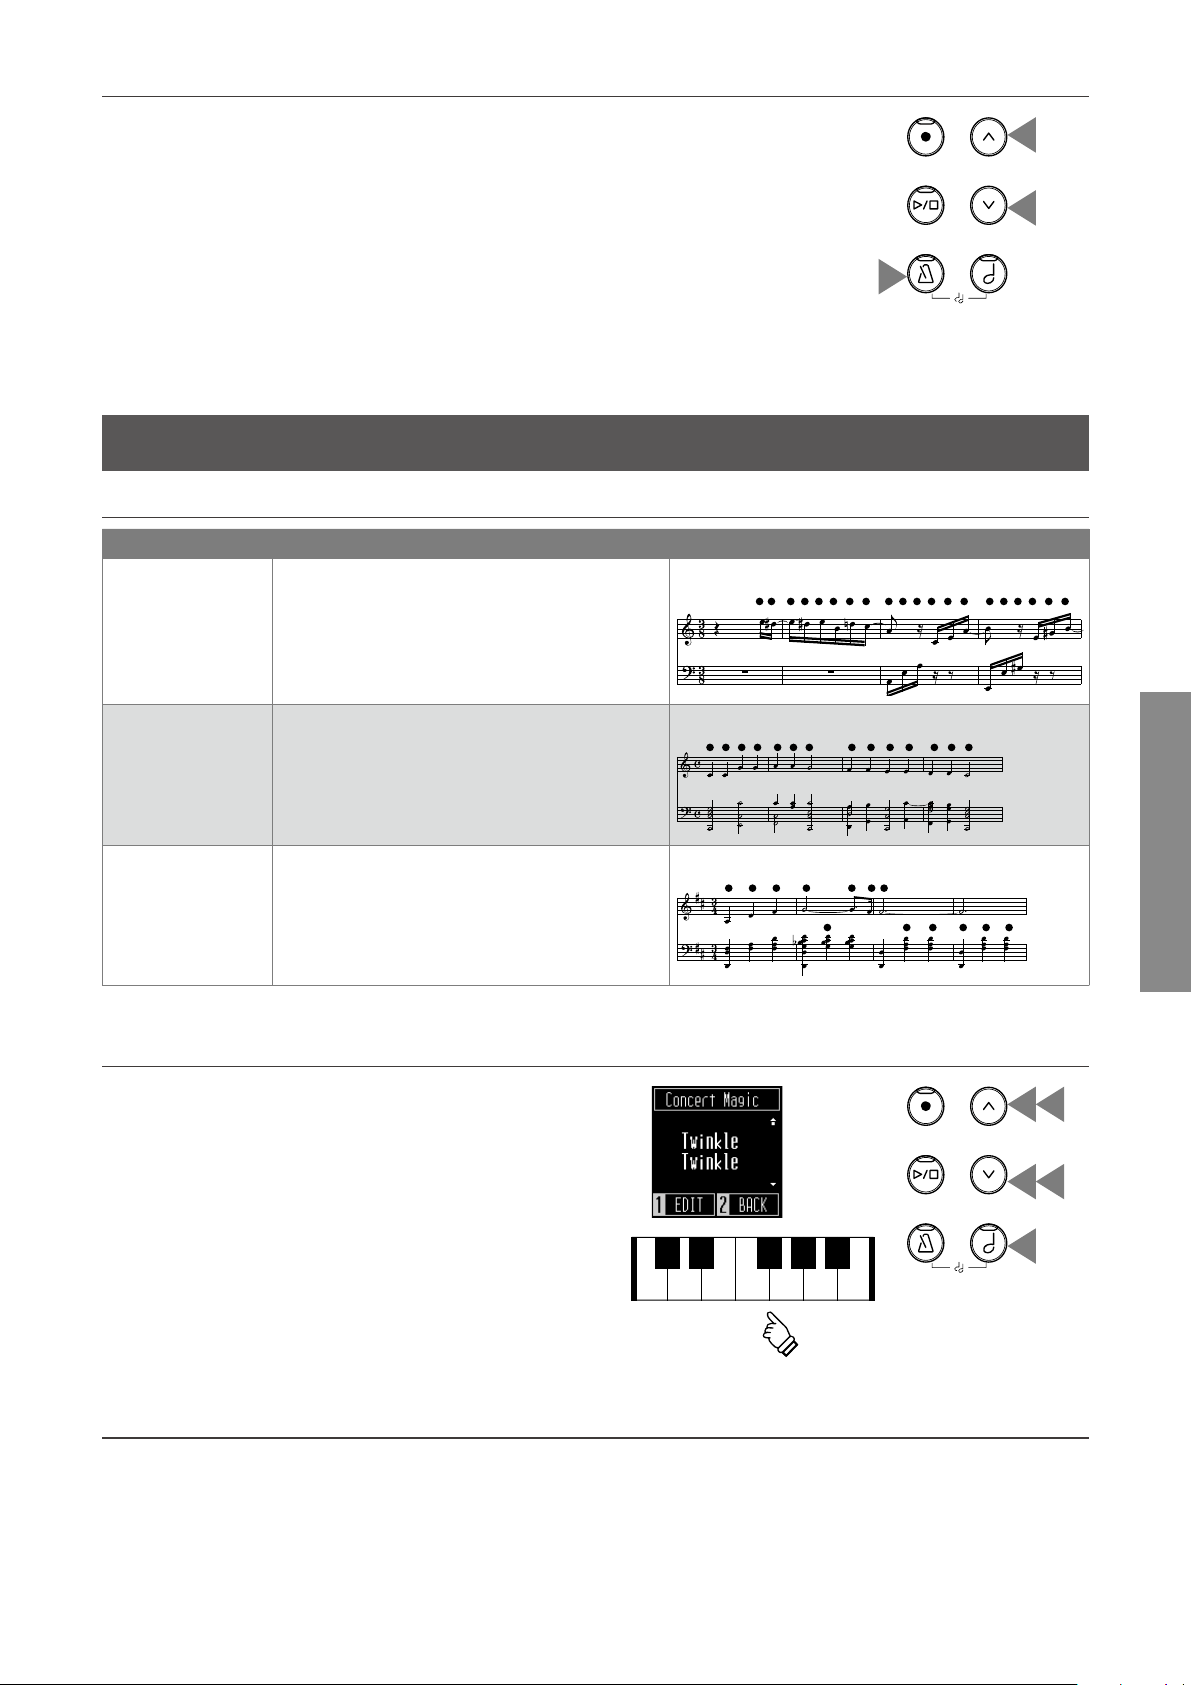
Concert Magic
▋ Arrangement types
Type Description Example
Easy Beat (EB) Tap out a constant, steady beat on any key of the
keyboard.
‘Für Elise’
Melody Play (MP) Tap out the rhythm of the melody on any key of
the keyboard.
‘Twinkle, Twinkle, Little Star’
Skillful (SK) tap out the rhythm of both the melody and the
accompaniment notes on any key of the keyboard.
‘Waltz of the Flowers’
▋ Playing a Concert Magic song
1. On the Concert Magic screen, press the [UP]/[DOWN] button
to select a song.
2. On the Concert Magic screen, press the [SOUND SELECT] but-
ton.
3. Press the [UP]/[DOWN] button to select a sound.
4. Keep playing the song by pressing any key.
• The song tempo will be determined by the interval of pressing
the keys.
• The dynamics of a song can be adjusted by the strength of
keystrokes.
▋ Listening to a Concert Magic song
On the Concert Magic screen, press the [PLAY/STOP] button to play back a Concert Magic song.
Press the [PLAY/STOP] button again to stop the song.
1
2
2
4
1
1
2
3
3
20
Music Menu
Basic Operation
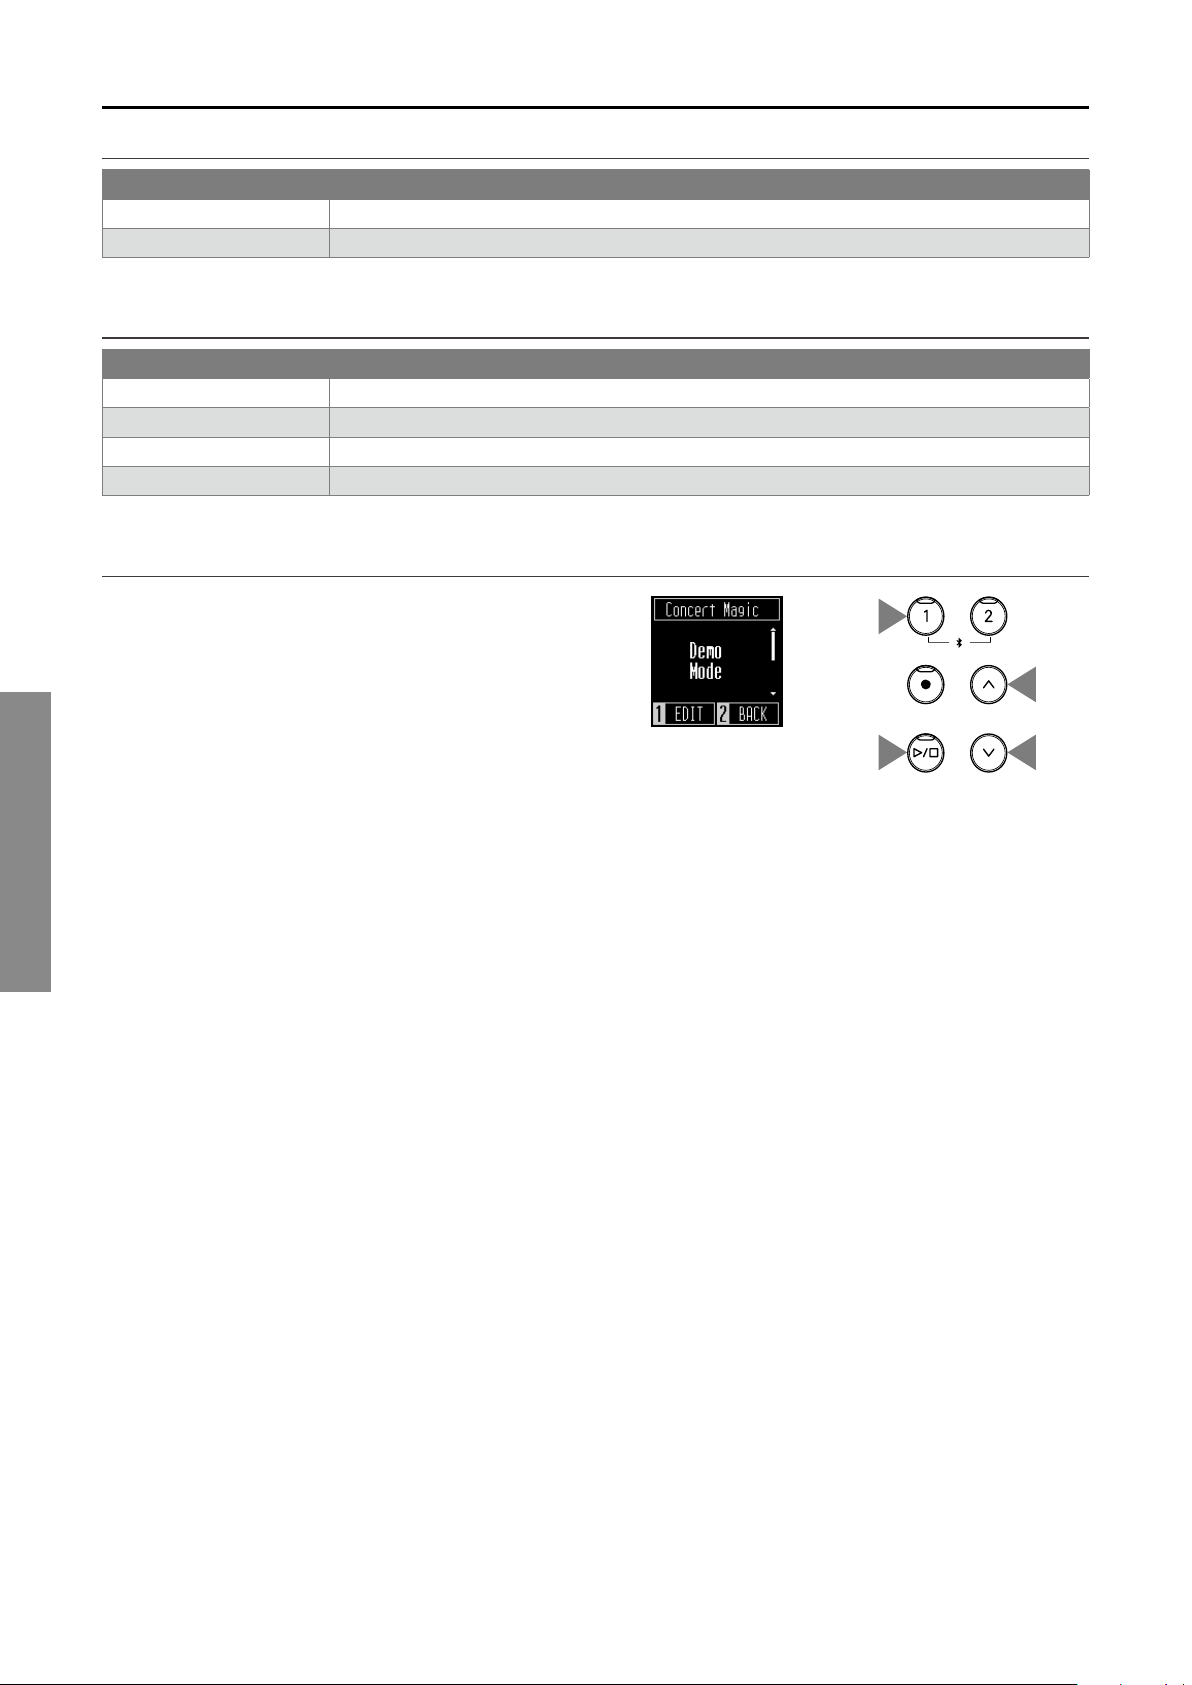
Setting a Concert Magic song
▋ Playing Mode list
Item Description
Normal Concert Magic songs will be performed according to their arrangement type.
Steady Beat All Concert Magic songs will be performed by tapping the key with a constant beat.
▋ Demo Mode list
Item Playback method
All Play Plays from the first song to the 50th song repeatedly in numerical order.
Repeat Play Plays songs in the group where the selected song belongs repeatedly in numerical order.
Category Play Plays the selected songs repeatedly.
Random Play Plays songs that are selected randomly. The playback starts with ‘Twinkle, Twinkle, Little Star.’
▋ Setting a Concert Magic song
1. On the Concert Magic screen, press the [1] button.
2. Press the [UP]/[DOWN] button to select the setting.
3. Press the [1] button.
4. Press the [UP]/[DOWN] button to select the type.
5. Press the [1] button.
2
2
3
1
21
Adjustments & Settings
Settings Menu
The following settings can be changed in the Settings menu.
▋ List of default settings in Settings menu
Function Default setting Page
Reverb (Depends on the sound) P22
Transpose 0 P22
Tone Control Flat P22
Low Volume Balance 3 P23
Dual 1: SK-EX Concert Grand Piano | Concert
2: Slow Strings
P23
4 Hands - P24
Tuning 440.0Hz P24
Touch Curve Normal P24
Virtual Technician Smart Mode Normal P25
Damper Noise 5 P25
Key Volume O P26
Startup Settings - P26
Spatial Headphone Sound Normal P27
Phones Type Normal P27
Bluetooth On P28
Bluetooth Audio Volume 0 P28
MIDI Settings For information regarding MIDI functions and settings,
please download the supplementary PDF manual from
the Kawai Global website:
https://www.kawai-global.com/support/manual
Auto Display O 5min. P29
Auto Power O - P29
Factory Reset - P29
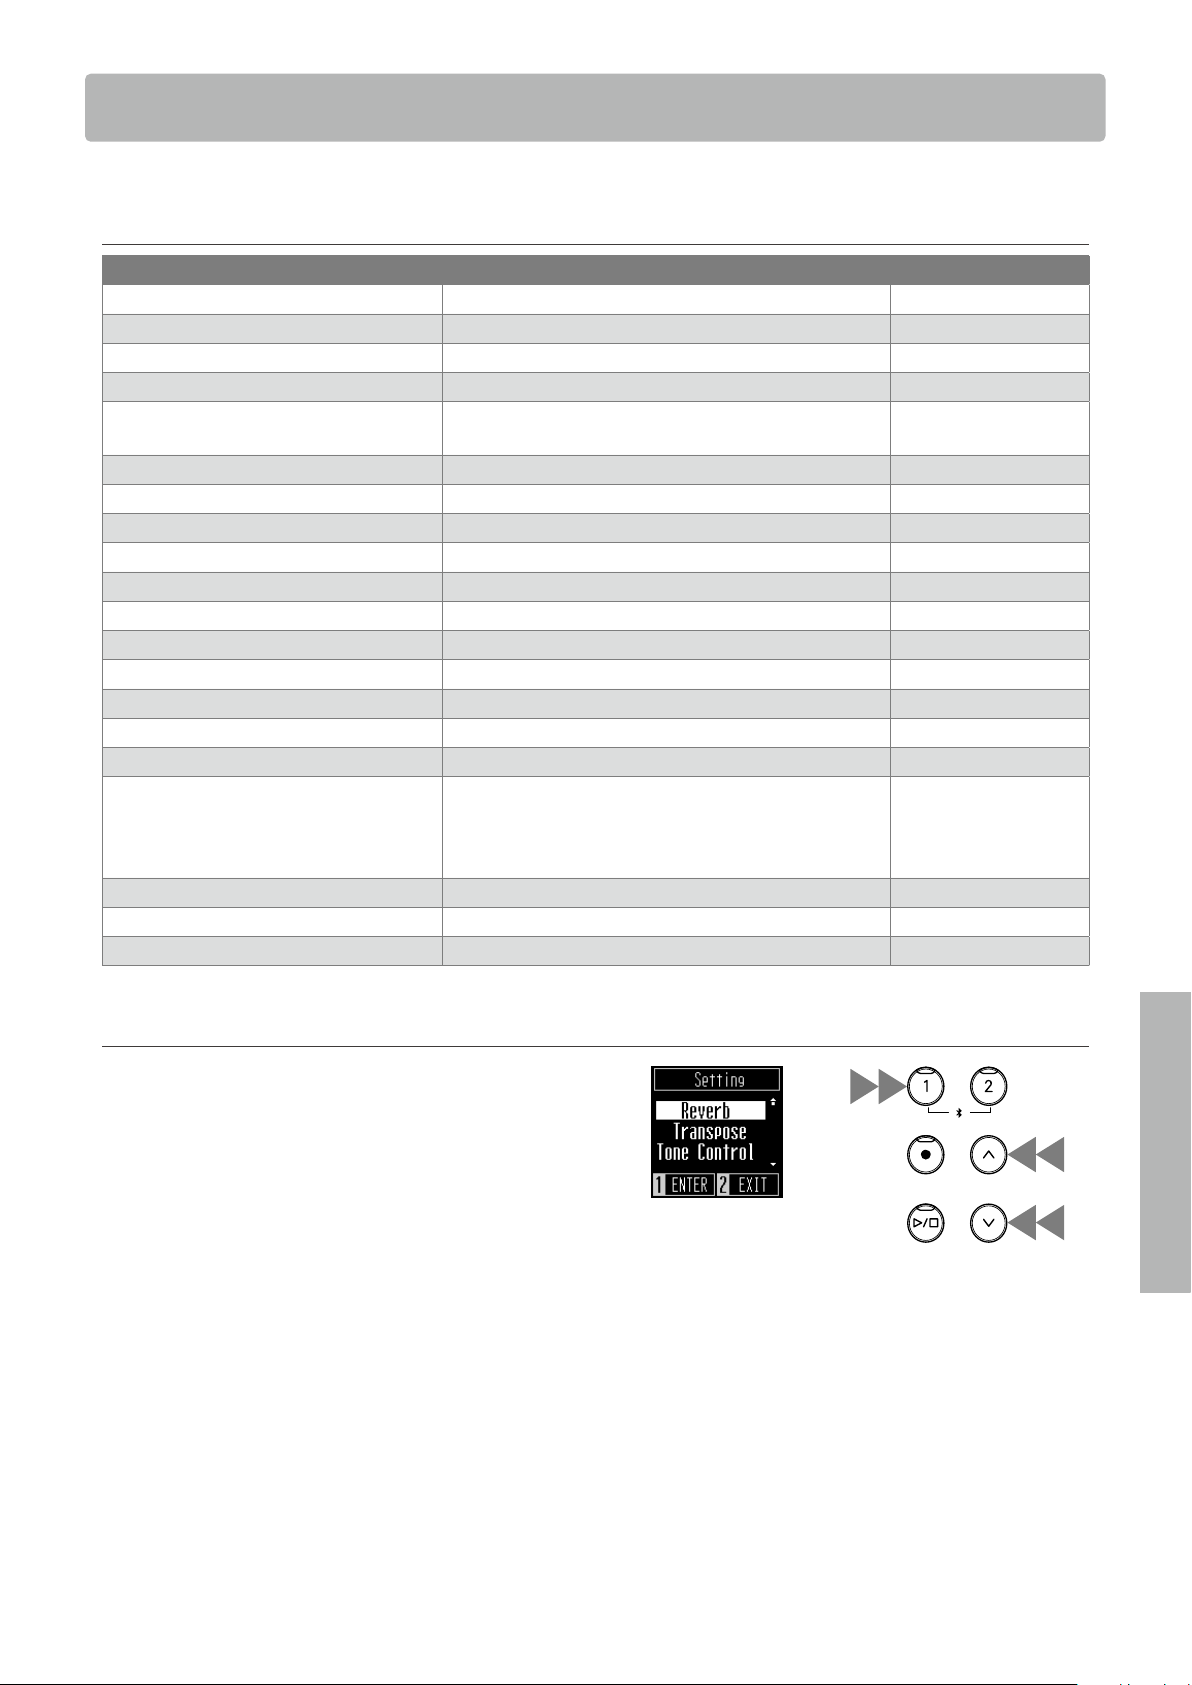
▋ Entering the Settings menu mode
1. On the Home screen, press the [1] button to enter the Set-
tings menu.
2. Press the [UP]/[DOWN] button to select a setting.
3. Press the [1] button.
4. Press the [UP]/[DOWN] button to set the value or type.
• Pressing the [UP]/[DOWN] button simultaneously will restore
the default setting.
1
2
2
3
4
4
Settings Menu
22
Settings Menu
Adjustments & Settings
Reverb
The Reverb setting adds reverberation to the sound.
▋ Reverb type
Type Eect
O Disables the reverb eect.
Room Simulates the reverberation of a performance in a small rehearsal room.
Lounge Simulates the reverberation of a performance in a piano lounge.
Small Hall Simulates the reverberation of a performance in a small hall.
Concert Hall Simulates the reverberation of a performance in a large concert hall for classical music.
Live Hall Simulates the reverberation of a performance in a large hall for live music performance.
Cathedral Simulates the reverberation of a performance in a large cathedral.
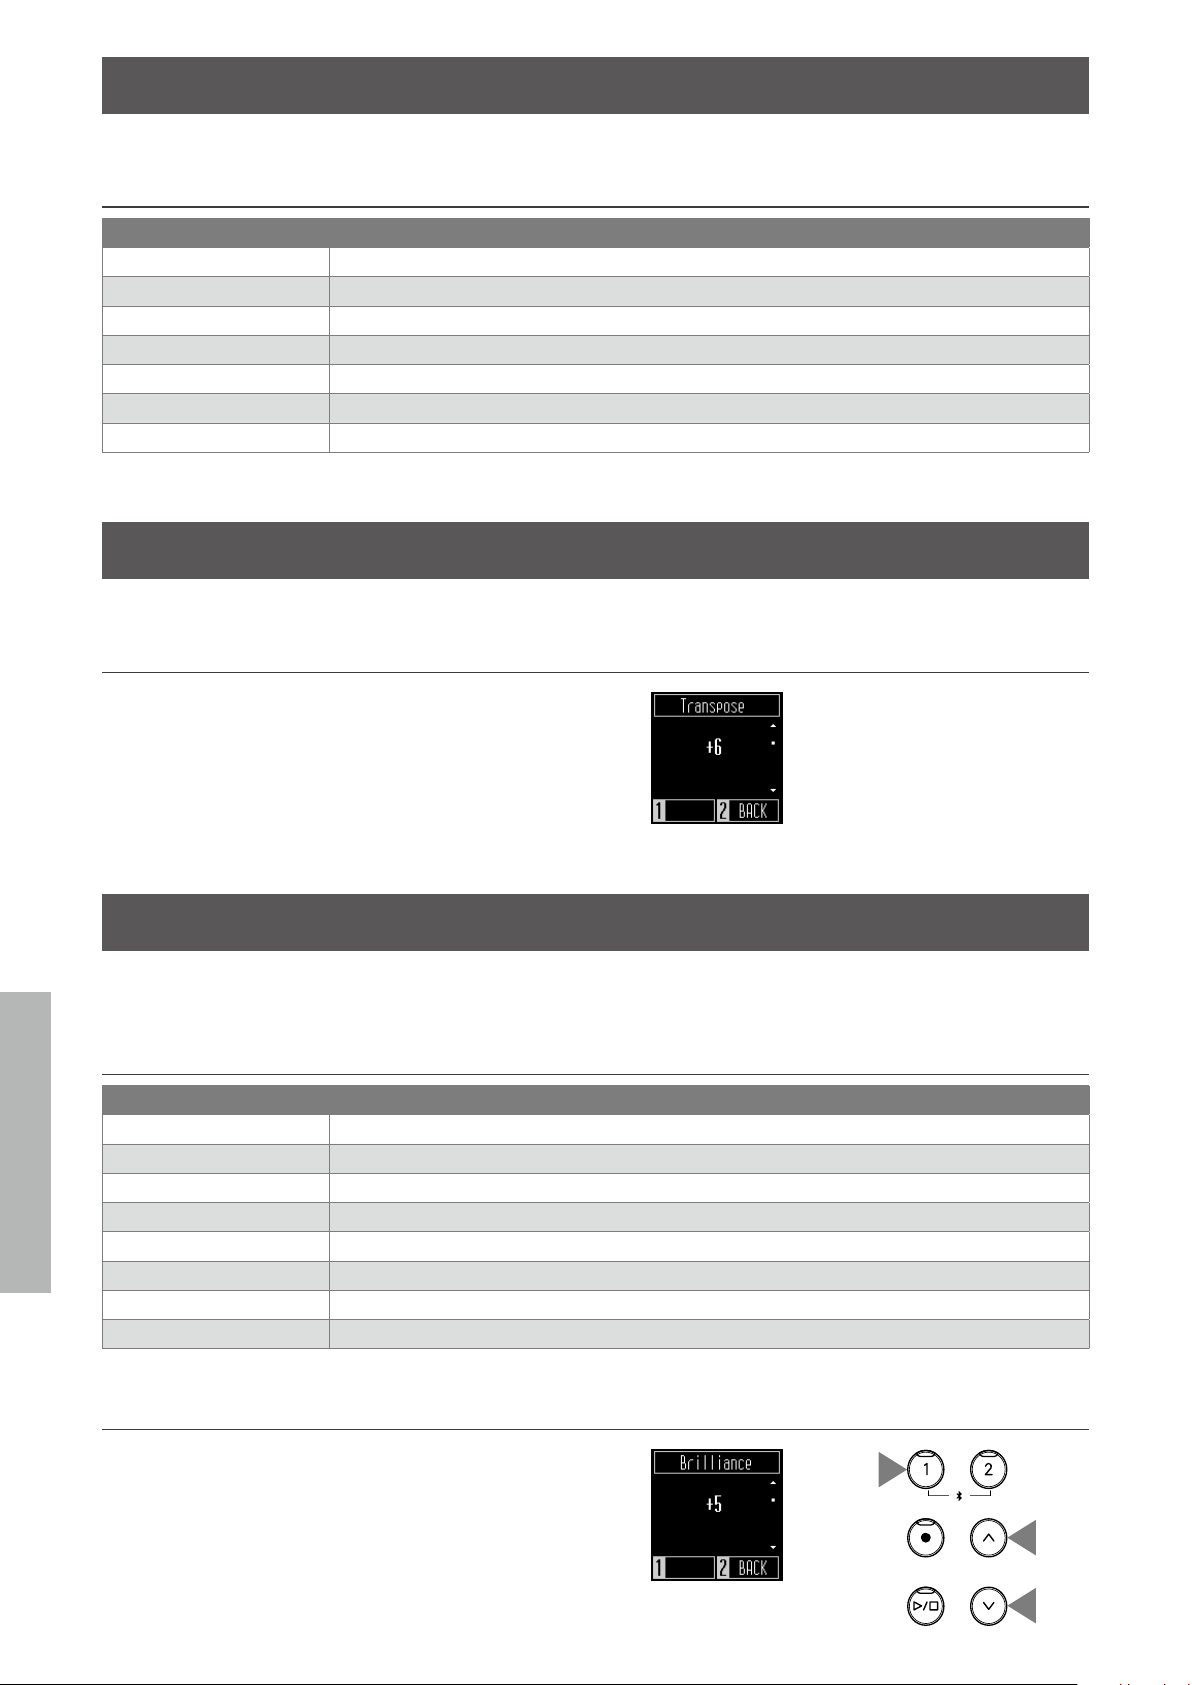
Transpose
The Transpose setting allows players to transpose without changing the keyboard key currently used.
▋ Transpose setting
The value can be specified in the range from -12 to +12 in semi-
tone steps.
Tone Control
The Tone Control setting allows players to optimise the sound quality in order to achieve the best sound
quality within the area that the instrument is located.
▋ Tone Control types
Type Eect
Flat Tone control adjustment is not applied.
Brilliance Allows players to adjust the brightness of the sound.
Bass Boost Emphasises low-range frequencies, creating a deeper sound.
Bass Cut Reduces low-range frequencies, creating a clearer sound.
Mid Boost Emphasises mid-range frequencies, creating a harder sound.
Loudness Emphasises frequencies to retain the instrument’s sound character even at low volume levels.
Bright Emphasises high-range frequencies, creating a brighter sound.
Mellow Reduces high-range frequencies, creating a softer sound.
▋ Adjusting the Brilliance value
In the Brilliance setting, the brightness value can be adjusted in
the range from -10 to +10.
1. On the Tone Control screen, select “Brilliance” and press the
[1] button.
2. Press the [UP]/[DOWN] button to adjust the value.
Increasing the value will make the sound brighter.
1
2
2
23
Settings Menu
Adjustments & Settings
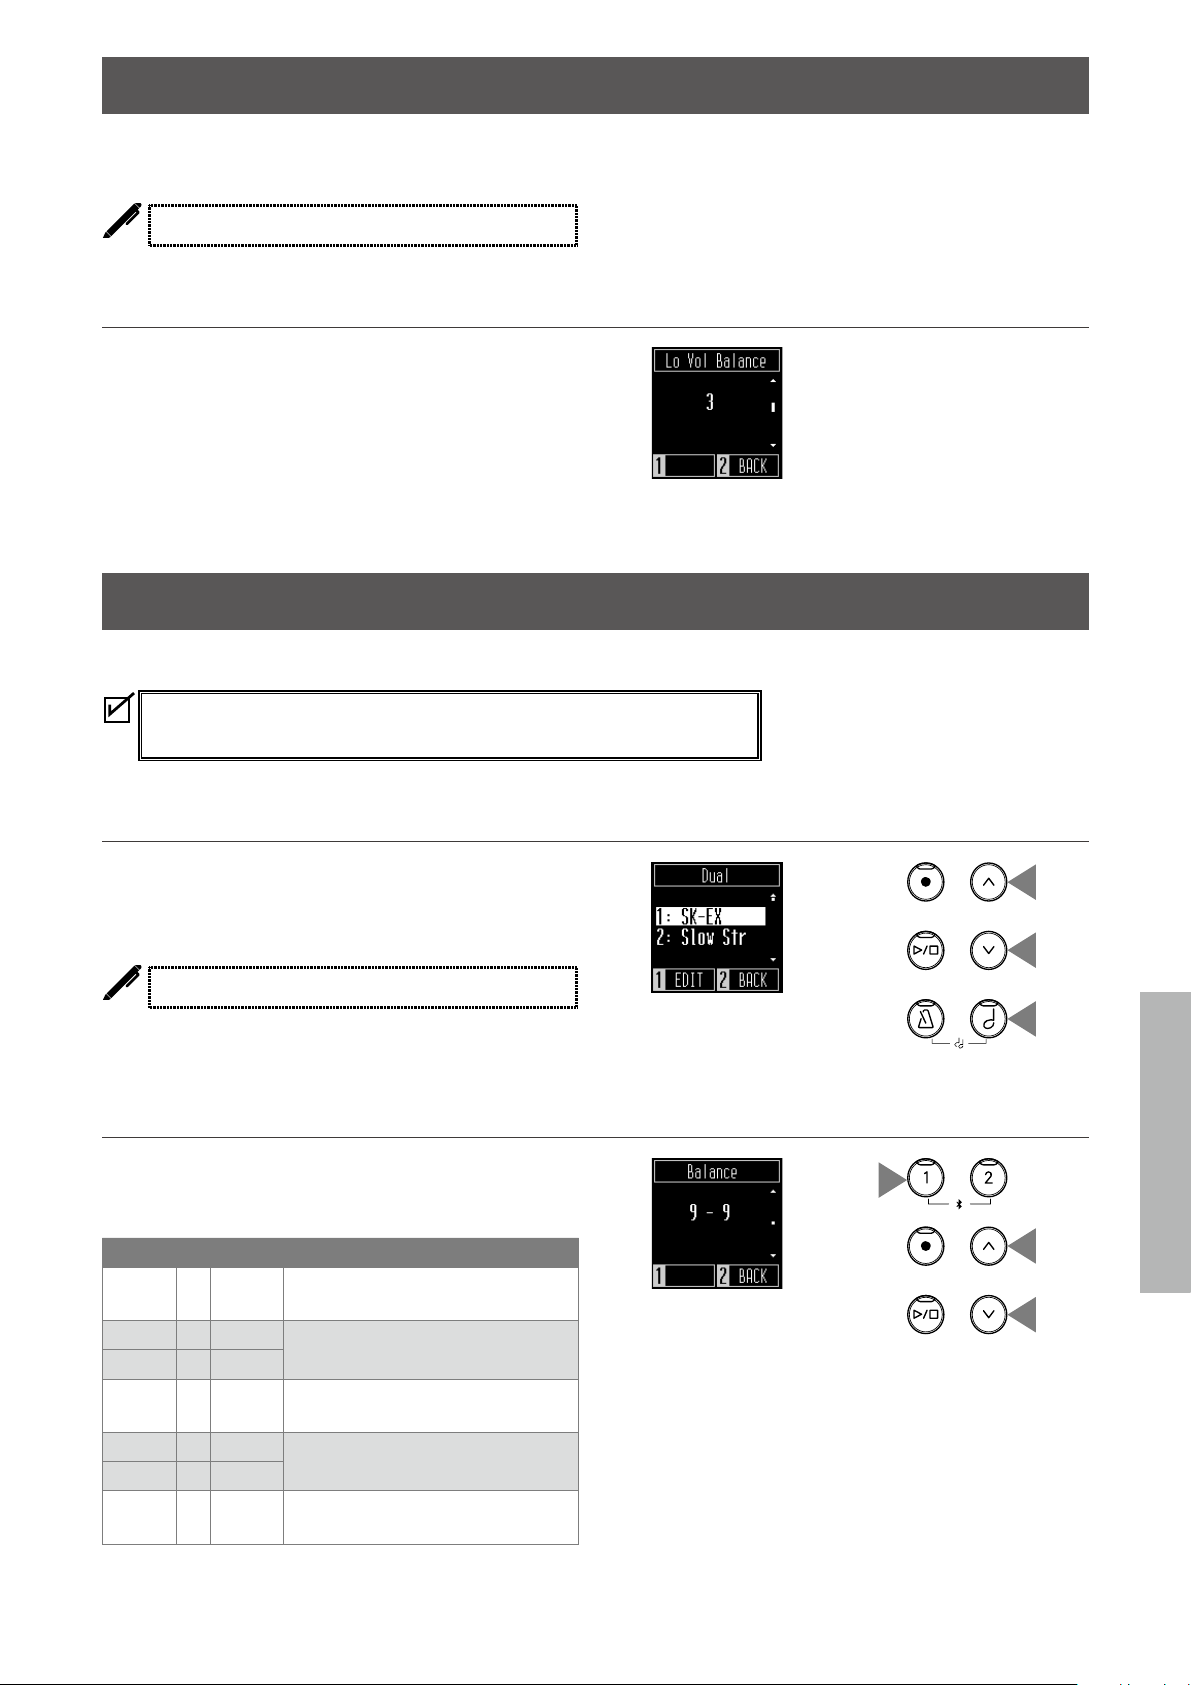
Low Volume Balance
The Low Volume Balance setting enhances pianissimo touches, allowing the piano to be played more
naturally when the [MASTER VOLUME] slider is set to a low level.
The display shows “Lo Vol Balance”.
▋ Low Volume Balance setting
The value can be specified in the range from 1 to 5 or set to o.
Increasing the value will enhance the sound of pianissimo
touches while the volume is reduced.
Dual
The Dual function allows two sounds to be layered together.
Press the [SOUND SELECT] and [METRONOME] buttons simultaneously to enter
this menu.
▋ Selecting a sound for each part
1. On the Dual screen, press the [SOUND SELECT] button and
select the part to change its sound.
2. Press the [UP]/[DOWN] button to change the sound for the
selected part.
The display shows shortened sound names.
▋ Adjusting the volume balance of Dual mode
1. On the Dual screen, press the [1] button to enter the Balance
screen.
2. Press the [UP]/[DOWN] button to adjust the value.
Part 2 Part 1 Description
9 – 1
Balance setting to minimise the vol-
ume of Part 1
�
–
�
�
9 – 8
9 – 9
Balance setting to keep the volume
of Part 1 and Part 2 at the same level
8 – 9
�
�
–
�
1 – 9
Balance setting to minimise the vol-
ume of Part 2
1
2
2
1
2
2
24
Settings Menu
Adjustments & Settings
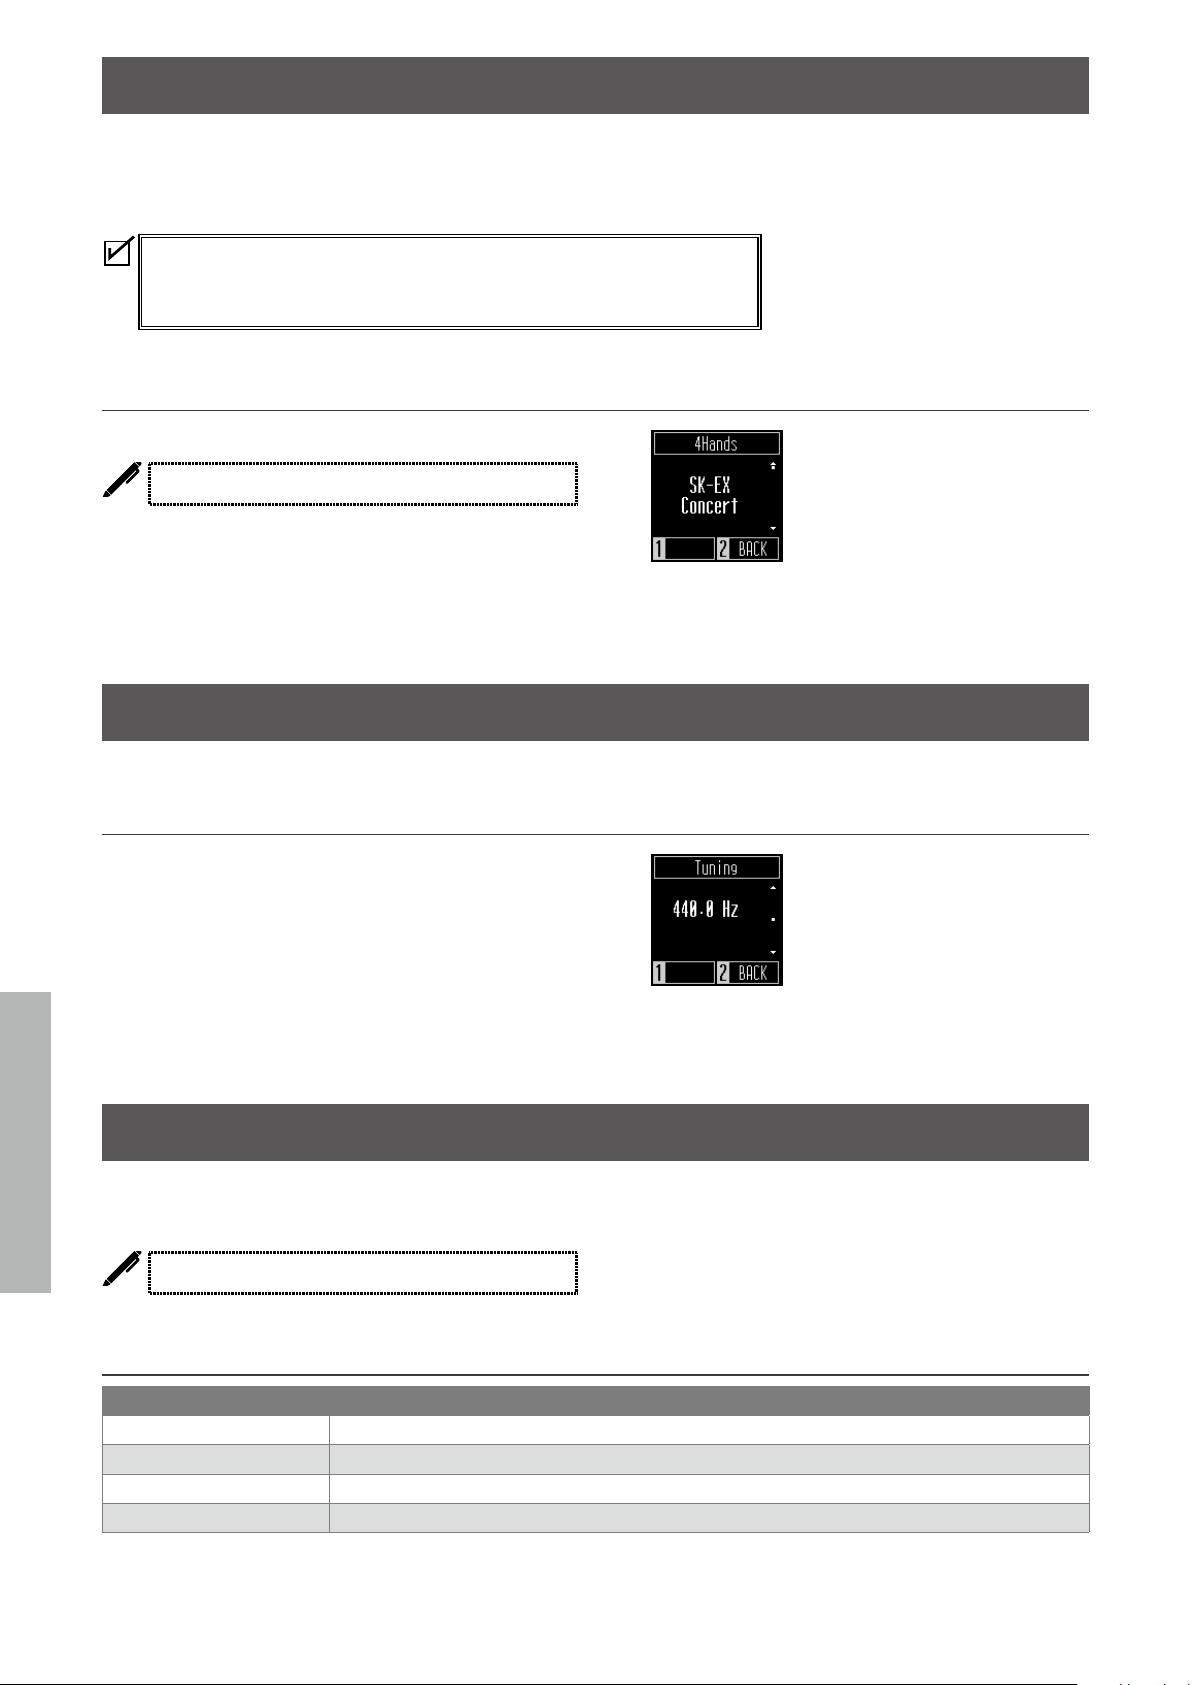
4 Hands
The Four Hands function divides the keyboard into left and right sections, each of which can be played
in the same key range. At this time, the damper pedal (right) acts as a damper pedal for the right section,
and the soft pedal (left) acts as a damper pedal for the left section.
• In the Four Hands Mode, the Split Point dividing the left and right sections is set
to the key F4 (Middle F) and cannot be changed.
• The sostenute pedal eect applies to the sound from the right section only.
▋ Selecting a sound
The same sound setting applies to both sections.
The display shows shortened sound names.
Tuning
The Tuning function allows players to adjust the pitch of the instrument.
▋ Adjusting the pitch
The pitch can be adjusted in the range from 427.0 to 453.0 Hz in
the unit of 0.5 Hz.
Touch Curve
The Touch Curve function allows players to change the relationship between the volume and the strength
of keystrokes.
The display shows “Touch”.
▋ Touch Curve types
Type Eect
Light Produces a lounger volume even with a soft touch.
Normal Reproduces the standard touch sensitivity of an acoustic piano.
Heavy Produces a softer sound consistently.
O Produces the sound at a constant volume regardless of the strength of keystrokes.
25
Settings Menu
Adjustments & Settings
Virtual Technician Smart Mode
The Virtual Technician Smart Mode function allows players to make various adjustments on the piano
with a single touch of a button.
The display shows “Smart Mode”.
▋ Smart Mode settings
Name Description
Normal Default setting for Smart Mode.
Noiseless Setting to minimise additional damper and string resonance, and mechanism noises
when keys are released.
Deep Resonance Setting to emphasise damper pedal resonance and string resonance.
Light Resonance Setting to reduce damper pedal resonance and string resonance.
Soft Setting to produce a softer tone by softening the hammers and increasing the touch
weight of the keyboard, which is suitable for slow, quiet pieces.
Brilliant Setting to produce a brighter tone including damper resonance by hardening the
hammers, which is suitable for cheerful and elegant pieces or songs requiring good
resonance.
Clean Setting to reduce resonance by hardening the hammers and lightening the touch
of keys.
Full Setting to emphasise noises and resonance by increasing the sensitivity of the ham-
mers, which is suitable for dynamic and powerful pieces.
Dark Setting to add unique darkness to the tone by hardening the hammers and increas-
ing the touch weight of keys.
Rich Setting to emphasise the resonance by increasing the sensitivity of the hammers
and lightening the touch of keys.
Historical Setting to replicate the tone of a piano used during the Classical and Romantic eras.
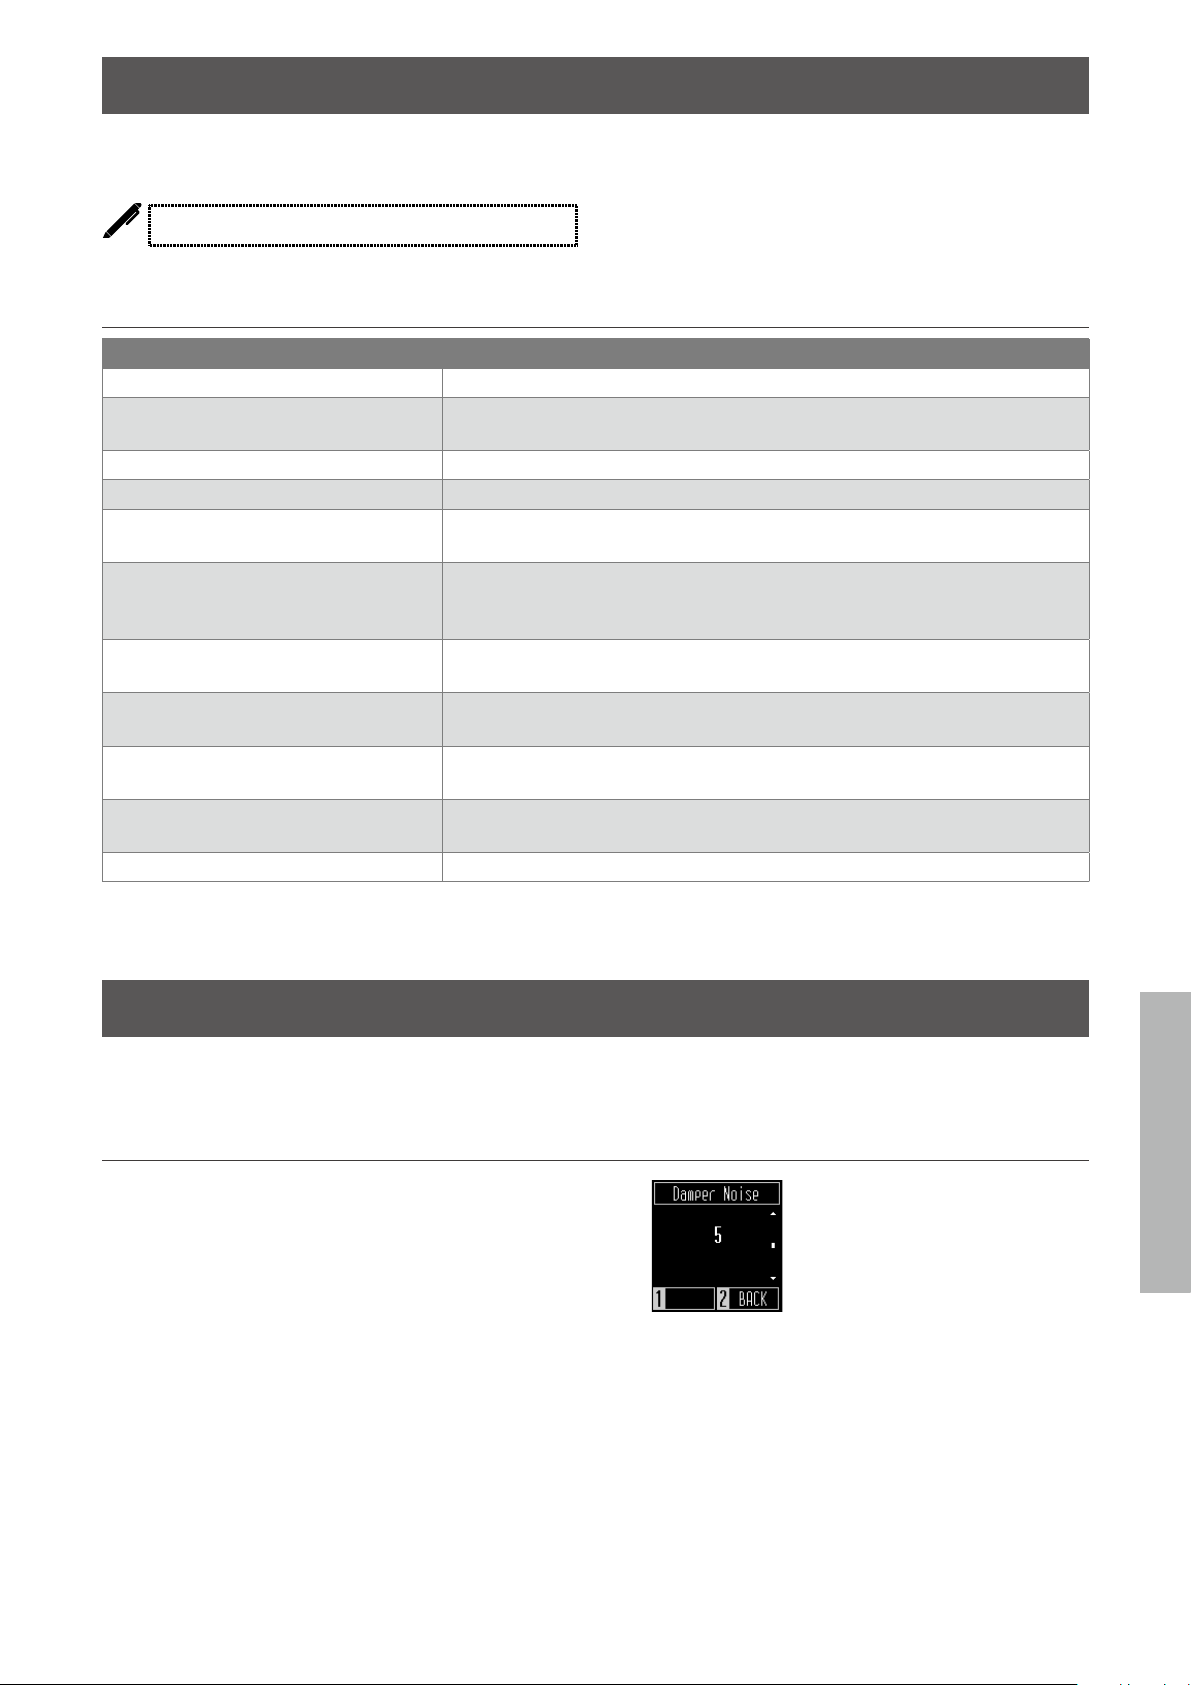
Damper Noise
The damper noise function reproduces the noise generated when the damper pedal is depressed and
released or when the damper head touches or moves away from the strings.
▋ Adjusting the Damper Noise
The value can be adjusted in the range from 0 to 10.
Increasing the value will make the noise volume greater.
26
Settings Menu
Adjustments & Settings
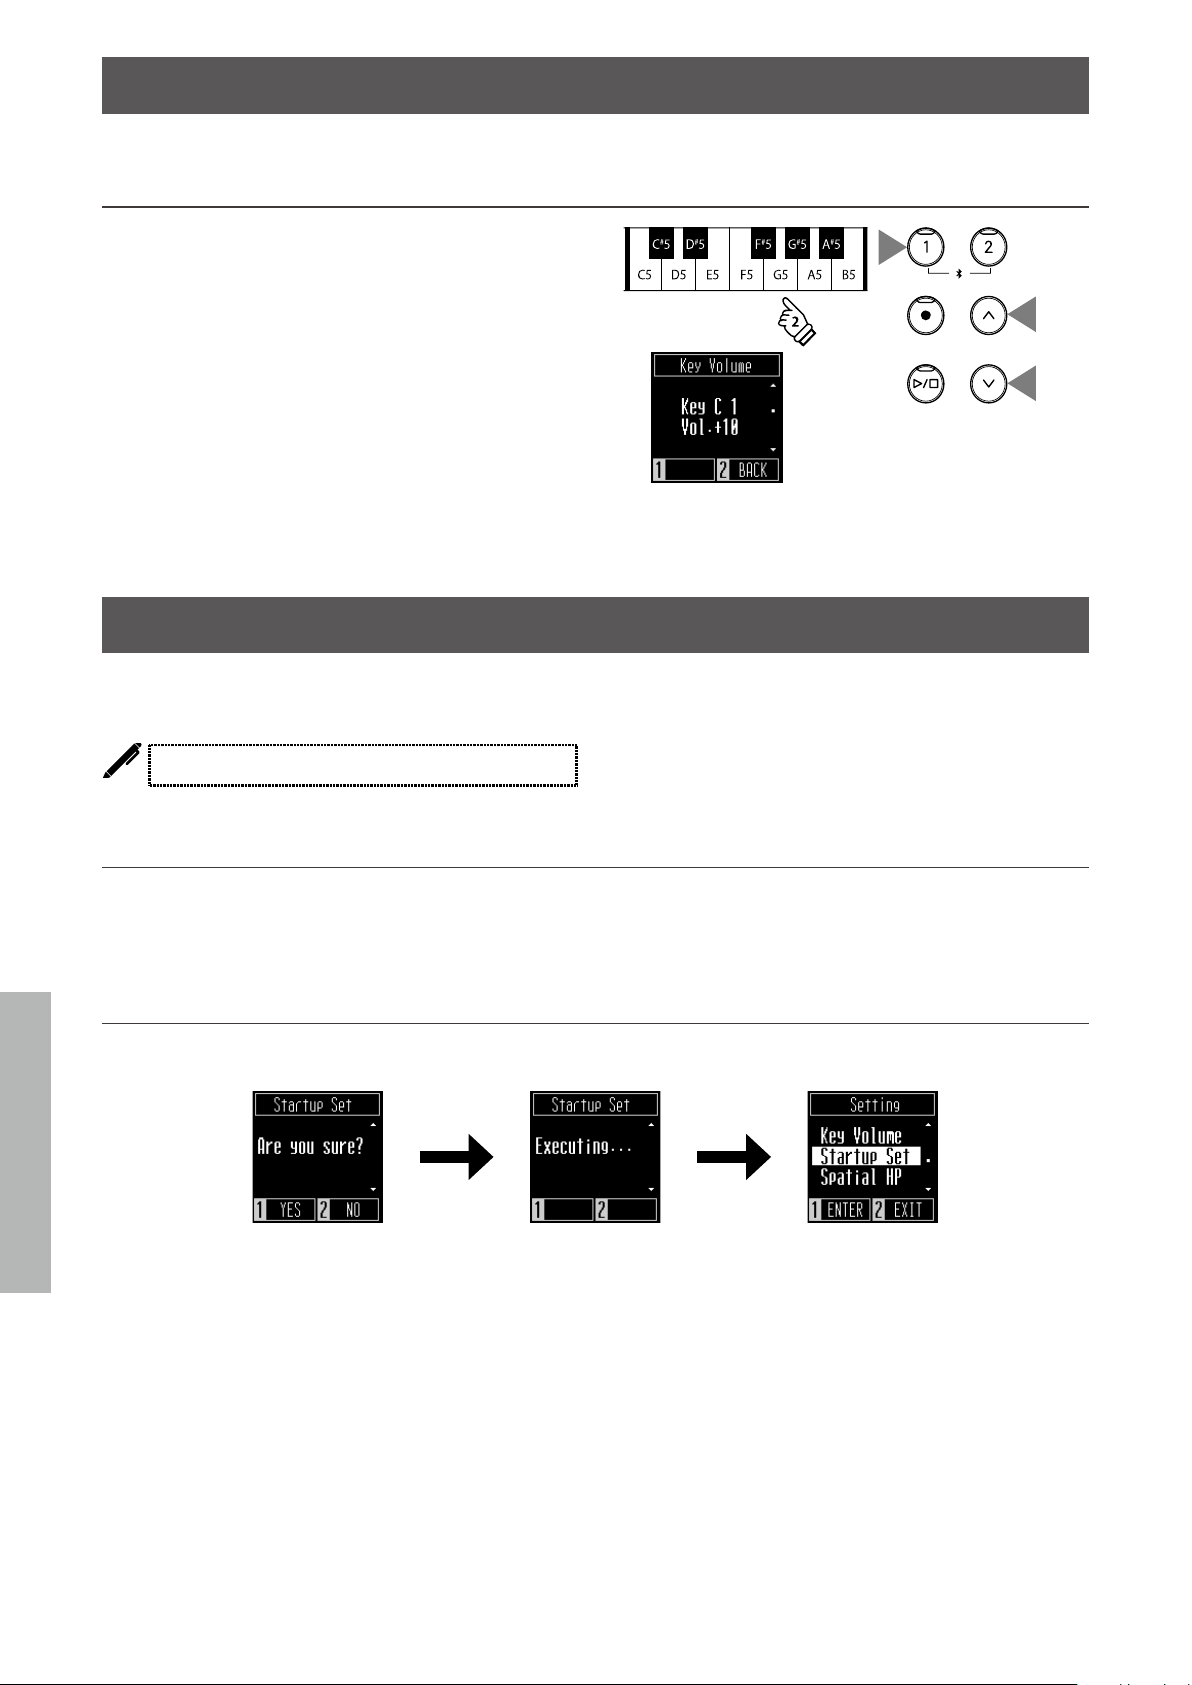
Key Volume
The Key Volume function allows players to adjust the volume of each of the 88 keys.
▋ Adjusting the Key Volume
1. On the Key Volume screen, press the [1] button.
2. Press a key to adjust its volume.
3. Press the [UP]/[DOWN] button to adjust the volume.
• The adjusted volume value will be saved automatically by exit-
ing the Key Volume function.
• Even after cycling the power, the adjusted Key Volume setting
will be re-applied automatically.
Startup Settings
The Startup Settings function allows preferred settings to be stored in memory, and automatically re-
called as the default settings every time the instrument is turned on.
The display shows “Startup Set”.
▋ Settings stored in Startup Settings
• Settings made in the Settings menu
• Metronome tempo, time signature, and volume
• Selected sounds
▋ Executing the Startup Settings
On the Startup Settings screen, press the [1] button to store the current settings to memory.
When the Startup Settings have been stored, the display will return to the Settings menu.
1
3
3
27
Settings Menu
Adjustments & Settings
Spatial Headphone Sound
Special Headphone Sound is a feature that enhances the depth and realism of the acoustic piano sound
through earphones or headphones. This feature also reduces auditory discomfort and fatigue when using
headphones or earphones for extended periods of time.
The display shows “Spatial HP”.
▋ Spatial Headphone Sound types
Type Eect
O Disables the Spatial Headphone Sound feature.
Forward Provides front focuses, somewhat narrow spatial positioning.
Normal Provides naturally balanced spatial positioning that is neither forward nor wide.
Wide Provides wide, very open spatial positioning.
Phones Type
The Phones Type setting optimises the sound of the instrument when listening through dierent types of
headphones or earphones.
▋ Phones type settings
Type Eect
Normal Disables the headphone optimisation.
Open Optimises the sound for open-type headphones.
Semi-Open Optimises the sound for semi-open type headphones.
Closed Optimises the sound for closed-type headphones.
Inner-ear Optimises the sound for inner-ear type headphones.
Canal Optimises the sound for canal-type headphones.
28
Settings Menu
Adjustments & Settings
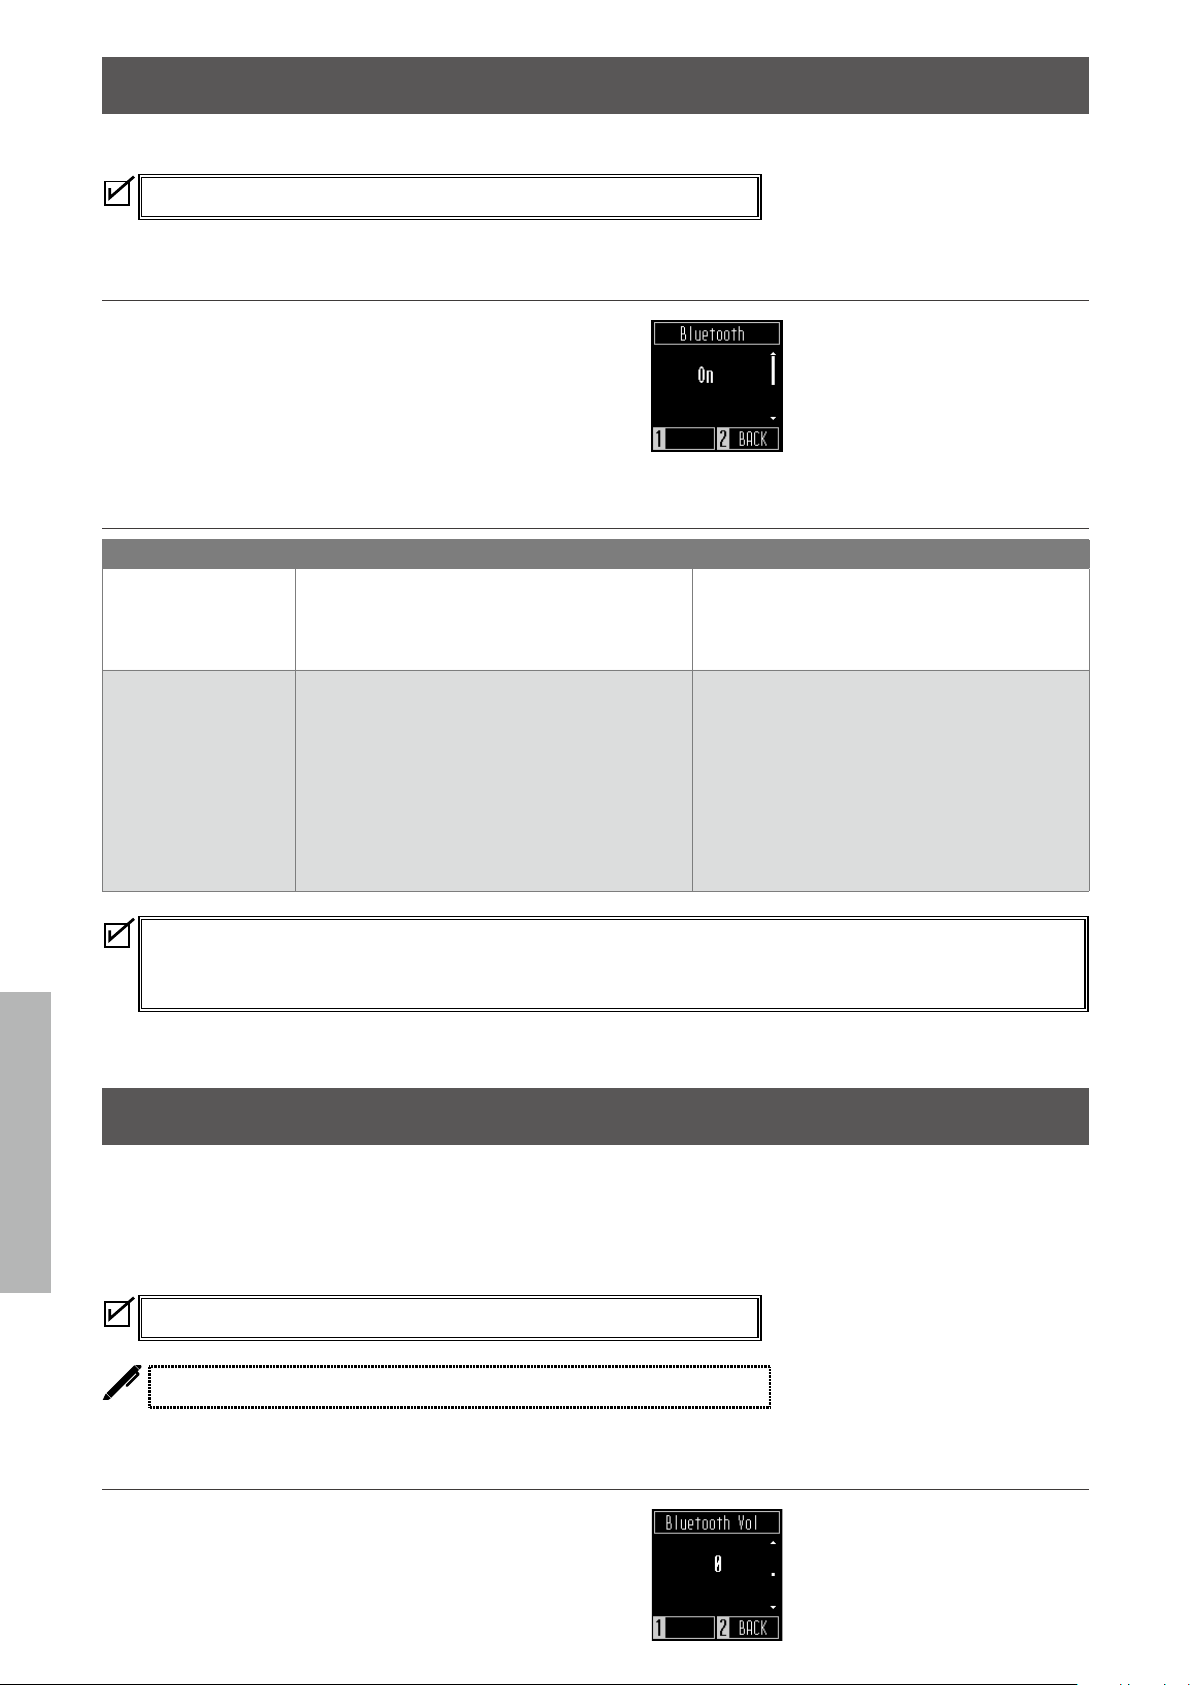
Bluetooth®
This instrument supports wireless connection to smart devices such as smartphones and tablets.
Availability of Bluetooth function dependent on market location.
▋ Bluetooth settings
This function can be turned on and o.
Turn on the Bluetooth function of this instrument and enable
Bluetooth communications of the smart device application near
the instrument.
▋ Bluetooth settings
Type Description Connection method
Bluetooth MIDI When using a smart device app that supports
Bluetooth MIDI, this function allows the instru-
ment to be controlled by an app, or send/receive
MIDI data wirelessly.
Enable the smart device's Bluetooth function,
launch an app that supports Bluetooth MIDI, then
select "CN201 MIDI" from the app's connection
setting screen.
Bluetooth Audio This function allows audio from the connected
smart device (such as songs, videos, etc.) to
be played through the instrument's speakers
wirelessly.
Enable the smart device's Bluetooth function, then
select "CN201 Audio" from the device's Bluetooth
connection setting screen.
If "CN201 Audio" does not appear, press and hold
the [1] and [2] buttons on the instrument's control
panel while the Home screen is shown in the
display.After pairing successfully, the instrument
will automatically reconnect to the smart device
when the power is turned on.
• For more detailed instructions regarding Bluetooth pairing, please refer to the supplementary Bluetooth® Connectivity
Guide manual, available from the Kawai Global website: http://www.kawai-global.com/support/manual.
• Only one smart device can be connected to the piano’s Bluetooth MIDI or Bluetooth audio at a time.
Bluetooth® Audio Volume
This function allows players to adjust the volume of music stored in smart devices, which is output from
the instrument’s speakers.
After adjusting the volume on the smart device or using the [MASTER VOLUME] slider, this function can
be used to fine tune the volume.
Availability of Bluetooth function dependent on market location.
The display shows “Bluetooth Vol”.
▋ Adjusting the audio volume
The value can be adjusted in the range from -15 to +15.
29
Settings Menu
Adjustments & Settings
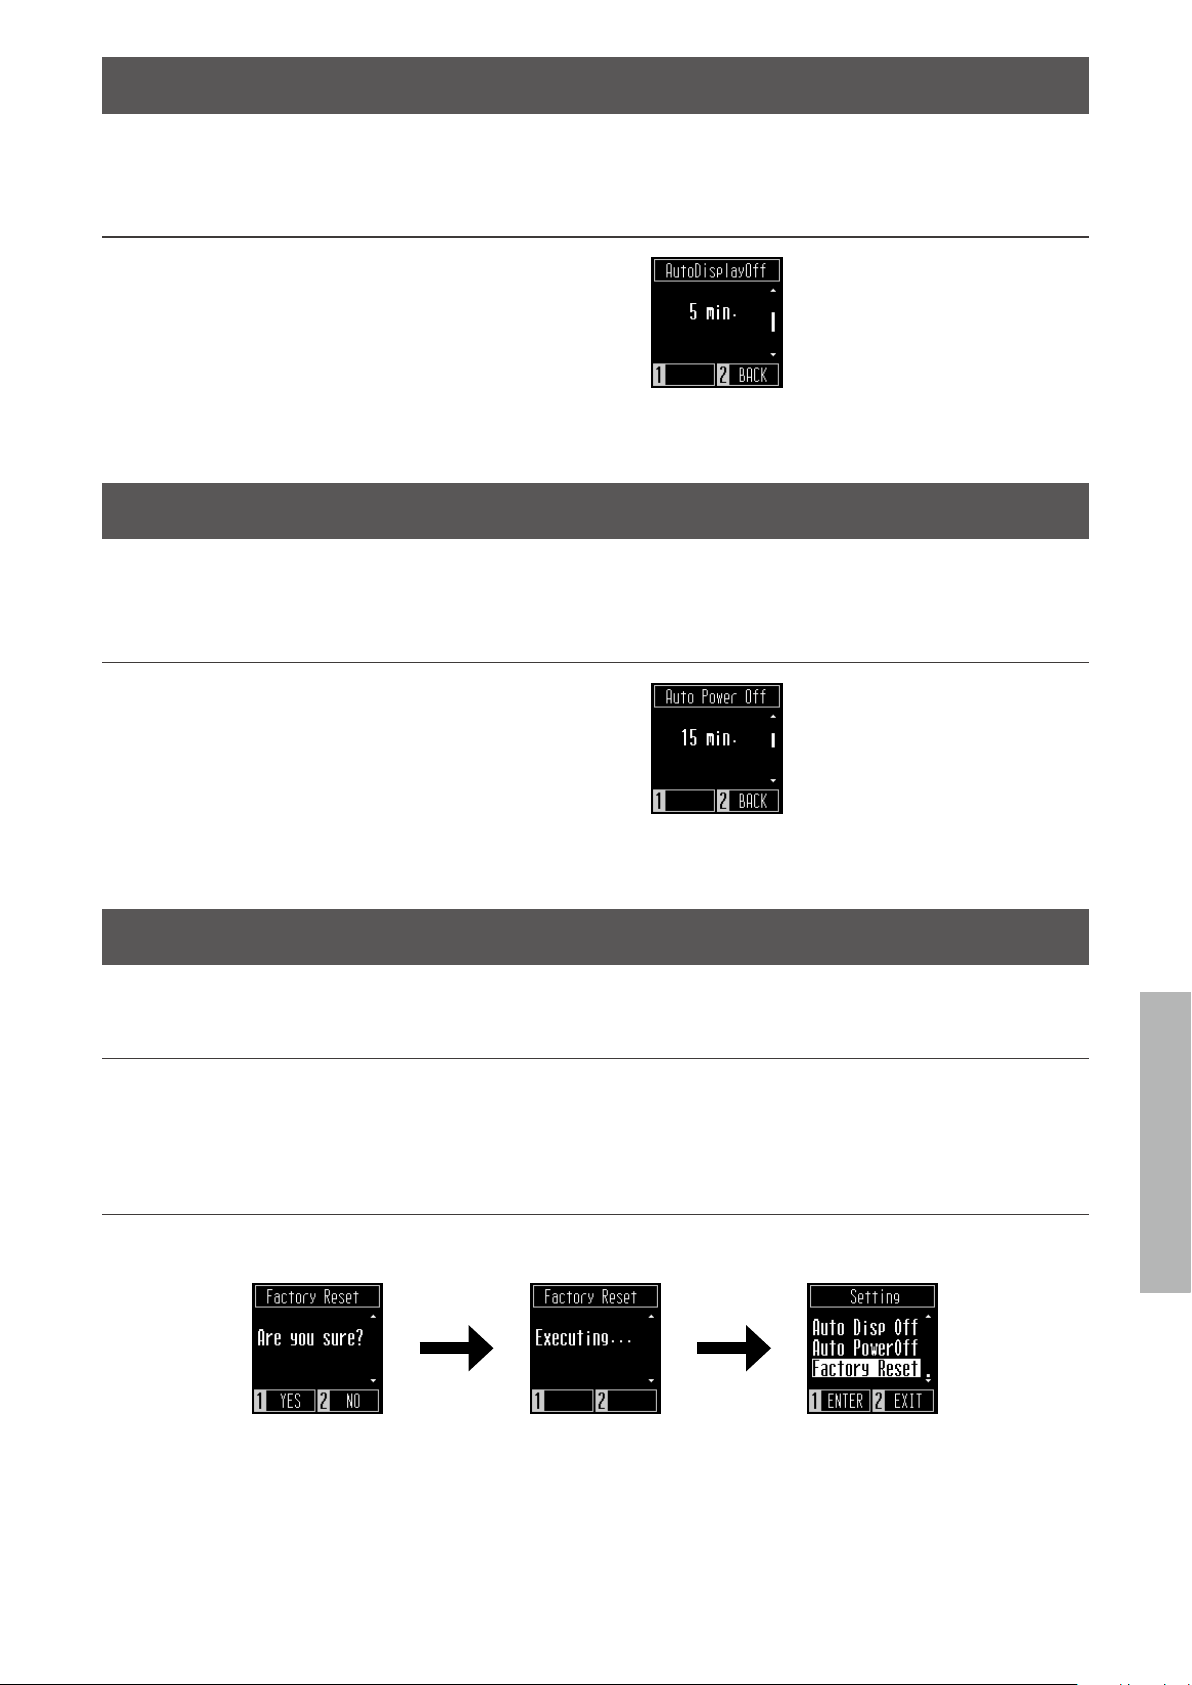
Auto Display O
The Auto Display O function can be used to automatically turn o the display after a specified time has
elapsed.
▋ Auto Display O setting
The Auto Display O setting can be set to 15 seconds, 5 minutes,
or 30 minutes.
After the display has turned o, pressing any of the control but-
tons will turn on the display again.
Auto Power O
The Auto Power O function can be used to automatically turn o the power after a specified period of
inactivity.
▋ Auto Power O setting
The Auto Power O setting can be set to 15 minutes, 60 minutes,
120 minutes or O.
Factory Reset
Factory Reset is a function that restores the instrument back to its factory default configuration.
▋ Initialised settings
• Settings made in the Startup Settings
• Auto Power O setting
• Key Volume setting
▋ Executing the Factory Reset
On the Factory Reset screen, press the [1] button to execute Factory Reset, or press the [2] button to cancel.
When the Factory Reset is complete, the display will return to the Settings menu.
30
Appendix
Troubleshooting
Troubleshooting
▋ Power (Settings)
Problem Possible Cause and Solution Page
The instrument does not turn
on.
Check to see if the main connector of this instrument, AC adaptor, and power outlet
are properly connected.
P12
The instrument turned itself o
all of a sudden.
The instrument turned o by
itself.
Check to see if the “Auto Power O” function is not enabled. P29
The display turned o all of a
sudden.
When the time to turn o the display is specified in the “Auto Display O” function,
the display will automatically turn o after the preset time. Pressing any of the control
buttons will turn on the display again.
P29
▋ Sound/Performance
Problem Possible Cause and Solution Page
No sound is coming out. • Check to see whether the volume has been set to the lowest level.
• Check to see whether a pair of headphones or a headphone conversion plug have
been connected to the [PHONES] jacks.
• Check to see whether “Local Control” has been turned o.
P13
Sounds get distorted in certain
performances or at specific
ranges.
For some performances, increasing the volume may cause the sound to be distorted.
If this happens, reduce the volume.
P12
The pitch or sound quality of
certain piano tones is odd.
The built-in piano tones are designed to reproduce the tones created by an acoustic
grand piano as accurately as possible. Since the pianos produce a rich variety of reso-
nance, the way the sound is perceived changes depending on the location or environ-
ment. The way the sound is perceived also changes when a single key is pressed and
when the same key is pressed in the flow of a song. For this reason, strong overtones
may be heard in some ranges, or the pitch and sound quality may seem odd.
But this is normal.
The volume is dierent for each
key.
Adjust the volume of keys as needed in the Key Volume setting. P26
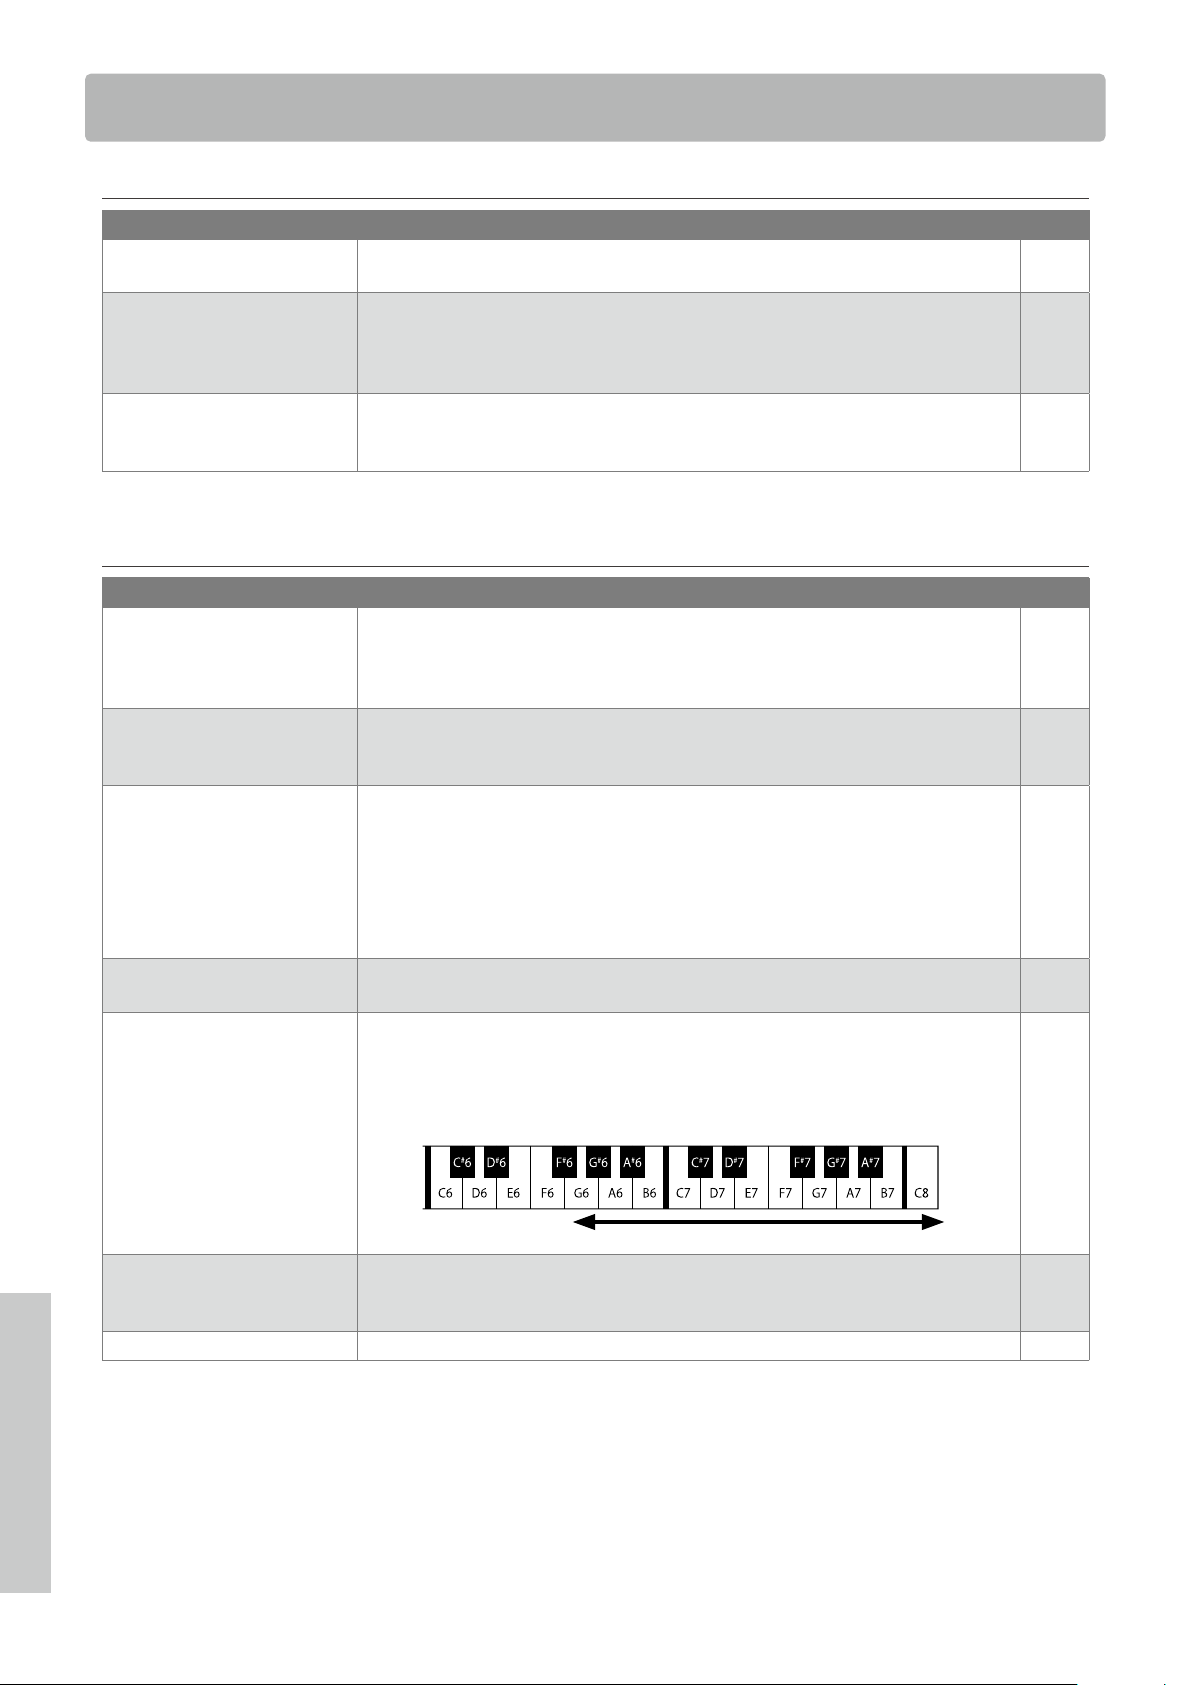
The high frequency notes
sustain longer even when the
damper pedal is not pressed.
This is normal.
The highest keys on an acoustic piano (shown below) are not equipped with the sound
suppressor dampers.
This instrument replicates this behaviour precisely and allows the sound of the keys
without dampers to sustain longer even when the damper pedal is not pressed.
No damper is attached
The pedal does not work at
all, or it does not produce the
same eect each time.
Check to see if the pedal cable is properly connected to the instrument. Even when
they are connected, try unplugging the cable and inserting it again to make sure.
The pedals are unstable. Check that the adjustor is set to an appropriate height. P11
31
Internal Songs List
Appendix
▋ Connection
Problem Possible Cause and Solution
The instrument is unable to
connect to a smart device.
• Check to see if the instrument’s Bluetooth function is enabled.
• Use the application’s settings to connect, instead of the Bluetooth setting of the smart device.
Connection fails for the
paired smart device.
If the connection gets cut o immediately after pairing, turn o the Bluetooth setting on the
smart device and turn it back on, then try connecting the device again.
The name of the piano does
not appear in the smart de-
vice.
It’s possible that another device is connected to the piano’s Bluetooth MIDI/Bluetooth Audio.
Press and hold the [1] button and [2] button on the Home screen to cancel pairing.
Unable to send recorded per-
formance of built-in songs.
Recorded performances of built-in songs will not output from Bluetooth MIDI.
▋ Operation
Problem Possible Cause and Solution Page
The playback of a lesson song
does not start.
Select a song and then press the [PLAY/STOP] button. P18
Internal Songs List
▋ Sound/Demo Songs List
Sound Name Song Title Composer
SK-EX Concert Grand Piano | Concert La Campanella Liszt
EX Concert Grand Piano | Concert Hungarian Rhapsodies No.6 Liszt
Upright Piano | Classic Alpenglühen Op.193 Oesten
SK-EX Concert Grand Piano | Jazz Original Kawai
EX Concert Grand Piano | Pop Original Kawai
SK-EX Concert Grand Piano | Mellow Sonata No.30 Op.109 Beethoven
EX Concert Grand Piano | Mellow La Fille aux Cheveux de lin Debussy
EX Concert Grand Piano | Modern Original Kawai
Tine Electric Piano Original Kawai
Modern Electric Piano Original Kawai
Jazz Organ Original Kawai
Church Organ Chorale Prelude “Wachet auf, ruft uns die Stimme”. Bach
Harpsichord French Suite No.6 Bach
Vibraphone Original Kawai
String Ensemble Le quattro stagioni: la “Primavera” Vivaldi
Slow Strings Original Kawai
Choir Londonderry Air Irish folk song
New Age Pad Original Kawai
Atmosphere Original Kawai
32
Internal Songs List
Appendix
▋ Concert Magic Songs List
Children’s Songs
Song Name Composer Type
Twinkle, Twinkle, Little Star French folk song MP
I’m A Little Teapot Traditional MP
Mary Had A Little Lamb American folk song MP
London Bridge Traditional MP
Row, Row, Row Your Boat American folk song MP
Frère Jacques French folk song MP
Old MacDonald Had A Farm American folk song MP
Christmas Songs
Song Name Composer Type
Hark The Herald Angels Sing Mendelssohn MP
Jingle Bells Traditional MP
Deck The Halls Welsh Air MP
O Come All Ye Faithful J.Reading MP
Joy To The World Traditional MP
Silent Night Traditional MP
We Wish You A Merry
Christmas
British folk song MP
American Classics
Song Name Composer Type
Battle Hymn Of The Republic Traditional MP
Yankee Doodle American folk song MP
Londonderry Air Irish folk song EB
Clementine American folk song MP
Auld Lang Syne Scottish folk song MP
Oh Susanna S.C.Foster SK
The Camptown Races S.C.Foster MP
American Classics
Song Name Composer Type
When The Saints Go
Marching In
American folk song EB
The Entertainer S.Joplin SK
Classical Selections
Song Name Composer Type
William Tell Overture Rossini SK
Andante from Symphony
No.94
Haydn MP
Für Elise Beethoven EB
Clair De Lune Debussey SK
Skater’s Waltz E.Waldteuful SK
Blue Danube Waltz Strauss SK
Gavotte (Gossec) Gossec SK
Waltz Of The Flowers Tchaikovsky SK
Special Occasions
Song Name Composer Type
Bridal Chorus Wagner MP
Wedding March Mendelssohn SK
Pomp And Circumstance Elgar SK
International Songs
Song Name Composer Type
When Irish Eyes Are Smiling E.R.Ball EB
Chiapanecas Mexican folk song SK
Santa Lucia Naplish folk song SK
Funiculì Funiculà L.Denza SK
Romance De L’amour Spanish folk song EB
My Wild Irish Rose Chauncy Alcote EB
33
Appendix
Connecting to Other Devices
Connecting to Other Devices
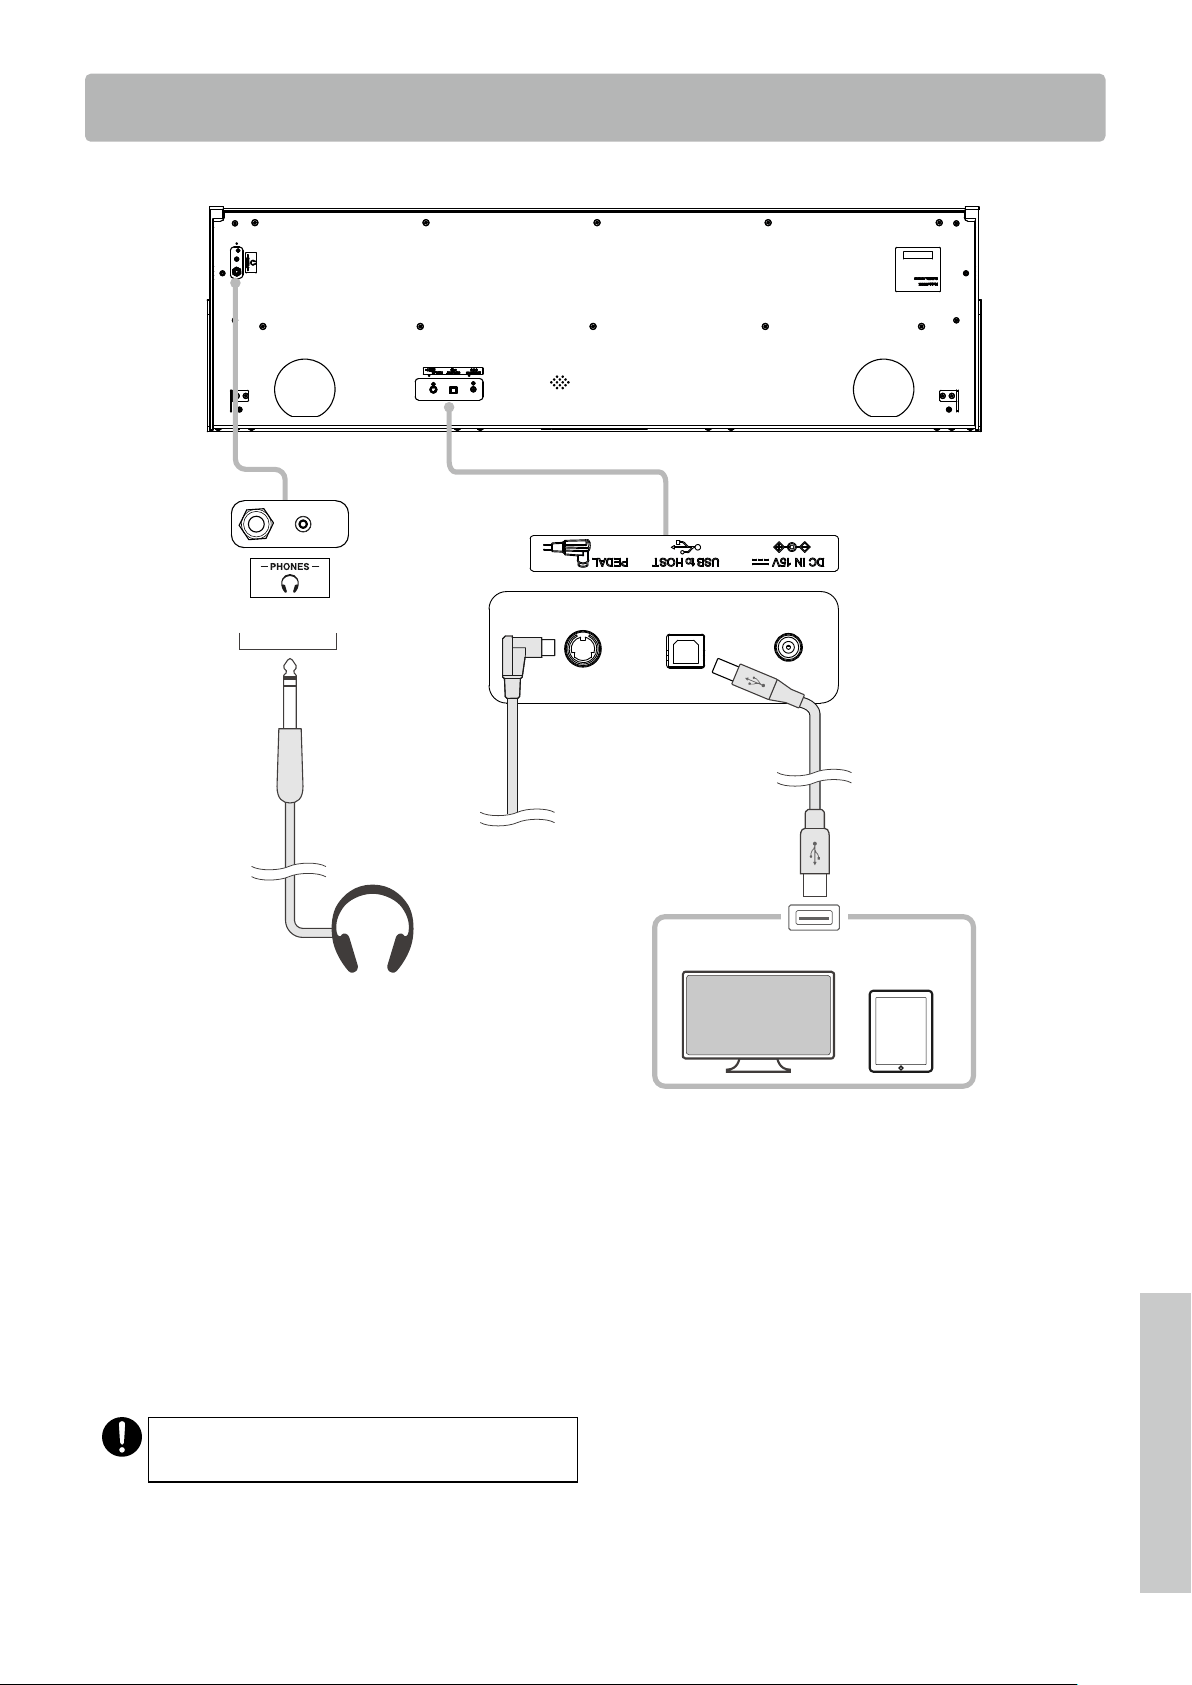
Headphones
①
Pedal cable
Smart device
Computer
Main body (Front)
Main body (Bottom)
Main body (Rear)
② ③
① PHONES (Headphones jacks)
These jacks are used to connect headphones. Up to two sets can be connected.
② PEDAL (Pedal connector)
This connector is used to plug the pedal cable attached to the pedal unit.
③ USB to HOST
This port is used connect the instrument to a computer or smart device using a standard USB cable. The instrument is recognised
as a MIDI device that will send and receive MIDI messages.
Use the appropriate cable for the device to be connected.
Before connecting the instrument to other devices,
make sure to turn o the power of this instrument.
34
Connecting to Other Devices
Appendix
▋ USB drivers
For exchanging data between this digital piano and a computer via USB connection, the software (USB-MIDI driver) for the digital pi-
ano to function properly must be installed in the computer. On most modern operating systems, this driver software will be installed
automatically, and additional drivers will not be required.
The USB-MIDI driver to use is different depending on the computer’s operating system. For more information, visit our website:
https://www.kawai-global.com/support/manual/
▋ Smart devices
This product supports connection to smart devices and allows players to use application designed for the instrument.
Before using this feature, check the latest information on the supported application and operating environment, which is available
from the Kawai Global website:
https://www.kawai-global.com/support/manual/
▋ Precautions for using USB
When connecting the digital piano to a computer with a USB cable, insert the USB cable first and then turn on the digital piano.
After connecting the digital piano to a computer via USB, it may take some time to establish communication between them.
If communication becomes unstable on the connection between the digital piano and the computer through a USB hub, connect
the USB cable directly to one of the computer’s USB ports.
Powering on/o the digital piano or plugging/unplugging the USB cable during any of the following situations may cause the
computer or digital piano to exhibit unstable behaviour:
- while installing the driver
- while restarting the computer
- while the MIDI application is running
- while communicating with the computer
- while the computer is in energy-saver mode
Depending on the settings of the computer, the USB function may not work as intended. Please read the owner’s manual of the
computer and adjust the settings accordingly.
35
Appendix
Assembly Instructions
Assembly Instructions
The assembly requires two people.
When moving this product, make sure to keep it lifted in a horizontal orientation.
Be particularly careful to avoid catching hands and fingers in between parts.
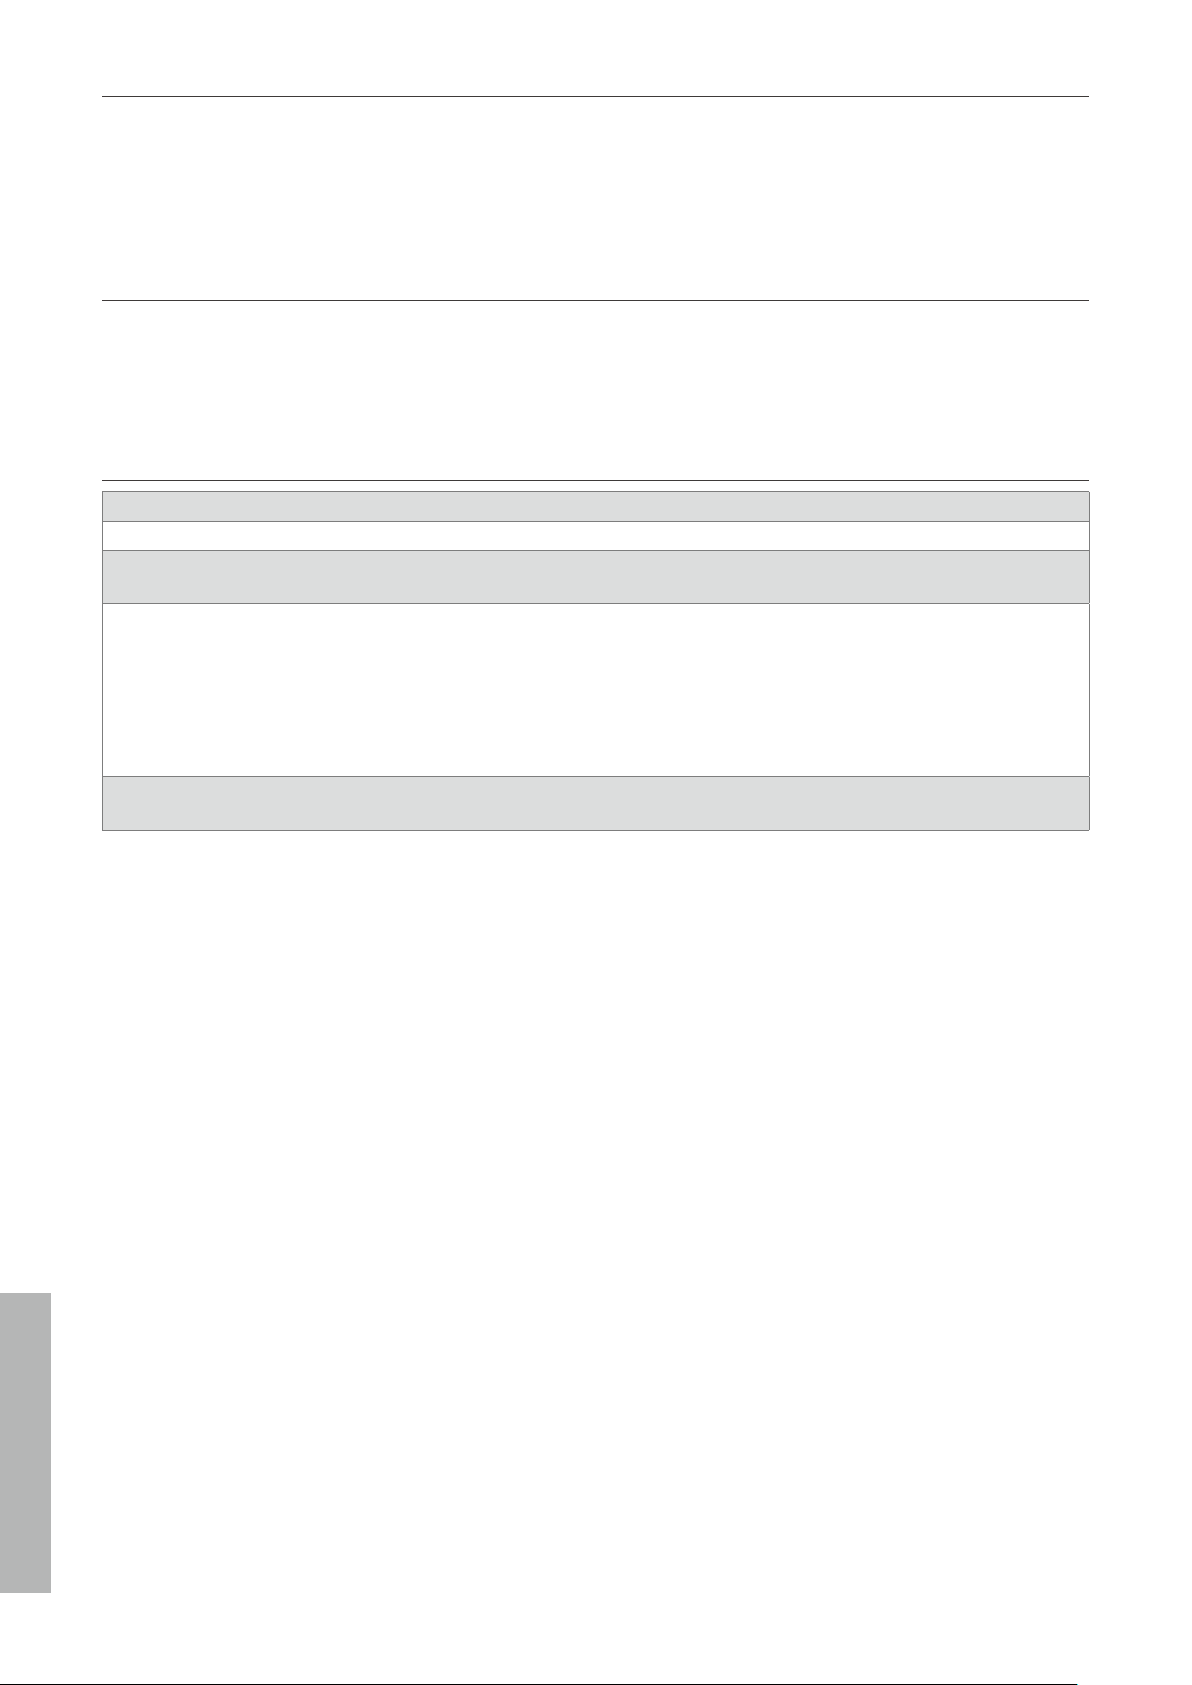
▋ Checking the included parts
Before attempting to assemble this product, ensure that all the parts listed below are included. Please also prepare a Phillips-head
screwdriver.
Tappin
g
screw (long, black) (4 x 30 mm) x 2 *
Screw (with at washer and spring washer) x 4
Tappin
g
screw (short, black) (4 x 20 mm) x 4 *
Tappin
g
screw (silver) (4 x 16 mm) x 4
2 Side panels (left & right) Main body
1 Power cord 1 AC adaptor
1 Back board
1 Pedal base
1 Pedal adjustor
A
B
C
D
E
Headphone hook
Screw set Headphone hook set
* The silver tapping screws are provided
in a separate bag.
* For some of the body colours, silver screws are
provided instead of black screws.
Mounting screw (4 x 14 mm) x 2
36
Assembly Instructions
Appendix
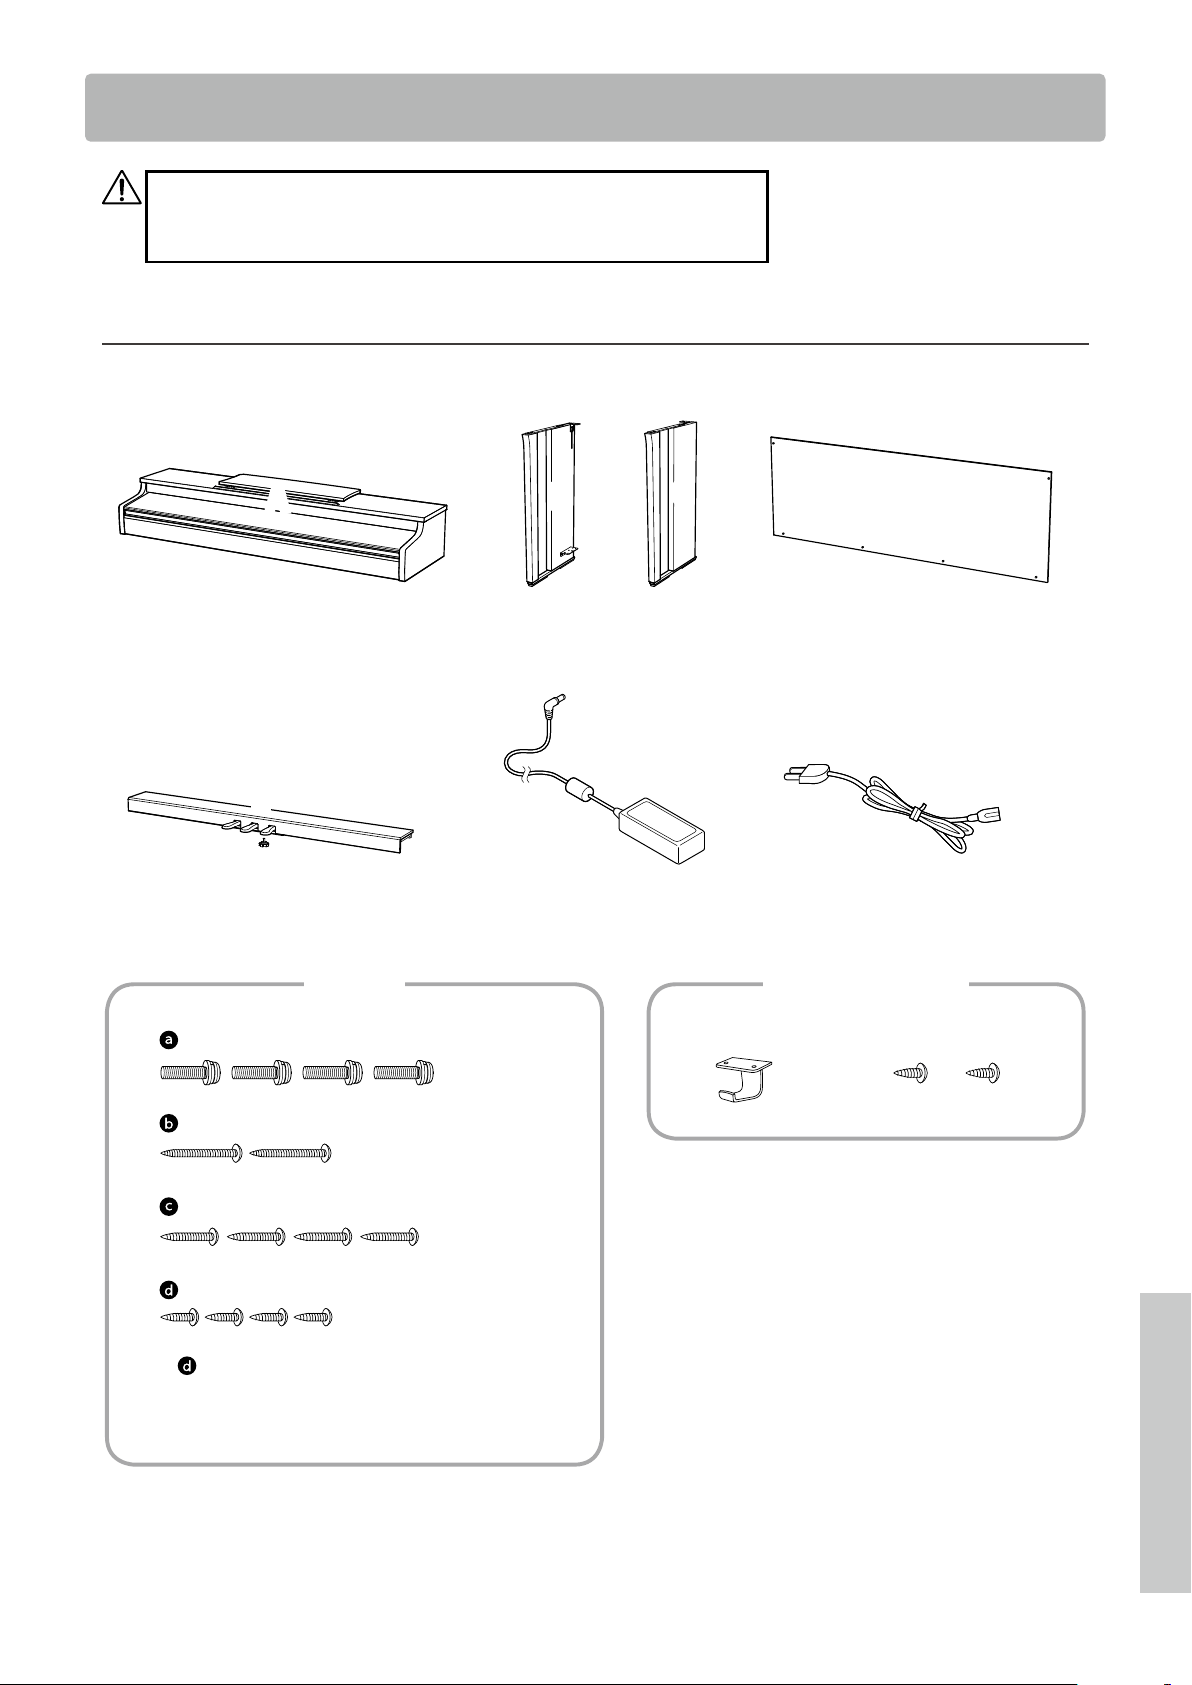
1. Attaching B and C to E
① Unfasten the pedal cable attached to E (one location only)
and extend the cable.
② Take the screws temporary mounted in E and set each one to
the metal groove of B and C, respectively.
③ Make sure that B and C are pressed against E without a gap.
Then, fasten the temporary mounting screws.
④ Insert the four silver tapping screws d into the rest of the
holes. Tighten the screws to secure the panels in place.
B
E
Temporary mounting screw
③
②
d
B B
B B
E E
E
E
B
C
E
Gaps
③
Pedal cable
①
④
2. Attaching D
① Allow the E assembled with B and C to stand upright as
shown in the figure below.
Ensure that the adjustor is attached and the floor is
clear from parts or musical notes.
② Align the screw hole position of D to that of B and C. Use two
pieces of the long black tapping screws b to set them in
place temporarily.
③ Align the screw hole position of D and E. Use four pieces of
the short black tapping screws c to secure them in place.
④ Ensure that B and C are aligned with D without a gap, and
then fasten the temporarily mounted b long black tapping
screws* to keep them in contact.
* For some of the body colours, silver screws are provid-
ed instead of black screws.
Adjustor
Not aligned
D
C
B
④
c
c
c
c
b
b
①
②
③

37
Assembly Instructions
Appendix
3. Mounting A onto the stand
① Lift A and carefully place it onto the stand. Position A so that
the metal fitting holes are visible on the rear side of A when
viewed from above.
② Secure C in place. To prevent A from tilting and falling o,
hold the front side of A with one hand and slide A backwards.
The hook of A engages the metal fitting of the side panel.
Be careful not to have hands or fingers caught between
A and the stand.
C
A
A
B
①
②
4. Fastening A to the stand
① Temporarily fasten A and the stand with four screws a (with
flat washer and spring washer).
② First, loosely fasten the screws a, and move A to the position
that allows the four screws go straight in. Then, even out the
left and right overhang.
③ Lastly, tighten the temporary fastened screws a until the
spring washer becomes flat to ensure that A is rigidly at-
tached to the stand.
Make sure to fasten A to the stand using the screws.
Failure to do so could cause A to fall o from the stand,
which is extremely dangerous.
Front view
C
C
A
A
B
B
②
a
38
Assembly Instructions
Appendix
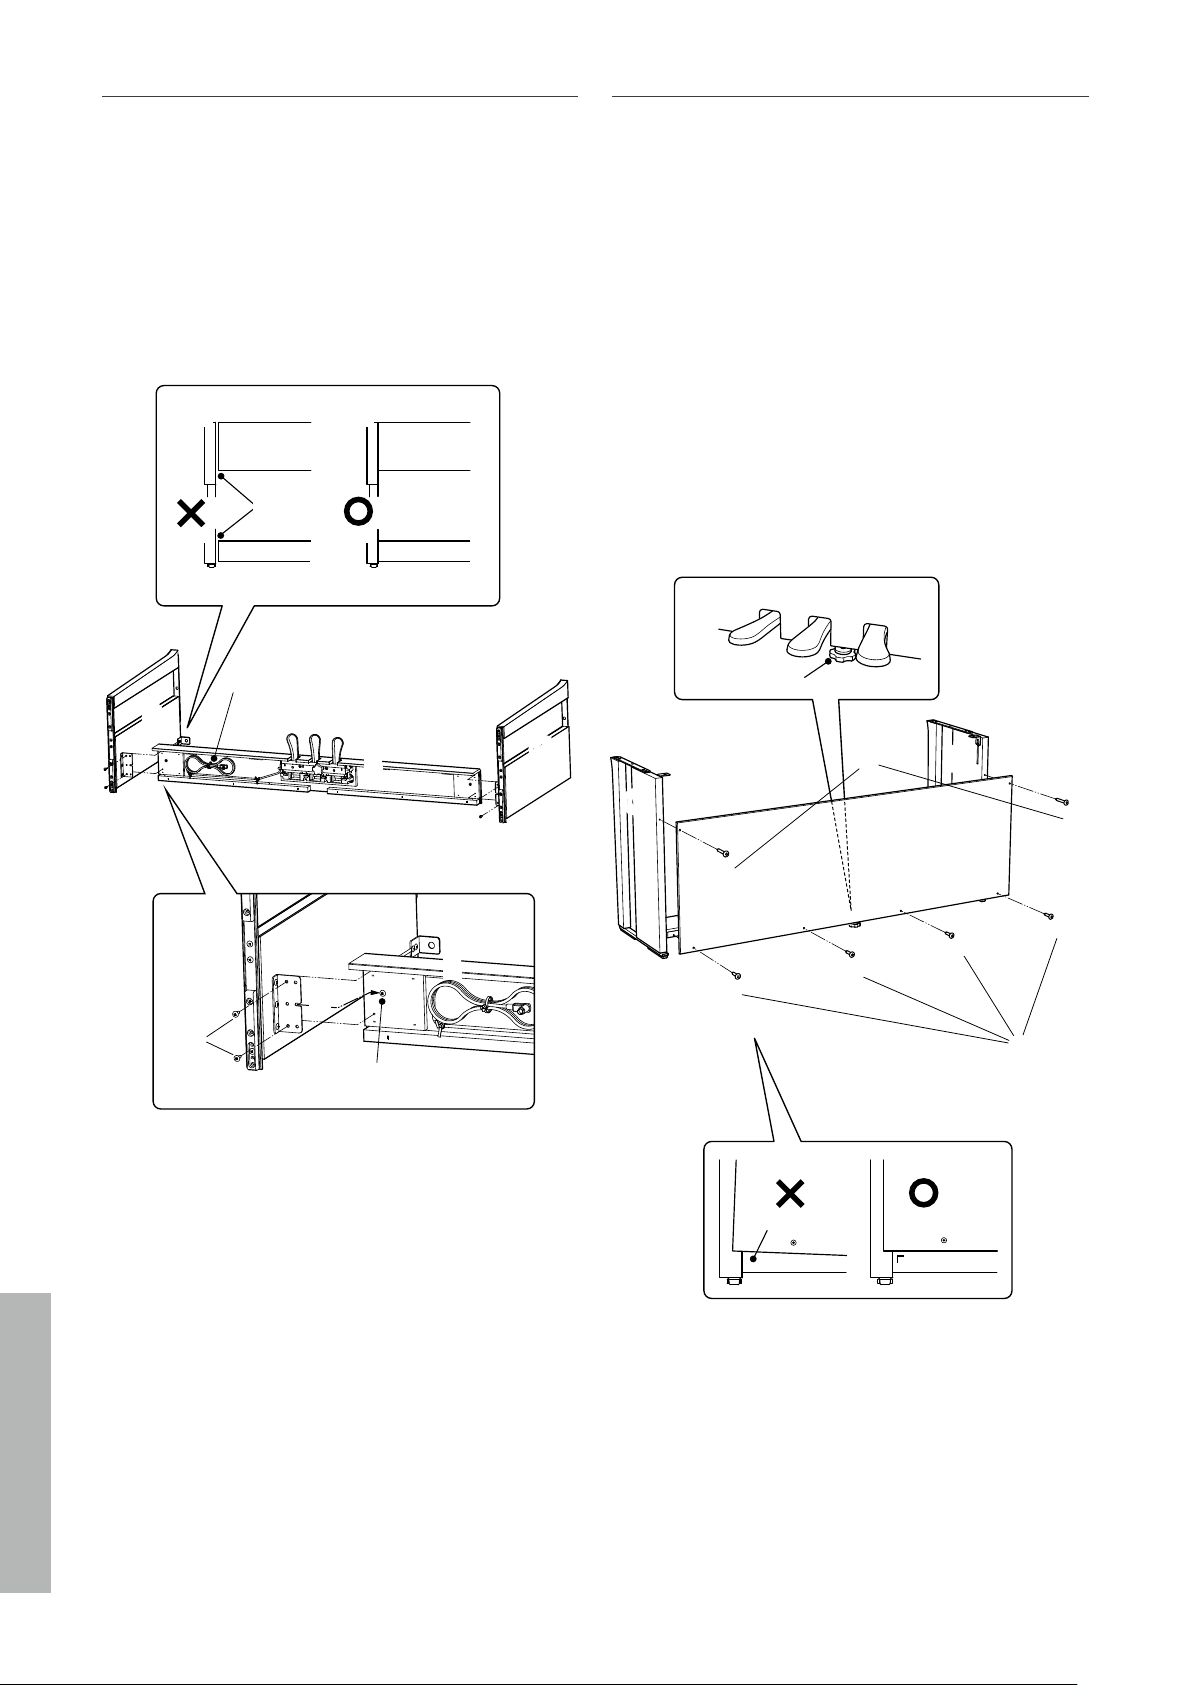
5. Connecting the cables
① Pass the pedal cable extended from E through the gap of D
to the rear side of the instrument and insert the cable to the
pedal connector on the bottom of A.
② Plug the AC adaptor into the power cord and insert it into
the [DC IN] jack.
③ Use the binders to secure the cables connected to B.
• Be careful with the orientation of the connector
parts.
• Plug the connector straight in. Forcibly inserting it
could lead to a malfunction.
③
①
②
E
A
C
Insert the plug straight in at the correct angle. Avoid
applying excess force on it. Not doing so could bend
the pins or damage the plugs.
Do not bend Do not pull
the cable
Keep the correct
angle
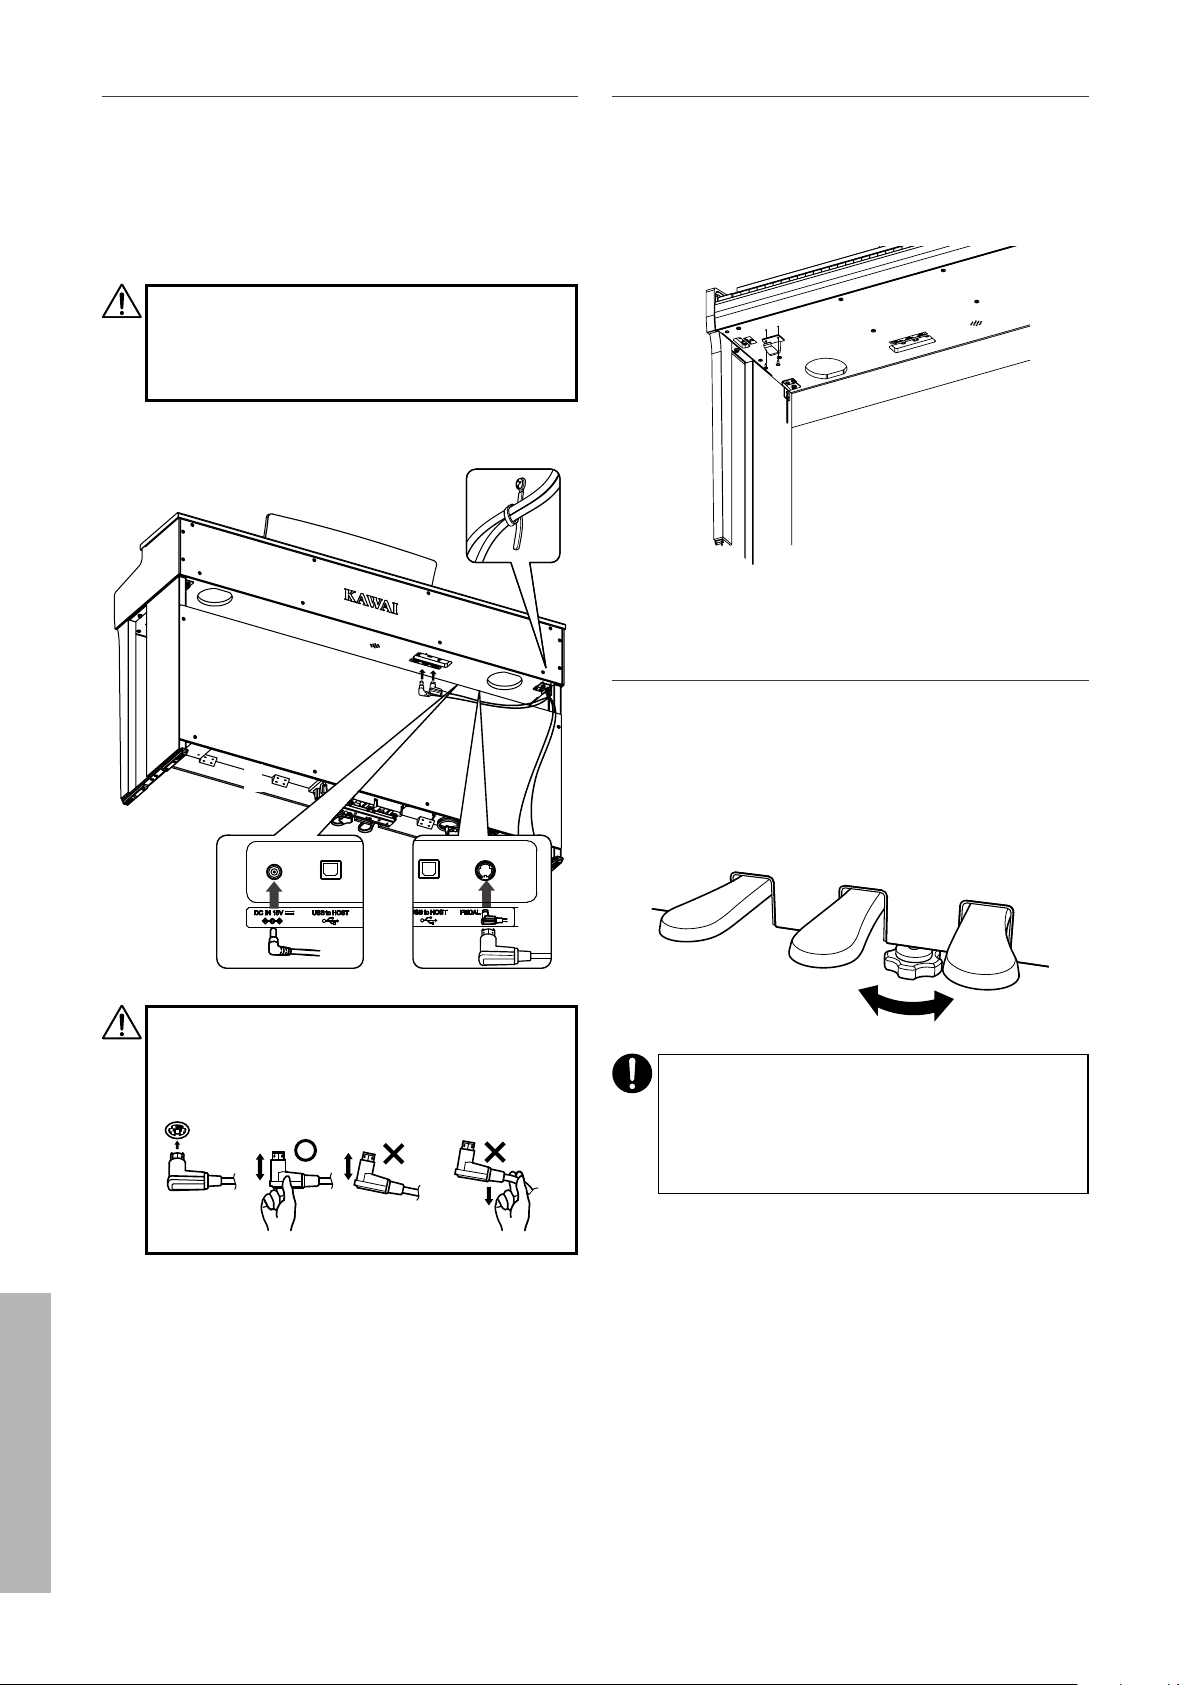
6. Attaching the headphone hook
Attach the headphone hook to the hole shown in the fig-
ure, using the two tapping screws (4 x 14 mm) provided in
the same bag.
7. Rotating the adjustor
Make sure to rotate the adjustor on the rear side of E until
the adjustor touches the floor. Depending on the material
and condition of the floor, stepping on the pedal may gen-
erate frictional noises between the pedal and the floor. If
this happens, please use a felt or carpet pad between the
floor and the adjustor to fill the gap.
Using the instrument with the adjustor lifted o the
floor or forcibly pressed against the floor could cause
the pedal base to break.
When moving the instrument, make sure to lift it o
from the floor without dragging it.
39
Appendix
Information about Adaptor Specications
Information about Adaptor Specifications
This adapter specification table conforms to the requirements of EU Commission Regulation (EU)
2019/1782.
Adaptor Type
PS-129 PS-154 PS-241 PS-242
Manufacturer’s trademark KAWAI KAWAI KAWAI KAWAI
Model identifer PS-129 PS-154 PS-241 PS-242
Input voltage 230 V 230 V 230 V 230 V
Input AC frequency 50 Hz 50 Hz 50 Hz 50 Hz
Output voltage 12.0 V 15.0 V 24.0 V 24.0 V
Output current 2.0 A 4.0 A 6.2 A 5.0 A
Output power 24.0 W 60.0 W 150.0 W 120.0 W
Average active efficiency 90.38% 90.17% 90.41% 91.55%
Efficiency at low load (10%) 85.71% 85.13% 78.62% 88.84%
No-load power consumption 0.061 W 0.200W 0.135 W 0.020 W
40
Appendix
EU Declaration of Conformity
SV
Swedish
FÖRENKLAD EU-FÖRSÄKRAN OM ÖVERENSSTÄMMELSE
Härmed försäkrar Kawai Europa GmbH att denna typ av radioutrustning [ CN201 ] överensstämmer med direktiv 2014/53/EU.
Den fullständiga texten till EU-försäkran om överensstämmelse finns på följande webbadress:
https://www.kawai-global.com/
Slovenian
FI
Finnish
YKSINKERTAISTETTU EU-VAATIMUSTENMUKAISUUSVAKUUTUS
Kawai Europa GmbH vakuuttaa, että radiolaitetyyppi [ CN201 ] on direktiivin 2014/53/EU mukainen. EU-
vaatimustenmukaisuusvakuutuksen täysimittainen teksti on saatavilla seuraavassa internetosoitteessa:
SK
Slovak
ZJEDNODUŠENÉ EÚ VYHLÁSENIE O ZHODE
Kawai Europa GmbH týmto vyhlasuje, že rádiové zariadenie typu [ CN201 ] je v súlade so smernicou 2014/53/EÚ.
Úplné EÚ vyhlásenie o zhode je k dispozícii na tejto internetovej adrese:
SL
POENOSTAVLJENA IZJAVA EU O SKLADNOSTI
Kawai Europa GmbH potrjuje, da je tip radijske opreme [ CN201 ] skladen z Direktivo 2014/53/EU.
Celotno besedilo izjave EU o skladnosti je na voljo na naslednjem spletnem naslovu:
Portuguese
RO
Romanian
DECLARAȚIA UE DE CONFORMITATE SIMPLIFICATĂ
Prin prezenta, Kawai Europa GmbH declară că tipul de echipamente radio [ CN201 ] este în conformitate cu Directiva 2014/53/UE.
Textul integral al declarației UE de conformitate este disponibil la următoarea adresă internet:
PL
Polish
UPROSZCZONA DEKLARACJA ZGODNOŚCI UE
Kawai Europa GmbH niniejszym oświadcza, że typ urządzenia radiowego [ CN201 ] jest zgodny z dyrektywą 2014/53/UE.
Pełny tekst deklaracji zgodności UE jest dostępny pod następującym adresem internetowym:
PT
DECLARAÇÃO UE DE CONFORMIDADE SIMPLIFICADA
O(a) abaixo assinado(a) Kawai Europa GmbH declara que o presente tipo de equipamento de rádio [ CN201 ] está em conformidade com a Diretiva 2014/53/
UE. O texto integral da declaração de conformidade está disponível no seguinte endereço de Internet:
Maltese
NL
Dutch
VEREENVOUDIGDE EU-CONFORMITEITSVERKLARING
Hierbij verklaar ik, Kawai Europa GmbH, dat het type radioapparatuur [ CN201 ] conform is met Richtlijn 2014/53/EU. De
volledige tekst
van de EU-conformiteitsverklaring kan worden geraadpleegd op het volgende internetadres:
HU
Hungarian
EGYSZERŰSÍTETT EU-MEGFELELŐSÉGI NYILATKOZAT
Kawai Europa GmbH igazolja, hogy a [ CN201 ] típusú rádióberendezés megfelel a 2014/53/EU irányelvnek.
Az EU-megfelelőségi nyilatkozat teljes szövege elérhető a következő internetes címen:
MT
DIKJARAZZJONI SSIMPLIFIKATA TA' KONFORMITÀ TAL-UE
B'dan, Kawai Europa GmbH, niddikjara li dan it-tip ta' tagħmir tar-radju [ CN201 ] huwa konformi mad-Direttiva 2014/53/UE. It-
test kollu tad-dikjarazzjoni ta' konformità tal-UE huwa disponibbli f'dan l-indirizz tal-Internet li ġej:
Latvian
LT
Lithuanian
SUPAPRASTINTA ES ATITIKTIES DEKLARACIJA
Aš, Kawai Europa GmbH, patvirtinu, kad radijo įrenginių tipas [ CN201 ] atitinka Direktyvą 2014/53/ES. Visas
ES atitikties deklaracijos tekstas prieinamas šiuo interneto adresu:
IT
Italian
DICHIARAZIONE DI CONFORMITÀ UE SEMPLIFICATA
Il fabbricante, Kawai Europa GmbH, dichiara che il tipo di apparecchiatura radio [ CN201 ] è conforme alla direttiva 2014/53/UE. Il
testo completo della dichiarazione di conformità UE è disponibile al seguente indirizzo Internet:
LV
VIENKĀRŠOTA ES ATBILSTĪBAS DEKLARĀCIJA
Ar šo Kawai Europa GmbH deklarē, ka radioiekārta [ CN201 ] atbilst Direktīvai 2014/53/ES. Pilns
ES atbilstības deklarācijas teksts ir pieejams šādā interneta vietnē:
French
HR
Croatian
POJEDNOSTAVLJENA EU IZJAVA O SUKLADNOSTI
Kawai Europa GmbH ovime izjavljuje da je radijska oprema tipa [ CN201 ] u skladu s Direktivom 2014/53/EU.
Cjeloviti tekst EU izjave o sukladnosti dostupan je na sljede?oj internetskoj adresi:
EN
English
SIMPLIFIED EU DECLARATION OF CONFORMITY
Hereby, Kawai Europa GmbH declares that the radio equipment type [ CN201 ] is in compliance with Directive 2014/53/EU.
The full text of the EU declaration of conformity is available at the following internet address:
FR
DECLARATION UE DE CONFORMITE SIMPLIFIEE
Le soussigné, Kawai Europa GmbH, déclare que l'équipement radioélectrique du type [ CN201 ] est conforme à la directive 2
014/53/UE.
Le texte complet de la déclaration UE de conformité est disponible à l'adresse internet suivante:
Estonian
EL
Greek
ΑΠΛΟΥΣΤΕΥΜΕΝΗ ΔΗΛΩΣΗ ΣΥΜΜΟΡΦΩΣΗΣ ΕΕ
Με την παρούσα ο/η Kawai Europa GmbH, δηλώνει ότι ο ραδιοεξοπλισμός [ CN201 ] πληροί την οδηγία 2014/53/ΕΕ.
Το πλήρες κείμενο της δήλωσης συμμόρφωσης ΕΕ διατίθεται στην ακόλουθη ιστοσελίδα στο διαδίκτυο:
DE
German
VEREINFACHTE EU-KONFORMITÄTSERKLÄRUNG
Hiermit erklärt Kawai Europa GmbH, dass der Funkanlagentyp [ CN201 ] der Richtlinie 2014/53/EU entspricht.
Der vollständige Text der EU-Konformitätserklärung ist unter der folgenden Internetadresse verfügbar:
ET
LIHTSUSTATUD ELI VASTAVUSDEKLARATSIOON
Käesolevaga deklareerib Kawai Europa GmbH, et käesolev raadioseadme tüüp [ CN201 ] vastab direktiivi 2014/53/EL nõuetele.
ELi vastavusdeklaratsiooni täielik tekst on kättesaadav järgmisel internetiaadressil:
Czech
DA
Danish
FORENKLET EU-OVERENSSTEMMELSESERKLÆRING
Hermed erklærer Kawai Europa GmbH, at radioudstyrstypen [ CN201 ] er i overensstemmelse med direktiv 2014/53/EU.
EU-overensstemmelseserklæringens fulde tekst kan findes på følgende internetadresse:
ES
Spanish
DECLARACIÓN UE DE CONFORMIDAD SIMPLIFICADA
Por la presente, Kawai Europa GmbH declara que el tipo de equipo radioeléctrico [ CN201 ] es conforme con la Directiva 2014/53/UE.
El texto completo de la declaración UE de conformidad está disponible en la dirección Internet siguiente:
CS
ZJEDNODUŠENÉ EU PROHLÁŠENÍ O SHODĚ
Tímto Kawai Europa GmbH prohlašuje, že typ rádiového zařízení [ CN201 ] je v souladu se směrnicí 2014/53/EU. Úplné
znění EU prohlášení o shodě je k dispozici na této internetové adrese:
EU Declaration of Conformity
BG
Bulgarian
ОПРОСТЕНА ЕС ДЕКЛАРАЦИЯ ЗА СЪОТВЕТСТВИЕ
С настоящото Kawai Europa GmbH декларира, че този тип радиосъоръжение [ CN201 ] е в съответствие с Директива 2014/53/
ЕС. Цялостният текст на ЕС декларацията за съответствие може да се намери на следния интернет адрес:
EU Declaration of Conformity
41
Appendix
Specications
Specifications
Keyboa
rd
Responsive Hammer III (RHIII) action with Let-O, Triple Sensor, and Counterweights
88 weighted keys with Ivory Touch key surfaces
Display 128 × 128 dots OLED
Polyphony max. 192 notes
Sounds
19 sounds
P14
Metronome 1/4, 2/4, 3/4, 4/4, 5/4, 3/8, 6/8 beat
Internal Recorder 3 song recorder – approximately 10,000 note memory capacity
Internal Songs
Demo Songs: 19 songs
Lesson: Alfred, Burgmüller, Czerny, Chopin, and Beyer lesson songs
Concert Magic: 40 songs
Eect Reverb (Room, Lounge, Small Hall, Concert Hall, Live Hall, Cathedral)
Transpose
-12~+12 Semitone
Bluetooth®
MIDI: Bluetooth (Ver. 5.0 GATT-compatible) / Bluetooth Low Energy MIDI
Specification-compliant
AUDIO: Bluetooth (Ver. 5.1 A2DP-compatible)
Other Functions
Tone Control, Low Volume Balance, Dual, 4 Hands, Tuning, Touch Curve,
Virtual Technician Smart Mode, Damper Noise, Key Volume, Startup Settings,
Spatial Headphone Sound, Phones Type, Bluetooth®, Bluetooth® Audio Volume,
MIDI Settings, Auto Display O, Auto Power O, Factory Reset
Pedals Sustain (with half-pedal support), Soft, Sostenuto
Key Cover Sliding type
Jacks Headphones × 2, USB to HOST
Output Power 20 W + 20 W
Speakers 12 cm × 2
Power Consumption 12 W (PS-154 AC adaptor)
Dimensions
(Folding music rest)
1360 (W) × 405 (D) × 860 (H) mm
53 1/2" (W) × 16" (D) × 34" (H)
Weight 43.0 kg / 95 lbs.
* The specifications and included products are subject to change without notice for improvement purposes.
Availability of Bluetooth function dependent on market location.


Copyright © 2021 Kawai Musical Instruments Mfg. Co.,Ltd. All Rights Reserved.
SP00001465