Loading ...
Loading ...
Loading ...
Setting Warmer Drawer Controls (cont'd)
Warmer Drawer Recommended
Food Settings Table
Food Item Setting
Bacon HI
Hamburger Patties HI
Poultry HI
Pork Chops HI
Fried Foods HI
Pizza HI
Gravies MED
Casseroles MED
Eggs MED
Roasts (Beef, Pork, Lamb) MED
Vegetables MED
Biscuits MED
Rolls, hard MED
Pastries MED
Rolls (soft) LO
Empty Dinner Plates LO
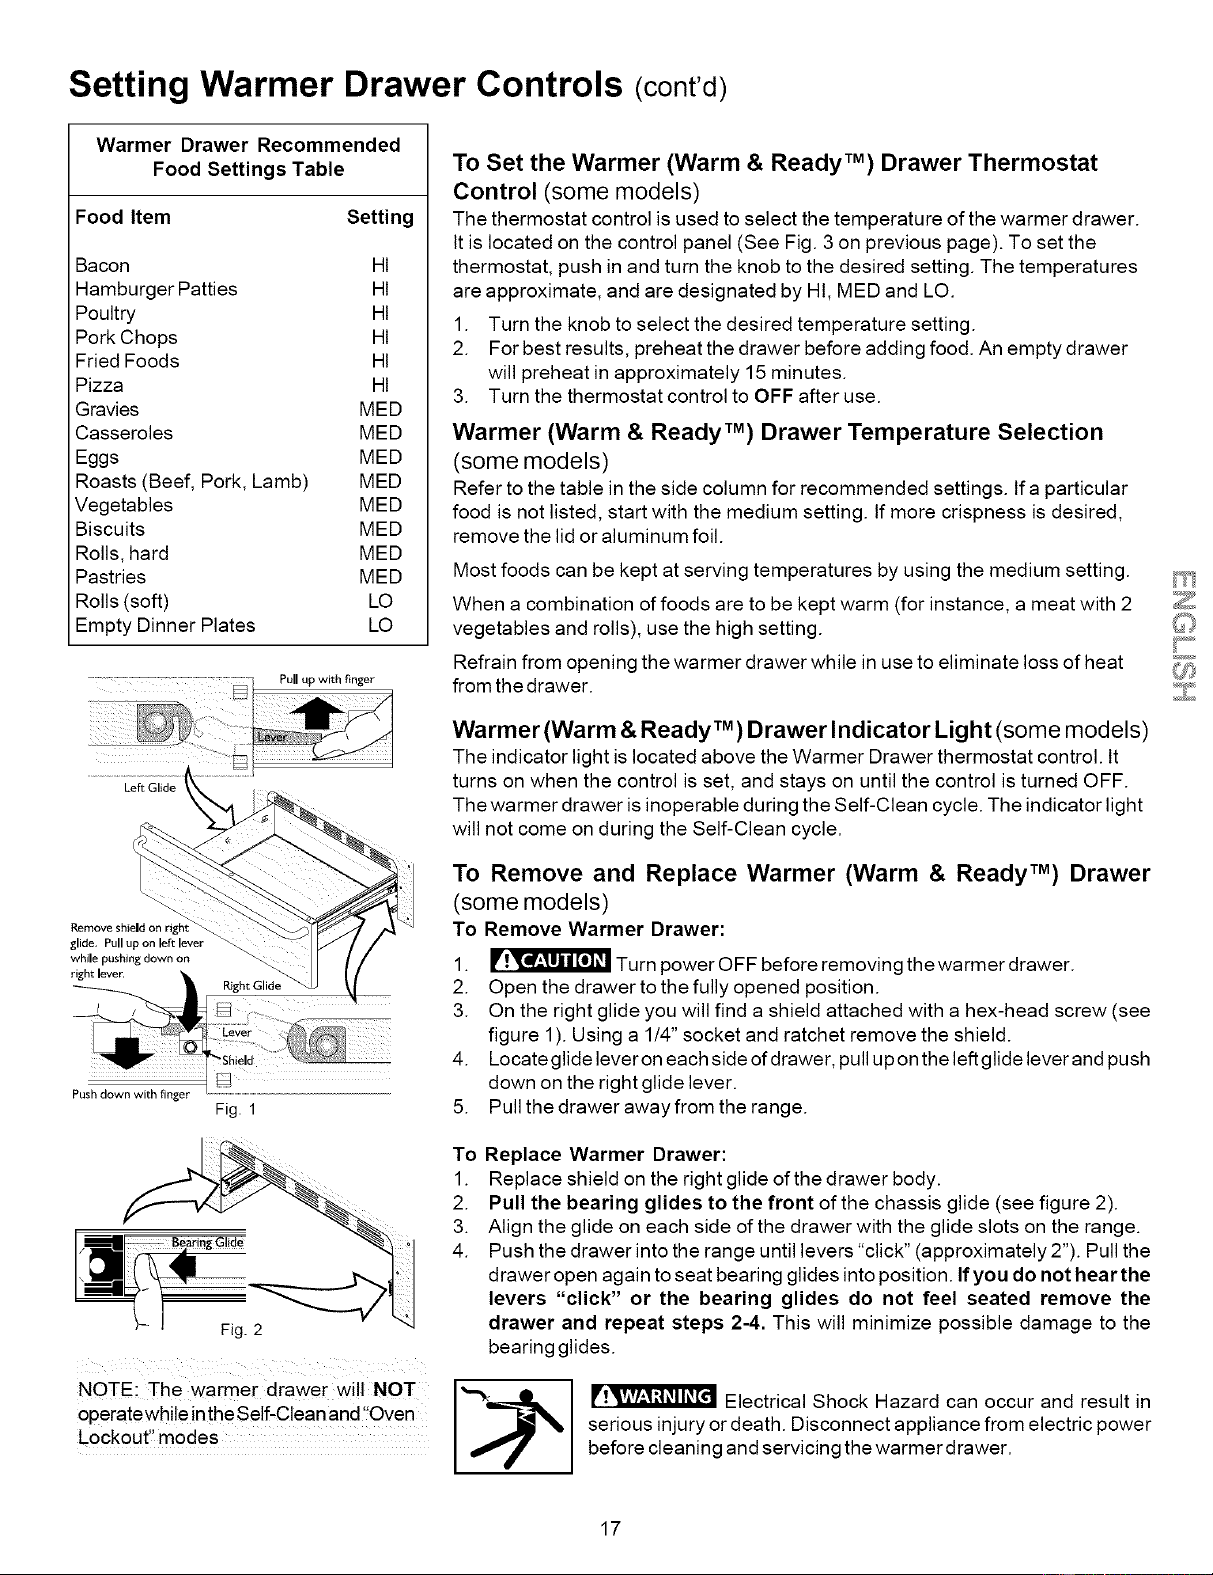
Pull up with finger
Left Glide
Remove shield on righ
glide, Pull up on left lever
while pushing down on
right lever.
Push down with finger
Fig. 1
To Set the Warmer (Warm & Ready TM) Drawer Thermostat
Control (some models)
The thermostat control is used to select the temperature of the warmer drawer.
It is located on the control panel (See Fig. 3 on previous page). To set the
thermostat, push in and turn the knob to the desired setting. The temperatures
are approximate, and are designated by HI, MED and LO.
1. Turn the knob to select the desired temperature setting.
2. For best results, preheat the drawer before adding food. An empty drawer
will preheat in approximately 15 minutes.
3. Turn the thermostat control to OFF after use.
Warmer (Warm & Ready TM) Drawer Temperature Selection
(some models)
Refer to the table in the side column for recommended settings. If a particular
food is not listed, start with the medium setting. If more crispness is desired,
remove the lid or aluminum foil.
Most foods can be kept at serving temperatures by using the medium setting.
When a combination of foods are to be kept warm (for instance, a meat with 2
vegetables and rolls), use the high setting.
Refrain from opening the warmer drawer while in use to eliminate loss of heat
from the drawer.
Warmer (Warm & Ready TM) Drawer Indicator Light (some models)
The indicator light is located above the Warmer Drawer thermostat control. It
turns on when the control is set, and stays on until the control is turned OFF.
The warmer drawer is inoperable during the Self-Clean cycle. The indicator light
will not come on during the Self-Clean cycle.
To Remove and Replace Warmer (Warm & Ready TM) Drawer
(some models)
To Remove Warmer Drawer:
1. _r_ Turn power OFF before removing the warmer drawer.
2. Open the drawer to the fully opened position.
3. On the right glide you will find a shield attached with a hex-head screw (see
figure 1). Using a 1/4" socket and ratchet remove the shield.
4. Locate glide lever on each side of drawer, pull up on the left glide lever and push
down on the right glide lever.
5. Pull the drawer away from the range.
Fig. 2
NOTE: The warmer drawer will NOT
operatewhile inthe Self-Clean and '!Oven
lockout" modes
To Replace Warmer Drawer:
1. Replace shield on the right glide of the drawer body.
2. Pull the bearing glides to the front of the chassis glide (see figure 2).
3. Align the glide on each side of the drawer with the glide slots on the range.
4. Push the drawer into the range until levers "click" (approximately 2"). Pull the
drawer open again to seat bearing glides into position. If you do not hear the
levers "click" or the bearing glides do not feel seated remove the
drawer and repeat steps 2-4. This will minimize possible damage to the
bearing glides.
Electrical Shock Hazard can occur and result in
serious injury or death. Disconnect appliance from electric power
before cleaning and servicing the warmer drawer.
17
Loading ...
Loading ...
Loading ...