Loading ...
Loading ...
Loading ...
ENGLISH
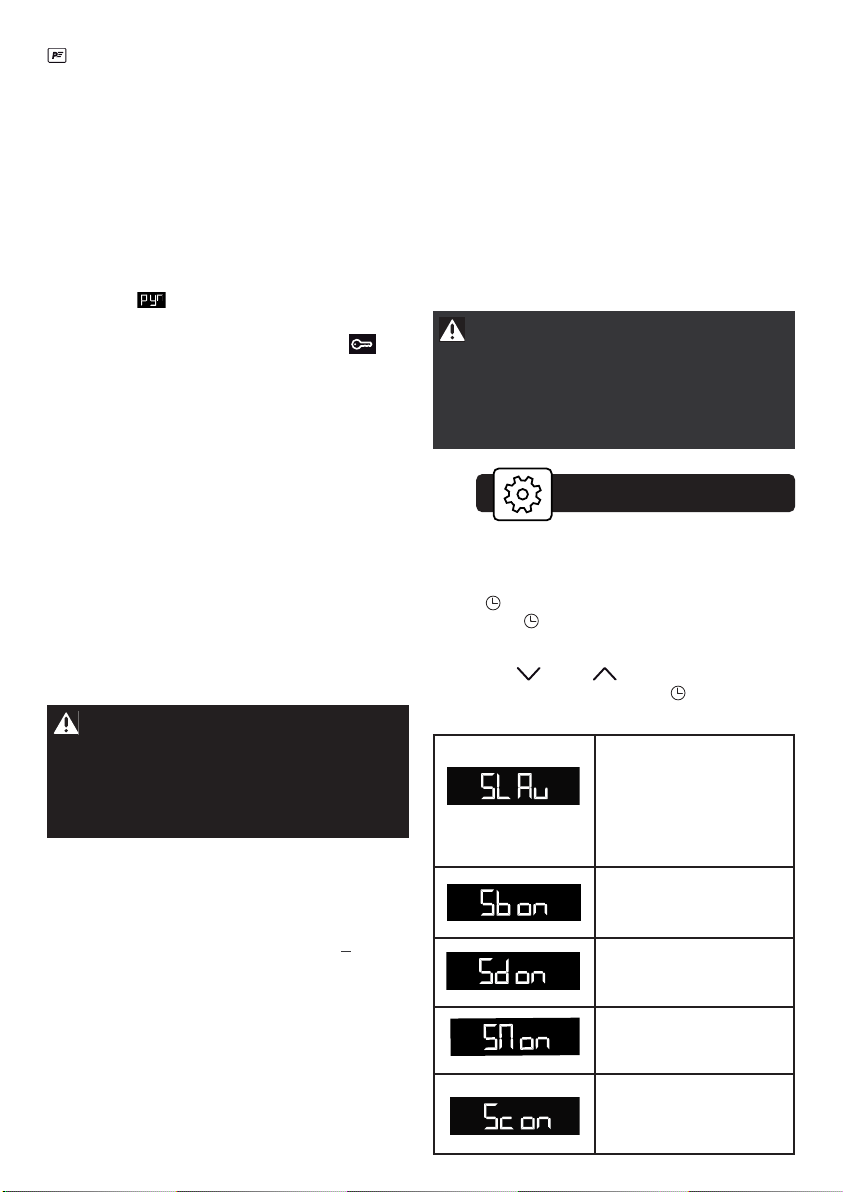
7.1 MENU
You can adjust different settings on your oven.
To do so:
Press until you get to the “MENU” display
then press again to select the different set-
tings.
Activate or de-activate the different parame-
ters with
and
; see table below.
To exit “MENU” mode, press until you get
to the clock display.
Settings
7
DELAYED PYROLYSIS
Follow the instructions described in the «immediate
pyrolysis» and refer to Chapter 4.4 to adjust the
pyrolysis end time.
After these steps have been completed, the start of
pyrolysis is delayed so that it finishes at the
programmed time.
6.3 CLEANING THE INSIDE GLASS
To make it easier to clean the inside glass, remove
the glass panels. Before doing this, remove any
excess grease with a soft cloth and washing up
liquid.
REMOVAL
Open the door fully and block it with the plastic
wedge pro
vided in your appliance’s plastic pouch.
Remove the first clipped glass panel:
Use a tool (screwdriver) to press the slots A
in order
to unclip the glass panel.
Remove the glass panel.
Depending on the model, the door consists of two
additional glass panels, with a black rubber spacer
at each corner. If necessary, remove them to clean.
Do not soak the glass panels in water. Rinse with
clean water and dry off with a lint-free cloth.
RE-ASSEMBLING THE DOOR
After cleaning, reposition the four rubber stops
> PyroExpress in 59 minutes.
The
PyroExpress
function benefits from the heat
accumulated during the previous cooking session to
rapidly clean a slightly soiled oven using the
principles of pyrolysis, in under one hour, depending
on certain conditions.
PyroExpress
is only possible if your oven is
still sufficiently hot, just after cooking. If this
is not the case, a 90-minute classic pyrolysis
cycle will automatically begin.
To activate pyrolysis, select the pyrolysis function of
your choice. Confirm by pressing OK.
The symbol displays as well as the length of
time for which the oven will be unavailable. The door
is locked during pyrolysis; the symbol will
appear on the display. At the end of the cleaning
cycle, 0:00 will appear on the display and the door
will be unlocked.
with the arrow upwards and reposition all of the
glass panels.
Slip the last glass panel into the metal stops, then
clip it in with the shiny side facing outwards.
Remove the plastic wedge.
Your appliance is now ready for use again.
AUTO: In cooking mode ,
the light inside the oven
automatically turns itself
off after 90 seconds.
ON: In cooking mode, the
light is on all the time.
Activate/de-activate the
beeping sound of the
buttons
Activate/de-activate
demonstration setting
Activate/de-activate
memo active mode
Activate/de-activate
booster mode
Warning
Do not use scouring cleaning products,
abrasive sponges or metal scrapers to clean
the oven's class door, which may scratch the
surface and lead to the glass breaking.
6.4 REPLACING THE OVEN LAMP
Bulb specification:
15 W, 220-240 V~, 300°C, E14 cap.
To unscrew the view port and the light, use a
rubber glove, which will make disassembly easier.
Warning:
Make sure the appliance is disconnected
from the power before replacing the lamp
in order to avoid the risk of electric
shock. Change the lamp only when the
appliance has cooled down.
Loading ...
Loading ...
Loading ...