Loading ...
Loading ...
Loading ...
12
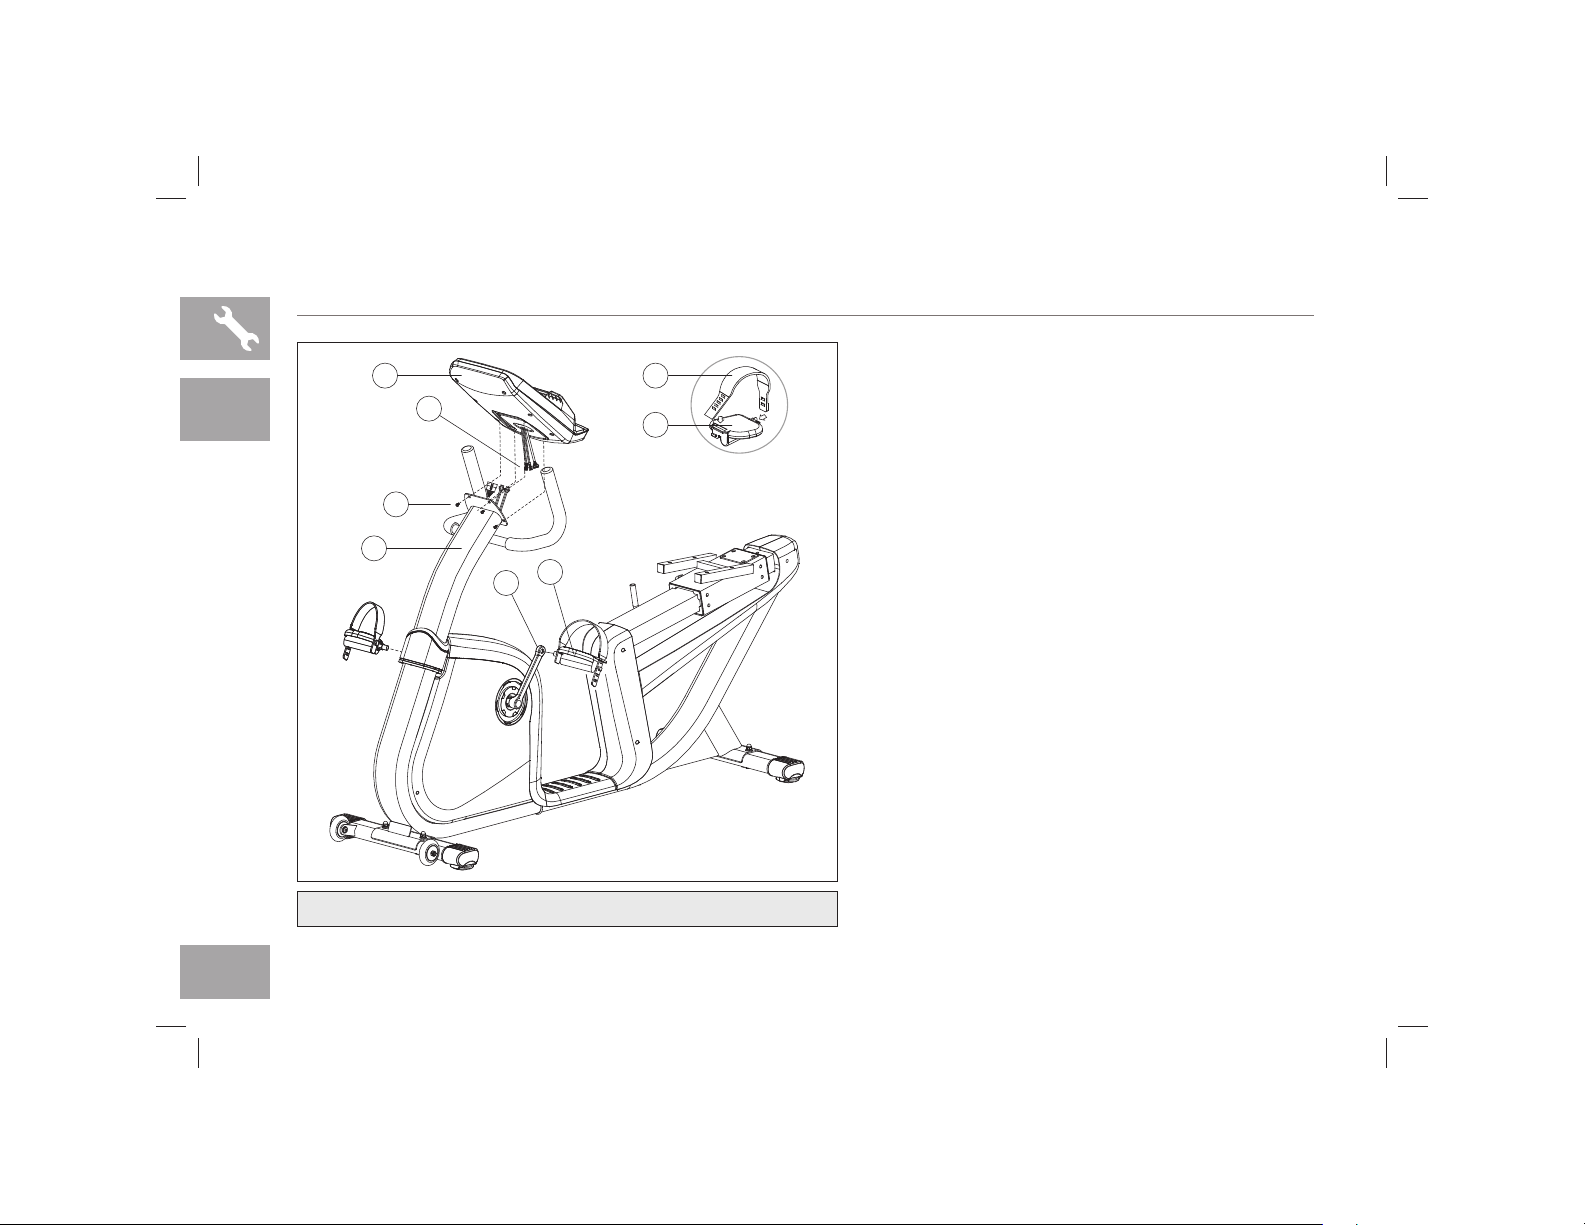
7.3AR ASSEMBLY STEP 3
* NOTE: There is no hardware for this step.
A Attach PEDAL STRAPS (7) to PEDALS (8).
B Attach the RIGHT PEDAL to the RIGHT CRANK
ARM, tightening it CLOCKWISE with the provided
13mm/15mm flat wrench.
C Attach the LEFT PEDAL (8) onto the LEFT
CRANK ARM (9), tightening it COUNTER-
CLOCKWISE with the provided 13mm/15mm flat
wrench. (NOTE: The left crank arm is reversed
threaded so it is very important that it is tightened
counter-clockwise. Tightening it the opposite way
can damage the pedal or the crank arm or both.)
D Connect the CONSOLE CABLES (6) and carefully
tuck them into the CONSOLE MAST (5).
E Attach the CONSOLE (10) to the CONSOLE
MAST (5) using the 4 PRE-ATTACHED SCREWS
(11) (The screws will have to be removed from the
console first).
10
7
8
11
5
9
8
6
7.3AR
NOTE: Be careful not to pinch any wires while attaching the console.
AFG14_7.3AR_AU_OM_r1_5.indd 12 5/12/14 11:12 AM
Loading ...
Loading ...
Loading ...