Loading ...
Loading ...
Loading ...
en Rails
28
2.
Press "Drying function".
a The duration appears on the display. You cannot
change the duration of the drying function.
3.
Start the drying function using
.
a A notification stating that you should carry out the
necessary preparatory work for the drying function
appears on the display.
4.
Press "OK" to confirm the notification.
a The drying function starts. The duration counts down
on the display.
a Once the drying function has run through to the
end, an audible signal sounds.
5.
Leave the appliance door open for 1-2minutes so
that the cooking compartment dries completely.
Rails
22 Rails
To thoroughly clean the rails and the cooking compart-
ment, or to replace the rails, you can remove the rails.
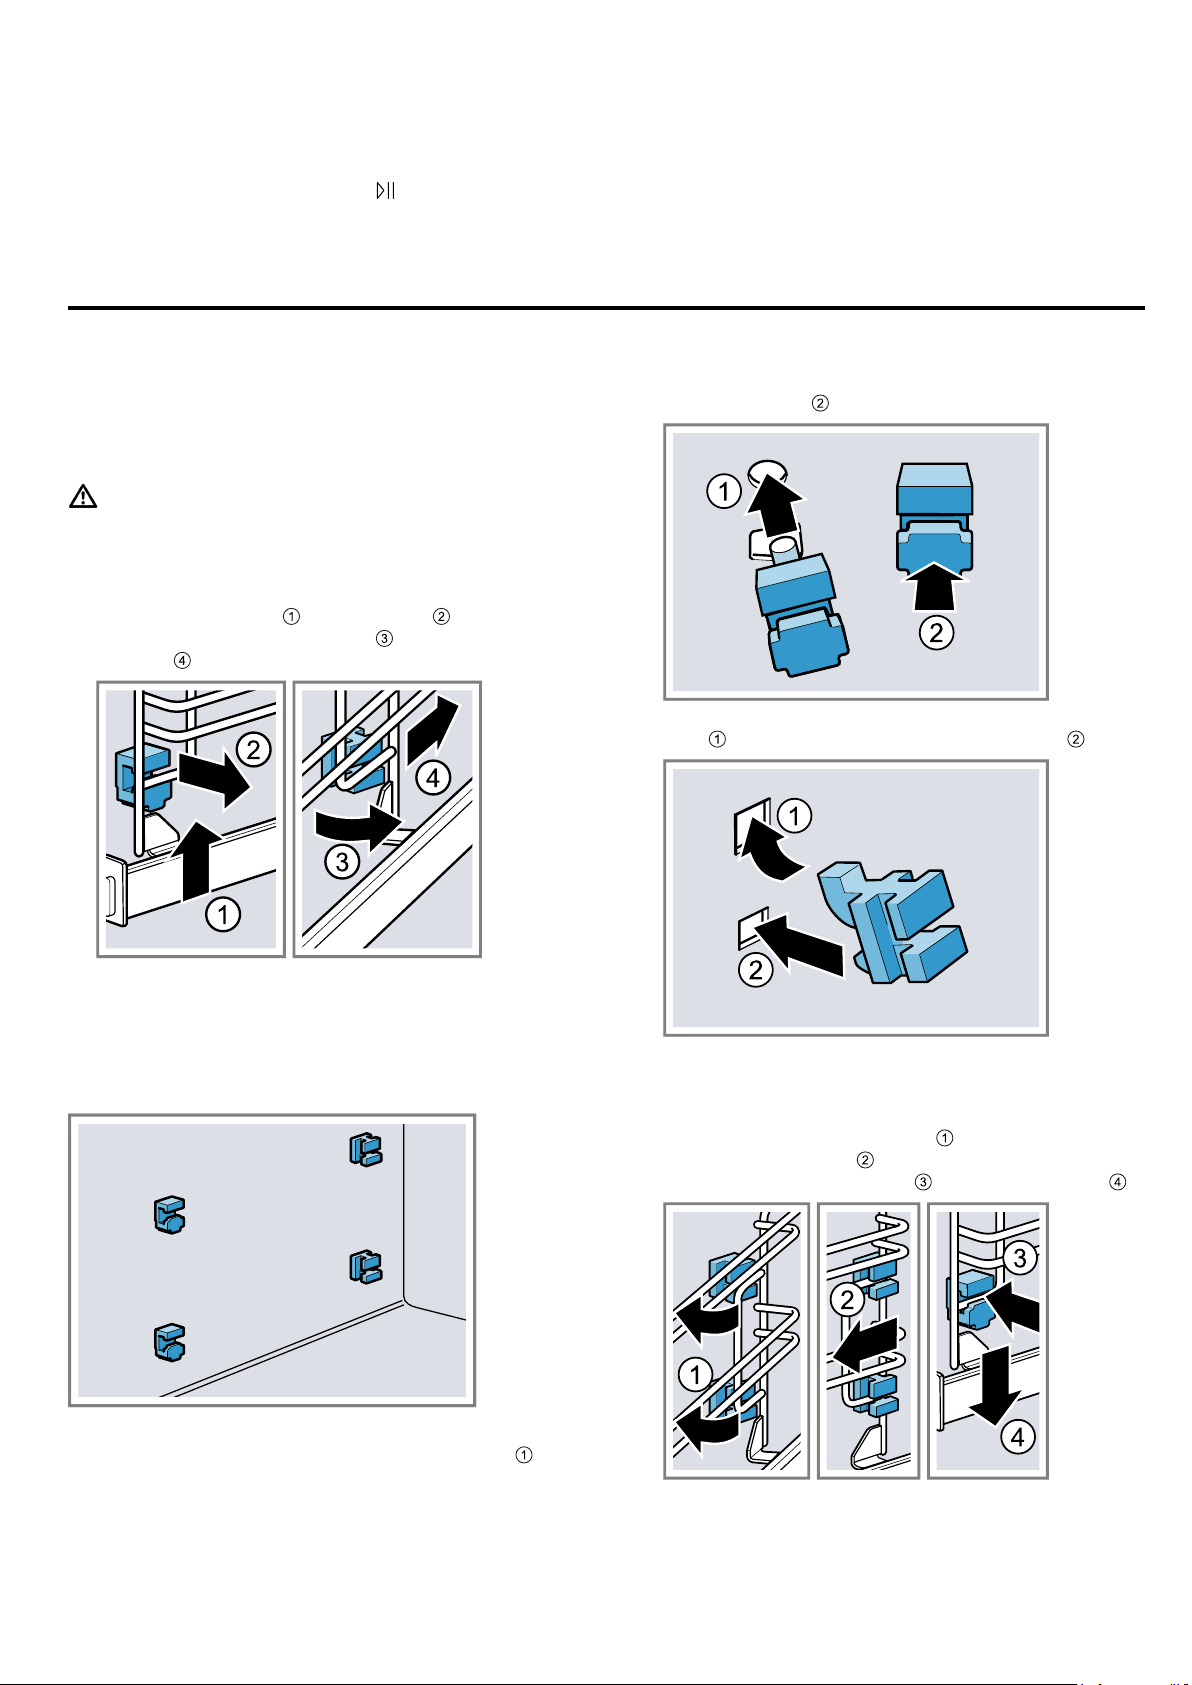
22.1 Detaching the rails
WARNING‒Risk of burns!
The shelf supports get very hot
▶ Never touch the shelf supports when hot.
▶ Always allow the appliance to cool down.
▶ Keep children at a safe distance.
1.
Lift the rail forwards and detach it .
2.
Swivel the entire rail outwards and unhook it at
the rear .
22.2 Fitting the retainers
The retainers may fall out when you detach the rails.
Note:
The retainers at the front differ from those at the rear.
1.
Hook the front retainers with the hook into the round
hole at the top and set them at a slight angle .
2.
Hook the front retainers in at the bottom and
straighten them .
3.
Hook the rear retainers with the hook into the top
hole and push them into the bottom hole .
22.3 Attaching the rails
1.
Set the rear rail at an angle, hooking it into the re-
tainers at the top and bottom
.
2.
Pull the rail forwards .
3.
Hook in the rail at the front and press it down .
Loading ...
Loading ...
Loading ...