
Loading ...
Loading ...
Loading ...
WARNING:
If raising the mower to access the blades, make sure the
mower is properly secured and the parking brake is set
before proceeding. Failure to properly secure the mower
could cause it to fall, resulting in possible death or serious
personal injury.
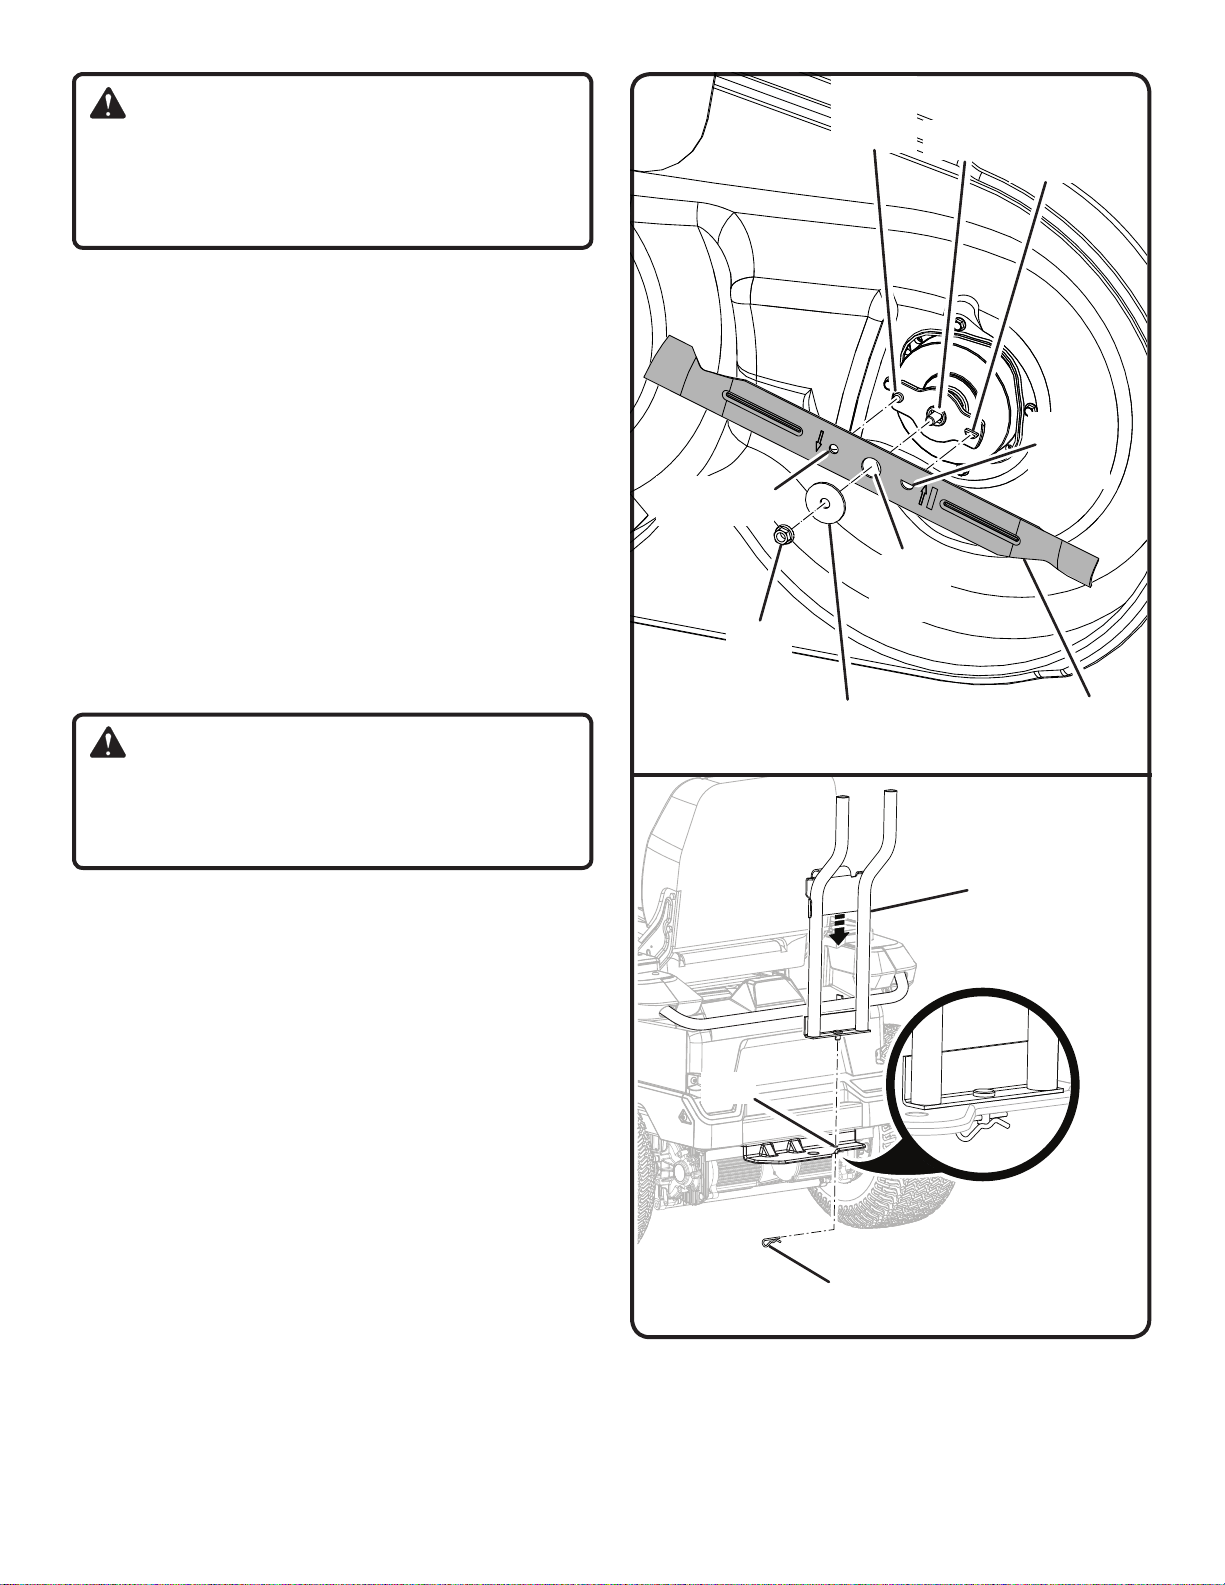
Wedge a block of wood between the blade and mower deck
to prevent the blade from turning.
Loosen the blade nut by turning it counterclockwise (as
viewed from bottom of mower) using a 15 mm wrench or
socket (not provided).
Remove the blade nut, spring washer, and blade.
Place the new blade on the shaft against the corresponding
blade posts. Ensure blade is properly seated with shaft
going through center blade hole and the two blade posts
inserted into their respective holes on the blade. Make sure
it is installed with the curved ends pointing up toward the
mower deck and not down toward the ground. When seated
properly, the straight sides should be aligned and the blade
should be flat against the blade posts.
Replace the spring washer, then thread the blade nut on the
shaft and finger tighten.
Torque the blade nut down clockwise using a torque wrench
(not provided) to ensure the bolt is properly tightened. The
recommended torque for the blade nut is 600-650 in. lbs.
WARNING:
Ensure blade is properly seated and the blade nut is
tightened to the torque specifications above. Failure to
properly attach the blade could cause it to come loose and
result in possible serious personal injury.
Repeat with second blade.
INSTALLING THE BAGGER
See Figures 4 - 10.
Make sure drive levers are in open position and blade engage
knob is down.
Stop the motor, remove the start key, and set the parking
brake.
Insert the bagger bracket into the hole on the rear right side
of the mower as shown.
Install hitch pin through hole at bottom of bracket to secure.
Place cover on top of bracket with openings on cover sliding
over shafts on frame.
Lift the cover all the way up and slide bags onto bagger
frame.
Lower cover until it snaps closed.
Remove mulch cover from mower, if installed.
Install the upper end of the top bagger tube (side with handle)
into the hole in the back of the grass catcher cover.
Install bottom bagger tube to side discharge outlet by plac-
ing opening over tab on mower frame, then hooking the
fasteners to the frame as shown.
Pull the top tube back out of the cover just far enough to
connect the two tubes together, lining up hole in bottom
tube latch with tab on upper tube. Push bottom tube latch
over top tube tab to secure.
BRACKET
HITCH PIN
HOLE
Fig. 4
Fig. 3
BLADE
BLADE
NUT
BLADE
CIRCLE
POST
SHAFT
BLADE HALF
CIRCLE POST
SPRING
WASHER
BLADE
HALF
CIRCLE
HOLE
BLADE
CIRCLE HOLE
CENTER
BLADE
HOLE
Loading ...
Loading ...
Loading ...