Loading ...
Loading ...
Loading ...

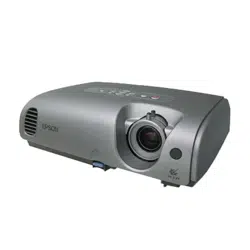
Epson PowerLite 62c/82c Projector
9/05 Epson PowerLite 62c/82c Projector - 5
The projector beeps once and the
Power light flashes green as
the projector warms up, then an image begins to appear. When
the
Power light stops flashing and remains green, the projector
is ready for use.
Warning:
Never look into the lens when the lamp is on. This can damage your
eyes, and is especially dangerous for children.
❏ If you’ve connected a Windows
®
-based computer to the
projector, you may see a message that your computer has
found a plug-and-play monitor; if so, click
Cancel.
❏ If you don’t see the image you want, press the
Source
Search button on the projector or the Search button on
the remote control until you see the image you want to
project. Then press the
Play button on your DVD player or
other device.
❏ If you are prompted to enter a password, see the
User’s Guide.
Note:
You can also use the Source buttons on the remote control to switch
between devices connected to the ports identified on each button.
If a projected image fails to appear, see “You Can’t Project an
Image” below.
When you’re done projecting, turn off the projector as
described on page 6. Shutting down the projector correctly
prevents premature lamp failure and possible damage from
overheating.
You Can’t Project an Image
If you don’t see the image you are trying to project, try the
following:
❏ Make sure the cables are connected correctly.
❏ Make sure the
Power light is green and not flashing and the
lens cap is off.
❏ If you’ve connected more than one computer and/or video
source, you may need to press the
Source Search button
on the projector’s control panel or the
Search button on
the remote control to select the correct source. (Allow a few
seconds for the projector to sync up after pressing the
button.)
❏ If you’re using a notebook PC, see the next section.
The Projector and Notebook Don’t
Display the Same Image
If you’re projecting from a notebook, and you can’t see your
image on the projection screen and on your notebook at the
same time, follow these guidelines.
If you’re using a notebook PC with Windows:
❏ On most notebooks, there’s a function key that lets you
toggle between the LCD screen and the projector, or display
on both at the same time. It may be labeled
CRT/LCD or
have an icon such as . You may have to hold down
the
Fn key while pressing it. Allow a few seconds for the
projector to sync up after changing the setting.
❏ If the function key doesn’t permit you to display
simultaneously on both screens, you should check your
monitor settings to make sure both the LCD screen and the
external monitor port are enabled.
From the Control Panel, open the
Display utility. In the
Display Properties dialog box, click the
Settings tab, then
click
Advanced. The method for adjusting the settings
varies by brand; you may need to click a
Monitor tab, then
make sure the external Monitor port is set as your primary
display and/or enabled. See your computer’s documentation
or online help for details.
If you’re using a Macintosh
®
with OS X:
You may need to set up your notebook to display on the
projector screen as well as the LCD screen. Follow these steps:
1. From the Apple menu, select
System Preferences, then
click
Displays.
2. Select VGA Display or Color LCD, click Arrange or
Arrangement, and make sure Mirror Displays is checked.
If you’re using a Macintosh with OS 8.6 to 9.x:
You may need to set up your notebook to display on the
projector screen as well as the LCD screen. Follow these steps:
1. From the Apple menu, select
Control Panels, then click
Monitors or Monitors and Sound.
2. Click the Arrange icon.
3. Drag one monitor icon on top of the other.
If the
Arrange option isn’t available, try selecting one of the
Simulscan resolution settings. Click the
Monitor icon, if
necessary, and then select a
Simulscan resolution. (Allow a few
seconds for the projector to sync up after making the selection.)
Loading ...
Loading ...
Loading ...
