Loading ...
Loading ...
Loading ...
CARTON CONTENTS
jl
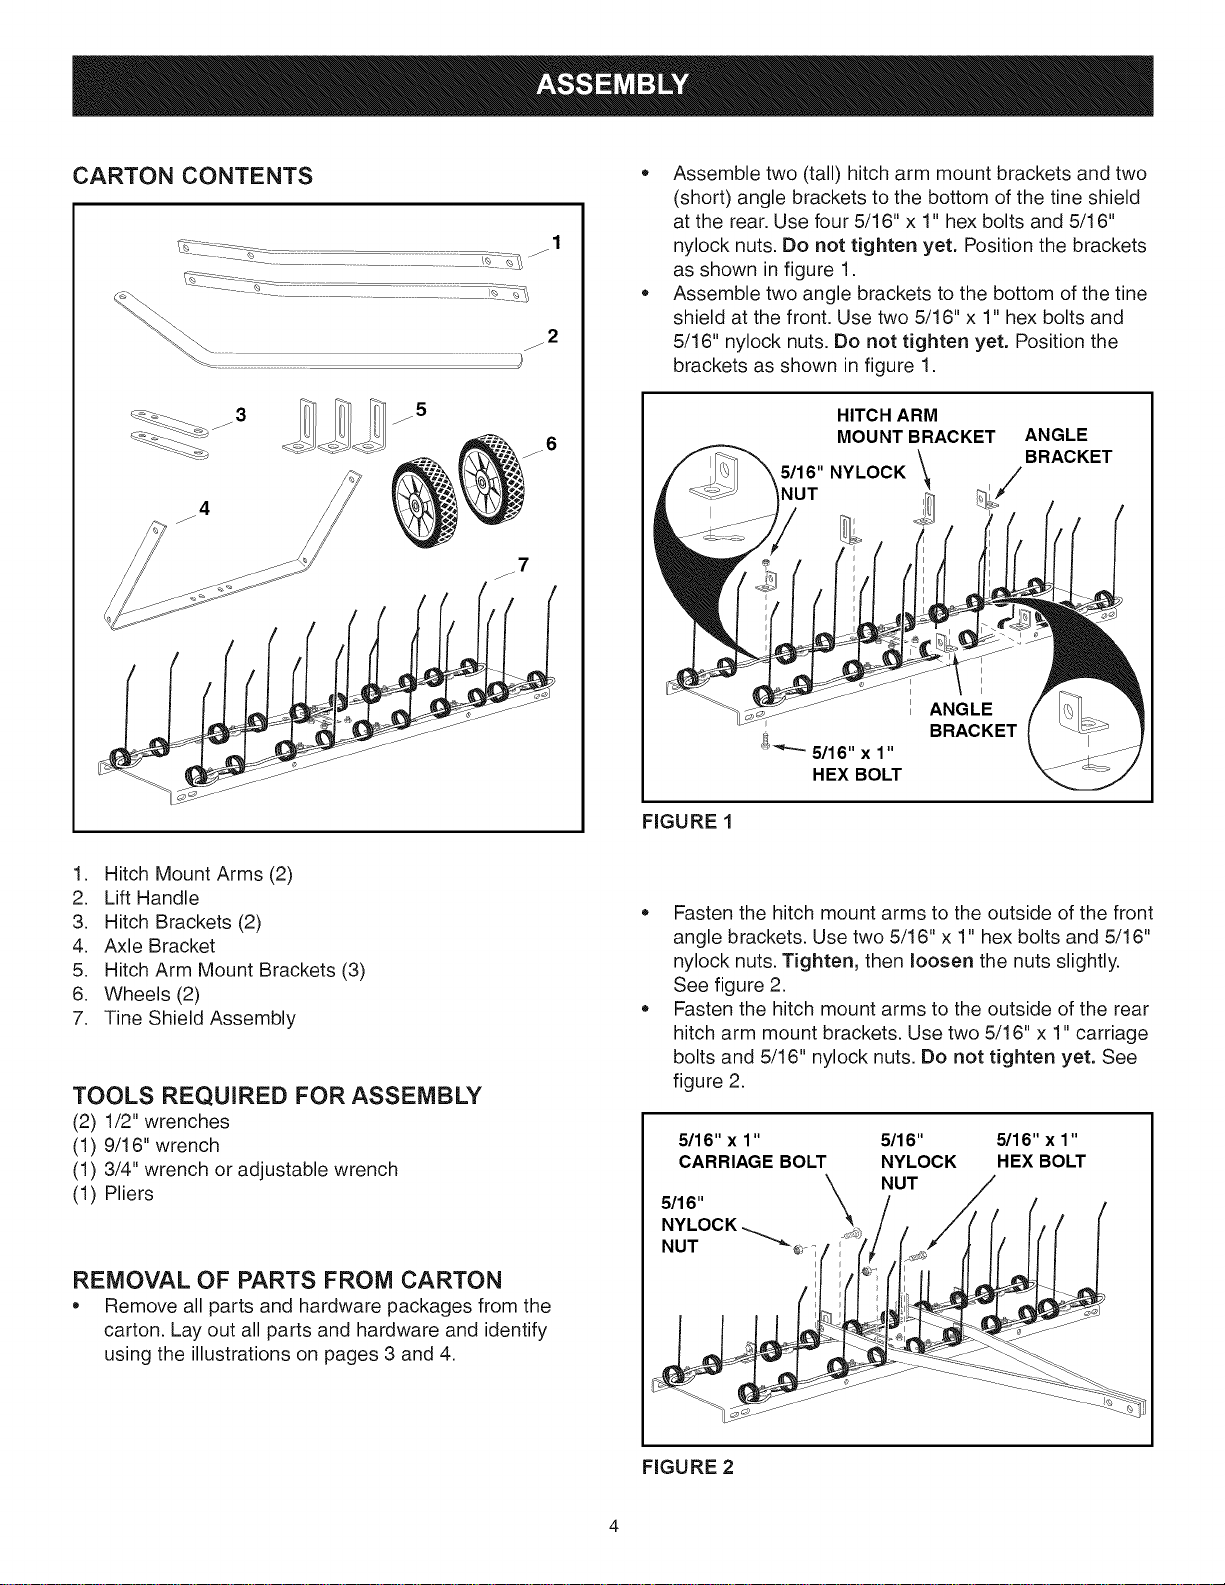
• Assemble two (tall) hitch arm mount brackets and two
(short) angle brackets to the bottom of the tine shield
at the rear. Use four 5/16" x 1" hex bolts and 5/16"
nylock nuts. Do not tighten yet. Position the brackets
as shown in figure 1.
Assemble two angle brackets to the bottom of the tine
shield at the front. Use two 5/16" x 1" hex bolts and
5/16" nylock nuts. Do not tighten yet. Position the
brackets as shown in figure 1.
HITCH ARM
MOUNT BRACKET ANGLE
BRACKET
5/16" NYLOCK _,.
NUT
ANGLE
BRACKET
FIGURE 1
1. Hitch Mount Arms (2)
2. Lift Handle
3. Hitch Brackets (2)
4. Axle Bracket
5. Hitch Arm Mount Brackets (3)
6. Wheels (2)
7. Tine Shield Assembly
TOOLS REQUIRED FOR ASSEMBLY
(2) 1/2" wrenches
(1) 9/16" wrench
(1) 3/4" wrench or adjustable wrench
(1) Pliers
REMOVAL OF PARTS FROM CARTON
Remove all parts and hardware packages from the
carton. Lay out all parts and hardware and identify
using the illustrations on pages 3 and 4.
Fasten the hitch mount arms to the outside of the front
angle brackets. Use two 5/16" x 1" hex bolts and 5/16"
nylock nuts. Tighten, then loosen the nuts slightly.
See figure 2.
Fasten the hitch mount arms to the outside of the rear
hitch arm mount brackets. Use two 5/16" x 1" carriage
bolts and 5/16" nylock nuts. Do not tighten yet. See
figure 2.
5116"x 1" 5116" 5116"x 1"
CARRIAGE BOLT NYLOCK HEX BOLT
., _ NUT
5116
NYLOCK ,_
NUT
FIGURE 2
Loading ...
Loading ...
Loading ...