Loading ...
Loading ...
Loading ...

8 — English
MAINTENANCE
WARNING:
To avoid serious personal injury, always remove the
battery pack from the product before inspecting, cleaning
or performing any maintenance.
WARNING:
Always wear eye protection with side shields marked to
comply with ANSI Z87.1. Failure to do so could result in
objects being thrown into your eyes resulting in possible
serious injury.
WARNING:
When servicing, use only identical replacement parts.
Use of any other parts could create a hazard or cause
product damage.
NOTICE:
Periodically inspect the entire product for damaged,
missing, or loose parts such as screws, nuts, bolts, caps,
etc. Tighten securely all fasteners and caps and do not
operate this product until all missing or damaged parts
are replaced. Please contact customer service or a quali-
fied service center for assistance.
GENERAL MAINTENANCE
Avoid using solvents when cleaning plastic parts. Most
plastics are susceptible to damage from various types of
commercial solvents and may be damaged by their use. Use
clean cloths to remove dirt, dust, oil, grease, etc.
WARNING:
Do not at any time let brake fluids, gasoline, petroleum-
based products, penetrating oils, etc., come in contact
with plastic parts. Chemicals can damage, weaken or
destroy plastic which may result in serious personal injury.
OPERATION
If the tines become obstructed:
Remove the battery pack.
Remove obstruction from the tines.
NOTE: Use a screwdriver or a small stick to remove ob-
structions. Do not try to unclog the tines by tapping the
motor head against the ground as this could bend the
tines or damage the unit.
If the tine shaft becomes obstructed:
Remove the battery pack.
Remove the hitch pin and tines from one side of the tine
shaft.
Remove vines, grass or other obstructions wrapped
around the tine shaft.
Replace the tines in the order that they were removed
and secure with hitch pin.
Repeat these steps to clean the other side of the tine
shaft.
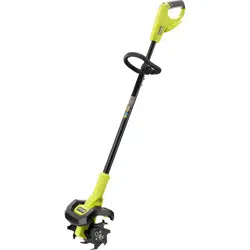
NOTE: The tool has four tines for cultivating — two inner
tines stamped “B” and “C”, and two outer tines stamped
“A” and “D”. When viewed from the front, as shown in
figure 11, the tines stamped “D” and “C” are on the left
and the tines stamped “A” and “B” are on the right. For
correct operation of the unit, the tines must be installed
in the correct orientation.
NOTE: The unit will not operate properly if the tines are
installed incorrectly. If you notice a problem with the
cultivating operation of the unit, check for proper tine
positioning.
Loading ...
Loading ...
Loading ...
