Loading ...
Loading ...
Loading ...
Installation
Step 4: Close your window to
secure the kit in place. It needs
to hold the windows kit firmly
in place, secure the window kit
with duct tape if required. It is
recommended that the gap
between the adapter and the
sides of the window should be
sealed off for maximum
efficiency.
NOTE: The air-conditioner should be installed on a flat surface with at least 300mm
clearance all around, including from the top of the unit as it is important that the air outlet
is not blocked. Power supply must be nearby.
WARNING: THIS APPLIANCE MUST BE INSTALLED, OPERATED AND STORED
IN A ROOM WITH A FLOOR AREA LARGER THAN 9m
2
Do not install and use the appliance in the bathroom or other humid environments.
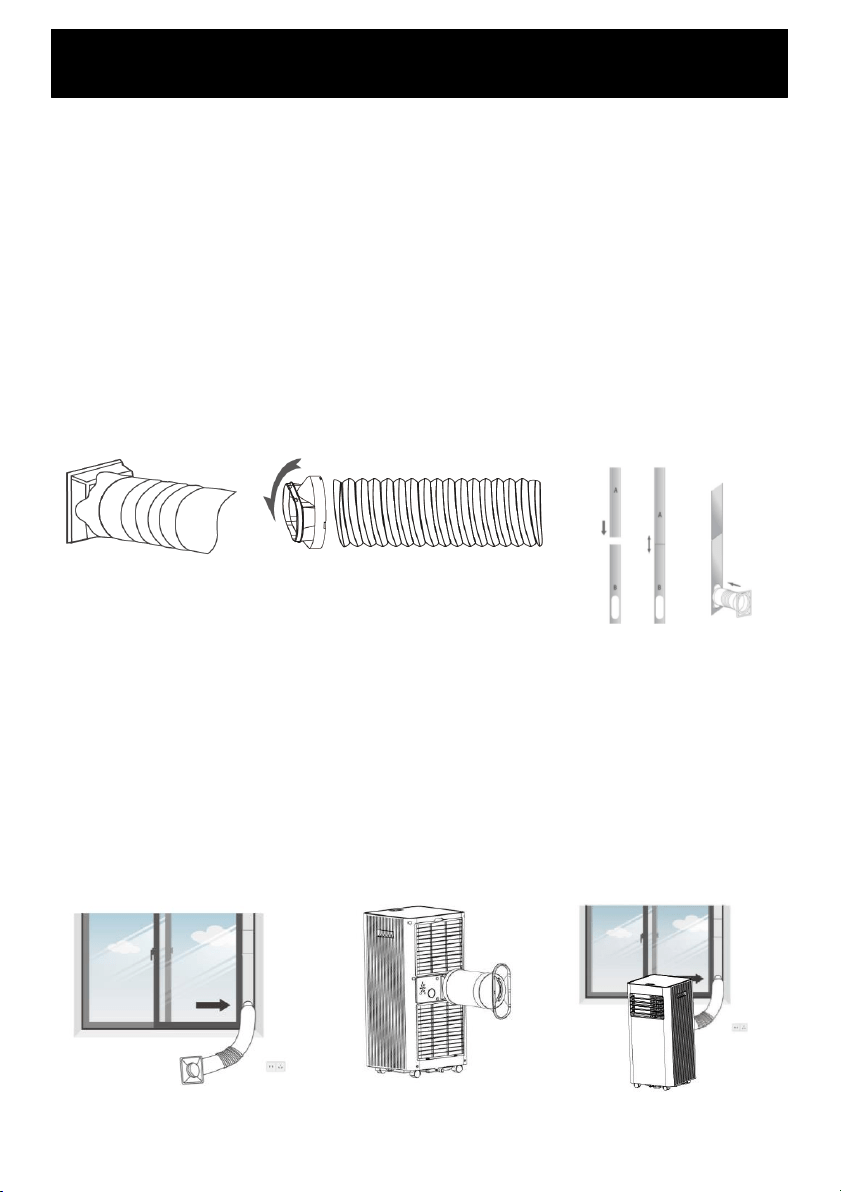
Attach the Exhaust Hose
Step 1: Connect the
hose connector to one
end of the exhaust
hose.
Step 2: Connect the
windows kit adapter to the
other end of the exhaust
hose.
Step 3: Extend the
adjustable window kit the
length of your window.
Connect the exhaust hose
to the window kit.
Step 4: Close your window to
secure the kit in place. It needs
to hold the windows kit firmly
in place, secure the window kit
with duct tape if required. It is
recommended that the gap
between the adapter and the
sides of the window should be
sealed off for maximum
efficiency.
Step 5: Attach the hose
connector to the exhaust air
outlet of unit.
Step 6: Adjusting the length
of the flexible exhaust hose,
and avoid bends in the
hose. Then place AC near an
electrical outlet. Adjust the
louver at the air outlet, and
then switch on the unit.
Loading ...
Loading ...
Loading ...