Loading ...
Loading ...
Loading ...
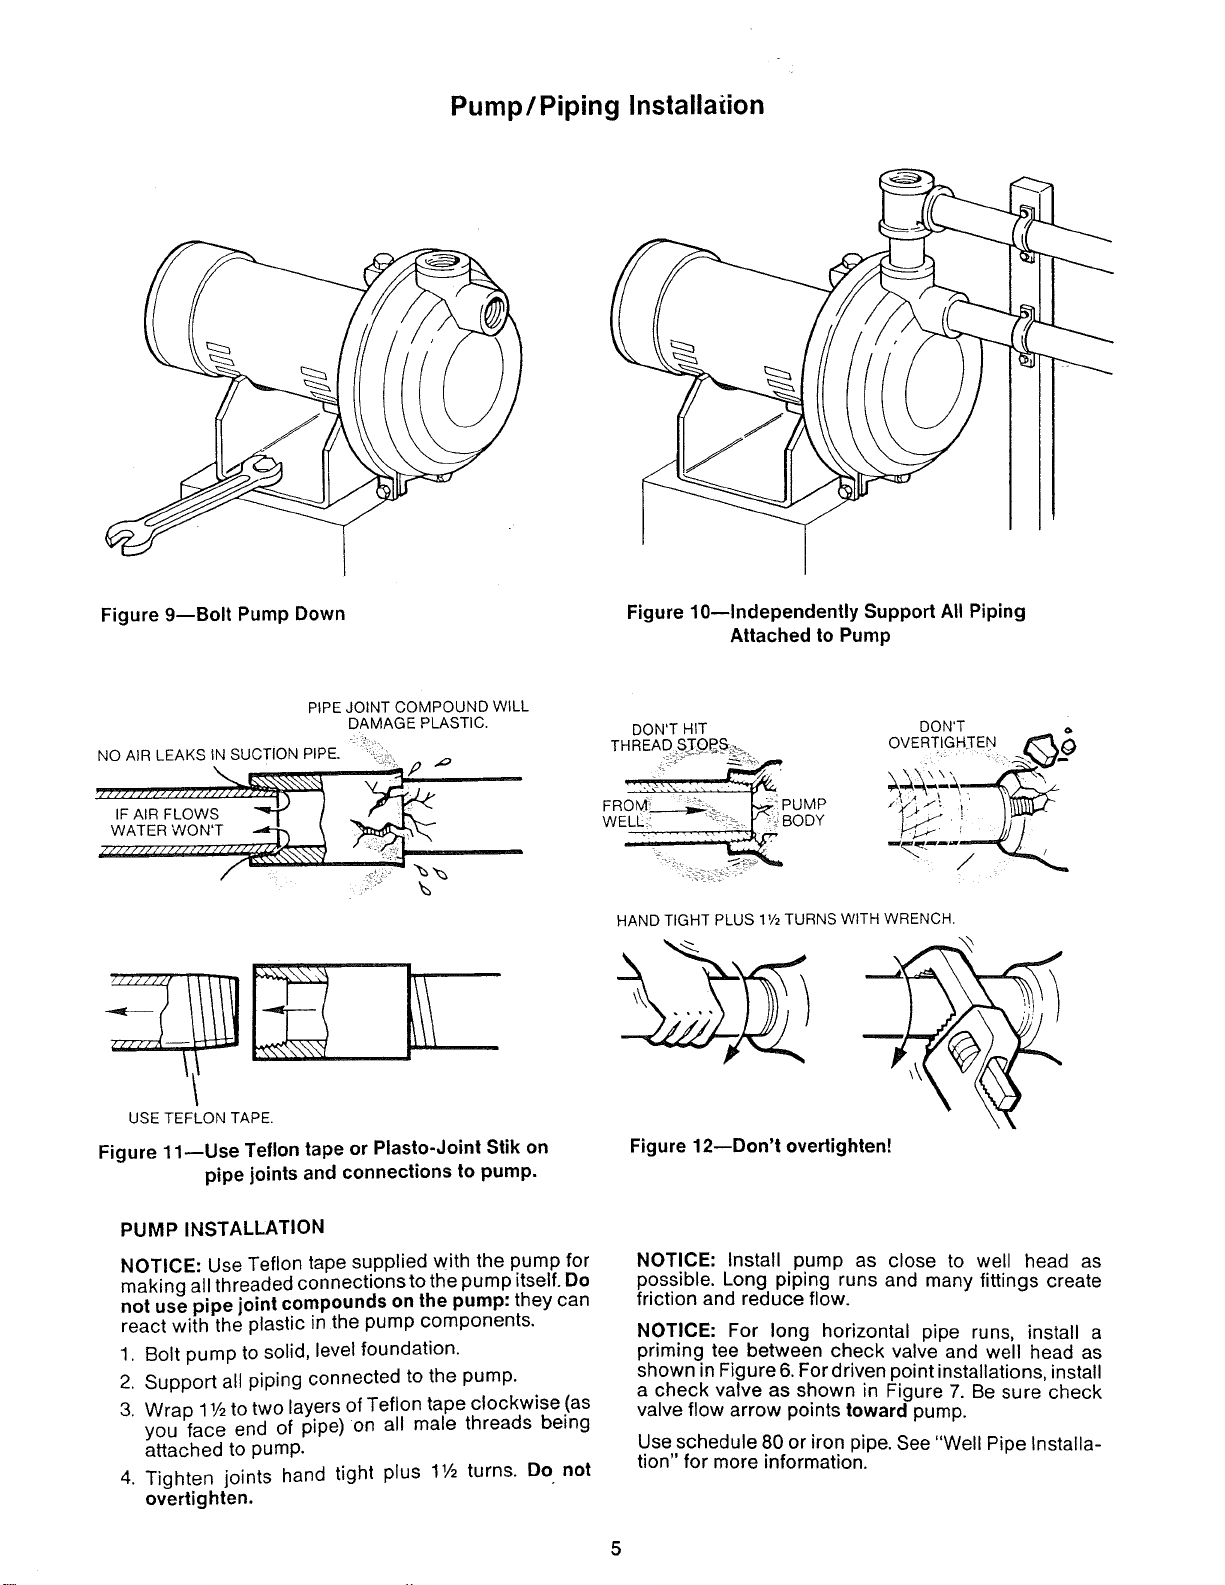
Pump/Piping Installation
Figure 9--Bolt Pump Down
Figure 10--Independently Support All Piping
Attached to Pump
PIPE JOINT COMPOUND WILL
DAMAGE PLASTIC.
NO AIR LEAKS IN SUCTION PIPE. "_.'(: ,
'W--)
WATER WON'T _ \ _ _"
/l!ll!//l///(l!!!//!/I/P / * -,'{[
USE TEFLON TAPE.
Figure 11--Use Teflon tape or Plasto-Joint Stik on
pipe joints and connections to pump.
DON'T HIT
THREAD STO_S _
W BODY
DON'T
OVERT!GHZEN _,_
HAND TIGHT PLUS 11/2TURNS WITH WRENCH.
Figure 12--Don't overtighten!
PUMP INSTALLATION
NOTICE: Use Teflon tape supplied with the pump for
making all threaded connections to the pump itself. Do
not use pipe joint compounds on the pump: they can
react with the plastic in the pump components,
1. Bolt pump to solid, level foundation.
2. Support all piping connected to the pump.
3. Wrap 11/2to two layers of Teflon tape clockwise (as
you face end of pipe)on all male threads being
attached to pump.
4. Tighten joints hand tight plus 1Vz turns. Do not
overtighten.
NOTICE: Install pump as close to well head as
possible. Long piping runs and many fittings create
friction and reduce flow.
NOTICE: For long horizontal pipe runs, install a
priming tee between check valve and well head as
shown in Figure 6. For driven point installations, install
a check valve as shown in Figure 7. Be sure check
valve flow arrow points toward pump.
Use schedule 80 or iron pipe. See "Well Pipe Installa-
tion" for more information.
Loading ...
Loading ...
Loading ...