™
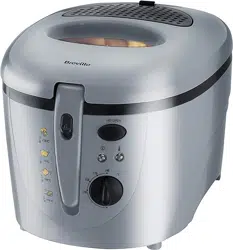
compact
deep fryer
®

2
product safety
READ CAREFULLY AND KEEP FOR FUTURE REFERENCE
This appliance shall not be used by children from 0 year to
8 years. This appliance can be used by children aged from
8 years and above if they are continuously supervised. This
appliance can be used by people with reduced physical,
sensory or mental capabilities or lack of experience and
knowledge if they have been given supervision or instruction
concerning use of the appliance in a safe way and understand
the hazards involved.
Keep the product and its cord out of reach of children aged
less than 8 years. Cleaning and user maintenance must not
be done by children.
This product must be positioned on a stable surface with the
handles positioned to avoid the spillage of hot liquids.
Surfaces of the product are liable to get hot during use.
Never operate the product by means of an external timer or
separate remote-control system.
If the supply cord is damaged, it must be replaced by the
manufacturer, its service agent or similarly qualied persons
in order to avoid a hazard.

3
product safety
! Never use this appliance for anything other than its intended use. This appliance is for
household use only. Do not use this appliance outdoors.
! Always ensure that hands are dry before handling the plug or switching on the
appliance.
! Always use the appliance on a stable, secure, dry and level surface.
! Ensure the appliance is switched off and unplugged from the supply socket if it is
left unattended, when it is not in use or before cleaning. Never leave the appliance
unattended when it is in use.
! Always allow the appliance to fully cool down before cleaning or storing.
! Do not use the appliance if it has been dropped, if there are any visible signs of
damage or if it is leaking.
! Never immerse any part of the appliance or power cord and plug in water or any other
liquid.
! Never let the power cord hang over the edge of a work top, touch hot surfaces or
become knotted, trapped or pinched.
! Do not touch the external surfaces of the appliance during use as they may become
very hot.
! Only use spares or accessories that are recommended by the manufacturer.

4
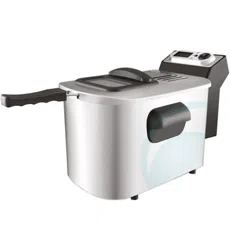
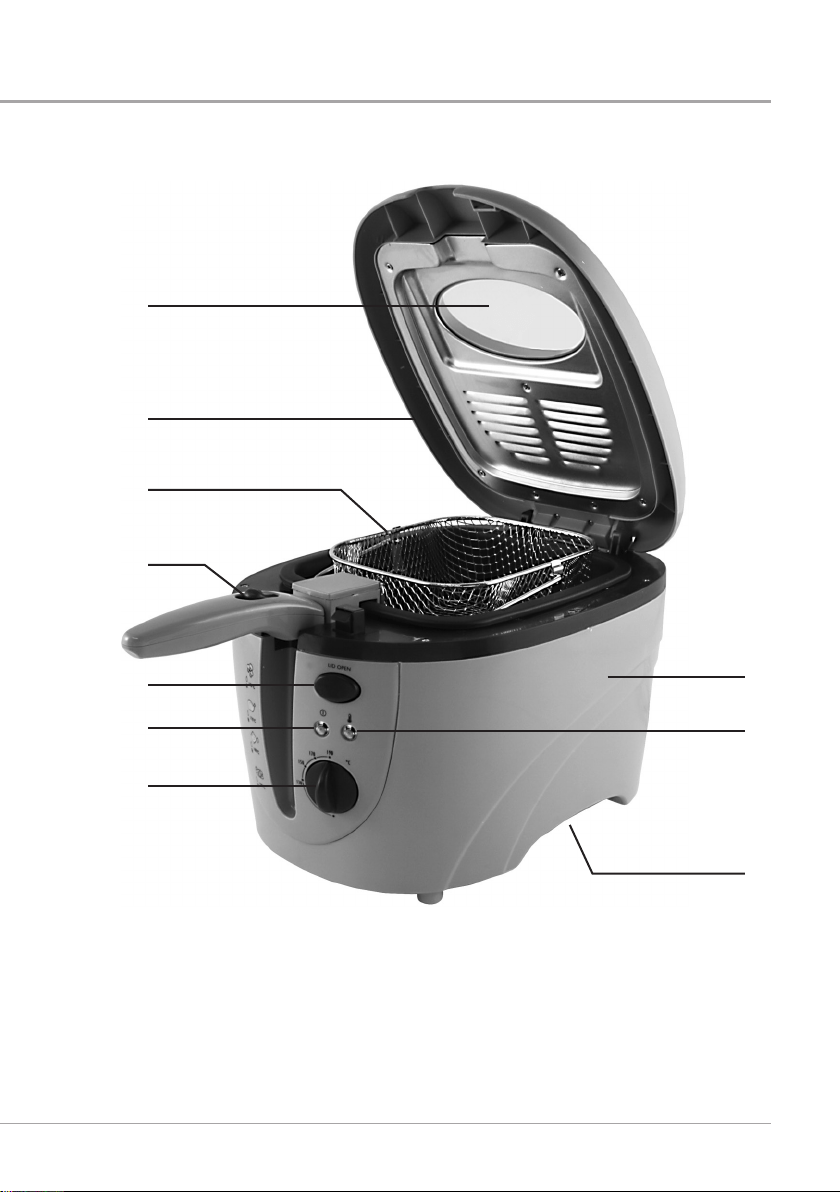
features
1 Temperature control
Allows you to choose the desired frying temperature. The control is marked in
degrees Centigrade (ºC)
2 Power indicator (red)
Lights up when your fryer is connected to the mains supply.
3 Lid release button
Press the lid release button to open the lid.
4 Handle release button
Lets you raise or lower the handle.
5 Frying basket
Allows food to be lowered and raised from the fryer easily.
6 Lid
Removable lid for easy cleaning
7 Viewing window
Allows you to keep an eye on your food during frying.
8 Body
Cool wall body.
9 Ready-to-cook indicator (green)
Lights up when your fryer is heating up; goes out when your fryer is ready to use.
10 Carrying handle
The carry handles allow your fryer to be moved easily.
5
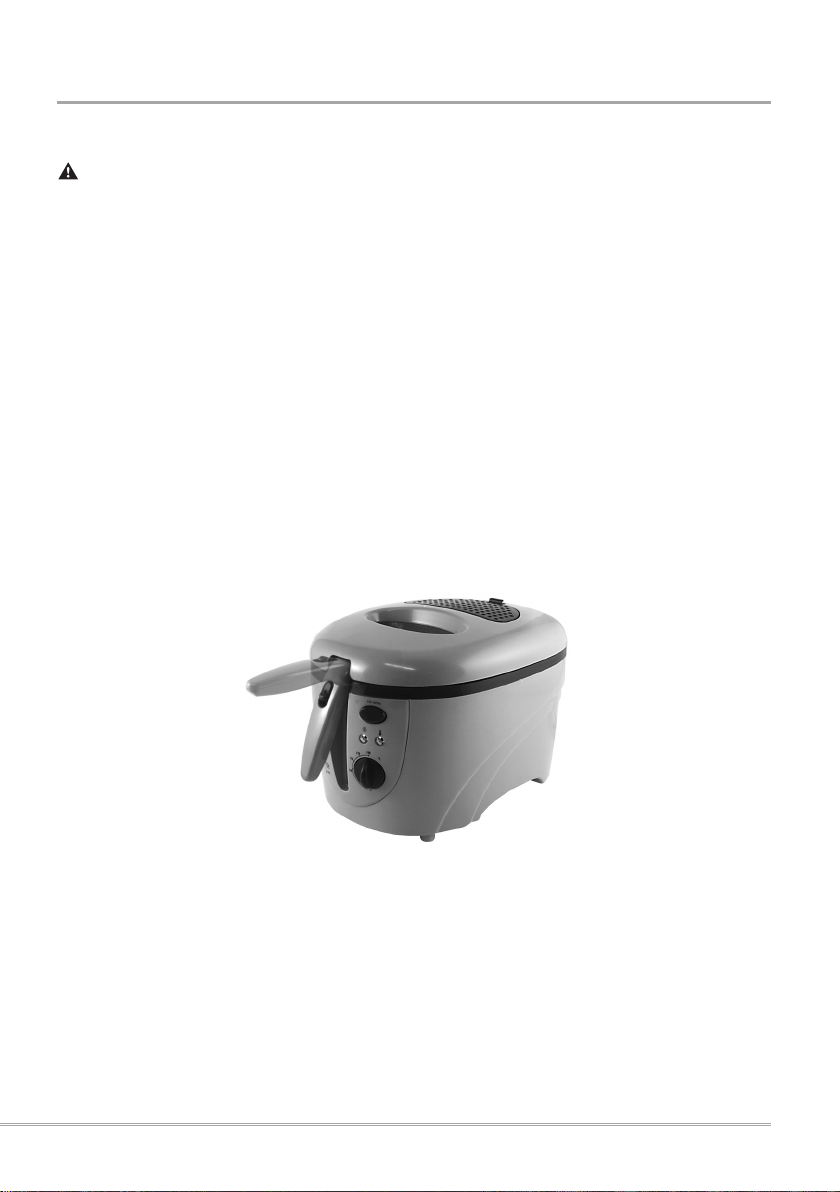
Due to our policy of continuous improvement, the actual product may differ slightly from the one illustrated in these instructions.
q
w
y
u
r
i
a
o
e
t

6
before using your fryer
Before use
Do not immerse any part of the main body, mains lead or plug in water or any
other liquid.
Before using your fryer remove all packaging, promotional materials and stickers.
Remove all printed documents. Check that there is no packing around or under the frying
basket.
• Wash the basket and basket handle in warm, soapy water. Rinse and dry thoroughly.
• Wipe the interior and exterior of the main body and lid with a damp cloth. Dry
thoroughly.

7
filling your fryer with oil
Make sure your fryer is switched off, cooled down, and unplugged from the
mains supply socket before lling with oil.
IMPORTANT! Never plug in or switch your fryer on without cooking oil in the bowl.
We recommend that you use a good quality oil in your fryer.
Always use sunower oil, vegetable oil or corn oil. Never use hard fats, olive oil or oil with
a high water content. Do not use butter or margarine.
If the oil has been previously used, check the condition of the oil and replace as
necessary. Oil needs to be replaced after 8-10 uses or as required. Do not mix different
types of oil together.
1. Open the lid and remove the basket from your fryer.
2. Pour oil (see page 10 for recommended types) into the frying bowl up to the MAX
mark indicated on the inside of the bowl. Do not ll above the MAX mark or below the
MIN mark.
Handy Tip: Don’t throw the empty oil bottle away. You can use this to dispose of or
to store the used oil once it has cooled—see page 16.

8
Always use your fryer on a stable, secure, dry and level surface.
Allow adequate space above and on all sides for air circulation.
Do not allow the appliance to touch any ammable material during use (such as
curtains or wall coverings).
Care is required when using the appliance on surfaces that may be damaged by
heat. The use of an insulated pad is recommended.
1. Open the lid by pressing the lid open button.
2. Check the oil level and rel or top up if neccessary.
3. Raise the frying basket by lifting the basket handle to the horizontal position until the
handle release button clicks.
4. Plug your fryer into a suitable mains supply and switch the socket on.
5. The red power indicator light will illuminate.
6. Close the lid then turn the temperature control dial to the desired temperature setting.
The oil will now start to heat up and the green temperature indicator will illuminate.
7. When the oil has reached its set temperature, the green temperature indicator will
go out. This light will cycle on and off during cooking as the thermostat regulates the
temperature. The red power indicator will remain on.
8. Your fryer is now ready for use.
using your fryer
9
using your fryer
Frying
HOT OIL CAN SCALD AND CAUSE SERIOUS BURNS! NEVER drop or tip
food into the bowl. NEVER put your hand or any other body part into the hot oil.
ALWAYS keep your hands and face away from rising steam or spitting oil.
1. With the basket in the raised position, add the food.
2. Close the lid until it clicks.
3. Pull the handle release button backwards with your thumb and gently lower the
basket into the hot oil.
4. When the food is cooked, raise the frying basket by lifting the basket handle to the
horizontal position until the handle release button clicks. This will allow excess oil to
drain from the food.
5. Open the lid by pressing the lid release button. Beware of spitting oil and rising steam
as you open the lid.
6. Lift the basket out of the fryer and place it onto a drip tray and/or kitchen paper.
Note: Battered or coated food may stick to the frying basket. To prevent this, use a
slotted spoon to lift the food away from the mesh straight after the basket has been
lowered into the oil.
After frying
Once you have nished using your fryer turn the temperature control dial fully
anticlockwise. Unplug your fryer from the mains supply socket.
Close the lid and allow the oil and your fryer to completely cool before moving or cleaning
your fryer. Always use the carrying handles when moving your fryer. Never attempt to
move your fryer using the lid or body.
We recommend that once the oil has cooled completely, it is best to remove the oil from
your fryer and to clean the appliance before storing.

10
Recommended types of oil
Oils recommended for use in your fryer include:
• Sunower
• Vegetable
• Groundnut
• Rape seed
• Corn
Oils and fats not recommended:
• Hard fats or solid
• Olive oil (any type)
Always use the recommended (MAX) quantity of oil when deep frying. Never exceed this
amount, and never use the fryer without any oil in it. Always ll above the MIN mark with
oil before using the fryer.
Utensils
Select your cooking utensils carefully. Do not use utensils which may melt (e.g. plastic).
Take care when using metal utensils as not to damage the heating element. Also metal
handles might get hot. Use oven gloves, or buy utensils with insulated handles.
Suitable utensils include metal or heat resistant plastic, slotted spoons, slotted sh slices,
or tongs.
Not suitable: wooden or plastic non-heat resistant utensils, knives or other sharp
implements.

11
Preparing food
• Cut food items such as chips to the same size and choose similar sized pieces of sh
and chicken.
• Make sure food is as dry as possible (except battered food) before frying. Water and
oil do not mix well, water causes hot oil to spit. Use kitchen paper to absorb excess
water from sh, meat, vegetables and fruit.
General
• Smaller pieces of food will fry faster than larger ones. It may be necessary to cook
chicken or frozen items for longer on a lower heat to avoid the outside cooking before
the middle is cooked.
• Delicate foods such as prawns or thinly sliced vegetables require less cooking at a
higher temperature than more robust food types.
• Use a food thermometer or the skewer test to ensure that the food has been cooked
through to the centre.
• Never exceed the MAX level when lling the frying bowl with oil.
• Always ll above the MIN level with oil before using the fryer.
• Avoid overlling the frying basket.
• DO NOT place face or hands in contact with hot oil or steam.
• To avoid battered or coated food sticking to the frying basket, use a slotted spoon to
lift the food away from the mesh. Then allow to cook, gently moving the basket from
side to side once or twice during cooking.
• For even cooking of foods, stir or turn the food with suitable utensils, or move the
basket gently during cooking.
Draining
• Use a drip tray (and rack) to drain large food items after frying. The drip tray without
the rack can also be used to drain smaller items when lined with kitchen paper or as
a rest for the frying basket.
• Avoid leaving food to drain for too long in the basket over the fryer as the food may
become soft and lose its crunchiness.

12
recipes
Fluffy Vegetable Fritters
Ideal for slices or wedges of lightly cooked carrots, turnips, potatoes, cauliower orets,
blanched button mushrooms, raw aubergines, courgette slices, etc.
Ingredients
2 eggs
100g (4oz) self raising our
2 x 5ml tsp of olive oil
4 x 15ml tbsp milk
6 x 15ml tbsp water
Pinch of salt and pepper
Method
1. Pat the vegetable slices dry with kitchen paper.
2. Separate the two eggs and beat the whites.
3. Mix together self-raising our, two egg yolks, olive oil, milk and salt and pepper.
4. Add water and stify beaten egg whites to the mixture.
5. Coat the vegetables in the mixture.
6. Drain excess batter then deep fry for 4-5 minutes at 150ºC.
Beef Cutlets
Ingredients
2 slices of beef, 150g each (6oz)
2 eggs
50g (2 oz) breadcrumbs
Salt and pepper
Method
1. Beat the cutlets gently for extra tenderness.
2. Beat the two eggs in a shallow dish and add seasoning.
3. Coat the beef in the egg mixture and then breadcrumb. Repeat the process to ensure
a good coating.
4. Deep fry the cutlets for 5-7 minutes at 170ºC, turn after 2-3 minutes so that they fry
evenly.

13
recipes
Sesame Chicken Goujons
Ingredients
2 chicken breasts
1 tbsp balsamic vinegar
2 tbsp sherry
2 tsp cornour
2 tsp our
50g sesame seeds
Salt and pepper
Method
1. Cut the chicken breasts into nger sized strips .
2. Make marinade by adding together balsamic vinegar, sherry, cornour, our and salt
and pepper.
3. Marinade the chicken for at least half an hour.
4. Drain well, then roll in sesame seeds, before deep frying for 4-5 minutes at 170ºC.
Deep-fried Camembert
Ingredients
8 individual portions of Camembert
1 tbsp seasoned our
1 beaten egg
50g (2oz) dried breadcrumbs
Method
1. Coat the Camembert portions in our, then egg and then breadcrumbs. Repeat the
process, to ensure a good coating.
2. Freeze or chill the coated Camembert portions for at least 30 minutes, before deep
frying for about 4 minutes at 170ºC.
3. It is essential that the Camembert portions are well chilled right up to the moment
they are put into the fryer, otherwise the cheese will become over-ripe, and ooze out
of the coating during frying.
4. After cooking, drain on kitchen paper and serve with hot cranberry or redcurrant
sauce.

14
recipes
Scampi
Ingredients
600g (25oz) scampi
3 tbsp our
1 lemon
1 cup of milk
2 eggs
Pinch of salt
Method
1. Mix the our, lemon and milk and add the beaten eggs and a pinch of salt.
2. Remove the tails from the shells of the scampi and add to the mixture, leaving to
marinade for one hour.
3. Deep fry the scampi for 7-10 minutes at 160ºC, turn after 4-5 minutes.
Chicken Kiev
Ingredients
50g (2oz) butter
½ tsp garlic powder
1 tsp chopped parsley
2 chicken breasts
1 egg
25g (1oz) seasoned our
25g (1oz) white breadcrumbs
Wooden cocktail sticks
Method
1. Mix together the butter, garlic powder and parsley and roll into two log shapes.
2. Flatten out the two chicken breasts.
3. Place a roll of the butter mix into each breast and roll up, fold up the ends so that the
butter is enclosed. Secure with a cocktail stick.
4. Beat the egg and dip the chicken breasts into the egg. Make sure the chicken is fully
coated in the egg, then coat in our and then breadcrumbs.
5. Chill for one hour before frying.
6. Deep fry the chicken for 15-20 minutes at 170ºC.

15
recipes
Deep Fried Squid
Ingredients
500g (20oz) squid
3 tbsp plain our
2 lemons
Pinch of salt
Method
1. Wash the squid and cut into rings.
2. Pat dry with kitchen paper and dip in the our.
3. Deep fry the squid for 9-10 minutes at 160ºC. Serve with slices of lemon and salt.
Fruity Fritters
Ingredients
Peeled and cored baking apples, bananas and tinned
pineapple rings
100g (4oz) self-raising our
Pinch of salt
1 egg
140ml (¼ pint) milk
Method
1. Cut the apples into rings, slice bananas lengthways and drain pineapple rings. Dust
with our.
2. Mix together our, salt, egg and milk.
3. Coat the fruit in the batter.
4. Drain the excess batter off and deep fry for 3-4 minutes at 150ºC.

16
how to remove oil from your fryer
Before removing oil from your fryer ALWAYS switch off, unplug and allow the oil
to cool completely.
1. You will need a slotted spoon, a suitable tray or large plate, kitchen paper, a funnel or
jug with a pouring lip, muslin (if reusing the oil), and the original oil bottle you saved
earlier! If you’ve thrown it away, any suitable sized bottle with a lid will do.
2. Using a slotted spoon, skim off any food scraps oating on the surface of the oil.
3. If you have used it, remove the basket from your fryer and place it on kitchen paper
to drain.
4. Next, place the oil bottle in the sink, remove its cap and place the funnel in the top. If
you wish to reuse the oil, line the funnel with a piece of muslin to act as a lter.
5. Remove the lid from your fryer (see page 17) to avoid it falling off when you tip the oil
out of the bowl.
6. Using both hands, carefully pick up your fryer by the carrying handles on each side.
7. Take it over to the sink and pour the oil from the bowl slowly into the bottle through
the funnel. Alternatively, pour the oil into a jug that has a pouring lip and use this to
transfer the oil into the bottle.
7. When all the oil has been poured into the bottle, remove the funnel (discard the
muslin, if used), and replace the bottle cap. The oil can now either be stored for
reuse, or discarded safely and cleanly.
8. You can now clean your fryer—see page 17.
Always dispose of the oil in an environmentally safe way. Never pour the oil into
drains. Contact your recycling centre for advice on the disposal of the oil.
17
how to clean and care for your fryer
Always unplug your fryer and allow the oil and appliance to cool completely
before cleaning it.
Do not immerse any part of the main body, mains lead or plug in water or any other
liquid.
Never use harsh abrasive cleaners or cleaning materials.
No parts of this appliance are dishwasher safe. Always hand wash.
Follow the instructions on page 16 to remove the oil from your fryer.
Cleaning the frying basket and lid
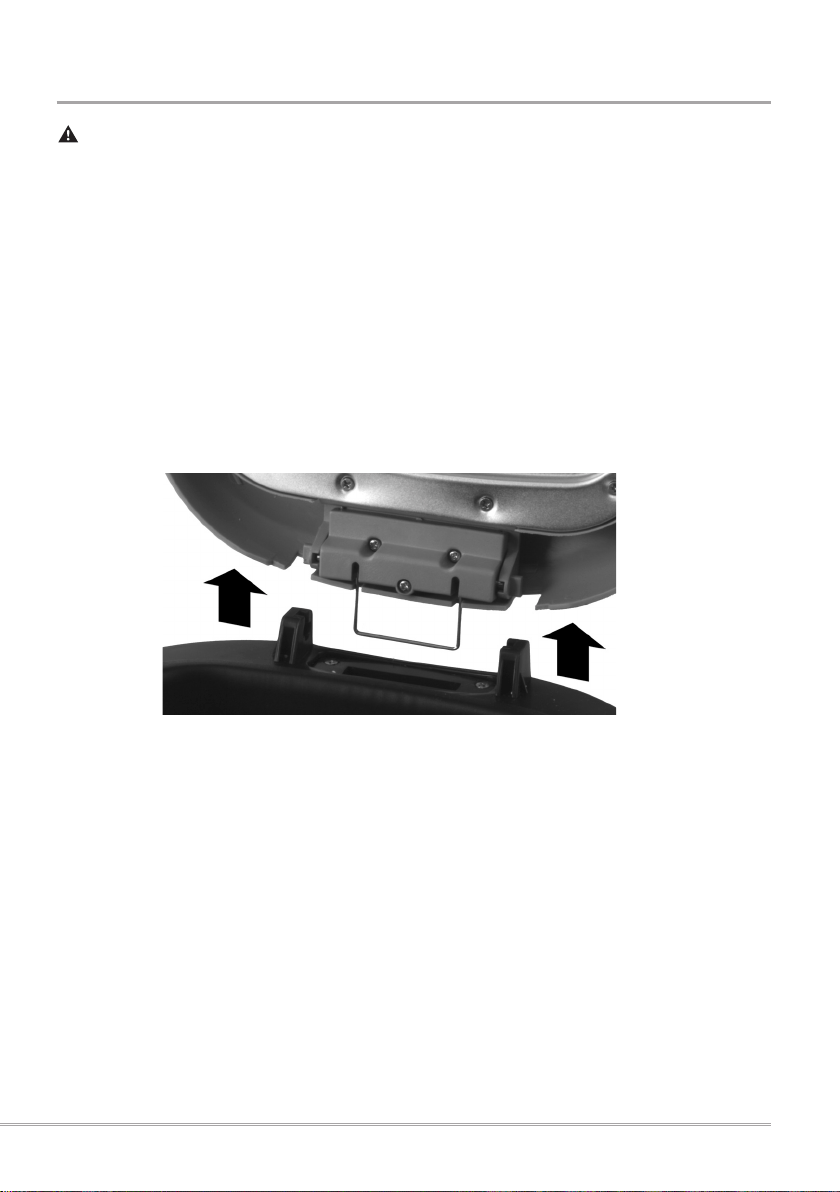
• Remove the lid by opening it then pulling it straight upwards.
• Wash the basket and lid by hand in warm soapy water using a cloth, sponge or
brush. Dry completely before use or storage.
Cleaning the frying bowl and body
• Remove any food deposits from the frying bowl using kitchen paper. Wipe over the
frying bowl and body with a clean, slightly damp cloth and dry thoroughly.
18
how to clean and care for your fryer
Condensation tray
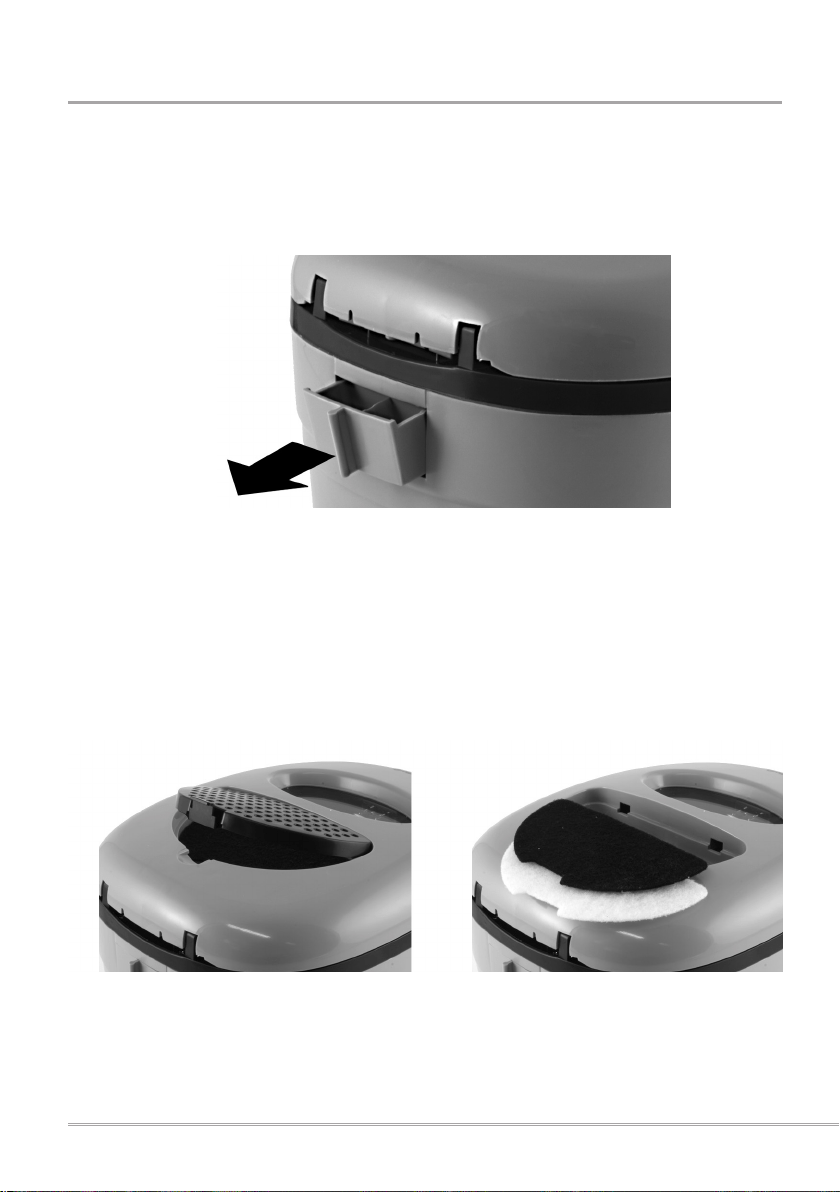
Your fryer has a condensation tray located at the back of the appliance.This needs to
be checked and emptied after each couple of uses. Pull the tray out and empty it. If
neccessary, wash it in warm soapy water. Dry and ret the tray.
Replacing the lters
1. Locate the lter cover on top of the lid.
2. Press the tab at the back of the lter cover and lift it off your fryer.
3. Remove the two lters.
4. Wipe the inside of the lter compartment using a damp cloth and dry thoroughly.
5. Place the new lters back into the lter compartment in the same order as the old
ones were removed.
6. Replace the lter cover.

19
Replacement parts
For additional or replacement parts, please visit www.breville.co.uk or call us on 0161
621 6900.
Troubleshooting
For troubleshooting and FAQs visit www.breville.co.uk/faqs
Turn on your Creativity™
Let Breville
®
help you turn on your creativity with a gateway to a world of food and drinks
without limits. You don’t have to travel far – just to your computer, tablet or mobile - where
you will discover our FREE website with top tips and recipes to inspire your imagination.
Join us now at www.turnonyourcreativity.com
useful information
™
20
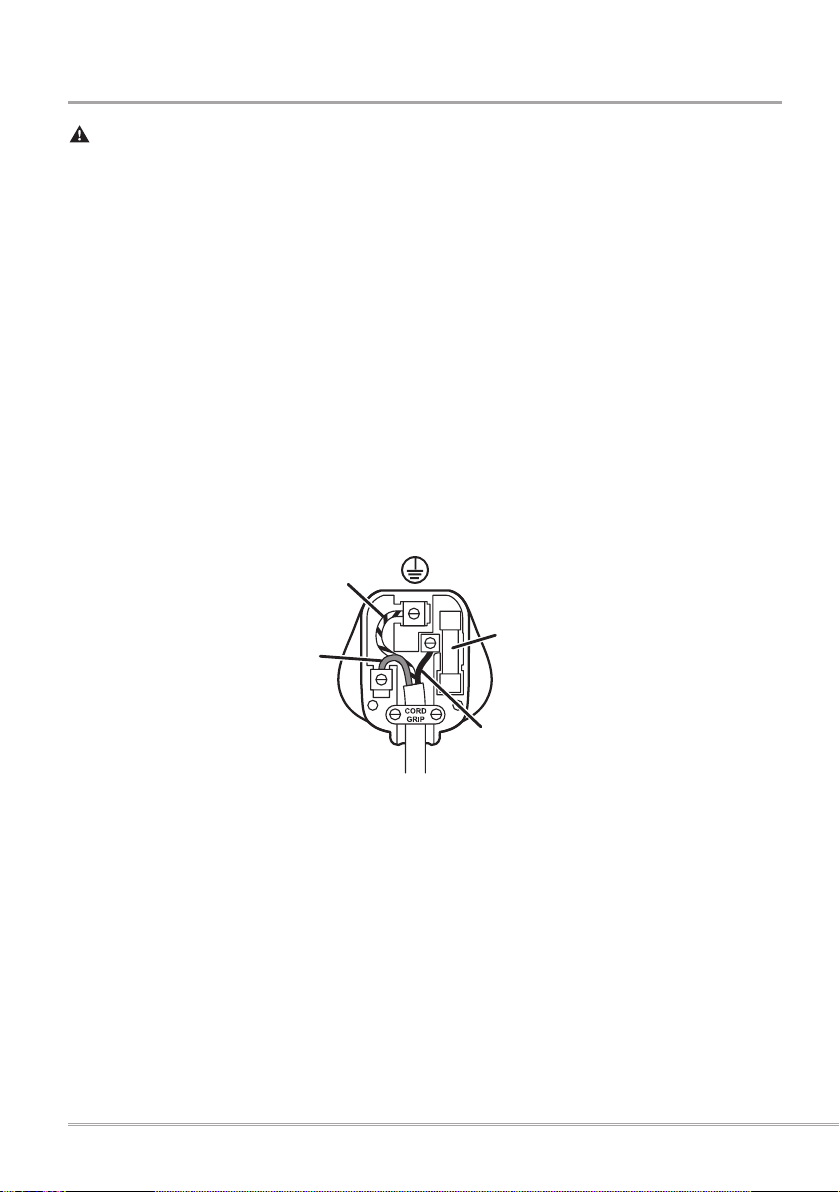
This appliance must be earthed.
If the plug is not suitable for the socket outlets in your home, it can be removed and
replaced by a plug of the correct type.
If the fuse in a moulded plug needs to be changed, the fuse cover must be retted. The
appliance must not be used without the fuse cover tted.
If the plug is unsuitable, it should be dismantled and removed from the supply cord and
an appropriate plug tted as detailed. If you remove the plug it must not be connected to
a 13 amp socket and the plug must be disposed of immediately.
If the terminals in the plug are not marked or if you are unsure about the installation of the
plug please contact a qualied electrician.
connection to the mains supply
Blue
(Neutral)
Brown
(Live)
Fuse
Green/Yellow
(Earth)
Plug should be ASTA
approved to BS1363
Fuse should be ASTA
approved to BS1362
Ensure that the outer sheath of
the cable is firmly held by the cord grip
13A

21
after sales service
These appliances are built to the very highest of standards. There are no user serviceable
parts. Follow these steps if the unit fails to operate:
1. Check the instructions have been followed correctly.
2. Check that the fuse has not blown.
3. Check that the mains supply is functional.
If the appliance will still not operate, return the appliance to the place it was purchased for
a replacement. To return the appliance to the Customer Service Department, follow the
steps below:
1. Pack it carefully (preferably in the original carton). Ensure the unit is clean.
2. Enclose your name and address and quote the model number (located on the rating
label) on all correspondence.
3. Give the reason why you are returning it.
4. If within the guarantee period, state when and where it was purchased and include
proof of purchase (e.g. till receipt).
5. Send it to our Customer Service Department at the address below:
Customer Service Department
Jarden Consumer Solutions (Europe) Limited
Middleton Road
Royton
Oldham
OL2 5LN, UK.
Telephone: 0161 621 6900 Fax: 0161 626 0391
e-mail: [email protected]

22
guarantee
Please keep your receipt as this will be required for any claims under this guarantee.
This appliance is guaranteed for 1 year after your purchase as described in this
document.
During this guaranteed period, if in the unlikely event the appliance no longer functions
due to a design or manufacturing fault, please take it back to the place of purchase, with
your till receipt and a copy of this guarantee.
The rights and benets under this guarantee are additional to your statutory rights, which
are not affected by this guarantee. Only Jarden Consumer Solutions (Europe) Limited.
(“JCS (Europe)”) has the right to change these terms.
JCS (Europe) undertakes within the guarantee period to repair or replace the appliance,
or any part of appliance found to be not working properly free of charge provided that:
• you promptly notify the place of purchase or JCS (Europe) of the problem; and
• the appliance has not been altered in any way or subjected to damage, misuse,
abuse, repair or alteration by a person other than a person authorised by JCS
(Europe).
Faults that occur through, improper use, damage, abuse, use with incorrect voltage, acts
of nature, events beyond the control of JCS (Europe), repair or alteration by a person
other than a person authorised by JCS (Europe) or failure to follow instructions for use
are not covered by this guarantee. Additionally, normal wear and tear, including, but not
limited to, minor discoloration and scratches are not covered by this guarantee.
The rights under this guarantee shall only apply to the original purchaser and shall not
extend to commercial or communal use.
If your appliance includes a country-specic guarantee or warranty insert please refer
to the terms and conditions of such guarantee or warranty in place of this guarantee or
contact your local authorized dealer for more information.
Waste electrical products should not be disposed of with Household waste. Please
recycle where facilities exist. E-mail us at [email protected] for further recycling and
WEEE information.
Jarden Consumer Solutions (Europe) Limited
5400 Lakeside
Cheadle Royal Business Park
Cheadle
SK8 3GQ
UK

23

VDF054_Iss_3 10/14 93099-2 UKPUL
P.N. 179444
Jarden Consumer Solutions (Europe) Limited
Cheadle Royal Business Park, Cheadle, SK8 3GQ, United Kingdom
e-mail: [email protected]
Telephone: 0161 621 6900
For Customer Service details, please see the website.
www.breville.co.uk
© 2014 Jarden Consumer Solutions (Europe) Limited
All rights reserved. Imported and distributed by Jarden Consumer Solutions (Europe) Limited,
Cheadle Royal Business Park, Cheadle, SK8 3GQ, United Kingdom.
The product supplied may differ slightly from the one illustrated due to continuing product development.
Printed in China
®