
Loading ...
Loading ...
Loading ...
NOTE
Makesurethatyouputthecuttinglineinthesloton
thenewspoolandextendthelineapproximately15
cmbeforeyouinstallthenewspool.
5. Puttheendsofthecuttinglinesthroughtheholes.
6. Extendthecuttinglinetoreleaseitfromtheguide
slotinthespool.
7. Pushthetabsandinstallthespoolcoverontothe
spoolhousing.
8. Pushthespoolcoveruntilitclicksintoposition.
5.4 REPLACETHECUTTINGLINE
Figure15-22.
NOTE
Useonlywiththenyloncuttinglineof1.65mm
diameter.
1. Simultaneouslypressthetabsonbothsidesofthe
trimmerheadandremovethespoolcover.
2. Removethespool.
3. Removetheremainingcuttinglineonthespool.
Replacespoolifitiswornordamaged.
4. Cuttwopiecesofcuttinglineapproximately3mlong
ofeach.
5. Bendoneendoftheline1/4ofaninch
(approximately6mm)andinsertthelineintothe
anchorholeofthespool.
6. Windthecuttinglinesaroundthespooluniformly
andtightlyintheindicateddirection.
NOTE
Failuretowindthelineintheindicateddirectionwill
causethebumpheadtooperateincorrectly.
7. Inserttheendofthecuttinglineintotheguideslot.
8. Putthespoolinthespoolhousing.
9. Puttheendofthecuttinglinethroughtheeyeletand
extendapproximately15cmtoreleaseitfromthe
guideslotinthespool.
10. Installthespoolcoverontothespoolhousing.
6 TRANSPORTATIONAND
STORAGE
6.1 MOVETHEMACHINE
Whenyoumovethemachine,youmust:
• Weargloves.
• Stopthemachine.
• Removethebatterypackandchargeit.
• Assemblethebladeguard.
6.2 STORETHEMACHINE
• Removethebatterypackfromthemachine.
• Makesurethatchildrencannotcomenearthe
machine.
• Keepthemachineawayfromcorrosiveagentssuch
asgardenchemicalsandde-icingsalts.
• Securethemachineduringtransportiontoprevent
damageorinjury.Cleanandexaminethemachine
foranydamage.
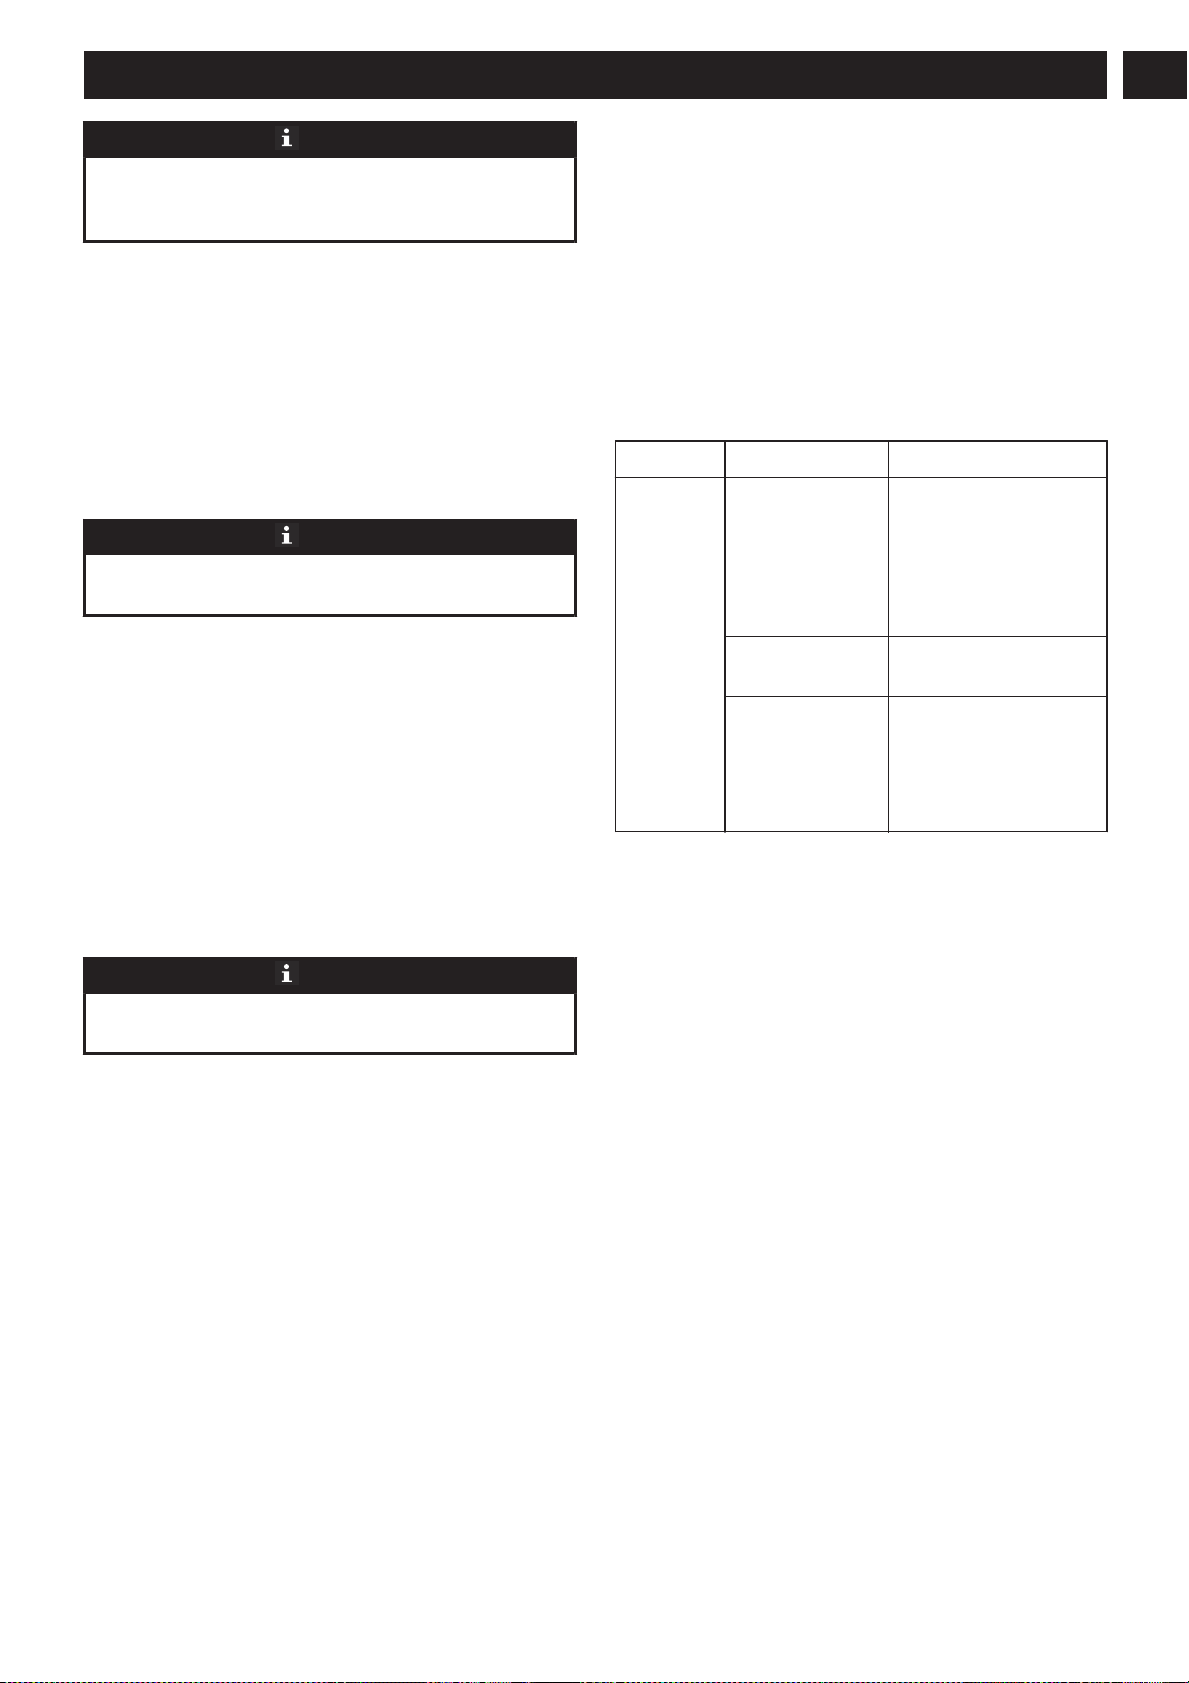
7 TROUBLESHOOTING
Problem PossibleCause Solution
Thema-
chinedoes
notstart
whenthe
triggeris
pushed.
Noelectrical
contactbetween
themachineand
thebatterypack.
1.Removebattery
pack.
2.Checkcontactand
installthebatterypack
again.
Thebatterypack
isdepleted.
Chargethebattery
pack.
Thelock-outbut-
tonandtrigger
arenotpushed
atthesame
time.
1.Pullthelock-outbut-
tonandholdit.
2.Pullthetriggerto
startthemachine.
7
English
EN
Loading ...
Loading ...
Loading ...