Loading ...
Loading ...
Loading ...
sharkclean.com/AIRobotSEsharkclean.com/AIRobotSE
BUTTONS AND INDICATOR LIGHTS
!
!
!
!
!
!
DOCK BUTTON
Press to stop cleaning and
send robot back to the base
to recharge.
CHARGE INDICATOR LIGHTS
Display the amount of charge
remaining in the battery.
“!” ERROR INDICATOR
See Troubleshooting section
for full list of error codes.
WI-FI INDICATOR
White light: connected to
Wi-Fi.
Red light: not connected.
Flashing white: setup mode.
No light: not set up yet.
CLEAN BUTTON
Hold down for 5-7 seconds
to power on robot. Press
to begin a cleaning session
and press again to stop the
cleaning session. Hold down
for 5-7 seconds to power o
the robot.
!
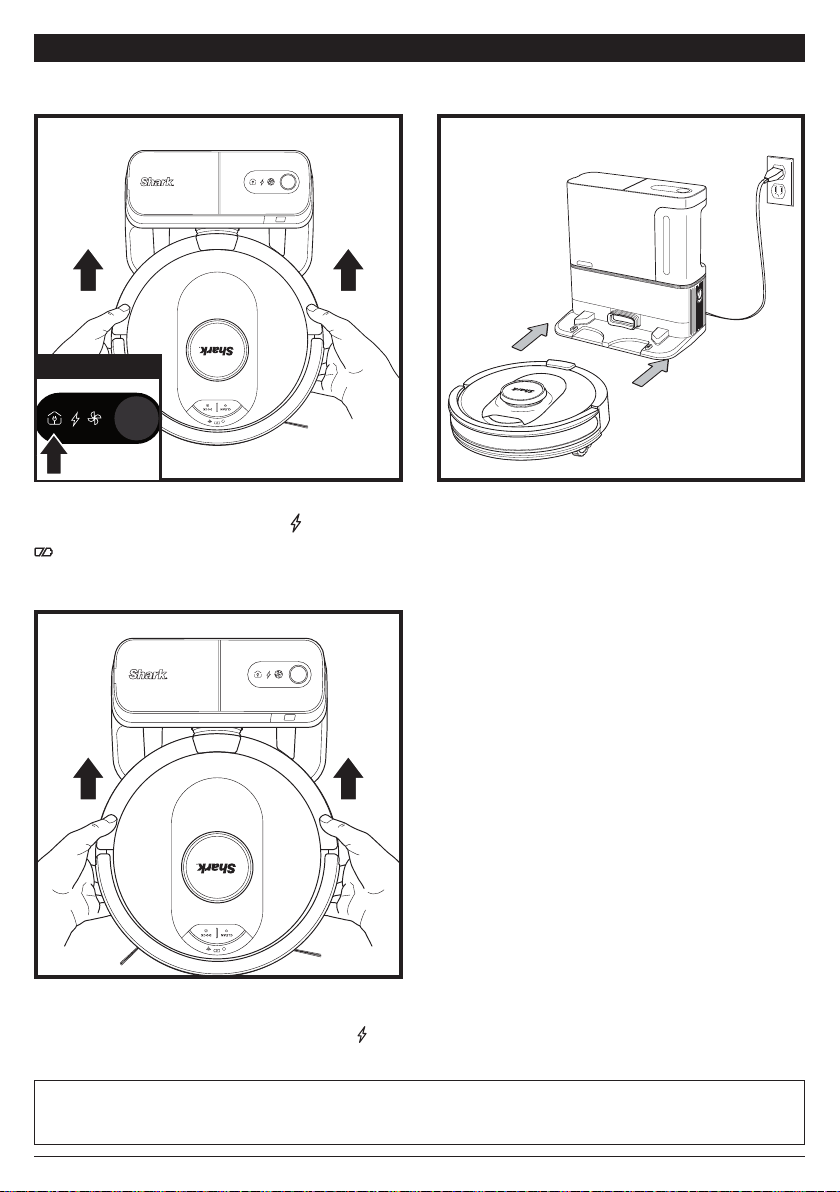
If the robot has no charge or it cannot return to the
base, manually place it on the base. When the robot
is properly aligned on the base with the robot’s
BACK against the base, the Charging Symbol on
the top right side of the base will illuminate. The
robot will beep when charging begins.
When the cleaning cycle is complete, the battery
is low, or when programmed to recharge/resume
mission, the robot will search for the base. If the
robot doesn't return to base, its charge may have
run out.
TO TURN ON ROBOT: Place robot on base or hold
down CLEAN button for 5 to 7 seconds until the
indicator lights turn on.
CHARGING
IMPORTANT: The Shark AI ULTRA™ ROBOT has a pre-installed rechargeable battery. Charge the battery
completely before first use. It may take up to 6 hours to fully charge.
To, charge, place the robot on the base for 6 hours.
When the robot is properly aligned with its BACK
against the base, the Charging Symbol
on the top
right side of the base will illuminate. and the Battery icon
on the robot will illuminate. When the battery is fully
charged, the charging icon will stop pulsing but remain
illuminated.
!
NOTE: When manually placing the robot on the base, make sure the Charging Contacts on the bottom of the robot are
touching the ones on the base.
NOTE: When picking up the robot, be careful not to place fingers between the bumper and the base of the robot.
INDICATOR
Loading ...
Loading ...
Loading ...