Loading ...
Loading ...
Loading ...
12 ENGLISH
This mower is equipped with the lock key and handle
switch. If you notice anything unusual with either of the
lock key or switch, stop the operation immediately and
have them checked by your nearest Makita Authorized
Service Center.
For XML11/XML14
1. Install the battery cartridges. Insert the lock key,
and then close the battery cover.
2. Press the main power switch.
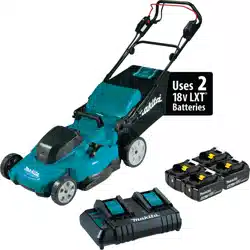
3. Pull the switch lever toward you while holding
down the switch button. Release the switch button as
soon as the motor starts running.
1
2
Fig.21
► 1. Switch button 2. Switch lever
4. While holding the switch lever, push the drive lever
forward and hold it to drive the rear wheels.
1
Fig.22
► 1. Drive lever
NOTE: You can drive the rear wheels by pushing
the drive lever forward and hold it without pulling the
switch lever.
5. Release the drive lever and the switch lever to
stop the machine.
For XML10/XML13
1. Install the battery cartridges. Insert the lock key,
and then close the battery cover.
2. Press the main power switch.
3. Pull the switch lever toward you while holding
down the switch button. Release the switch button as
soon as the motor starts running.
1 2
Fig.23
► 1. Switch button 2. Switch lever
4. Release the switch lever to stop the motor.
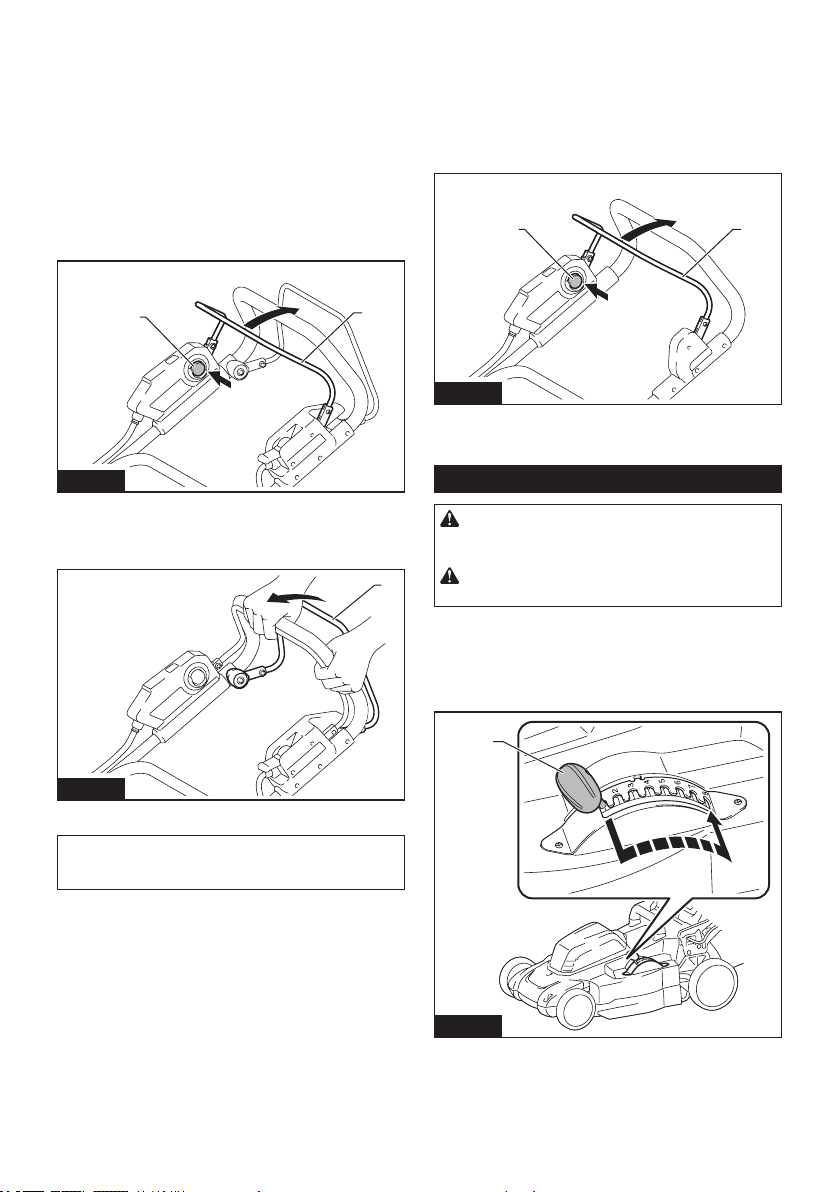
Adjusting the mowing height
WARNING: Never put your hand or leg under
the mower body when adjusting the mowing
height.
WARNING: Always make sure that the lever
ts in the groove properly before operation.
The mowing height can be adjusted in the range of
between 32 mm (1-1/4″) and 100 mm (3-15/16″).
Remove the lock key, and then pull the mowing height
adjusting lever outward of the mower body and move it
to your desired mowing height.
1
Fig.24
► 1. Mowing height adjusting lever
Loading ...
Loading ...
Loading ...