Loading ...
Loading ...
Loading ...
11
WARNING: Do not install equipment until you have stabilized the enclosure. Install heavier equipment first and install it toward the
bottom of the enclosure. Install equipment starting from the bottom of the enclosure and proceeding toward the top of the
enclosure - never the reverse. If using sliding equipment rails, be careful when extending the rails. Do not extend more than one
set of sliding equipment rails at one time. Avoid extending sliding equipment rails near the top of the enclosure.
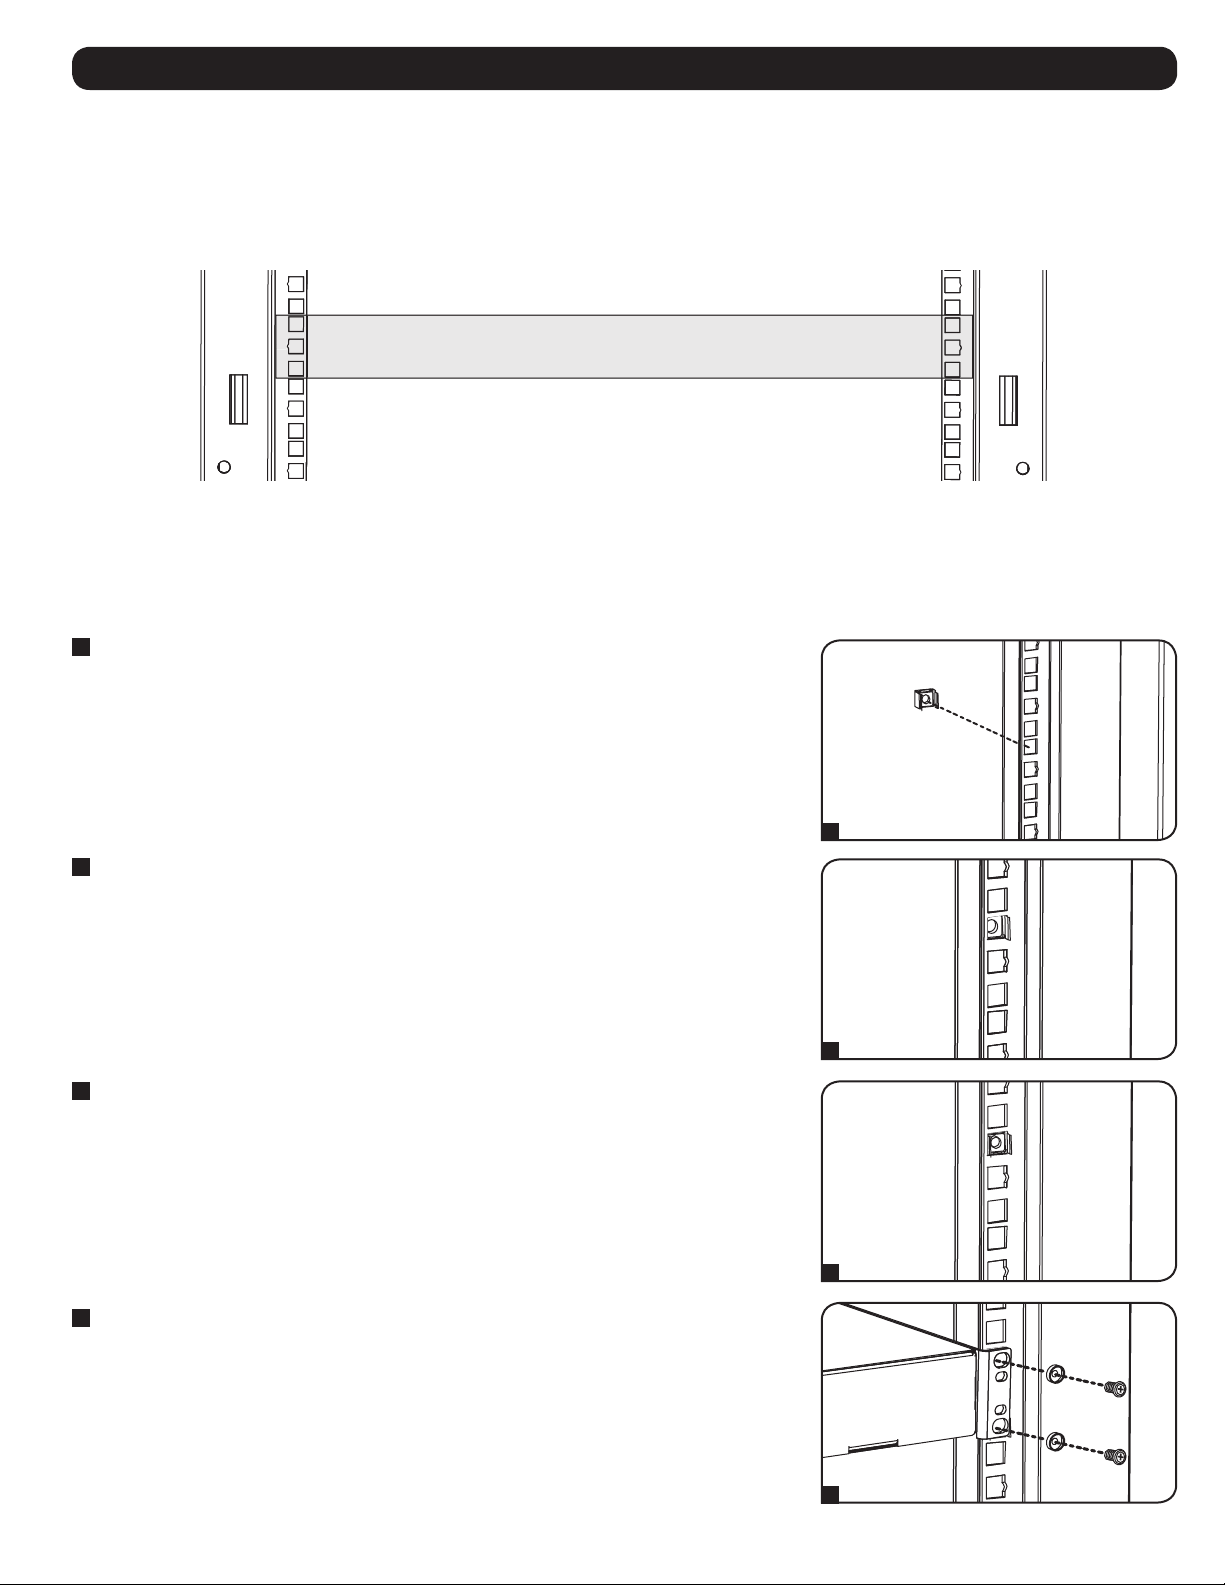
Note: The square holes at the middle of each rack unit are numbered and also include a small notch to aid identification. A single rack unit includes
the space occupied by the numbered hole and the holes directly above and below.
Equipment Installation
Installing or Removing Cage Nuts
WARNING: The flanges of the cage nuts should engage the sides of the square opening in the rail, not the top and bottom. Follow
the instructions in your equipment documentation to ensure proper installation of your equipment.
Installing Cage Nuts
1
Locate the numbered square openings in the mounting rails where you plan to install your
equipment. You will install cage nuts (included) into the square openings in order to provide an
attachment point for the mounting screws (included).
Note: Consult your equipment documentation to determine how many cage nuts will be
required and where they will need to be installed.
2
From the inside of the mounting rail, insert one of the flanges of the cage nut through the
square opening. Press it against the side of the square opening. Each flange should engage one
side of the square opening, not the top or bottom.
3
Compress the cage nut at the sides slightly to allow the remaining flange to fit through the
square opening. When the cage nut is properly installed, both flanges will protrude through the
square opening and will be visible on the outer surface of the mounting rail. Repeat steps 1-3
until all required cage nuts are installed.
4
After installing the required cage nuts, use the included mounting screws and cup washers to
secure your equipment to the rack rail. Place the cup washers between the screws and the
equipment mounting brackets.
Note: Your equipment may also include mounting hardware. Read the mounting instructions
that came with your equipment before installing your equipment.
To Remove Cage Nuts, Reverse Steps 1-3
Note: You may wish to use a cage nut tool (user-supplied) to aid cage nut installation and removal.
24
25
23
22
24
25
23
22
24
24
2
1 Rack Unit
20
19
22
21
20
19
21
20
19
21
20
19
21
1
2
3
4
Loading ...
Loading ...
Loading ...