Loading ...
Loading ...
Loading ...
20
2. Refer to “Junction Box Assembly” section of this Owner’s
Manual to attach cable fitting to the home wiring and its
assembly.
3. After the complete assembly of Junction box with home wiring,
Secure the junction box to the back of the cabinet wall using
four screws (not provided). Be sure to avoid driving screws
into utility lines possibly located in the wall behind the junction
box.
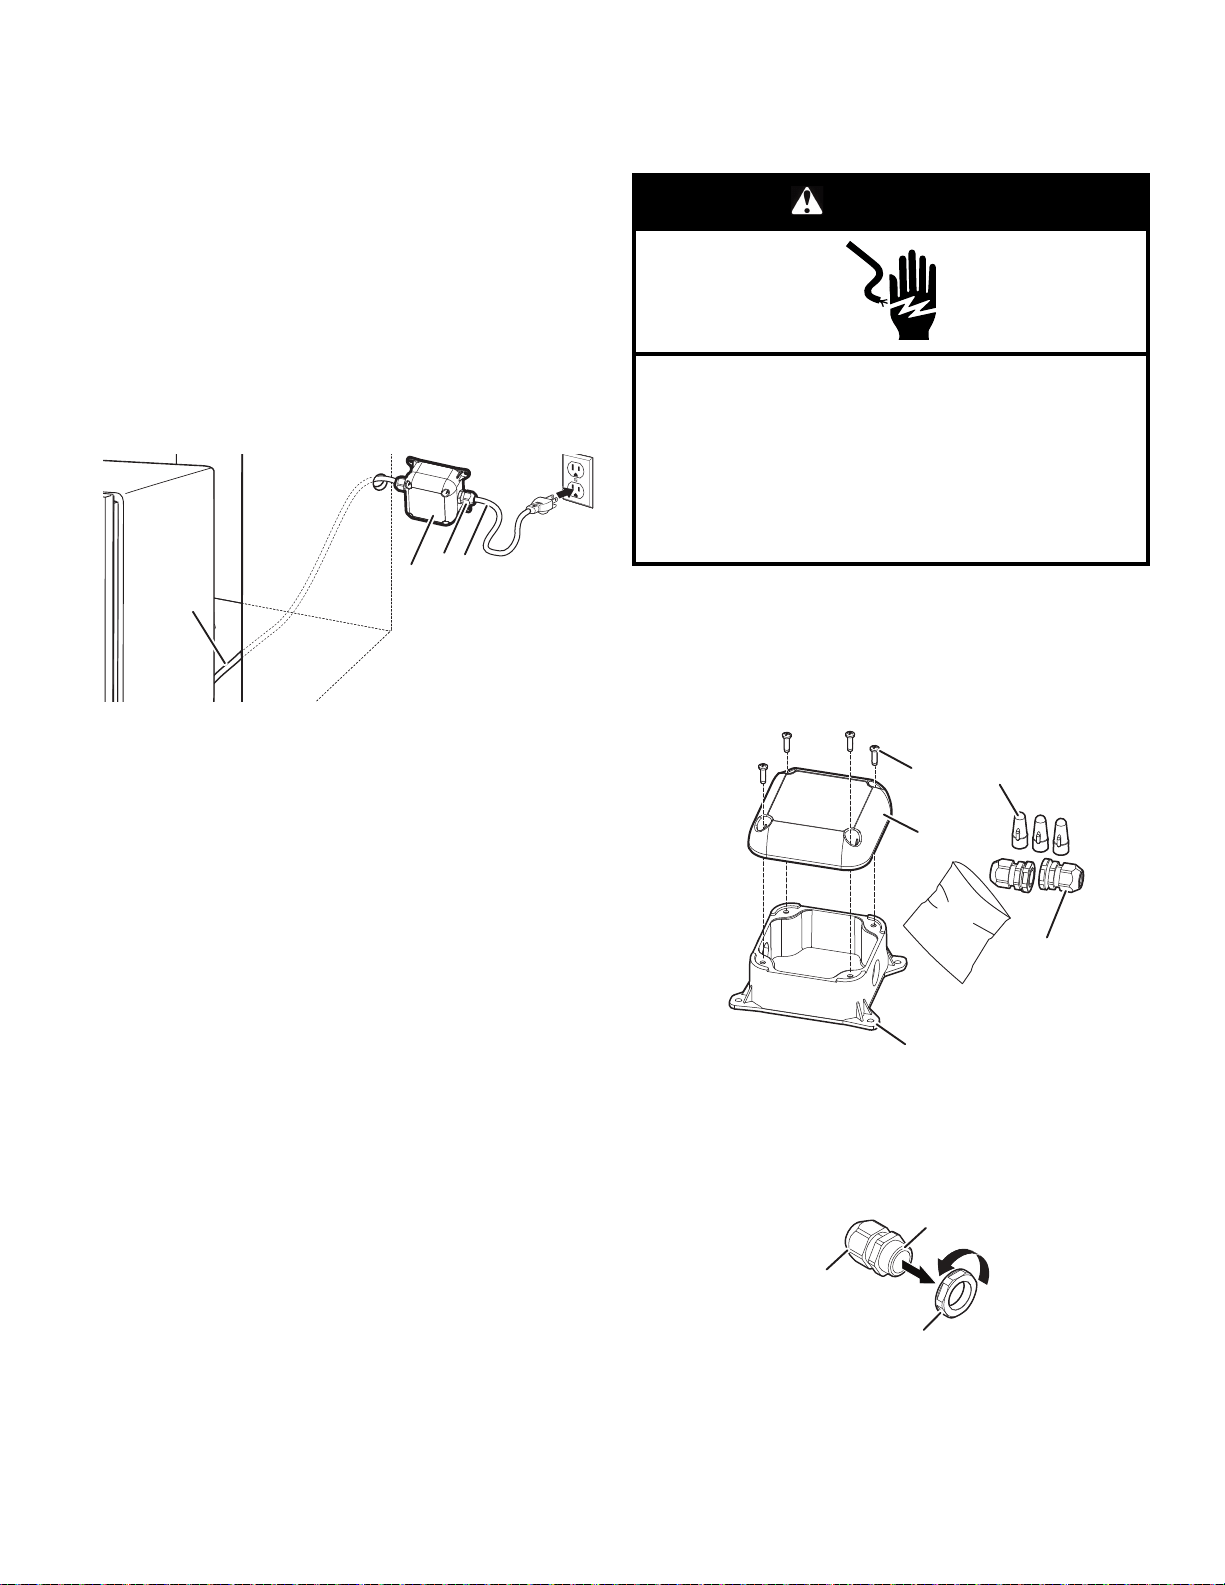
Power Cord Connection
1. Use power cord kit (sold separately per Whirlpool Part
Number W11670634) and Junction box assembly (included)
for connecting the dishwasher to the power supply as shown
below. The power cord kit includes a straight plug that is
recommended for most installations.
NOTE: To ease some installations, a power cord with a right
angle plug is also available per Whirlpool Part Number
W11645183.
A
D
B
C
A. Junction box cable
B. Junction box
C. Cable fittings (2)
D. Power cord
IMPORTANT: Do not plug cord into an outlet until instructed to
do so.
2. Refer to “Junction Box Assembly” section of this Owner’s
Manual to attach cable fitting to the power cord and its
assembly.
3. After complete assembly of Junction box with Power cord,
Secure the junction box to the back of the cabinet wall using
four screws (not provided). Be sure to avoid driving screws
into utility lines possibly located in the wall behind the junction
box.
Junction Box Assembly
1. The junction box comes in a plastic bag located inside a
cardboard box in the lower rack of the dishwasher (previously
removed at the beginning of the installation process).
DANGER
Electrical Shock Hazard
Disconnect power before servicing.
Fully assemble cable fittings.
Place all wiring inside junction box.
Replace cover before reconnecting power.
Failure to do so can result in death, fire, or electrical
shock.
2. Route the junction box cable from the dishwasher through the
electrical conduit hole in the cabinet wall.
3. Use a #2 Phillips screwdriver to remove the Junction box lid
from the junction box (4 screws).
4. Remove the plastic bag containing cable fittings and wire nuts
from the inside of the junction box. Take out the cable fittings
and wire nuts from plastic bag.
B
D
E
A
C
A. Junction box base
B. Cable fittings (2)
C. Wire nuts (3)
D. Junction box lid
E. Screws (4)
5. Remove the mounting nuts from cable fittings as shown
below.
A
B
C
A. Elongated (strain relief) nut
B. Strain relief body
C. Mounting nut
26-Jun-2023 08:47:55 EDT | RELEASED
In some European factories the letter "W" of the part code mentioned herein will be automatically
replaced by the number "4000" (e.g. "W12345678" becomes "400012345678")
Loading ...
Loading ...
Loading ...