Loading ...
Loading ...
Loading ...
en Installation instructions
14
Preparing the appliance
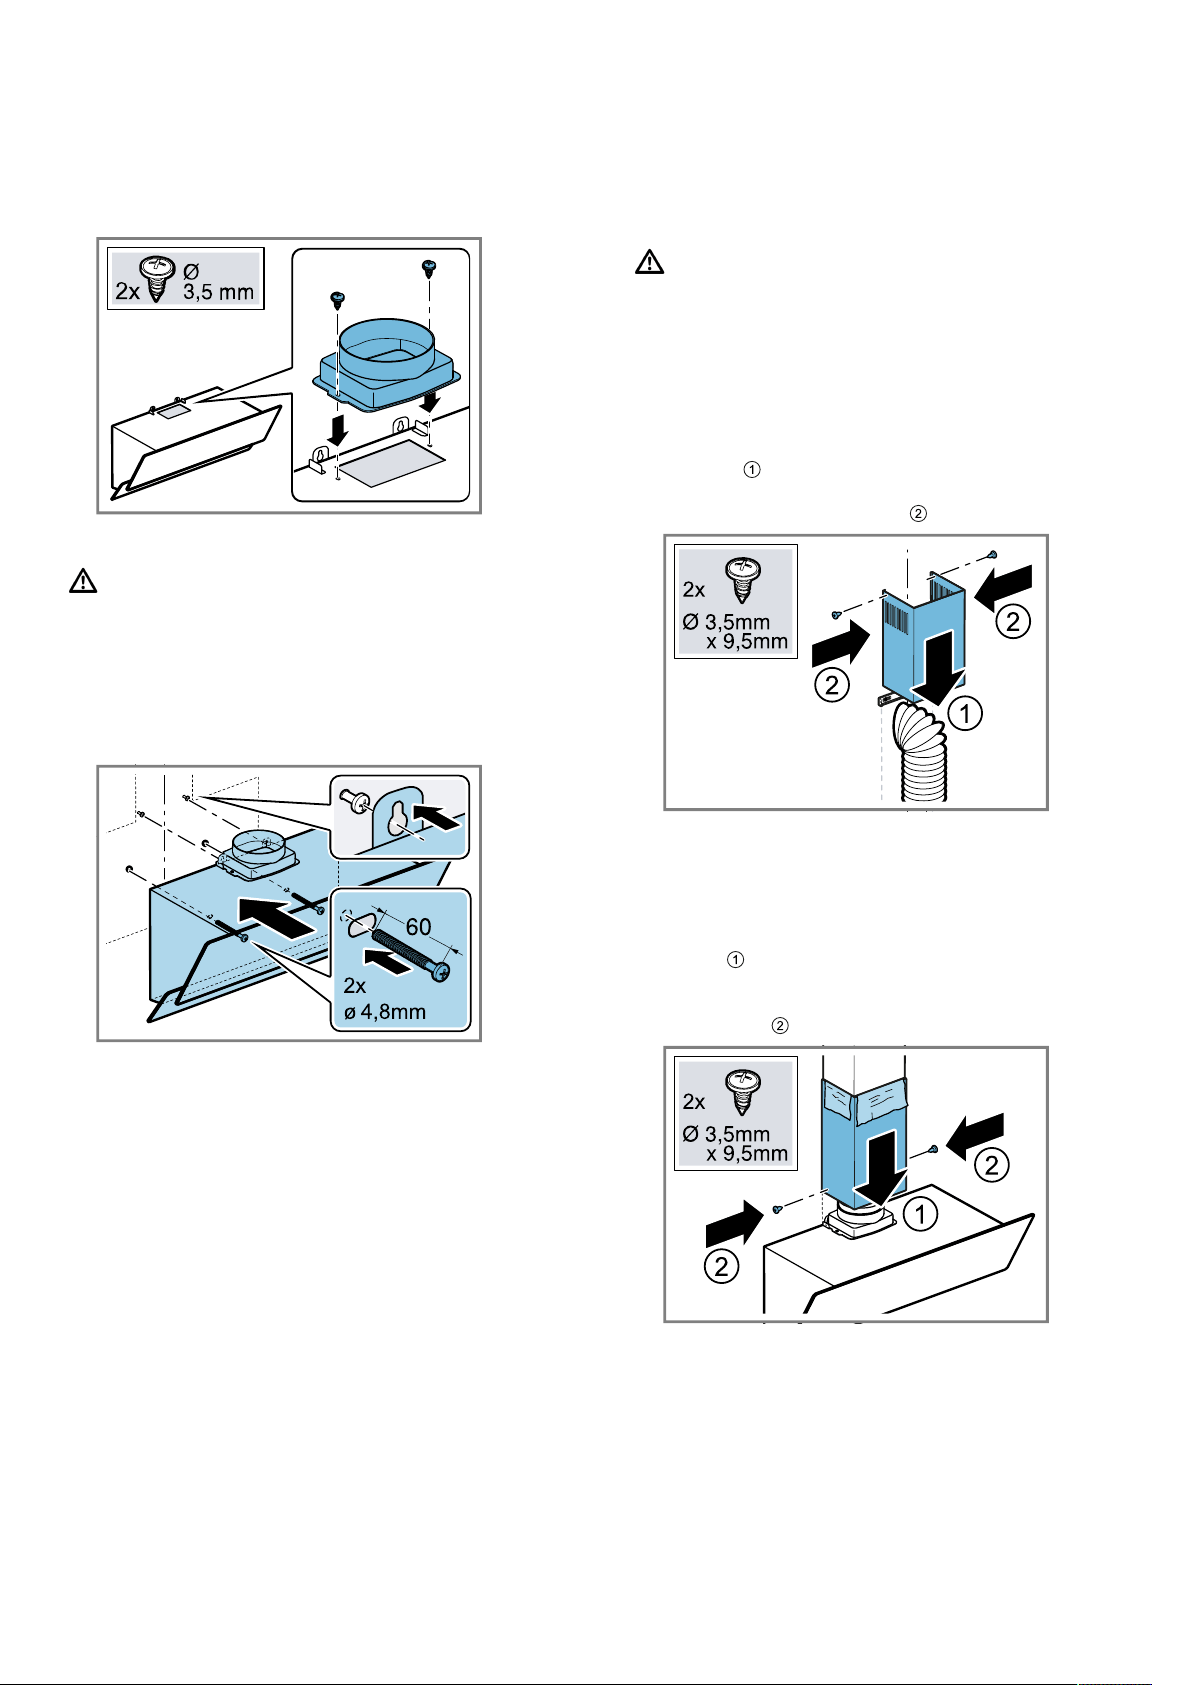
1.
Remove the grease filters.
To avoid causing damage, do not bend the grease
filters.
2.
Secure the air pipe connector to the appliance.
Installing the appliance
WARNING‒Risk of injury!
Components inside the appliance may have sharp
edges.
▶ Wear protective gloves.
1.
Remove the protective film from the rear.
‒ Once the appliance is installed, fully remove the
protective film.
2.
Hook on the appliance.
3.
Align the appliance horizontally using screws.
4.
Fit the grease filters.
To avoid causing damage, do not bend the grease
filters.
Establishing the exhaust air connection
(exhaust pipe, 150mm diameter)
1.
Secure the exhaust pipe to the air pipe connector.
2.
Establish the connection to the exhaust air opening.
3.
Seal the joints.
Establishing the exhaust air connection
(exhaust pipe, 120mm diameter)
1.
Secure the reducing connector to the air-pipe con-
nector.
2.
Secure the exhaust pipe to the air pipe connector.
3.
Establish the connection to the exhaust air opening.
4.
Seal the joints.
Connecting to the power supply
1.
Insert the mains plug into the protective contact
socket.
2.
If a fixed connection is required, follow the instruc-
tions in the section
→"Instructions for the electrical connection",
Page12.
Fitting the flue duct
WARNING‒Risk of injury!
Components inside the appliance may have sharp
edges.
▶ Wear protective gloves.
1.
Remove the protective foil from both flue duct sec-
tions.
2.
Fit the upper flue duct section.
‒ Gently push the two side panels apart, and then
hook them into the angle bracket on the left and
right.
‒ Screw the upper flue duct section onto the sides
of both angle brackets.
If air extraction is required, fit the flue duct section
with its slots facing downwards.
3.
Install the lower flue duct section.
‒ Gently push the two side panels apart, hook
them in behind the upper flue duct section and
then push them back together as far as they will
go.
‒ Place the flue duct sections onto the appliance
and screw them to the sides of the angle
bracket.
To prevent scratches, lay paper over the edges of
the lower flue duct section to protect the surface.
Removing the appliance
1.
Remove the flue duct.
2.
Disconnect the appliance from the power supply.
3.
Loosen the exhaust pipe.
4.
Remove the grease filters.
To avoid causing damage, do not bend the grease
filters.
Loading ...
Loading ...
Loading ...