Loading ...
Loading ...
Loading ...
Installation instructions en
13
Flat ducts
Use flat ducts with an inner cross-section that corres-
ponds to the diameter of the round pipes:
¡ Diameter of 150mm corresponds to ap-
prox.177cm².
¡ Diameter of 120mm corresponds to ap-
prox.113cm².
¡ Use sealing strips for different pipe diameters.
¡ Do not use any flat ducts with sharp bends.
Round pipes
Use round pipes with an inner diameter of 150mm (re-
commended) or at least 120mm.
12.9 Instructions for the air extraction mode
For air extraction mode, a one-way flap should be in-
stalled.
Notes
¡ If a one-way flap is not included with the appliance,
one can be ordered from a specialist retailer.
¡ If the exhaust air is conveyed through the external
wall, a telescopic duct should be used.
12.10 Information about circulating-air
mode
The appliance must only be operated when it is se-
curely installed and the pipework is connected.
12.11 Installation
Checking the wall
1.
Check whether the wall is vertical and has sufficient
load-bearing capacity.
The maximum weight of the appliance is 16kg.
2.
Drill the hole depth in accordance with the length of
the screws.
The wall plugs must have a secure grip.
The enclosed screws and wall plugs are suitable for
solid brickwork. Suitable fasteners must be used for
other structures (e.g. plasterboard, porous concrete,
poroton bricks).
Preparing the wall
1.
Ensure that there are no electrical wires, gas pipes
or water pipes in the area where holes are to be
drilled.
2.
Cover the hob to prevent damage.
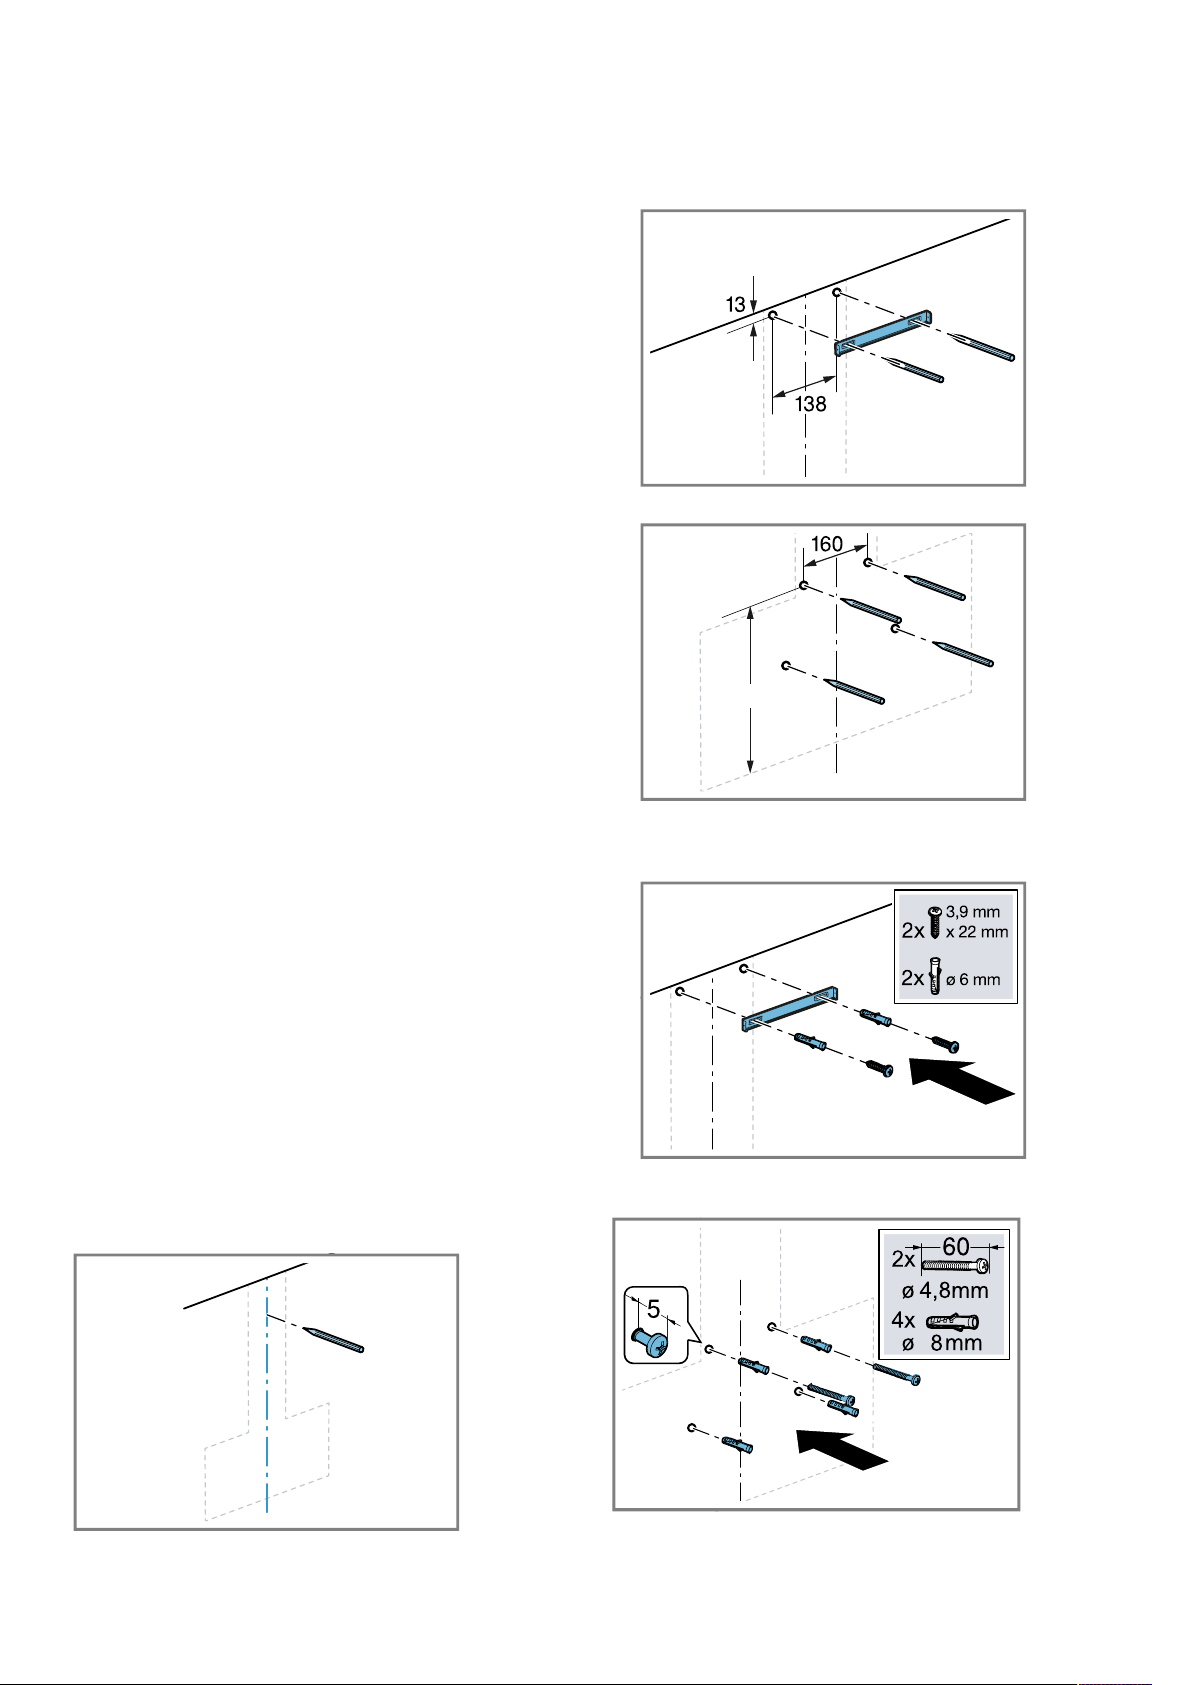
3.
Mark a vertical centre line on the wall from the ceil-
ing to the lower edge of the appliance.
4.
Centre the angle brackets using the centre line.
The centre of the angle brackets is marked with a
notch.
5.
Align the angle brackets horizontally.
6.
Mark the holes for the angle brackets in the flue.
7.
Mark the holes for the appliance bracket.
370
8.
Drill the holes.
9.
Insert the wall plugs flush with the wall.
10.
Screw on the angle bracket for the flue duct.
11.
Screw in the screws for the appliance bracket
loosely; do not tighten them fully.
Loading ...
Loading ...
Loading ...